

The Ultimate No-Bake Reese’s Peanut Butter Pie
If you’re anything like me, the combination of chocolate and peanut butter isn’t just a flavor—it’s an absolute lifestyle. There is something purely magical about that salty-sweet dynamic that hits the spot every single time. And let me tell you, this Reese’s Peanut Butter Pie is the crown jewel of that flavor combination.
I first threw this pie together for a last-minute summer barbecue a few years ago. I didn’t want to turn on my oven, and I only had a handful of ingredients in my pantry. Fast forward to today, and I am literally not allowed to show up to family gatherings without it. It’s rich, ridiculously creamy, and loaded with the peanut butter cup goodness we all grew up loving.
The best part? You don’t need to be a pastry chef to pull this off. It looks like a million bucks, tastes like a fancy restaurant dessert, but takes about fifteen minutes of active prep time. Grab your mixing bowls, because you are going to fall head over heels for this one.
What Is Reese’s Peanut Butter Pie?
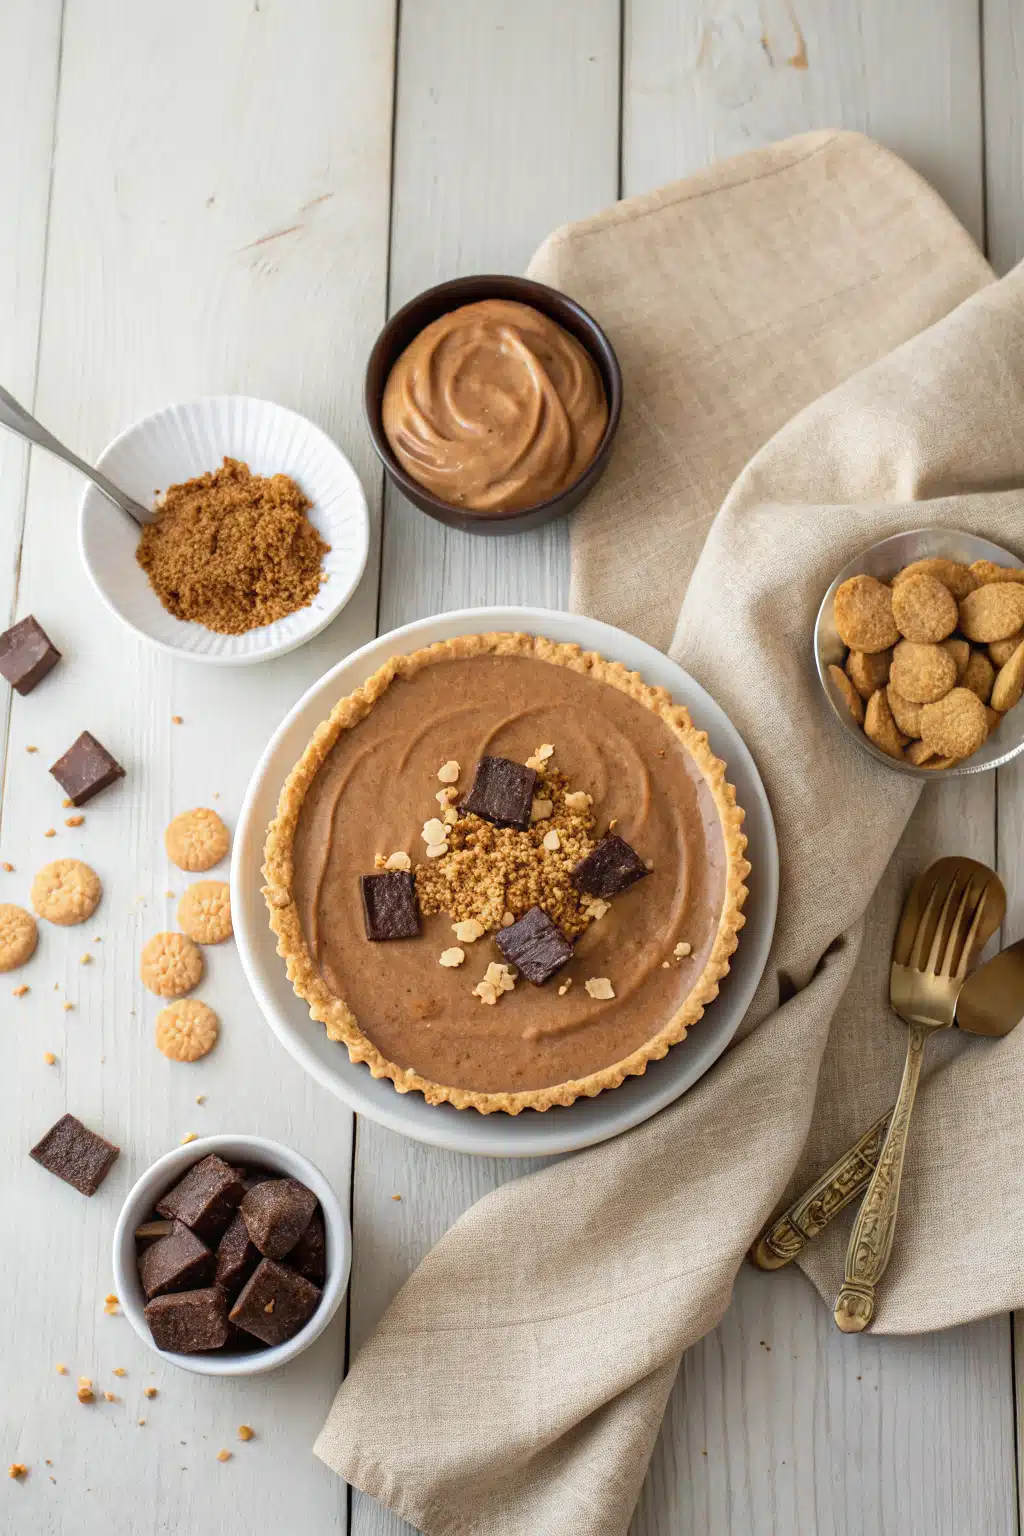
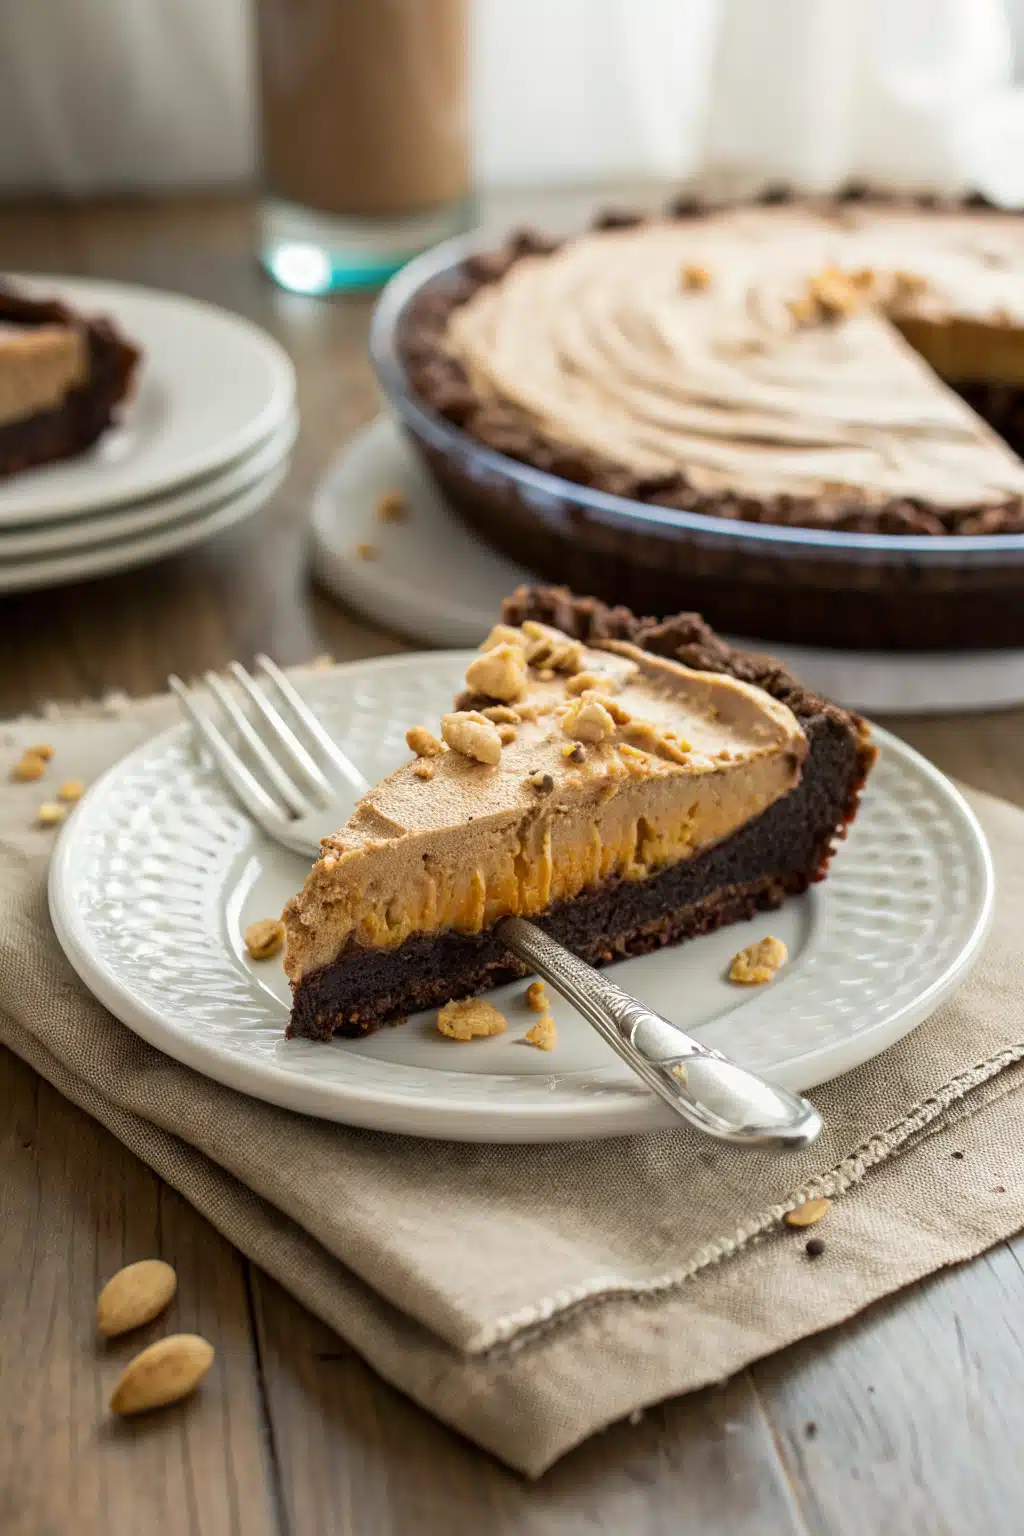
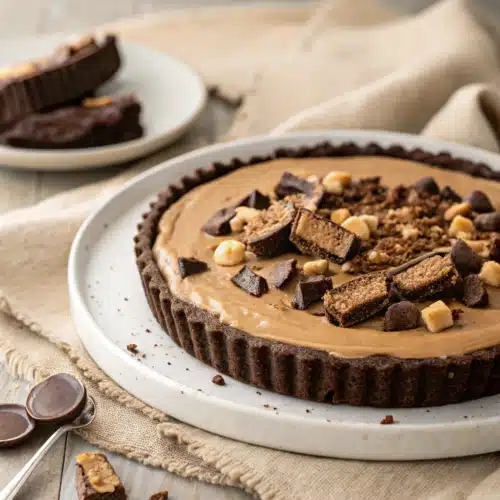
So, what exactly are we making here? Imagine a giant, sliceable peanut butter cup, but elevated. A Reese’s Peanut Butter Pie is a decadent, no-bake dessert that layers a buttery, crunchy chocolate cookie crust with a sky-high, fluffy peanut butter filling.
The filling is the real star of the show. It’s a luscious blend of softened cream cheese, creamy peanut butter, powdered sugar, and whipped cream. The cream cheese gives it a slight tang that cuts through the sweetness, while the whipped cream lightens the whole thing up so it feels like a peanut butter cloud rather than a heavy brick.
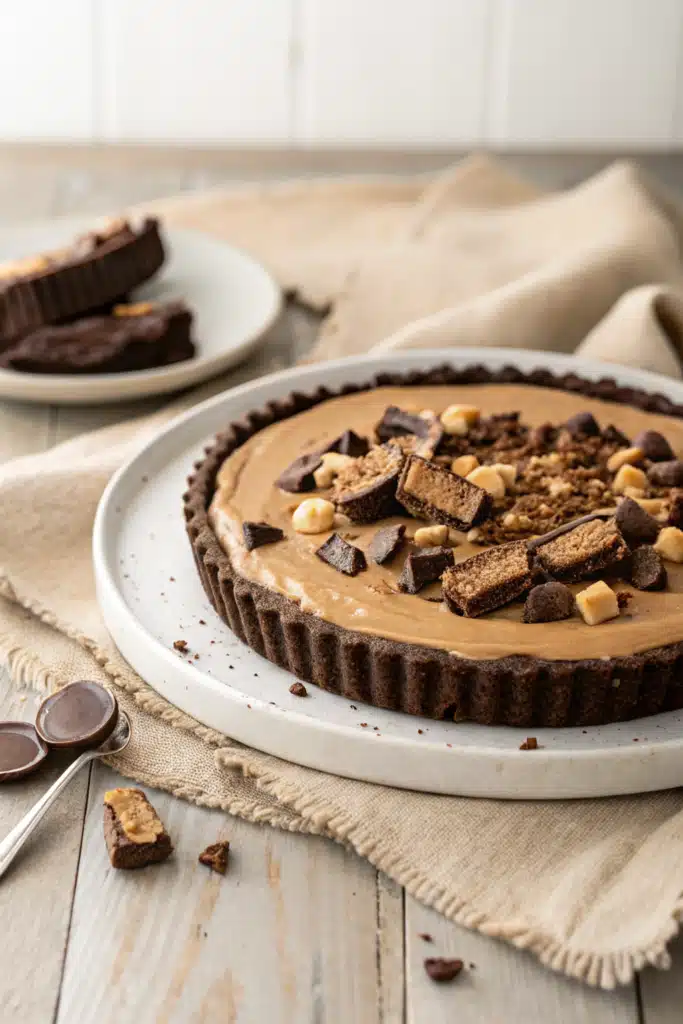
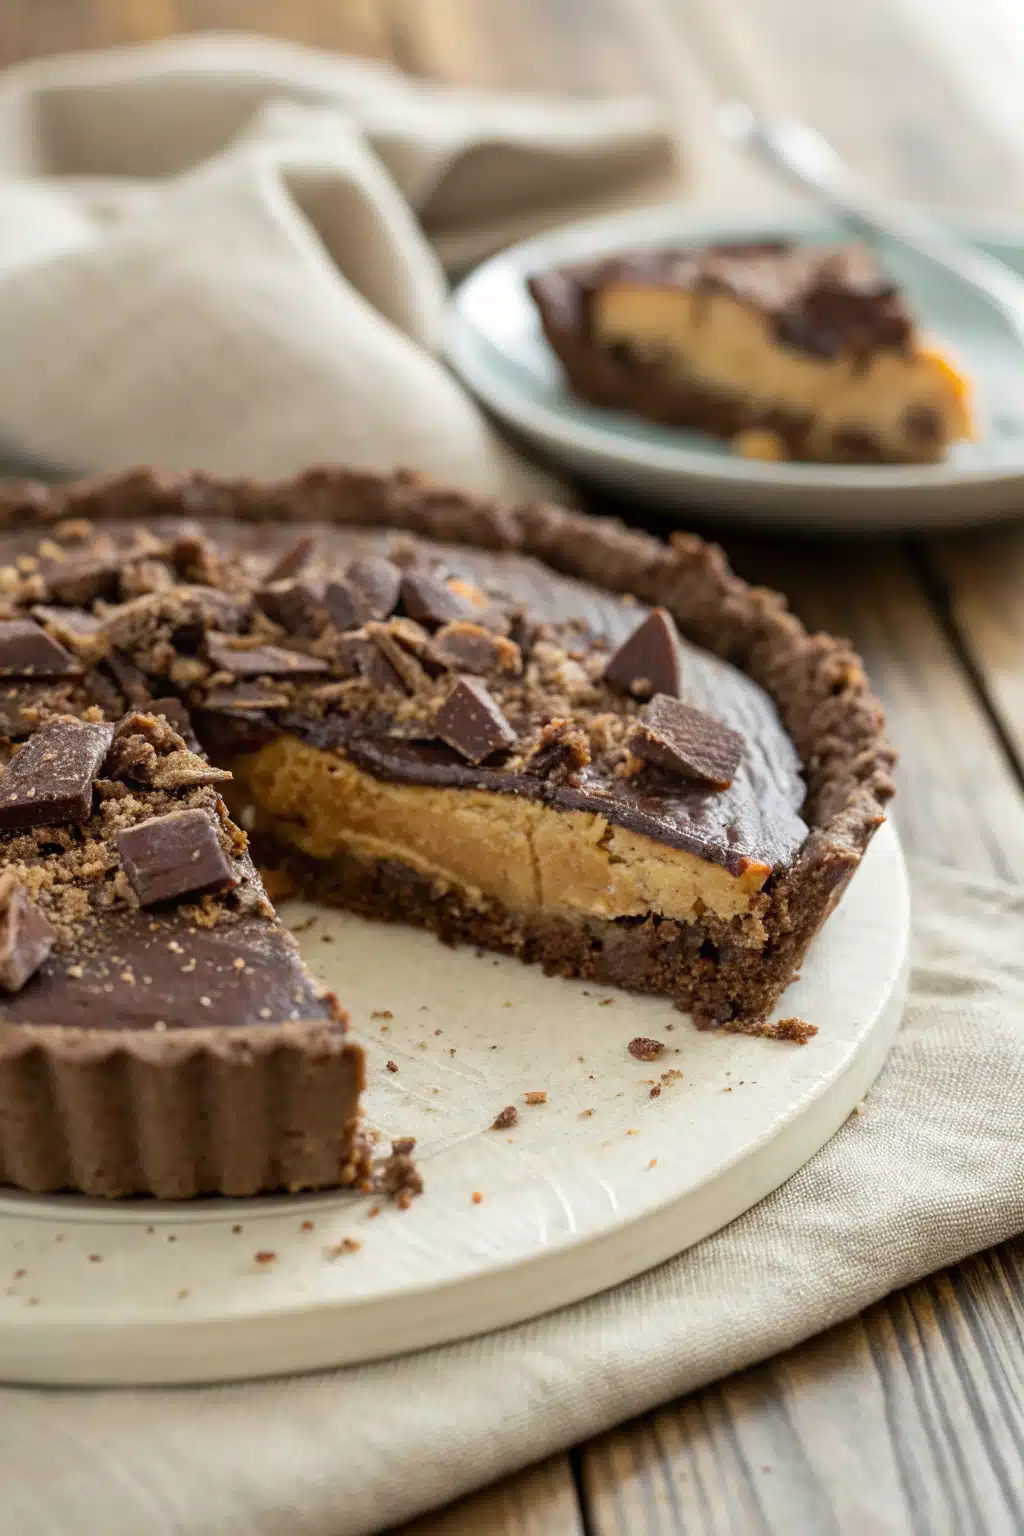
To finish it off, the pie is heavily garnished with chopped Reese’s peanut butter cups, a generous drizzle of hot fudge, and maybe even a little caramel if you’re feeling extra indulgent. It is a textural masterpiece—crunchy crust, silky filling, and chunky candy bites on top. It’s a peanut butter lover’s absolute dream come true.
How to Make Reese’s Peanut Butter Pie
Quick Overview
Making this pie is dangerously easy. We are basically going to whip up a simple chocolate crust (or use a store-bought one if you’re short on time—no judgment here!), blend our cream cheese and peanut butter base, and fold in some fluffy whipped cream. After smoothing it all into the crust, the fridge does the hard work of setting it up. Finally, we go crazy with the candy toppings. It’s practically foolproof!
Ingredients
Here is what you’ll need to grab from the store to make this peanut butter masterpiece:
- Chocolate Sandwich Cookies: About 24 cookies, crushed into fine crumbs (keep the cream filling in!).
- Melted Butter: 5 tablespoons, to bind your crust together.
- Cream Cheese: 8 ounces, full-fat, and it absolutely must be softened to room temperature.
- Creamy Peanut Butter: 1 cup. Stick to conventional brands like Jif or Skippy for the best texture.
- Powdered Sugar: 1 cup, sifted if it’s super clumpy.
- Vanilla Extract: 1 teaspoon of the good stuff.
- Heavy Whipping Cream: 1 and 1/4 cups, whipped to stiff peaks (or an 8-ounce tub of thawed whipped topping).
- Reese’s Peanut Butter Cups: 10-12 standard cups, chopped roughly.
- Chocolate Syrup or Hot Fudge: For drizzling over the top.
Step-by-Step Instructions
Step 1: Prep the Chocolate Crust
Start by crushing your chocolate sandwich cookies into fine crumbs. You can use a food processor or just throw them in a zip-top bag and smash them with a rolling pin (a great stress reliever!). Mix the crumbs with your melted butter until it looks like wet sand. Press this mixture firmly into the bottom and up the sides of a 9-inch pie dish. Pop it in the freezer to set while you make the filling.
Step 2: Whip the Peanut Butter Base
In a large mixing bowl, beat your softened cream cheese and creamy peanut butter together until they are completely smooth and combined. You want to make sure there are no lumps of cream cheese hiding in there. Add your powdered sugar and vanilla extract, and mix on low speed until it’s all incorporated, then bump up the speed and beat it until it’s light and fluffy.
Step 3: Fold in the Fluff
If you are using heavy whipping cream, whip it in a separate bowl until stiff peaks form. Gently fold the whipped cream (or your store-bought whipped topping) into the peanut butter mixture. Use a rubber spatula and use a sweeping, folding motion so you don’t deflate the air you just whipped into the cream. The mixture should become pale, thick, and incredibly airy.
Step 4: Assemble and Chill
Take your chilled crust out of the freezer and pour the peanut butter filling right in. Smooth the top with your spatula. Now, cover the pie loosely with plastic wrap and place it in the refrigerator. It needs to chill for at least 4 to 6 hours, but overnight is highly recommended so it slices cleanly.
Step 5: Garnish and Serve
Right before serving, it’s time to make it pretty. Scatter your chopped Reese’s peanut butter cups all over the top of the pie. Warm up a little hot fudge or chocolate syrup and drizzle it generously over the candy. Slice, serve, and watch everyone’s eyes roll back in their heads!
What to Serve It With
Because this Reese’s Peanut Butter Pie is incredibly rich and decadent, you want to pair it with things that balance it out. A tall, ice-cold glass of milk is practically mandatory for a dessert like this. It washes down the peanut butter perfectly.
If you are serving this at a dinner party, a freshly brewed cup of dark roast coffee or an unsweetened espresso is a phenomenal pairing. The bitterness of the coffee cuts right through the sweet, salty richness of the pie.
Want to go completely over the top? Serve a slice alongside a small scoop of high-quality vanilla bean ice cream. The contrast of the cold, milky ice cream against the thick peanut butter filling is out of this world.
Top Tips for Perfecting Your Reese’s Peanut Butter Pie
I’ve made this pie dozens of times, and I’ve learned a few tricks along the way to ensure it comes out flawless every single time. Keep these tips in mind:
- Room Temperature Cream Cheese is Non-Negotiable: If your cream cheese is even a little bit cold, you will end up with little white lumps in your pie filling. Leave it out on the counter for a good two hours before you start baking.
- Avoid Natural Peanut Butter: I love natural peanut butter for my morning toast, but keep it away from this pie. The oils tend to separate, which can make your pie filling greasy and prevent it from setting up properly. Stick to standard, processed creamy peanut butter.
- Don’t Skimp on Chill Time: It is so tempting to cut into this pie after an hour, but don’t do it! The filling needs time to firm up so you can get those beautiful, clean slices. Overnight is truly best.
- Use a Hot Knife for Clean Slices: When you are ready to serve, run a sharp chef’s knife under hot water, wipe it dry, and then make your slice. Repeat this between every cut for bakery-worthy presentation.
Storing and Reheating Tips
If you somehow have leftovers (which is a rare occurrence in my house), storing this pie is a breeze. Keep it in the pie dish, cover it tightly with plastic wrap or aluminum foil, and store it in the refrigerator. It will stay fresh and delicious for up to 5 days.
Can you freeze it? Absolutely! In fact, some of my family members prefer eating this pie straight out of the freezer. When frozen, it takes on the texture of a dense, creamy ice cream cake. To freeze, wrap the pie tightly in plastic wrap and then a layer of foil. It will keep for up to 2 months. When you’re ready to eat it, just let it thaw in the fridge for a few hours, or eat it frozen!
Since this is a strictly no-bake, chilled dessert, there is zero reheating involved. Keep it cold, and it will keep you happy.
Frequently Asked Questions
Final Thoughts
There you have it, my friends—the ultimate Reese’s Peanut Butter Pie. It is sweet, salty, incredibly creamy, and guaranteed to make you the most popular person at your next potluck or family dinner. I love how something so simple to whip together can taste so gourmet and special.
I really hope you give this recipe a try the next time you have a major sweet tooth craving. When you do, please come back and let me know how it turned out! Did you make any fun tweaks? Add extra chocolate? Let’s chat in the comments below. Happy un-baking!
Reese's Peanut Butter Pie
Ingredients
Main Ingredients
- 4 cups milk chocolate chips divided
- 2 Tbsp vegetable shortening divided
- 2 cups creamy peanut butter
- 2 cups powdered sugar sifted
- 8 Tbsp butter softened
Instructions
Preparation Steps
- In a small glass bowl, add 2 cups chocolate chips and 1 Tbsp of shortening.
- Melt in the microwave in 30 second intervals, stirring in between, until fully melted.
- Pour melted chocolate into a 10-inch tart pan coating the entire bottom and sides of pan. Refrigerate until set.
- In a large bowl, add the peanut butter, powdered sugar, and softened butter and mix until smooth.
- Scoop the peanut butter mixture into the tart pan and evenly smooth the top.
- Melt remaining 2 cups of chocolate chips and 1 Tbsp of shortening. Pour the melted chocolate over the peanut butter filling and spread evenly.
- Refrigerate until set, about 1 hour.
- Slice and serve.
Notes
Featured Comments
“Impressed! Clear steps and so flavorful results. Perfect for busy nights.”
“New favorite here — crowd-pleaser. crowd-pleaser was spot on.”
“Super easy and turned out amazing! My family asked for seconds. Saving this one.”
“This sweet treat was absolutely loved — the cozy really stands out. Thanks!”
“Made it tonight and wow — turned out amazing! Will definitely make Reese’s Peanut Butter Cup Pie: 5 Reasons It’s the Ultimate Dessert! again.”
“Packed with flavor and so simple. Exactly what I wanted from Reese’s Peanut Butter Cup Pie: 5 Reasons It’s the Ultimate Dessert!.”


