

The Ultimate Gooey Rice Krispie Treats (With 3x the Marshmallows!)
Let’s be real for a second—is there any dessert more nostalgic than a classic batch of Rice Krispie Treats? Just thinking about them brings me right back to my childhood kitchen, standing on a step stool and eagerly waiting to lick the gooey marshmallow off the wooden spoon. But as I got older, I realized the standard back-of-the-box recipe just wasn’t cutting it anymore. They were always a little too dry, a little too crunchy, and honestly, a bit stingy on the marshmallows.
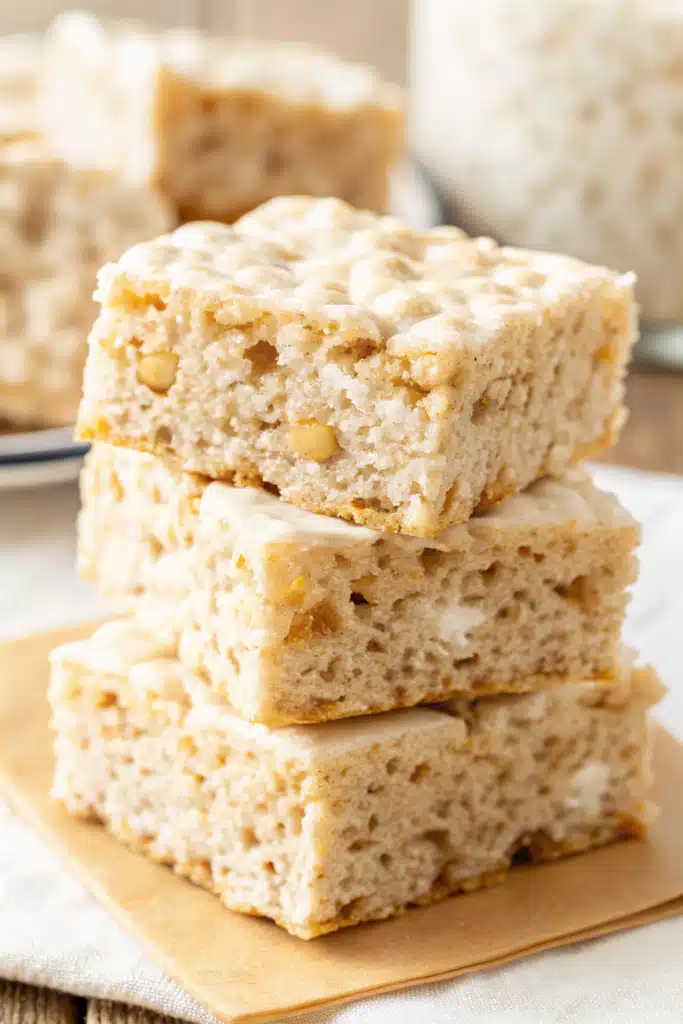
So, I made it my personal mission to fix that. After a lot of delicious trial and error, I finally cracked the code to the absolute best Rice Krispie Treats you will ever make in your life. The secret? We are throwing the old ratios out the window and using almost triple the marshmallows. Yes, you heard me right! This recipe yields those incredibly thick, melt-in-your-mouth, bakery-style squares that pull apart with those glorious marshmallow strings. They are unapologetically gooey, wonderfully buttery, and guaranteed to make you the most popular person at your next potluck or bake sale.
What Are Rice Krispie Treats?
If you somehow missed out on this quintessential American dessert growing up, let me introduce you to your new obsession. Traditional Rice Krispie Treats are a simple, no-bake dessert bar made by binding crispy puffed rice cereal together with a sticky, sweet mixture of melted butter and marshmallows. They have been a lunchbox staple and bake sale champion for decades, loved for their sweet flavor and satisfyingly chewy crunch.
However, our version takes this beloved classic and completely elevates it. Instead of a hard, crunchy block that scrapes the roof of your mouth, these upgraded treats are unbelievably soft and pillowy. By tweaking the ratio of butter to cereal, and massively increasing the marshmallow content, we transform a basic childhood snack into a decadent, gourmet dessert experience. We also add a splash of pure vanilla extract and a crucial pinch of salt to balance the sweetness, giving the flavor a sophisticated depth that adults appreciate just as much as the kids do. It is the nostalgic treat you know and love, just made infinitely better.
How to Make Rice Krispie Treats
Quick Overview
Making homemade Rice Krispie Treats is wonderfully straightforward, but the technique is just as important as the ingredients. The process basically comes down to three easy steps: melting your buttery marshmallow base, gently folding in your dry ingredients, and lightly pressing the mixture into your pan. The most critical thing to remember here is temperature control. You want to melt your butter and marshmallows slowly over medium-low heat to keep the sugars from seizing up. If you rush the melting process with high heat, your bars will end up tough and rubbery instead of soft and gooey. Take your time, move quickly once the cereal goes in, and you will be rewarded with the best no-bake dessert of your life!
Ingredients
You only need five simple ingredients for this magical recipe. I highly recommend buying name-brand, fresh marshmallows for the absolute best melting results!
- Unsalted Butter: 3/4 cup (or 1.5 sticks). This provides the rich, flavorful base.
- Mini Marshmallows: 3 (10-ounce) bags. We will melt two bags and save the third for folding in later!
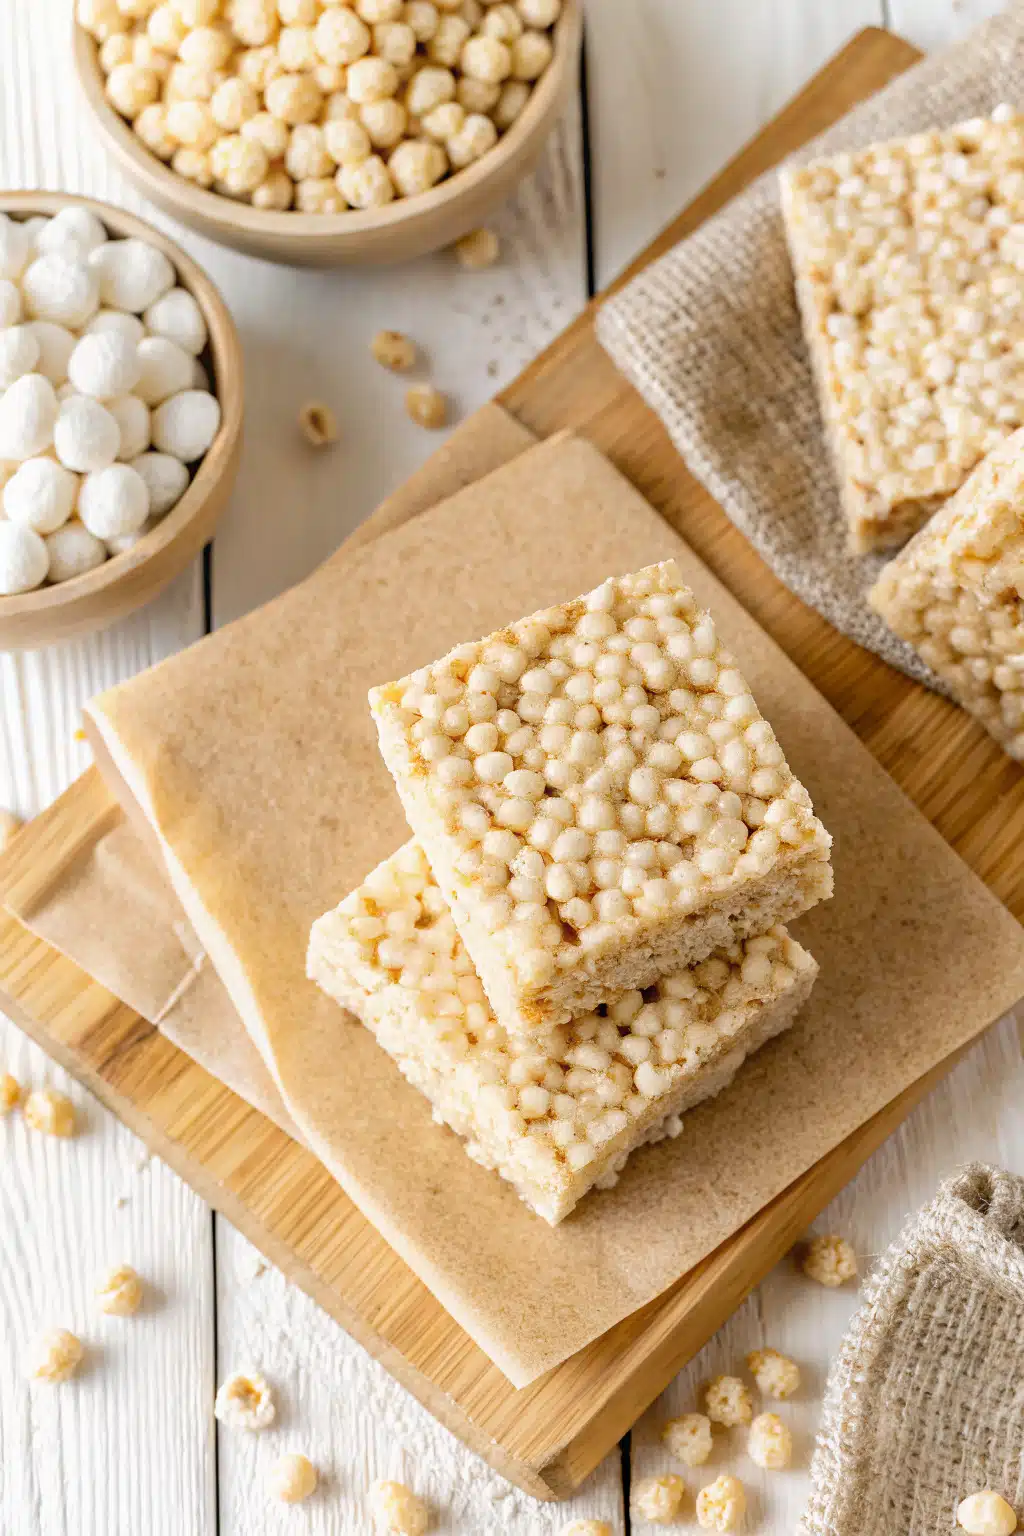
- Crispy Rice Cereal: 10 cups of your favorite brand.
- Pure Vanilla Extract: 1 teaspoon to elevate the overall flavor profile.
- Salt: Just a pinch to perfectly balance out all that sweetness.
Step-by-Step Instructions
Step 1: Preheat & Prep Pan
Start by generously greasing a 9×13 inch casserole pan with butter or non-stick cooking spray. If you want to make removing the bars even easier, you can line the pan with a sheet of parchment paper, leaving a little overhang on the sides to lift them out later.
Step 2: Melt the Butter and Marshmallows
Grab a large, heavy-bottomed pot (a light-colored enamel Dutch oven works beautifully for this) and melt your butter over medium heat. Once the butter is completely melted, pour in exactly two bags of the mini marshmallows. Stir continuously until the marshmallows are completely melted and the mixture is smooth and velvety. Immediately remove the pot from the heat.
Step 3: Add Flavor and Cereal
Quickly stir in your vanilla extract and that crucial pinch of salt. Next, gently fold in the crispy rice cereal. You want to use a silicone spatula or a wooden spoon to carefully coat the cereal without crushing those delicate little puffs.
Step 4: The Secret Marshmallow Addition
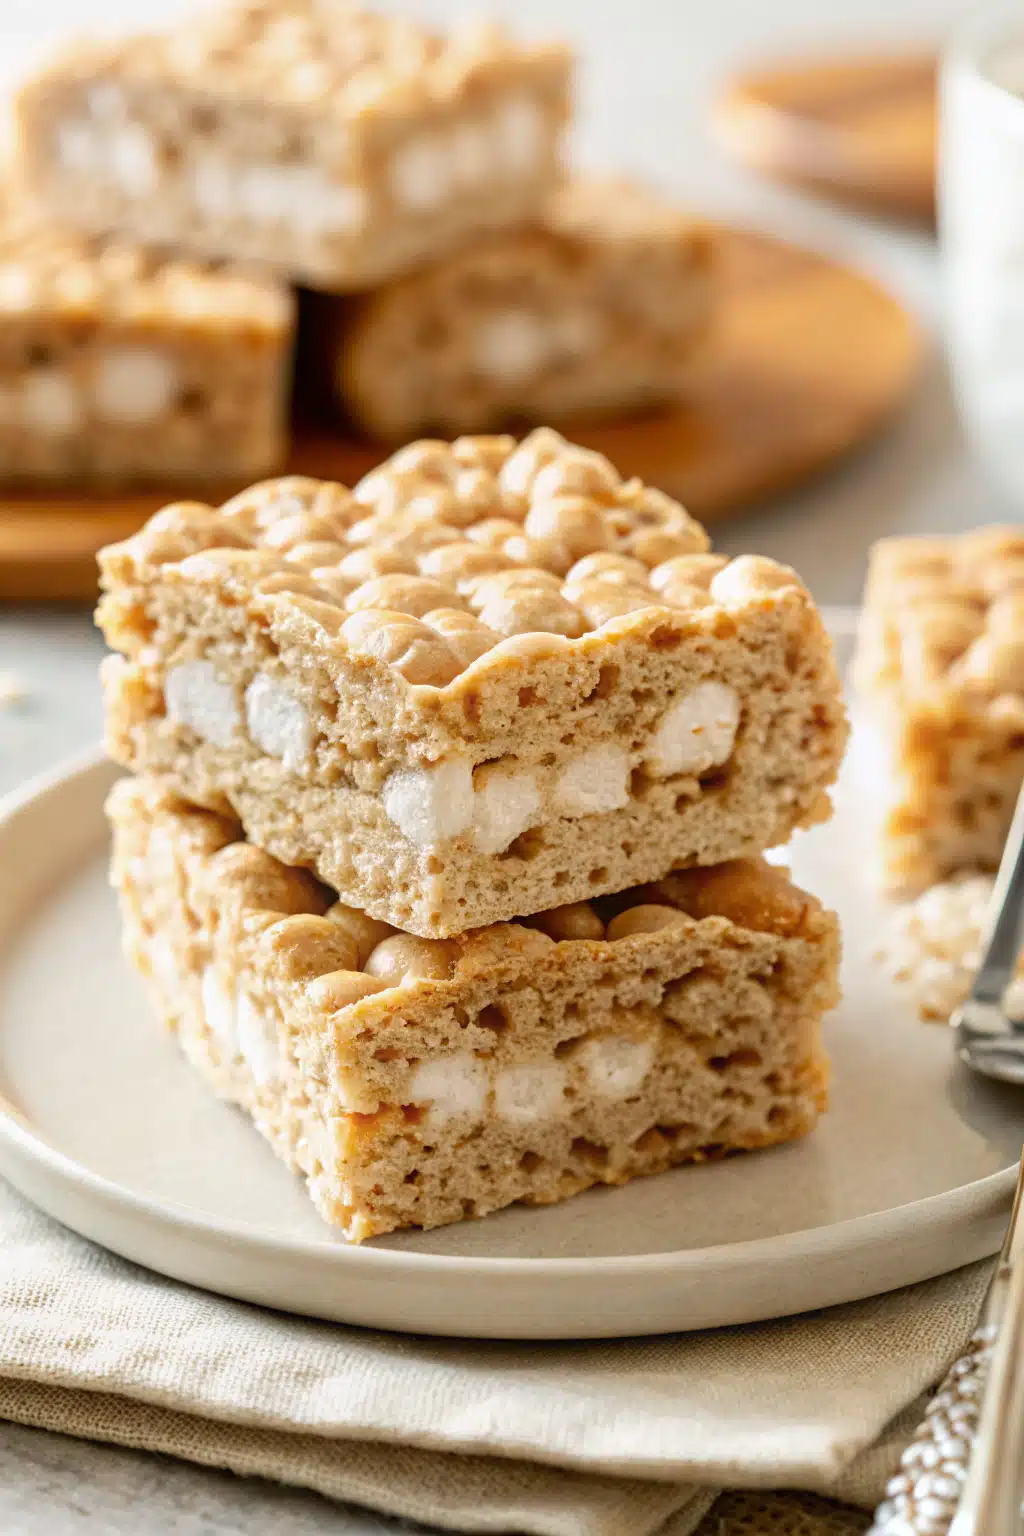
While the mixture is still warm, fold in that third and final bag of mini marshmallows. You just want to mix them in until they are slightly softened but still retain their shape. This creates those amazing gooey pockets of fluff throughout the bars!
Step 5: Press and Cool
Transfer the sticky mixture into your prepared pan. Using a buttered spatula (or lightly greased fingers), very gently spread the mixture out to the edges. Do not pack it down tightly! Pressing too hard is the number one reason treats turn out dense and hard. Let them rest at room temperature for about an hour to set before slicing into thick squares.
What to Serve It With
Honestly, a massive square of these gooey Rice Krispie Treats is a spectacular dessert all on its own, but there are definitely fun ways to serve them if you are hosting a party or having friends over!
I absolutely love serving these alongside a big glass of ice-cold milk or a hot cup of coffee. The slight bitterness of the coffee cuts through the sweet marshmallow perfectly. If you are making these for a summer barbecue or a kid’s birthday party, try serving them on a massive dessert platter alongside other easy grab-and-go sweets like fudgy brownies, chocolate chip cookies, or fresh fruit skewers.
Want to go completely over the top? Serve a warm Rice Krispie Treat in a bowl topped with a giant scoop of vanilla bean ice cream and a heavy drizzle of hot fudge or caramel sauce. It is a decadent, messy, and utterly delicious combination that will have everyone fighting for seconds.
Top Tips for Perfecting Your Rice Krispie Treats
Even though this is a simple no-bake recipe, a few little tricks make all the difference between an okay treat and an unforgettable one.
- Use Fresh Marshmallows: This is non-negotiable! Older, stale marshmallows lose their moisture and simply will not melt smoothly. They will make your bars tough and rubbery. Always buy fresh bags specifically for this recipe.
- Do Not Crush the Cereal: When you are folding the crispy rice into the melted marshmallow mixture, be gentle. Treat it like you are folding egg whites into a cake batter. Preserving the integrity of the cereal puffs keeps the texture light and airy.
- The “Light Touch” Rule: I cannot stress this enough—when transferring the mixture to your pan, use the absolute lightest touch possible. Just coax the mixture into the corners. If you smash it down firmly, you compress the cereal and squeeze out all the air, resulting in a rock-hard brick.
- Brown the Butter: If you want to feel like a gourmet pastry chef, try browning your butter before adding the marshmallows. It adds a nutty, toasted caramel flavor that completely transforms the dessert!
Storing and Reheating Tips
One of the best things about these extra-marshmallow treats is how beautifully they keep. Because of the high marshmallow-to-cereal ratio, they stay soft much longer than standard recipes do.
Room Temperature: Store your leftover treats in an airtight container at room temperature. You can also cover your 9×13 pan tightly with plastic wrap or foil. They will stay fresh, soft, and deliciously chewy for up to a full week. Never put them in the refrigerator, as the cold air will make them hard and completely ruin the soft texture.
Freezing: Yes, you can absolutely freeze Rice Krispie Treats! To freeze, wrap each square individually in plastic wrap, or place layers of treats in an airtight zip-top bag separated by sheets of wax paper. Freeze for up to three months. When you are ready to enjoy one, just let it sit on the counter at room temperature for about 15 to 20 minutes to thaw.
Reheating: If your treats have been sitting for a few days and you want to revive that fresh-out-of-the-pot gooeyness, pop a square in the microwave for exactly 5 to 8 seconds. It warms the butter and puffs the marshmallows right back up!
Frequently Asked Questions
Final Thoughts
There is something so incredibly special about taking a recipe we all grew up with and making it just a little bit more magical. These ultimate Rice Krispie Treats, with their triple dose of marshmallows and perfectly balanced buttery flavor, are proof that sometimes the simplest desserts really are the best.
I hope you try making a batch of these for your family, your friends, or honestly, just for yourself on a cozy Sunday afternoon. They are quick, they are easy, and I promise you will never want to go back to the store-bought version or the old back-of-the-box recipe ever again. Grab your biggest pot, open up those fresh bags of mini marshmallows, and get ready to enjoy the softest, most deliciously gooey treat of your life. Happy no-baking, friends!

Best Rice Krispie Treat Recipe
Ingredients
Main Ingredients
- 0.75 cup unsalted butter 1.5 sticks
- 3 bag mini marshmallows 10 oz each
- 1 teaspoon pure vanilla extract
- 1 pinch salt
- 10 cup crispy rice cereal
Instructions
Preparation Steps
- Grease a 9x13 casserole pan with butter, set aside.
- In a large, light colored, heavy bottomed pot, like an enameled dutch oven, melt butter over medium heat.
- Once melted, add 2 bags of the marshmallows and stir until marshmallows are melted and the mixture is completely melted and smooth.
- Remove from heat, then immediately stir in the vanilla extract and salt. Fold in crispy rice cereal, moving quickly and then fold in remaining bag of mini marshmallows.
- Pour mixture into prepared pan. Using a buttered spatula, lightly press them into pan. Do not press them down too much, just spread them out. If you press them down too much they will become very dense and not as fluffy.
- Allow treats to rest for at least 1 hour at room temperature too cool. Slice into squares or cut into shapes and store any leftovers in an airtight container for up to a week.
Notes
Featured Comments
“Impressed! Clear steps and spot on results. Perfect for busy nights.”
“New favorite here — spot on. crowd-pleaser was spot on.”
“Super easy and turned out amazing! My family asked for seconds. Saving this one.”
“This sweet treat was absolutely loved — the light really stands out. Thanks!”
“Made it tonight and wow — absolutely loved! Will definitely make Rice Krispie treats again.”
“Packed with flavor and so simple. Exactly what I wanted from Rice Krispie treats.”


