

Oh, you know those days when the house just feels… a little too quiet? Or maybe it’s that late afternoon slump where you’re craving something sweet but don’t want to whip up a whole cake? That’s exactly when my mind drifts to this apple cinnamon yogurt swirl bread. It’s not quite a cake, not quite a quick bread, but something wonderfully in between, with the most comforting scent of baked apples and warm cinnamon filling every corner of the kitchen. It’s the kind of thing that instantly makes a house feel like a home. My kids, bless their hearts, ask for this one all the time, especially when they see me grating apples. It reminds me a little of my grandmother’s apple crisp, but it’s so much easier to whip up when you’re short on time. This apple cinnamon yogurt swirl bread is a total hug in loaf form, and I just know you’re going to fall in love with it too.
What is Apple Cinnamon Swirl Bread?
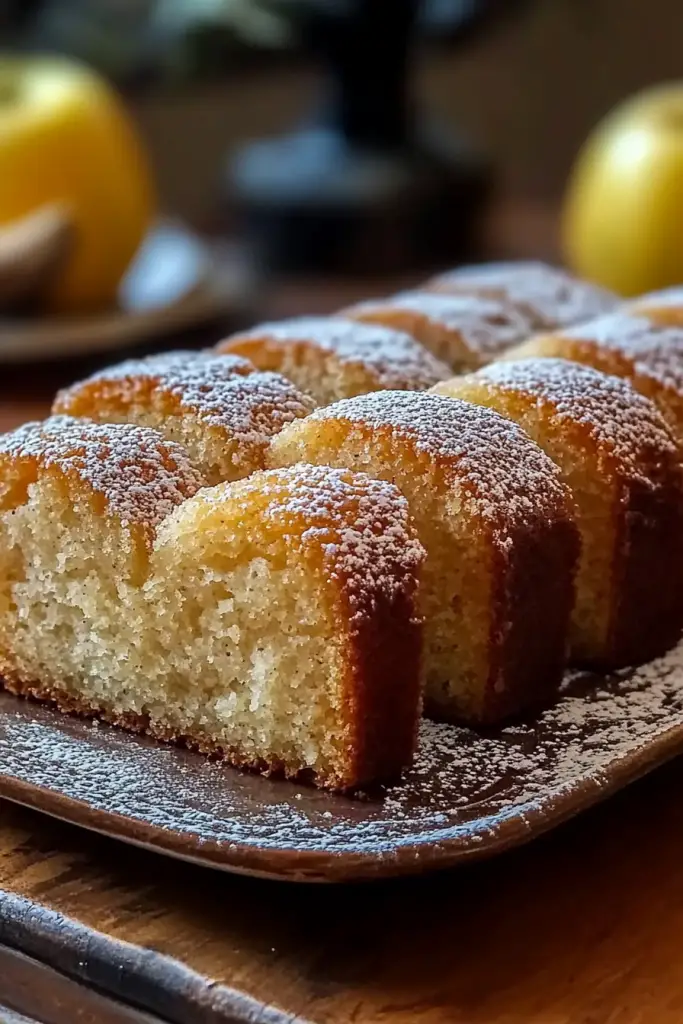
So, what exactly is this apple cinnamon yogurt swirl bread I’m raving about? Think of it as the most delightful marriage between a tender, moist quick bread and the cozy flavors of an Apple Crumble. It’s essentially a simple, no-fuss batter that gets swirled with a sweet, spiced apple mixture and a little something extra that makes it incredibly tender – that’s where the yogurt comes in! It’s not complicated like a yeast bread, and you don’t need any fancy equipment. It’s the perfect solution for using up those apples that are just starting to look a bit too soft for snacking, or when you just get that craving for something warm and spiced. The “swirl” is what really makes it special, creating beautiful ribbons of apple-cinnamon goodness throughout the soft bread. It’s easy, it’s forgiving, and it’s ridiculously delicious.
How to Make Apple Cinnamon Yogurt Swirl Bread
Quick Overview
Making this apple cinnamon yogurt swirl bread is incredibly straightforward. You’ll essentially prepare a simple, moist batter, then create a spiced apple mixture. The magic happens when you layer these two components in your loaf pan and create beautiful swirls before baking. It’s a hands-off kind of baking process once it’s in the oven, filling your home with an amazing aroma. The result is a tender, flavorful loaf that’s perfect for any time of day.
Ingredients
For the Main Batter:
Here’s what you’ll need for the bread itself. I always try to use a good quality plain yogurt – full-fat is usually best for richness, but 2% works too. It makes the bread so wonderfully tender. Don’t use flavored yogurt here; we want the pure tang to balance the sweetness. The flour is just your standard all-purpose, and make sure your baking powder and baking soda are fresh – that’s key for a good lift!
- 2 cups all-purpose flour
- 1 teaspoon baking soda
- 1/2 teaspoon baking powder
- 1/2 teaspoon salt
- 1 teaspoon ground cinnamon
- 1/4 teaspoon ground nutmeg
- 1 cup granulated sugar
- 1/2 cup unsalted butter, softened
- 2 large eggs
- 1 cup plain yogurt (full-fat or 2%)
- 1 teaspoon vanilla extract
For the Filling:
This is where the star of the show, the apples, come in! I love using a mix of tart and sweet apples for the best flavor. Granny Smith is great for tartness, and Fuji or Honeycrisp for sweetness. Make sure to dice them fairly small so they cook through nicely. Chop them up relatively uniformly – it helps them distribute evenly in the swirl.
- 2 cups diced apples (about 2 medium apples, peeled or unpeeled – your choice!)
- 1/4 cup packed light brown sugar
- 1 tablespoon all-purpose flour
- 1 teaspoon ground cinnamon
- Pinch of salt
For the Glaze:
This is optional, but highly recommended! It adds a little extra sweetness and shine. You can adjust the amount of milk to get your desired consistency. I like it just thick enough to drizzle without running off completely.
- 1 cup powdered sugar
- 2-3 tablespoons milk (or a little plain yogurt for extra tang)
- 1/4 teaspoon vanilla extract (optional)
Step-by-Step Instructions
Step 1: Preheat & Prep Pan
First things first, get your oven preheated to 350°F (175°C). Grab a standard 9×5 inch loaf pan and grease it really well. I like to grease it and then lightly flour it, tapping out any excess. You can also line it with parchment paper, leaving some overhang on the sides – this makes lifting the bread out a breeze! This simple step ensures your beautiful loaf doesn’t stick.
Step 2: Mix Dry Ingredients
In a medium bowl, whisk together the all-purpose flour, baking soda, baking powder, salt, cinnamon, and nutmeg. Whisking them well ensures that the leavening agents are evenly distributed, which is crucial for a consistent rise. Make sure there are no clumps.
Step 3: Mix Wet Ingredients
In a larger bowl, cream together the softened butter and granulated sugar until light and fluffy. This takes a minute or two with a mixer, or a bit longer by hand, but it incorporates air which helps with the texture. Beat in the eggs one at a time, making sure each one is fully incorporated before adding the next. Then, stir in the plain yogurt and Vanilla Extract. The mixture might look a little curdled at this point, and that’s totally normal!
Step 4: Combine
Now, gradually add the dry ingredients to the wet ingredients, mixing on low speed or by hand until just combined. Be careful not to overmix! Overmixing develops the gluten in the flour, which can lead to a tough bread. A few streaks of flour are okay; they’ll disappear as you fold in the apples. Just mix until it’s mostly uniform.
Step 5: Prepare Filling
In a separate small bowl, toss the diced apples with the brown sugar, flour, cinnamon, and pinch of salt. The flour helps to thicken the apple juices as they bake, preventing a soggy bottom. Make sure the apples are evenly coated. This step is super quick and makes all the difference in the swirl!
Step 6: Layer & Swirl
Pour about half of the batter into your prepared loaf pan and spread it evenly. Sprinkle about half of the apple filling over the batter. Then, pour the remaining batter over the apples, trying to cover them as much as possible. Finally, spoon the rest of the apple filling over the top. Now for the fun part: take a butter knife or a skewer and gently swirl the filling into the batter. Don’t overdo it – you want distinct swirls, not a muddy mess. Aim for a few figure-eights or gentle pulls through the batter. You want those beautiful ribbons of apple goodness!
Step 7: Bake
Place the loaf pan in the preheated oven. Bake for about 50-60 minutes, or until a wooden skewer or toothpick inserted into the center comes out clean (avoid hitting any apple chunks!). Ovens can vary, so start checking around the 50-minute mark. If the top starts to brown too quickly, you can loosely tent it with aluminum foil.
Step 8: Cool & Glaze
Once baked, let the bread cool in the pan for about 10-15 minutes. This allows it to set up properly. Then, carefully invert it onto a wire rack to cool completely. While it’s cooling, whisk together the powdered sugar, milk, and vanilla extract (if using) for the glaze. Start with 2 tablespoons of milk and add more only if needed to reach your desired drizzling consistency. Once the bread is completely cool, drizzle the glaze over the top. I like to do this when it’s completely cool so the glaze doesn’t melt and disappear.
Step 9: Slice & Serve
Once the glaze has set a bit, slice your beautiful apple cinnamon yogurt swirl bread and enjoy! It’s best served at room temperature, but a quick warm-up in the toaster oven is heavenly too. I love slicing it thick and just enjoying it as is, but a little pat of butter is always a good idea!
What to Serve It With
This apple cinnamon yogurt swirl bread is wonderfully versatile and pairs well with so many things! It’s not just a one-trick pony, you know.
For Breakfast: This is where it truly shines! Serve a thick slice alongside your morning coffee or tea. It’s comforting and satisfying without being too heavy to start your day. A little bit of Greek yogurt or a dollop of Whipped Cream can make it feel even more special for a weekend breakfast.
For Brunch: Elevate it for a brunch spread! Serve it with some fresh berries, a side of scrambled eggs, and perhaps some crispy bacon. It adds a lovely sweet and spiced element that complements savory dishes beautifully. A mimosa or a latte would be the perfect beverage pairing.
As Dessert: For an after-dinner treat, warm up a slice and serve it with a scoop of vanilla bean Ice Cream or a drizzle of caramel sauce. The warm apples and cinnamon are just divine with something cold and creamy. It’s a simple yet elegant dessert that won’t have you slaving away in the kitchen after a big meal.
For Cozy Snacks: This is my go-to for an afternoon pick-me-up. I’ll grab a slice with a glass of milk, or even a cozy mug of hot apple cider. It’s the perfect companion for reading a book or catching up with a friend. My kids often ask for a slice after school, and it’s always gone in minutes!
I’ve found that a little smear of cream cheese on a warm slice is also absolutely divine. Honestly, it’s hard to go wrong with this bread!
Top Tips for Perfecting Your Apple Cinnamon Yogurt Swirl Bread
I’ve made this apple cinnamon yogurt swirl bread more times than I can count, and over the years, I’ve picked up a few tricks that really help make it shine. Here are some of my best tips!
Apple Prep: When dicing your apples, aim for pieces that are about 1/4 to 1/2 inch in size. Smaller pieces distribute better and cook through more evenly without making the bread too wet. You can peel them if you prefer a smoother texture, but I often leave the peels on for extra fiber and a bit of rustic charm. Just make sure they’re washed well! If your apples are super juicy, you might want to drain off any excess liquid after tossing them with the filling ingredients.
Mixing Advice: The biggest culprit for tough quick bread is overmixing. Once you add the dry ingredients to the wet, mix only until they are *just* combined. It’s better to have a few tiny streaks of flour left than to overwork the batter. Gently folding is your friend here. A light hand leads to a tender crumb.
Swirl Customization: Don’t be afraid to get creative with your swirl! You don’t need to be an artist. Gentle figure-eights or just a few passes with a knife through the batter are perfect. The goal is to create visible ribbons of the apple mixture, not to blend it completely in. If you want more intense swirls, try swirling just the top layer of batter and filling.
Ingredient Swaps: Don’t have plain yogurt? Sour cream works wonderfully as a substitute and will give you a similar tenderness. For a dairy-free version, a thick, unsweetened plant-based yogurt (like coconut or soy) can be used, though the texture might be slightly different. If you’re out of nutmeg, a pinch of allspice or ginger can add a lovely warmth to the dry ingredients. You can also experiment with different apple varieties – a mix of sweet and tart always wins for me.
Baking Tips: Every oven is a little different, so I always recommend starting to check for doneness a bit before the minimum baking time. If the top is browning too quickly but the center isn’t cooked, loosely tent the loaf pan with aluminum foil. This will protect the crust while allowing the inside to bake through. Make sure your oven rack is in the center position for even heat distribution.
Glaze Variations: If you’re not a fan of powdered sugar glaze, try a simple dusting of powdered sugar once the bread is cooled. Alternatively, you can make a cinnamon-sugar topping by mixing a tablespoon of cinnamon with a quarter cup of sugar and sprinkling it over the top before baking, or drizzling with melted chocolate. For a less sweet glaze, use more milk or a squeeze of lemon juice.
Storing and Reheating Tips
Storing this apple cinnamon yogurt swirl bread properly ensures it stays wonderfully moist and delicious. I’ve got a few methods that work like a charm!
Room Temperature: Once completely cooled, you can store the bread at room temperature, well-wrapped. I usually wrap it tightly in plastic wrap and then place it in an airtight container or a large zip-top bag. It stays fresh and moist like this for about 2-3 days. I find it’s actually even better on the second day as the flavors meld together.
Refrigerator Storage: If your kitchen is particularly warm, or if you want to extend its freshness, you can store it in the refrigerator. Again, make sure it’s well-wrapped in plastic wrap or foil, and then in an airtight container. It will keep well in the fridge for up to a week. The texture might become slightly firmer when cold, but it’s easily remedied.
Freezer Instructions: This bread freezes beautifully! For the best results, I recommend slicing it first. Wrap each slice individually and tightly in plastic wrap, then place them in a freezer-safe bag or container. You can also freeze the whole loaf, wrapped securely. It should keep well in the freezer for up to 2-3 months. Thawing is easy: just let it thaw at room temperature for a few hours, or pop a slice in the toaster for a quick warm-up.
Glaze Timing Advice: If you plan to freeze the bread, I highly recommend glazing it *after* it has thawed. Glaze applied before freezing can sometimes become sticky or melty when thawing. If you’re storing it at room temperature or in the fridge for a few days, glazing it before storing is perfectly fine, as long as the bread is completely cool first.
Frequently Asked Questions
Final Thoughts
I really hope you’ll give this apple cinnamon yogurt swirl bread a try. It’s more than just a recipe to me; it’s a little bit of comfort, a splash of warmth, and a whole lot of deliciousness that’s surprisingly easy to bring into your own kitchen. The aroma that fills your home while it bakes is truly something special, and the tender, moist crumb with those ribbons of spiced apple is just perfection. It’s the kind of treat that makes simple moments feel a little more magical, whether it’s a quiet morning with coffee or an afternoon snack for the kids. If you enjoy this recipe, you might also love my spiced pear bread or my easy apple crumble bars – they’re in a similar cozy vein! I can’t wait to hear how yours turns out, so please do leave a comment below and share your thoughts, or even your own creative twists!
Apple Cinnamon Yogurt Bowls
Ingredients
For the Apple Topping
- 1 sweet apple apple peeled, cored, seeded and diced (Honey Crisp or Gala recommended)
- 15 grams raw sugar
- 1 tablespoon golden raisins
- 0.25 teaspoon cinnamon
- 1 pinch nutmeg
For the Bowls
- 2 cups plain yogurt 0% fat
- 4 tablespoons chopped walnuts or pecans
Instructions
Preparation Steps
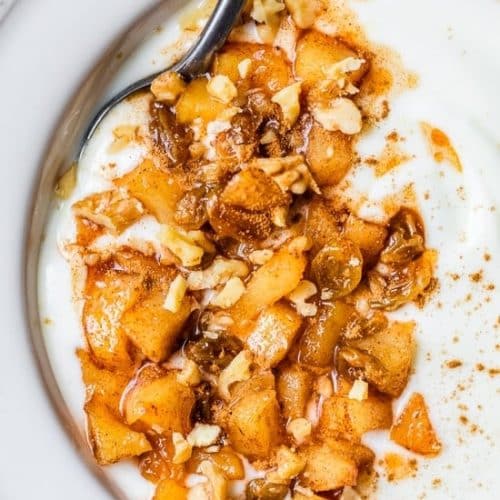
- Place diced apple, sugar and raisins in a small pot. Add 1/4 cup water, sprinkle with cinnamon and a pinch of nutmeg. Cover and cook over low heat until soft, about 16 to 18 minutes.
- Set the cooked apple mixture aside to cool.
- Divide the yogurt into 2 medium bowls. Top with the cooled apple mixture and chopped nuts. Serve immediately.
Notes
Featured Comments
“Impressed! Clear steps and restaurant-level results. Perfect for busy nights.”
“New favorite here — super easy. crowd-pleaser was spot on.”
“Super easy and turned out amazing! My family asked for seconds. Saving this one.”
“This sweet treat was absolutely loved — the hearty really stands out. Thanks!”
“Made it tonight and wow — crowd-pleaser! Will definitely make Simple Apple Cinnamon Yogurt Treats again.”
“Packed with flavor and so simple. Exactly what I wanted from Simple Apple Cinnamon Yogurt Treats.”


