

There’s something about the smell of pumpkin pie wafting through the house that instantly makes me feel like everything’s right in the world. I’ll never forget those chilly fall weekends when my grandma would pull out her vintage pie dish, and the aroma of warm spices and sweet pumpkin would fill the kitchen. It’s hilarious—my kids actually ask for this pie all the time, especially when Halloween decorations start to go up! Honestly, I think it’s the perfect combination of creamy filling and buttery crust that keeps everyone coming back for seconds. And the best part? You don’t have to be a seasoned baker to get great results. I’ve tested this recipe countless times, and it’s never failed me. Plus, it’s a lifesaver on busy nights when I need something comforting and homemade in no time. Trust me on this one—once you try this pumpkin pie, it’ll become a permanent fixture in your holiday traditions too!
What is pumpkin pie?
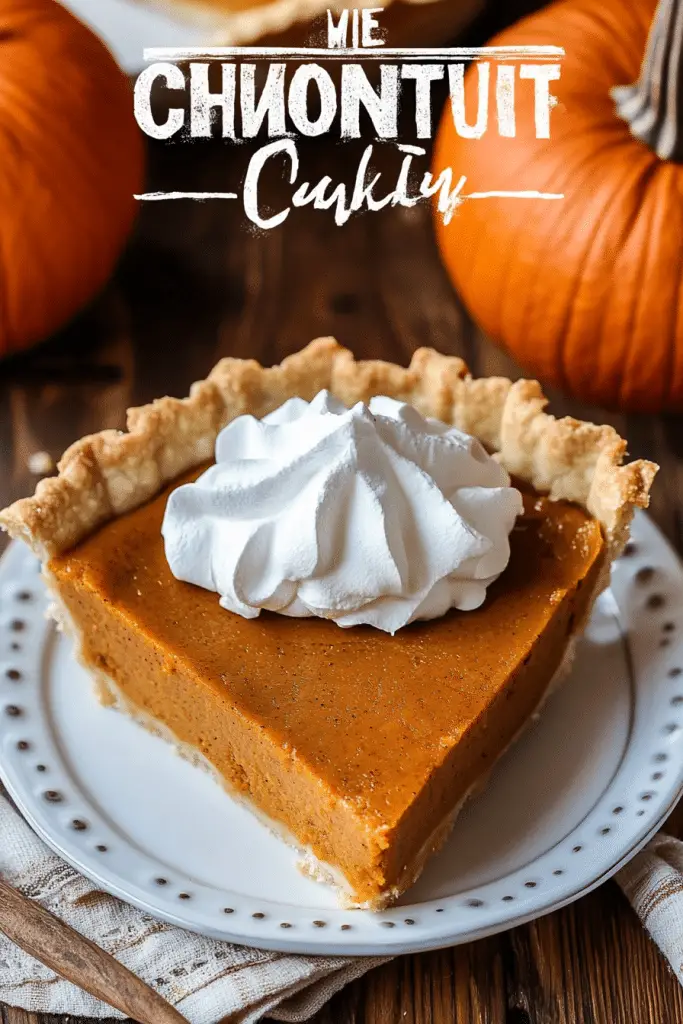
Think of pumpkin pie as the ultimate autumn dessert—a warm, spiced custard nestled in a flaky crust, topped with whipped cream to finish it off. It’s basically the essence of fall all in one slice, rooted in centuries-old recipes that celebrate pumpkin, a vegetable that’s become synonymous with cozy family gatherings. The name itself is pretty straightforward: “pumpkin” for the main ingredient, and “pie” because of its classic circular shape and pie crust. It’s essentially a rich, velvety filling made from pumpkin puree, sweetened with sugar, and loaded with warm spices like cinnamon, nutmeg, and clove. Then, it’s poured into a homemade or store-bought crust and baked until perfectly tender. Think of it as the love-child of a custard and a cookie—delightfully creamy with just a hint of crunch from the crust. It’s no wonder that every Thanksgiving table feels incomplete without a slice of this nostalgic treat!
How do I make pumpkin pie?
Quick Overview
Making this pumpkin pie is surprisingly straightforward. It all begins with preparing your crust—whether you go store-bought or homemade—and then mixing a smooth, flavorful filling with pumpkin puree, eggs, sugar, and spices. Pour it into your crust, swirl in a spoonful of cream or caramel if you like, then bake it to golden perfection. The trick is to keep an eye on it near the end to prevent overbaking—no one likes a dry filling! Once it’s set and slightly puffed, give it a good cool before adding a whipped cream topping or drizzle of caramel. This pie needs just about an hour to bake, but the overall hands-on time is minimal, making it perfect for last-minute guest visits or busy weeknights when you want that warm, homemade feeling.
Ingredients
For the Main Batter:
– 1 ½ cups pumpkin puree (canned or homemade, just make sure it’s smooth and thick)
– 3 large eggs
– ¾ cup light brown sugar (for a hint of caramel flavor)
– 1 cup heavy cream or full-fat coconut milk (I’ve tested both, and they’re equally velvety!)
– 1 teaspoon vanilla extract
– 1 teaspoon ground cinnamon
– ½ teaspoon ground nutmeg
– ¼ teaspoon ground clove
– ¼ teaspoon salt
For the Crust:
– 1 ¼ cups all-purpose flour (or gluten-free flour blend)
– ½ teaspoon salt
– ½ cup unsalted butter, chilled and cubed
– 3–4 tablespoons ice-cold water (add gradually until dough just comes together)
For the Glaze (optional):
– ½ cup heavy cream or milk
– 2 tablespoons powdered sugar
– ½ teaspoon vanilla extract
– A pinch of cinnamon or nutmeg for extra flair
Step-by-Step Instructions
Step 1: Preheat & Prep Pan
Preheat your oven to 350°F (175°C). If you’re using a homemade crust, roll it out and fit it into your pie dish, crimping the edges for a fancy touch. For store-bought crusts, just line the dish and set aside. Remember to prick the bottom with a fork a few times—this helps prevent bubbling, especially if you’re blind-baking. Set aside your prepared crust while you make the filling.
Step 2: Mix Dry Ingredients
In a small bowl, whisk together the sugar, cinnamon, nutmeg, clove, and salt. This helps evenly distribute the spices and ensures every bite is full of warm flavor. Trust me, I learned the hard way that skipping this step can lead to uneven spice pockets!
Step 3: Mix Wet Ingredients
In a large mixing bowl, whisk the eggs until just combined. Add in the pumpkin puree, cream, vanilla, and the spice mixture. Whisk smoothly until everything is blended into a velvety batter. The smell alone will make you oh-so-happy—and your kitchen will smell like fall in a bowl.
Step 4: Combine
Pour your wet mixture into the prepared crust. Don’t overmix—that can make the filling a little dense. Sharp stir just enough to ensure even distribution. If you see bubbles on the surface, give it a gentle tap to pop them—makes for a prettier slice.
Step 5: Prepare Filling
For a little extra flair, I sometimes swirl in a spoon of cream or caramel on top before baking. This makes a beautiful marbling effect, and the caramel adds a little surprise sweetness. Feel free to experiment with chopped nuts or even mini chocolate chips for a fun twist. Remember, the filling should be smooth but slightly puffed and shiny if you want that perfect look.
Step 6: Layer & Swirl
Pour the filling into the crust. If you want that marbled visual, gently swirl a spoon through the batter—don’t overdo it, or you’ll lose the pretty pattern. Just a few strokes for that artistic touch makes all the difference. Your pie will look so inviting, I guarantee!
Step 7: Bake
Bake the pie for about 50-60 minutes. Keep an eye on it—when the filling looks slightly puffed and the edges are set, it’s usually done. To check doneness, give the crust a gentle jiggle; the center should jiggle just a little but not be liquid. If you poke the center and it’s still runny, pop it back in for 5-10 more minutes. Every oven is different, so use your senses!
Step 8: Cool & Glaze
Allow the pie to cool completely on a wire rack—this helps it set perfectly. Once cooled, whip up a quick glaze by mixing heavy cream, powdered sugar, vanilla, and a pinch of cinnamon, then drizzle it over the top. It adds a lovely sweet gloss and extra flavor depth. Trust me, a little glaze makes every slice feel special.
Step 9: Slice & Serve
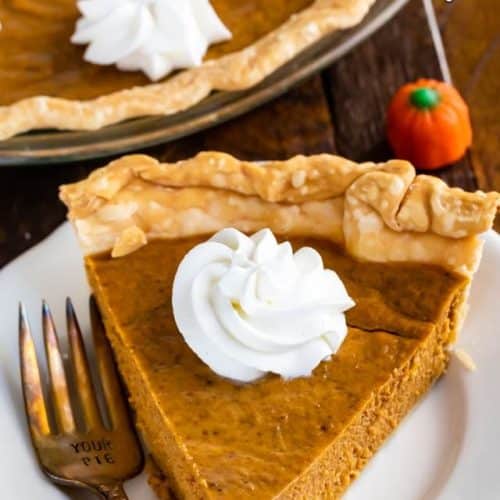
Use a sharp knife dipped in hot water for clean cuts. Serve slices chilled or at room temperature with a dollop of whipped cream or a sprinkle of cinnamon. My kids love it with a scoop of vanilla ice cream on top—hey, sometimes a dessert just calls for extra indulgence!
What to Serve It With
This pumpkin pie is a showstopper on its own, but I love pairing it with simple things that accentuate its warm flavors. During breakfast, a fresh cup of brewed coffee with a slice of pie is pure comfort. On brunch days, I’ll serve it alongside spiced chai or hot cider—perfect for those crisp mornings. As a dinner dessert, a drizzle of caramel sauce or a dusting of powdered sugar makes it feel extra fancy. And for casual family nights, some whipped cream and chopped pecans are all it needs. One of our family traditions is to have a small slice after every holiday dinner, and I’ve discovered that freezing leftovers makes for an amazing morning treat or even a quick snack—just let it thaw and enjoy!
Top Tips for Perfecting Your Pumpkin Pie
Over the years, I’ve learned a few tricks that turn this simple recipe into a showstopper. First, always drain your canned pumpkin if it seems watery—this keeps your pie from becoming too soggy. I’ve tested making the filling with almond milk, and honestly, it made it even creamier! When mixing, avoid overwhisking—the goal is just to blend everything smoothly; overmixing can lead to a denser texture. If you’re after that beautiful swirl effect, use a toothpick or skewer for delicate patterning—patience really pays off. As for ingredient swaps, you can swap light brown sugar for maple syrup or honey for a different sweetness profile. Be cautious with baking times—try to keep your oven at a steady 350°F, but if your pie starts to brown too quickly, tent it loosely with foil. I also experimented with different glaze flavors—try adding some orange zest or a pinch of cayenne pepper for a spicy kick. The key is to watch closely near the end of baking, and don’t forget to let it cool fully before slicing. Trust me, a little practice makes perfect, and once you nail the timing, your pumpkin pie will look like it’s straight out of a bakery!
Storing and Reheating Tips
If you have leftovers (which I hope you do!), here’s the scoop on storing and reheating. At room temperature, the pie stays good for up to two days if covered lightly with foil or plastic wrap—perfect for a quick dessert. For longer storage, pop it into an airtight container or cover it tightly with plastic wrap and refrigerate for up to four days. Just keep in mind that the flavors deepen and the texture slightly changes over time, but it’s still delicious. If you want to stash it away for a future treat, wrap it tightly in plastic and foil before freezing—this keeps the crust crisp and the filling fresh. Thaw it overnight in the fridge, then reheat slices gently in the oven at 300°F for about 10 minutes for that just-baked feel. As for glazing, if you decide to add it later, do so just before serving to keep that glossy shine. These steps keep your pumpkin pie tasting just as amazing as day one. Trust me, nothing beats slicing into a pie that’s been stored with love and patience!
Frequently Asked Questions
Final Thoughts
If you’re looking for a recipe that feels like a warm hug on a plate, this pumpkin pie will become your new best friend. It’s nostalgic, approachable, and endlessly adaptable—perfect for fall holidays, cozy weekends, or just whenever you crave a little piece of comfort. I’ve shared my favorite tips, tricks, and family secrets to make sure your pie turns out gorgeous and delicious every time. Honestly, once you get the hang of it, it’s so easy you’ll be making this in your sleep—well, almost. My hope is that this recipe brings as much joy to you as it has to my family over the years. So, gather your ingredients, put on some cozy music, and have fun creating your own pumpkin masterpiece. Can’t wait to hear how yours turns out—happy baking!
pumpkin pie
Ingredients
Main Ingredients
- 1 refrigerated pie crust refrigerated pie crust
- 15 ounces pumpkin puree
- 14 ounces sweetened condensed milk
- 2 large eggs eggs
- 0.5 teaspoon salt
- 2 teaspoons pumpkin pie spice
- Whipped cream for serving
Instructions
Preparation Steps
- Preheat oven to 425°F.
- Place pie crust in 9-inch pie plate and crimp edges as desired. Chill until ready to fill.
- Whisk pumpkin, sweetened condensed milk, eggs, salt, and pumpkin pie spice. Pour into prepared pie crust. Cover edges with foil or a pie shield.
- Bake at 425°F for 10 minutes, then lower temperature to 350°F and bake for an additional 30-40 minutes until the pie is almost set but slightly jiggly in the center.
- Remove from oven and let cool, then chill before serving.
- Store covered in the refrigerator for up to 3 days or freeze for up to one month.
Notes
Featured Comments
“Impressed! Clear steps and spot on results. Perfect for busy nights.”
“New favorite here — absolutely loved. crowd-pleaser was spot on.”
“Super easy and turned out amazing! My family asked for seconds. Saving this one.”
“This sweet treat was absolutely loved — the cozy really stands out. Thanks!”
“Made it tonight and wow — perfect for busy nights! Will definitely make Simple Autumn Pie Recipe You’ll Love again.”
“Packed with flavor and so simple. Exactly what I wanted from Simple Autumn Pie Recipe You’ll Love.”


