There are certain desserts that just make my heart sing, you know? The kind that transport you back to childhood, or are so ridiculously easy they feel like a secret superpower. This strawberry cheesecake dump cake is absolutely one of those. I remember the first time I made it, it was a scorching summer afternoon, and the thought of turning on the oven for hours to make a “proper” cheesecake felt like a Herculean task. My neighbor, bless her soul, popped over with this recipe scribbled on a napkin, and honestly, I was skeptical. Dump cake? For cheesecake? But oh, was I wrong! It’s become my go-to when I need something utterly decadent but have zero time or energy. It’s like the shortcut to dessert heaven, and it never, ever disappoints. It’s my answer to those “I need something sweet, like, *now*” cravings, and it’s so much more delightful than you’d ever imagine.
What is a cheesecake dump cake?
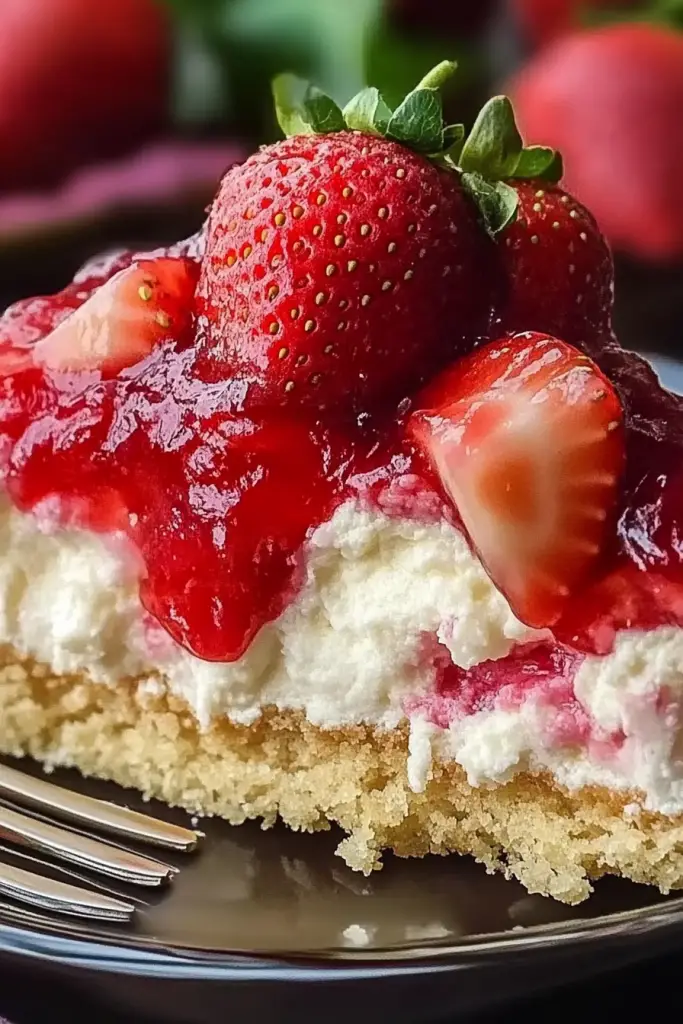
So, what exactly *is* a dump cake, and why does adding “strawberry cheesecake” to it sound like a culinary oxymoron? Think of a dump cake as the ultimate cheat code for baking. Instead of the meticulous creaming of butter and sugar, layering delicate pastry, or worrying about water baths, you literally “dump” your ingredients into a baking dish and let the magic happen. This strawberry cheesecake version takes that genius concept and elevates it. It’s essentially a luscious, creamy cheesecake filling, swirled with sweet strawberries, topped with a buttery cake mixture that bakes up into a golden, slightly crispy topping. The beauty of it is in its simplicity; there’s no complex batter to make, no crust to press. It’s the flavor profile of a rich strawberry cheesecake but with the satisfying ease of a dump cake. It’s the best of both worlds, really.
How do I make a strawberry cheesecake dump cake?
Quick Overview
Making this strawberry cheesecake dump cake is as straightforward as it sounds. You’ll prepare a simple cream cheese and strawberry filling, then top it with a dry cake mix that bakes up into a golden crust. It’s the ultimate “set it and forget it” dessert that still manages to taste incredibly gourmet. The magic happens in the layers and the baking process, creating a warm, gooey center with a perfectly crisp topping. It’s almost unbelievable how something so simple can yield such delicious results.
Ingredients
What is the cream cheesecake filling?
* 2 blocks (16 ounces) cream cheese, softened: Make sure these are really soft! It makes a huge difference in getting a smooth filling without lumps. I usually pull them out of the fridge at least an hour before I plan to bake.
* 1 can (14 ounces) sweetened condensed milk: This is what gives it that incredible sweetness and velvety texture. Don’t use evaporated milk, it’s a different thing entirely!
* 2 large eggs: These help set the filling so it’s not too runny. Just room temperature eggs are perfect here.
* 1 teaspoon vanilla extract: The classic flavor enhancer that makes everything taste better. Pure vanilla extract is always best if you can find it.
* 1 cup fresh or frozen strawberries, chopped: If using frozen, no need to thaw! They’ll break down beautifully in the oven. Fresh ones are lovely too, especially when they’re in season.
For the Cake Topping:
* 1 box (about 15.25 ounces) yellow cake mix: The kind you find in the baking aisle. This is the foundation of our “dump” topping.
* 1 cup (2 sticks) unsalted butter, melted: This is crucial for getting that golden, crispy topping. Don’t skimp here! Make sure it’s fully melted.
Step-by-Step Instructions
Step 1: Preheat & Prep Pan
First things first, get that oven preheating to 350 degrees Fahrenheit (175 degrees Celsius). Grab a 9×13 inch baking dish. You don’t need to grease it; the butter in the topping will take care of that. Just make sure the dish is clean and ready to go.
Step 2: Mix Cream Cheese Filling
In a large bowl, beat the softened cream cheese until it’s super smooth and creamy. This is the most important step to avoid any lumpy cheesecake! Then, pour in the sweetened condensed milk and beat again until well combined. Beat in the eggs one at a time, then stir in the vanilla extract. Don’t overmix once the eggs are in, just until everything is incorporated.
Step 3: Prepare Strawberries
Gently fold in the chopped strawberries into the cream cheese mixture. If you’re using fresh strawberries, give them a quick rinse and chop them into bite-sized pieces. If using frozen, just dump them in. You want them evenly distributed, but it’s okay if there are a few bigger chunks!
Step 4: Assemble the Dump Cake
Pour the strawberry cream cheese mixture evenly into your prepared baking dish. Now, for the “dump” part! Evenly sprinkle the dry yellow cake mix over the cream cheese mixture. Just dump it right on top – no stirring needed! Make sure to get it as close to the edges as possible.
Step 5: Add Butter Topping
Drizzle the melted butter evenly over the dry cake mix. Use a spatula or spoon to gently spread it around, trying to cover as much of the cake mix as you can. Don’t worry if it’s not perfectly covered; the butter will spread as it bakes.
Step 6: Bake Until Golden
Pop the dish into your preheated oven and bake for 40-50 minutes, or until the topping is golden brown and bubbly around the edges. The center should be set, meaning it’s not jiggly anymore. You can check for doneness by inserting a toothpick near the center; it should come out mostly clean (a few moist crumbs are okay).
Step 7: Cool and Let It Set
This is probably the hardest part: letting it cool! Let the dump cake sit on a wire rack for at least 15-20 minutes before serving. This allows the filling to set up properly. It will continue to firm up as it cools.
Step 8: Slice and Serve
Once slightly cooled and set, scoop generous portions into bowls or onto plates. It’s absolutely divine served warm, but it’s also delicious at room temperature. Trust me, it disappears fast!
What to Serve It With
This strawberry cheesecake dump cake is so incredibly versatile, it fits into almost any occasion. For a sweet BREAKFAST treat, especially on a weekend, I love serving it warm with a good strong cup of coffee. The richness of the cake is surprisingly satisfying to start the day. For BRUNCH, it feels a little more elegant, especially if you add a dollop of whipped cream or a few fresh berries on top. A mimosa or a nice iced tea pairs wonderfully. When it’s a formal DESSERT, a scoop of good quality vanilla bean ice cream is a non-negotiable in my book. A drizzle of chocolate sauce or a scattering of toasted slivered almonds can elevate it even further. And for those COZY SNACKS, when you just need comfort food? It’s perfect as is, maybe with a tall glass of cold milk. My family has a tradition of having this for dessert on movie nights, and it’s always a huge hit. It’s the ultimate crowd-pleaser, no matter how you serve it.
Top Tips for Perfecting Your Strawberry Cheesecake Dump Cake
Over the years, I’ve learned a few tricks that make this strawberry cheesecake dump cake even better, and I’m happy to share them! First, about the ZUCCHINI PREP – oh wait, that’s for another recipe! For *this* one, it’s all about the cream cheese. Make sure your cream cheese is *really* softened. I mean, spreadably soft. This is key to getting a super smooth, lump-free filling. If it’s still cold, you’ll end up with little pockets of cream cheese, and nobody wants that. When you’re mixing the wet ingredients, don’t overbeat the eggs. Just mix until they’re incorporated. Overbeating can lead to a tougher topping, and we want it tender and delicious. For SWIRL CUSTOMIZATION, while this recipe is more of a “dump and top,” you *could* gently swirl the strawberries into the cream cheese mixture before adding the cake mix if you prefer more distinct streaks. Just a light swirl, don’t go crazy! Ingredient swaps are where this recipe really shines. If you don’t have yellow cake mix, a white cake mix or even a vanilla pound cake mix works beautifully. Just use what you have! The butter is non-negotiable though; it’s what makes the topping so amazing. For BAKING TIPS, ovens can be tricky, so keep an eye on it around the 40-minute mark. If the topping is browning too quickly, you can loosely tent it with foil. The toothpick test is your best friend here for ensuring the center is cooked through. Finally, for GLAZE VARIATIONS – well, this recipe doesn’t really have a glaze, but if you wanted to add one, a simple powdered sugar and milk glaze would be lovely, or even a cream cheese frosting drizzled over the top after it cools slightly. Just remember, the magic of this dump cake is its simplicity, so don’t feel pressured to add too much!
Storing and Reheating Tips
The good news is that this strawberry cheesecake dump cake stores really well, making it perfect for leftovers (if you even have any!). At ROOM TEMPERATURE, it’s best to cover it tightly with plastic wrap or foil and it should be fine for about 2 days, especially if your kitchen isn’t too warm. However, for optimal freshness and to keep that creamy center from getting too soft, REFRIGERATOR STORAGE is your best bet. Store it in the baking dish, well-covered, and it will keep beautifully for up to 4 days. The texture actually improves a bit overnight as the flavors meld. If you plan to FREEZER INSTRUCTIONS, it’s best to let the dump cake cool completely first. Wrap it very securely in plastic wrap, then in aluminum foil, or transfer it to an airtight freezer-safe container. It can be frozen for up to 2-3 months. To reheat, you can either let it thaw overnight in the refrigerator and serve it chilled or at room temperature, or you can warm individual portions in the microwave for about 30-60 seconds until heated through. For a crisper topping, you can gently reheat it in a 300-degree Fahrenheit oven for about 10-15 minutes. Regarding GLAZE TIMING ADVICE, if you’ve made a separate glaze and want to add it, I’d recommend waiting until after the cake has cooled for at least an hour, or even until serving. If you’re storing it with a glaze already applied, it might make the topping a bit soggy over time, so it’s often better to glaze just before serving.
Frequently Asked Questions
Final Thoughts
So there you have it – my absolute favorite strawberry cheesecake dump cake! It’s proof that you don’t need a lot of fuss to create something truly magical in the kitchen. This recipe has saved me so many times, and the smiles it brings to my family’s faces make it all worthwhile. It’s that perfect blend of creamy, fruity, and comforting, all wrapped up in the easiest dessert package. If you’re someone who loves cheesecake but dreads the process, or if you’re just looking for a go-to dessert that’s guaranteed to impress without the stress, you absolutely have to give this a try. It’s a recipe that truly delivers on flavor and simplicity. If you enjoy this easy dessert, you might also love my Easy Lemon Blueberry Dump Cake or my No-Bake Chocolate Raspberry Cheesecake. Happy baking, and please, let me know in the comments how yours turns out! I’m always eager to hear your stories and see your creations!

Strawberry Cheesecake Dump Cake
Ingredients
Main Ingredients
- 1 package yellow cake mix
- 1 cup melted butter
- 2 cans 8 ounce cream cheese, softened
- 1 cup granulated sugar
- 1 large egg
- 21 ounces strawberry pie filling
Instructions
Preparation Steps
- Preheat your oven to 350°F (175°C). Lightly grease a 9x13 inch baking dish.
- In a medium bowl, combine the melted butter and the yellow cake mix. Stir until just combined. Press about two-thirds of this mixture evenly into the bottom of the prepared baking dish.
- In another bowl, beat the softened cream cheese and granulated sugar until smooth. Beat in the egg until well combined.
- Spread the cream cheese mixture evenly over the cake mix layer in the baking dish.
- Pour the strawberry pie filling evenly over the cream cheese layer.
- Sprinkle the remaining cake mix mixture over the strawberry layer.
- Bake for 45-55 minutes, or until the topping is golden brown and the filling is bubbly.
- Let the dump cake cool for at least 15 minutes before serving. Serve warm.
Notes
Featured Comments
“Impressed! Clear steps and super easy results. Perfect for busy nights.”
“New favorite here — so flavorful. crowd-pleaser was spot on.”
“Super easy and turned out amazing! My family asked for seconds. Saving this one.”
“This sweet treat was absolutely loved — the fresh really stands out. Thanks!”
“Made it tonight and wow — restaurant-level! Will definitely make strawberry cheesecake dump cake again.”
“Packed with flavor and so simple. Exactly what I wanted from strawberry cheesecake dump cake.”