


I’ll never forget the first time I tasted a slice of something I now call a sweet potato butter cake. It was late fall, and the kitchen smelled like cinnamon, caramel, and a whisper of smoke from the wood stove. My grandmother had baked something that felt cozy and bright all at once, the kind of dessert you crave after a long day but somehow still feels special enough for guests. This sweet potato butter cake isn’t just about sweetness—it’s about memories, textures, and that little jolt of orange color that brings a smile to everyone’s face. Think of it as a cross between a tender butter cake and a spiced carrot cake, with the mellow sweetness of roasted sweet potato. It’s a crowd-pleaser, and it’s surprisingly simple to pull off. This one’s a lifesaver on busy weeknights, because you get a gorgeous cake with minimal fuss, and the aroma alone makes the kitchen feel like a hug. I’ve tested it with almond milk and extra vanilla, and you’ll be surprised at how creamy the crumb stays. My kids actually ask for seconds, and that’s the sweetest compliment I can get.
What is Sweet Potato Butter Cake?
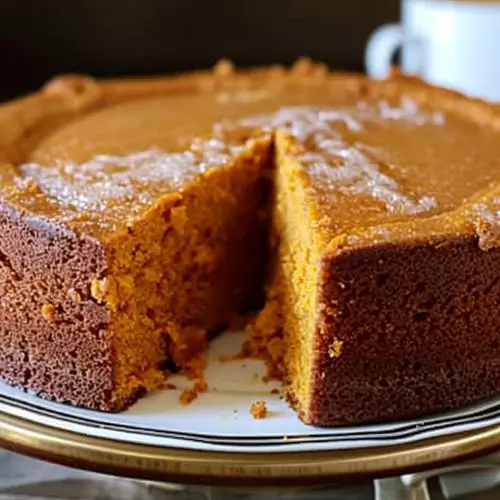
Sweet Potato butter cake is essentially a softly spiced vanilla cake that gets its vibrant sweetness from roasted sweet potato purée. Think of the purée as a secret ingredient that adds moisture, a subtle savory note, and a gorgeous orange tone that makes each slice feel sunny. The recipe often includes a creamy filling or swirl—usually a cinnamon-cream cheese or brown sugar butter mixture—that adds richness and a little tang. It’s not overly fussy, and it’s ideal for weeknights or weekend gatherings alike. The name comes from the cake’s star components: sweet potato purée blended into a butter-based batter, with butter and eggs carrying the tender crumb. It’s essentially a cozy, return-to-friendly-from-scratch cake that feels homey but polished enough for a party. I love the way the flavors whisper to each other—sweet potato, vanilla, cinnamon, and a kiss of caramel from the glaze. It’s a cake you can bake early in the day and still have perfectly moist slices come afternoon coffee.
Why you
What I love most about this Sweet Potato butter cake is how forgiving it is without compromising the crumb. The batter comes together with a minimal number of bowls and still yields a light, tender texture that becomes moistened as it sits. The filling swirl or creamy center is a genius little touch that makes the cake feel extra-special, yet it’s still simple enough for a weeknight dessert. The aroma alone—warm butter, brown sugar, and cinnamon—pulls everyone into the kitchen. It’s a fantastic bridge between breakfast and dessert, which is why it’s such a hit for brunches, potlucks, and after-school snack time when a crowd starts gathering around the kitchen island. Budget-wise, the ingredients are friendly—simple pantry staples with a couple of quality additions, like real vanilla and a hint of cinnamon. And if you’re feeding a family, this cake scales up or down easily, which is a huge plus on busy days. What I love most about this recipe is its versatility: you can swap the glaze, tweak the sweetness, or swap the cream cheese filling for a maple butter swirl and still end up with something irresistibly comforting. It’s a little cozy loaf in a full cake form, and the flavor keeps bringing everyone back for more.
How do I make a sweet potato butter cake
Quick Overview
This cake comes together like a dream: roast or boil a couple of sweet potatoes until ultra-soft, mash them smooth, and fold them into a butter-rich batter with vanilla, spices, and a touch of milk. You’ll swirl in a cinnamon-Cream Cheese filling for a pop of tang, then bake until the edges are lightly caramelized and the center just set. The glaze is optional but worth it—it adds a shiny finish and a little extra sweetness that doesn’t overwhelm the cake. The beauty is that you can prep the batter ahead, mix the filling while the oven preheats, and slide the cake into the oven with confidence. This is the kind of recipe that feels fancy but is actually friendly to novices and seasoned bakers alike.
Ingredients
For the
– 2 cups all-purpose flour (or 1 cup almond flour + 1 cup all-purpose for a lighter gluten-free version, see Top Tips)
– 1 1/2 teaspoons baking powder
– 1/2 teaspoon baking soda
– 1/2 teaspoon fine salt
– 1 teaspoon ground cinnamon
– 1/2 teaspoon ground ginger (optional but nice)
– 1/4 teaspoon nutmeg
– 1 cup granulated sugar
– 1/2 cup unsalted butter, softened
– 2 large eggs
– 1 cup Sweet Potato purée (roasted or steamed; see notes for texture and sweetness)
– 1/2 cup milk or almond milk
– 2 teaspoons vanilla extract
For the Filling:
– 8 oz cream cheese, softened
– 1/4 cup unsalted butter, softened
– 1/3 cup brown sugar, packed
– 1 teaspoon cinnamon
– Pinch of salt
For the Glaze:
– 1 cup powdered sugar
– 1-2 tablespoons milk or cream
– 1/2 teaspoon vanilla extract
– Optional: 1 tablespoon maple syrup for depth
Step-by-Step Instructions
Step 1: Preheat & Prep Pan
Preheat your oven to 350°F (175°C). Grease a 9-inch round pan and line the bottom with parchment, just a light sit-in so the cake releases easily. I like a quick spray of nonstick spray plus a dusting of flour, or a thin coat of butter and a dusting of flour, to ensure it lifts out cleanly. The bouquet of warm vanilla and butter should start filling the kitchen as soon as the oven preheats.
Step 2: Mix Dry Ingredients
In a medium bowl, whisk together the flour, baking powder, baking soda, salt, cinnamon, ginger, and nutmeg. This is the backbone of the cake’s structure and spice balance, so don’t skip this step. You want the spices evenly distributed so every bite gets a little glow of warmth. A few light strokes are all you need—overmixing here will make the crumb feel tight later.
Step 3: Mix Wet Ingredients
In a large bowl, beat the butter and sugar until pale and fluffy. It helps to scrape down the bowl once or twice to keep everything uniform. Beat in the eggs one at a time, then whisk in the vanilla and the sweet potato purée. The purée is the heart of this cake—smooth, bright, and a touch earthy, it keeps the crumb incredibly moist. If your purée is a tad thick, loosen it with a splash of milk so it blends smoothly.
Step 4: Combine
Fold the dry ingredients into the wet in two additions, alternating with the milk. You’re aiming for a batter that’s thick but spoonable, not runny. Stop as soon as you don’t see flour streaks. That’s when the magic happens—soft and tender, with just enough lift from the baking powder and soda.
Step 5: Prepare Filling
In a separate bowl, blend the cream cheese, butter, brown sugar, cinnamon, and a pinch of salt until smooth. If the mixture is a touch too stiff, warm it for a few seconds in the microwave or knead the bowl with your hands for a minute to soften. You want a luscious, spreadable paste that will swirl nicely into the batter without sinking to the bottom. Taste for balance—if it tastes too sweet, a tiny pinch more salt can do wonders.
Step 6: Layer & Swirl
Spread about half of the batter into the prepared pan. Dollop the filling over the batter in a few spoonfuls, then top with the remaining batter. Using a knife or skewer, swirl the filling into the batter with a few soft motions to create ribbons of orange and cream throughout the cake. Don’t over-swirl—your goal is pretty marbling, not a uniform color block.
Step 7: Bake
Bake for 45-50 minutes, rotating once halfway if your oven tends to bake unevenly. The cake is ready when a toothpick inserted into the center comes out with a few moist crumbs clinging to it. If the top seems too dark too early, tent loosely with a piece of foil for the last 10 minutes. The kitchen should smell like a bakery by the time you near the end of the bake.
Step 8: Cool & Glaze
Allow the cake to cool in the pan for about 15 minutes, then run a thin knife around the edge and invert onto a rack to cool completely before glazing. While cooling, whisk together the glaze ingredients until silky. If you want a thinner glaze, add a splash more milk; for a richer top, a touch more powdered sugar does the trick. Drizzle in a slow, confident line, letting some of the glaze pool and catching the swirls you created earlier. The glaze should set just enough to hold its shape but still gleam with a soft sheen.
Step 9: Slice & Serve
Once glazed and slightly set, slice with a sharp knife. The slices should reveal ribbons of filling and a moist crumb. I like to serve it slightly warm with a dollop of whipped cream or a scoop of vanilla ice cream if I’m feeling indulgent. A sprinkle of flaky salt on top can be a surprising, or dare I say genius, finish that brightens the flavors even more. This sweet potato butter cake is at its peak when it’s not too sweet, with a comforting depth that catches you by surprise in the best way possible.
What to Serve It With
This cake is a chameleon, in the best possible way. It shines as a centerpiece on a holiday table, yet it’s discreet enough for a casual coffee-and-dessert moment. Here are a few ideas that keep the vibe cohesive and delicious:
For Breakfast: A gentle slice with a mug of chunky pumpkin coffee or a latte. Add a dollop of mascarpone or a spoonful of maple yogurt for a brunchy feel. The sweetness lengthens my morning without tipping into dessert territory. It also pairs beautifully with a warm cinnamon latte or a robust Ethiopian pour-over.
For Brunch: Present slices on a wooden board with cinnamon-dusted whipped cream and orange zest. A few pomegranate seeds or toasted pecans add color and crunch, which makes the plate sing. Serve with fresh orange juice, and you’ve got a sunlit, cozy spread in minutes.
As Dessert: Plate with a small scoop of vanilla bean ice cream or a spoonful of lemon curd to balance the rich butteriness. A quick sprinkle of flaky salt and a drizzle of caramel sauce takes it from comforting to show-stopping.
For Cozy Snacks: Cut into thick squares and wrap individually for a late-night treat or school lunchbox addition. The moist crumb travels well, and the flavors taste like a hug in a lunchbox—simple, honest, and just a little magical.
We’ve done this at family gatherings where the cake disappears in minutes and cousins beg for the recipe. It’s the kind of dessert that travels well, tastes better the next day, and somehow still feels special even when served on a paper plate after a long day of cooking. My sister still swears the glaze is the secret that kept her kids quiet during a chaotic Christmas morning. It’s become a small tradition in our house—one that I hope you’ll adopt and make your own.
Top Tips for Perfecting Your Sweet Potato Butter Cake
These little tricks came from years of baking and a few messy disasters that taught me what works and what doesn’t. They’ll help you dial in the texture, moisture, and flavor so every slice is a smile.
Sweet Potato Prep: Roast the potato if you can; it intensifies the sweetness and adds a gentle caramel note. If you’re short on time, steam until extremely soft, then mash until completely smooth. A smooth purée distributes evenly, preventing any graininess in the crumb.
Moisture Balance: The ratio of purée to butter is key. If your purée is extra thick, you can add 1-2 tablespoons more milk to loosen the batter. If it’s very loose, reduce the milk by a tablespoon. You want a batter that falls slowly from the spoon, not one that runs.
Mixing Mastery: When you combine dry and wet ingredients, mix just until they come together. A few lumps are okay. Overmixing can lead to tough crumbs, and nobody wants a cake that feels like leather on the first bite.
Swirl Pattern: For a prettier marbling, dollop portions of the filling in a few even rows across the batter, then swirl once with a knife in a single pass. This prevents the filling from sinking into the bottom and keeps a striking contrast in every slice.
Ingredient Swaps: You can swap part of the all-purpose flour for almond flour for a nuttier flavor and a slightly denser crumb. If you go gluten-free, try a blend that’s designed for baking, and keep the liquid balance stable. Rice flour on its own tends to crumble easily, so pair it with a small amount of tapioca starch for cohesion.
Baking Temperature: If your oven runs hot, lower the temperature by 25°F (about 4°C) and bake longer. A thermometer can help ensure the center hits 205–210°F (96–99°C) for a not-too-dry crumb.
Glaze Texture: The glaze should be pourable but not runny. If it’s too thick, add a touch more milk; if too thin, whisk in a bit more powdered sugar. A glossy glaze clings to the cake’s ridges and catches the light beautifully, making the snaps of the marbled swirl look especially inviting.
Finally, trust your senses. The first time I baked this, I was nervous about the sweetness. After tasting a warm bite, I realized the balance was perfect—the sweet potato brings it forward without overpowering the vanilla and spice. If your kitchen fills with laughter and chatter while the cake bakes, you’re doing it right. The best memories happen around a cake that smells like home.
Storing and Reheating Tips
Storage is where many cakes lose their charm, but this one holds up nicely with a little care. Here’s how to keep every slice delicious.
Room Temperature: If you’re eating the cake within a day or two, keep it in a cake box or wrap well in foil to preserve moisture. It will stay freshest for about 2 days at room temperature. Don’t leave it out for longer than that in a warm kitchen; the filling can start to soften too much and the glaze might lose its gleam.
Refrigerator Storage: Store slices in an airtight container for up to 3–4 days. The cake will firm up a bit, but the flavors stay bright. Bring slices to room temperature for about 15 minutes before serving to regain some of that tender crumb.
Freezer Instructions: Slice first, then wrap each piece tightly in plastic wrap and place in a freezer bag. Freeze for up to 2–3 months. Thaw overnight in the fridge and warm gently in a 300°F (150°C) oven for 10–12 minutes to revive the buttery, cake-y texture. You’ll want to glaze after thawing if you’re freezing without glaze; the glaze can be added right before serving or brushed on for a quick finish.
Glaze Timing Advice: If you’re freezing, you can hold off on the glaze and add it after reheating for the best shine. If you’ve already glazed, the glaze should still be glossy after reheating, but you may notice a slight glossy set near the edges where the surface is more cooled. Either way, a quick warm-up and a fresh drizzle bring it back to life.
Frequently Asked Questions
Final Thoughts
Sweet potato butter cake has become a staple in our family because it’s equal parts comforting and celebratory. It tastes like Sunday mornings and cozy evenings, like a grandmother’s kitchen and a modern bake-right-now moment all at once. The batter stays tender with a moist crumb that holds up to a slice straight from the fridge, and the swirl inside feels like a little treasure in every bite. If you’re new to this style of cake, I’d suggest starting with the classic version and then playing with the filling—a maple cream cheese or a citrus-curd swirl both feel bright and lively against the warm spices. Don’t be afraid to adjust the spices to your taste—if you love ginger, add a whisper more; if you’re serving kids, you can tone the spice a touch. This recipe invites you to bake with heart, and I think that’s what makes it so memorable. I’d love to hear how yours turns out—tell me about your swirl patterns, your glaze choices, and any little tweaks you discover along the way. Happy baking!
Sweet Potato Butter Cake
Ingredients
Cake Batter
- 2 cup all-purpose flour
- 1.5 cup granulated sugar
- 2 teaspoon baking soda
- 1 teaspoon ground cinnamon
- 0.5 teaspoon ground nutmeg
- 0.25 teaspoon ground cloves
- 1 teaspoon salt
- 1 cup unsalted butter, softened
- 2 large eggs
- 1 cup mashed sweet potato
- 0.5 cup buttermilk
- 1 teaspoon vanilla extract
Instructions
Preparation Steps
- Preheat oven to 350°F (175°C). Grease and flour a 9x13 inch baking pan.
- In a large bowl, whisk together the flour, sugar, baking soda, cinnamon, nutmeg, cloves, and salt.
- In a separate bowl, cream together the softened butter and sugar until light and fluffy.
- Beat in the eggs one at a time, then stir in the mashed sweet potato and vanilla extract.
- Gradually add the dry ingredients to the wet ingredients, alternating with the buttermilk. Mix until just combined.
- Pour the batter into the prepared baking pan and spread evenly.
- Bake for 35-40 minutes, or until a wooden skewer inserted into the center comes out clean.
- Let the cake cool in the pan for 10 minutes before inverting it onto a wire rack to cool completely.
Notes
Featured Comments
“That sounds so cozy and delicious! Sweet potato butter cake must be like a warm hug in dessert form.”
“Impressed! Clear steps and absolutely loved results. Perfect for busy nights.”
“New favorite here — creamy. crowd-pleaser was spot on.”
“Super easy and turned out amazing! My family asked for seconds. Saving this one.”
“This sweet treat was absolutely loved — the buttery really stands out. Thanks!”
“Made it tonight and wow — quick weeknight win! Will definitely make sweet potato butter cake again.”


That sounds so cozy and delicious! Sweet potato butter cake must be like a warm hug in dessert form.