

There’s something about a warm, freshly made treat that just makes everything better, right? I remember sneaking into the kitchen as a kid, my nose almost glued to the oven door, waiting for that moment when my mom pulled out her famous donut holes. Those little, golden bites of heaven disappeared in minutes—nothing beats the smell of barely baked dough mingling with a swirl of cinnamon and sugar. Now, I’ve made countless batches over the years, tweaking a few things here and there, and I swear these donut holes have become a family staple. They’re incredibly easy to whip up on a busy weeknight when I want something sweet and comforting but don’t want to spend hours in the kitchen. Plus, they’re perfect for sharing—whether it’s with my kids, friends, or even just enjoying as a little treat with my morning coffee. If you’ve ever craved something warm and doughy but without the fuss of a full-blown cake or big batch of donuts, trust me on this: donut holes are pure magic—and I’m so excited to share my favorite recipe with you!
What are donut holes?
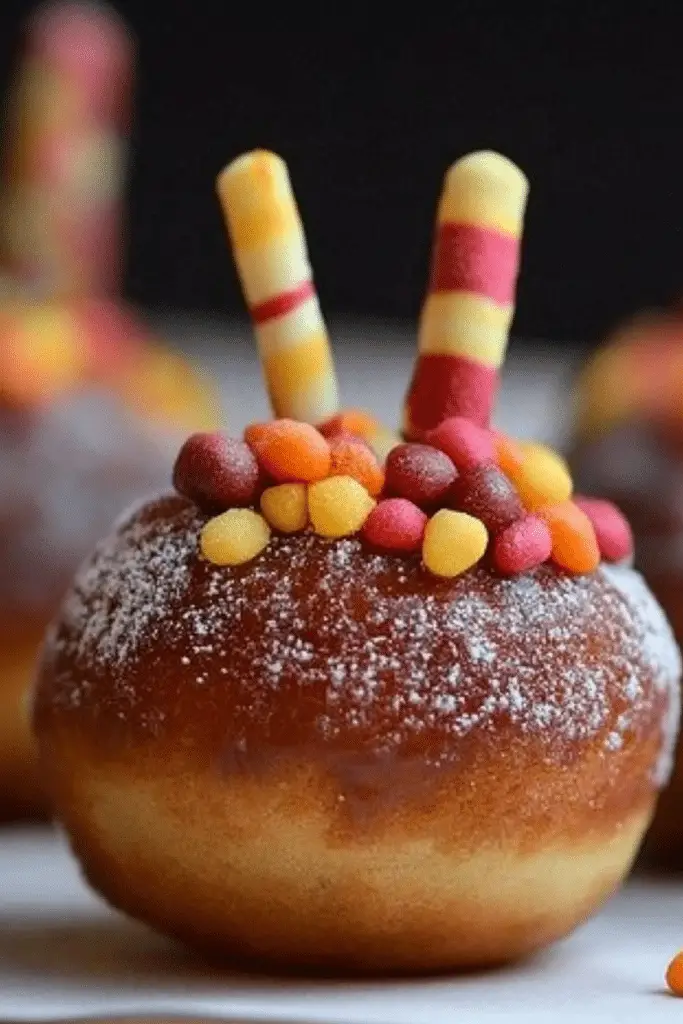
Think of donut holes as the adorable, bite-sized versions of their full-sized donut cousins. They’re essentially tiny rings or balls of sweet, tender dough that are fried until perfectly golden—kind of like miniature clouds of happiness melting in your mouth. The name might make you think of specialty bakeries or street food carts, but honestly, making these at home is so straightforward, you’ll wonder why you ever bought them pre-made. As the name suggests, they’re just small, round pieces carved out—or sometimes shaped—before frying, making them ideal for quick snacks or a fun activity with kids. Their soft, airy interior is what makes them special—promise, you’ll never want to settle for store-bought again once you see how easy it is to make these yourself. Think of them as a perfect hybrid between a donut and a muffin, with a playful, irresistible appeal you can customize with glazes, sugar coatings, or even fillings!
How do you make donut holes?
Quick Overview
This recipe for donut holes is all about simplicity and joy. You mix up a soft, slightly sticky dough, scoop out small portions, and fry until they’re golden and crispy on the outside but fluffy on the inside. The secret is not overmixing the batter, which keeps them light and airy. Once fried, you can toss them in cinnamon sugar, drizzle with glaze, or even stuff with something sweet—your choice! They cook in just a few minutes, making this the perfect quick treat to whip up whenever a craving strikes. I tested this with almond milk instead of regular milk, and honestly, it made the dough even creamier—so don’t be afraid to experiment a little! The entire process is kid-friendly, too, so it’s a fun activity for weekends or lazy afternoons. And because the size is so miniature, they’re just the right bite for that sweet tooth!
Ingredients
For the Main Batter:
- 1 ½ cups all-purpose flour (I like to use unbleached for a richer flavor)
- 1 teaspoon baking powder (to give that light, fluffy inside)
- ½ teaspoon salt (to balance the sweetness)
- ¼ cup granulated sugar (or honey for a more natural touch)
- ½ teaspoon cinnamon (optional, but highly recommended for that warm aroma)
- ½ cup milk (dairy or almond milk work beautifully)
- 1 large egg (for richness and structure)
- 2 tablespoons melted butter or coconut oil (whatever you’ve got on hand)
For the Filling: (optional, but fun if you want to stuff them)
- Jam, Nutella, or caramel sauce (your favorites)
For the Glaze:
- 1 cup powdered sugar
- 2-3 tablespoons milk or cream
- ½ teaspoon vanilla extract
- Optional: cocoa powder or food coloring for fun variations
Step-by-Step Instructions
Step 1: Preheat & Prep Pan
Start by heating your oil—about 350°F (175°C)—in a deep fryer or heavy-bottomed pot. I always do this first, so the oil gets nice and hot, ensuring perfect crispy donut holes. Line a tray with paper towels for draining, and have a slotted spoon handy. If you’re using a stove, a deep pot works perfectly—just make sure to keep an eye on the temperature. Safety tip: never fill the pot more than halfway with oil to prevent overflow when the dough goes in!
Step 2: Mix Dry Ingredients
In a big bowl, whisk together the flour, baking powder, salt, sugar, and cinnamon. This step is crucial—making sure those dry ingredients are evenly distributed ensures every bite is perfectly flavored. I always sift the flour if I have time—it makes the batter lighter and fluffier, but a good whisk works just fine if you’re in a hurry.
Step 3: Mix Wet Ingredients
In another bowl, beat the egg, then stir in the milk, melted butter, and vanilla. This mixture should be smooth and slightly frothy. I like to do this in a measuring jug—it’s just less dishes to wash! Make sure your butter isn’t super hot; just melted and cooled a bit so it doesn’t cook the egg when combined.
Step 4: Combine
Add the wet ingredients to the dry, mixing gently until just combined. Don’t overdo it—this batter should be slightly sticky but not runny. If it feels too stiff, a splash more milk will loosen it up without making it too wet. The key is to keep it light, so your donut holes stay tender.
Step 5: Prepare Filling
If you want to stuff your donut holes, keep your filling ready in a piping bag or small spoon. Do this step just before frying so the fillings stay neat and the holes don’t get soggy.
Step 6: Layer & Swirl
If you’re adding fillings, use your spoon or piping bag to gently stuff the center of each dough ball before frying. For marbling or swirling flavors into the batter (like cinnamon or cocoa), pour the batter into a piping bag, then swirl in your desired flavorings—this creates a pretty, marbled effect when fried.
Step 7: Bake
Carefully drop small scoops or rounded teaspoons of batter into hot oil. Don’t overcrowd; a few at a time is perfect. Fry until golden, about 2–3 minutes per side. Use your slotted spoon to flip them gently. When they bob to the surface, and look like little golden orbs, they’re ready.
Step 8: Cool & Glaze
Drain on paper towels briefly, then, if you’re glazing, wait a few minutes until they’re just warm. Dip or drizzle with your favorite glaze and let set for 5–10 minutes. This is the perfect time to let the sweet aroma take over the whole kitchen.
Step 9: Slice & Serve
Serve them warm—trust me, they’re best fresh! You can sprinkle extra cinnamon sugar or add a dollop of whipped cream if you like. Sometimes I even dust them with cocoa powder for a richer flavor. Either way, your friends will be asking for seconds!
What to Serve It With
For breakfast, these donut holes are a cozy treat alongside your morning brew. Pair them with a steaming cup of coffee or a glass of cold milk, and consider serving with fresh berries or sliced bananas to balance the sweetness. I love to cut up some fruit and lay everything out on a pretty platter—looks adorable and makes breakfast feel special. For brunch, these are fantastic with a side of scrambled eggs or breakfast sausage, and a mimosa or fresh juice adds a bubbly touch.
As a dessert, a drizzle of chocolate or caramel glaze takes them to the next level. Imagine serving them at a family dinner, with a scoop of vanilla ice cream on the side—yum! And for a casual snack, they’re so good on their own, freshly made and still warm from the fryer. My kids ask for these all the time—they especially love when I add a sprinkle of rainbow sprinkles on top. They’re just the perfect little indulgence that feels both homemade and special.
Top Tips for Perfecting Your Donut Holes
Great donut holes come down to a few easy tricks I’ve picked up over the years. First, don’t overmix your batter! Gluten develops quickly, and overworking it will make the donut holes dense and chewy instead of tender. I always fold ingredients together gently until just combined. If your batter feels too thick, a splash more milk helps—it should be easy to scoop but not runny.
When frying, maintain a steady temperature—around 350°F—so they cook evenly and don’t become greasy. I use a candy thermometer for peace of mind. Flipping them carefully is key; I use a slotted spoon for gentle handling. If you want a more uniform shape, slightly wet your hands or use a small ice cream scoop. Personal tip: I love swirling cinnamon into the batter before frying for a marbled effect, and it looks so pretty when fried!
For fillings, I recommend chilling your fillings first—it keeps everything neater. When it comes to glazing, I’ve tested everything from thick, sticky icing to runny glazes—my favorite is the slightly thicker glaze that just coats nicely without running off. Trust me, a good glaze will make them irresistible!
Lastly, don’t skip the cooling step before glazing; if they’re too hot, the glaze melts too quickly and gets drippy. My biggest lesson? Always fry in small batches and watch that oil temperature. It’s the little things that make homemade donut holes perfect every time!
Storing and Reheating Tips
If you’ve got leftovers (though I doubt it!), store your donut holes in an airtight container at room temperature for up to 24 hours—cover them with a paper towel first to absorb any excess moisture. When reheating, I stick them in a 350°F oven for about 5 minutes—just enough to warm through without drying out the crispy exterior. They taste almost like fresh again!
If you need to keep them longer, freeze your donut holes—wrap each in plastic wrap, then place in a freezer bag for up to 2 months. Thaw at room temperature, then warm in the oven. A quick tip: add glaze or toppings after reheating—they won’t look as fresh if you do it beforehand. The key is not to store them for too long, as the texture can fade, but trust me, they still taste great even a day later if handled properly.
Frequently Asked Questions
Final Thoughts
If you’ve ever thought that making your own donut holes at home was complicated or out of reach, I hope I’ve shown you just how easy—and rewarding—it can be. With just a handful of everyday ingredients and a few simple steps, you can create warm, tender bites of joy that taste just as good—and maybe even better—than those from your favorite bakery. I always keep the dough handy for when a spontaneous craving hits, and trust me, the smell alone draws everyone into the kitchen. This recipe has become a cherished part of my family’s weekend mornings, special celebrations, and cozy nights—proof that sometimes, the simplest treats are the best. I’d love to hear how your batch turns out, so don’t forget to comment below or share your own twist! Happy baking, and enjoy every delicious, fluffy bite.

donut holes
Ingredients
Main Ingredients
- 1 cup all-purpose flour
- 0.75 cup granulated sugar
- 0.25 teaspoon salt
- 1 tablespoon baking powder
- 0.5 cup whole milk
- 2 tablespoons unsalted butter, melted
- 1 teaspoon vanilla extract
Instructions
Preparation Steps
- In a large bowl, whisk together the flour, sugar, salt, and baking powder.
- Add the milk, melted butter, and vanilla extract to the dry ingredients and mix until just combined.
- Use a cookie scoop or spoon to form small dough balls and place them on a parchment-lined baking sheet.
- Preheat oil to 350°F (175°C). Carefully fry the dough balls in batches until golden brown, about 2-3 minutes per batch.
- Remove with a slotted spoon and drain on paper towels. Serve warm or at room temperature.
Notes
Featured Comments
“Love this! Donut holes are the perfect little bite—so much fun to make and eat. Reminds me of baking with my grandma too. 🍩”
“Impressed! Clear steps and so flavorful results. Perfect for busy nights.”
“New favorite here — perfect for busy nights. crowd-pleaser was spot on.”
“Super easy and turned out amazing! My family asked for seconds. Saving this one.”
“This sweet treat was absolutely loved — the silky really stands out. Thanks!”
“Made it tonight and wow — restaurant-level! Will definitely make Tiny Nut Treats How to Make Donut Holes again.”


Love this! Donut holes are the perfect little bite—so much fun to make and eat. Reminds me of baking with my grandma too. 🍩