

Oh, friends, I’m so excited to share this with you today! You know those days when you’re craving something truly special, something that feels a little bit fancy but doesn’t require a full-blown culinary expedition? That’s exactly when I turn to these tiramisu cupcakes. Seriously, they’re like a perfectly portioned hug in cake form. Imagine the classic, beloved flavors of a traditional tiramisu – that rich coffee, creamy mascarpone, and hint of cocoa – all packed into a delightful, bite-sized cupcake. I first whipped these up years ago when I was desperate for a dessert that felt a bit more exciting than cookies but less commitment than a whole cake. They were an instant hit, and now, they’re a regular request from my family, especially for birthdays. It’s funny, sometimes I think they’re even better than the original because you get that perfect ratio of cake to filling in every single bite. If you’re a fan of tiramisu, or just love a good coffee-infused treat, you are going to adore these tiramisu cupcakes.
What are Tiramisu Cupcakes?
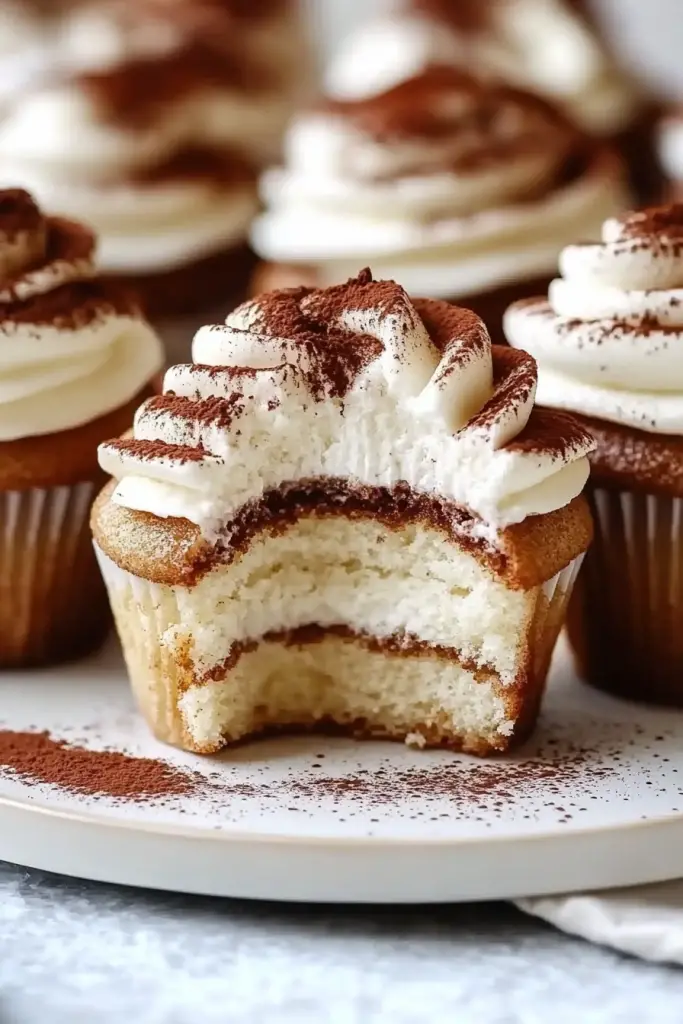
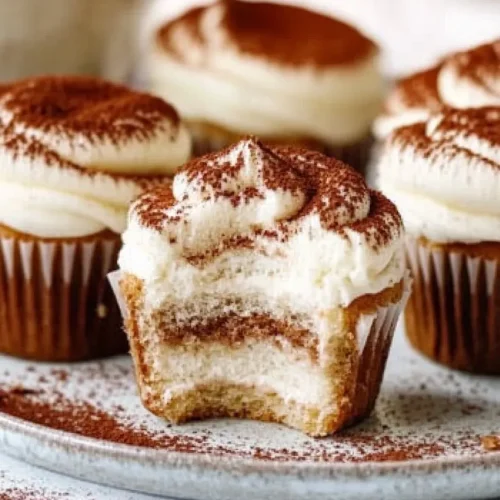
So, what exactly are tiramisu cupcakes? Think of them as the adorable, individual cousins of the grand, layered Italian dessert. Instead of ladyfingers soaked in coffee and layered with a rich mascarpone cream in a big pan, we’re transforming all those wonderful flavors into a moist, coffee-kissed cake. We bake them up into individual cupcake portions, then typically fill them with a luscious mascarpone cream and often a little drizzle or dusting of cocoa. The name “tiramisu” itself means “pick me up” in Italian, and these little guys definitely do the trick! They capture that signature coffee and creaminess that makes the original so irresistible, but in a format that’s just so darn convenient. It’s essentially all the joy of tiramisu, made super accessible and wonderfully portable.
How do I make Tiramisu Cupcakes?
Quick Overview
The beauty of these tiramisu cupcakes is that they come together faster than you might think. We’ll start by mixing up a tender, coffee-infused cake batter, bake them until perfectly golden, and then whip up a quick, cloud-like mascarpone filling. Once cooled, we’ll fill those lovely cupcakes and finish them off with a dusting of cocoa or a simple glaze. It’s a straightforward process that delivers maximum flavor with minimal fuss. You’ll be amazed at how easily you can create something so utterly delicious!
Ingredients
For the Main Batter:
All-Purpose Flour: About 1 ¾ cups. Make sure it’s spooned and leveled, not scooped directly from the bag, for the best texture. This is the foundation of our tender cake.
Granulated Sugar: 1 cup. This gives us sweetness and helps with the cake’s structure.
Unsweetened Cocoa Powder: ¼ cup. For that subtle chocolatey depth that complements the coffee so well.
Baking Soda: 1 teaspoon. Our leavening agent, crucial for a nice rise.
Salt: ½ teaspoon. Balances out the sweetness and enhances all the flavors.
Eggs: 2 large. Room temperature is key here! They emulsify and give our cakes richness.
Vegetable Oil: ½ cup. This is my secret to a super moist cake that stays tender for days. You can also use a mild-flavored oil like canola.
Buttermilk: ½ cup. Oh, buttermilk is a game-changer for tender cakes. If you don’t have any, you can make a quick substitute by adding 1 tablespoon of white vinegar or lemon juice to ½ cup of milk and letting it sit for 5-10 minutes.
Espresso Powder or Instant Coffee Granules: 2 teaspoons. Dissolved in hot water. This is where the magic happens for that authentic tiramisu flavor! Use good quality coffee for the best taste.
Vanilla Extract: 1 teaspoon. A classic flavor enhancer that rounds everything out.
For the Filling:
Mascarpone Cheese: 8 ounces, softened. This is the heart of our tiramisu filling. Make sure it’s nice and soft for easy mixing.
Heavy Whipping Cream: 1 cup, very cold. We’ll whip this to soft peaks to make the filling light and airy.
Powdered Sugar: ½ cup, or to taste. For sweetness and to help stabilize the cream.
Vanilla Extract: ½ teaspoon. Just a little extra boost of flavor.
Optional: A splash of coffee liqueur (like Kahlua) or rum: For an extra grown-up kick!
For the Glaze/Topping:
Unsweetened Cocoa Powder: For dusting. This is the simplest and most classic finish.
OR a simple coffee glaze: Mix 1 cup powdered sugar with 2-3 tablespoons strong brewed coffee or espresso until smooth and pourable.
Step-by-Step Instructions
Step 1: Preheat & Prep Pan
First things first, let’s get our oven ready! Preheat it to 350°F (175°C). Line a standard 12-cup muffin tin with paper liners. This is crucial for easy removal and a clean finish. I always like to give the liners a little extra press into the tin just to make sure they’re snug.
Step 2: Mix Dry Ingredients
In a large bowl, whisk together the all-purpose flour, granulated sugar, unsweetened cocoa powder, baking soda, and salt. Give it a good whisk to make sure everything is evenly distributed. This step ensures our leavening agents and cocoa are spread throughout the batter, preventing any dense spots or uneven coloring.
Step 3: Mix Wet Ingredients
In a separate medium bowl, whisk together the eggs until they’re lightly beaten. Then, stir in the vegetable oil, buttermilk, and vanilla extract. In a small cup, dissolve the espresso powder or coffee granules in about 2 tablespoons of hot water. Let it cool slightly, then add it to the wet ingredients. Whisk it all together until well combined.
Step 4: Combine
Now, pour the wet ingredients into the bowl with the dry ingredients. Mix everything together with a whisk or spatula until *just* combined. It’s really important not to overmix here. A few small lumps are perfectly okay! Overmixing can develop the gluten in the flour too much, leading to tough cupcakes. We want these to be wonderfully tender.
Step 5: Prepare Filling
While the cupcakes bake (or cool), let’s make that gorgeous filling. In a medium bowl, beat the softened mascarpone cheese until it’s smooth and creamy. In a separate, chilled bowl, whip the cold heavy cream with the powdered sugar and vanilla extract until soft peaks form. Be careful not to over-whip; we want it light and airy, not stiff. Gently fold the Whipped Cream into the mascarpone cheese until everything is just combined and smooth. If you’re using liqueur, stir it in now.
Step 6: Layer & Swirl
This step is more about assembly than anything else! Once your cupcakes are completely cool – and this is key, never fill warm cupcakes – you can either:
1. Use a small knife to cut a little well in the top center of each cupcake and spoon in some filling.
2. Or, even easier, just pipe or spoon the filling directly onto the top of each cupcake.
If you’re feeling fancy, you can use a piping bag with a decorative tip for a beautiful presentation.
Step 7: Bake
Spoon the batter evenly into the prepared muffin cups, filling each about two-thirds full. They’ll puff up beautifully. Bake for 18-22 minutes, or until a wooden skewer or toothpick inserted into the center of a cupcake comes out clean. Ovens can vary, so keep an eye on them! The aroma will be amazing.
Step 8: Cool & Glaze
Let the cupcakes cool in the muffin tin for about 5-10 minutes before transferring them to a wire rack to cool completely. It’s really important they are fully cool before adding the filling and topping, otherwise, the mascarpone can melt. Once cool, top them with your prepared mascarpone filling. For that classic tiramisu look, dust generously with unsweetened cocoa powder using a fine-mesh sieve. Alternatively, you can drizzle them with a simple coffee glaze made from powdered sugar and a bit of strong coffee.
Step 9: Slice & Serve
These are best served within a few hours of frosting, so the filling stays nice and firm. You can gently place them on a serving platter. The beauty is they’re already perfectly portioned! I love serving these slightly chilled, as it really makes the flavors pop and the filling firm up just right.
What to Serve It With
These tiramisu cupcakes are so versatile, they fit in beautifully with any occasion. For a lovely breakfast treat, especially on a weekend, I love serving them with a strong, freshly brewed coffee. The bitterness of the coffee cuts through the sweetness of the cupcake perfectly. A cappuccino or a latte also works wonderfully! For a more elegant brunch spread, I’ll arrange them on a tiered stand alongside fresh berries like raspberries or strawberries. The tartness of the berries is a delightful counterpoint. If you’re serving them as a dessert after dinner, they’re simply divine on their own, or perhaps with a small scoop of vanilla bean Ice Cream on the side. For those cozy evenings when you just need a little something sweet, a single tiramisu cupcake with a warm mug of tea is pure comfort. My family has a tradition of having one of these for our ‘celebration treat’ after finishing a big project or a tough week – it feels like a special occasion, even if it’s just Tuesday!
Top Tips for Perfecting Your Tiramisu Cupcakes
After making these tiramisu cupcakes more times than I can count, I’ve picked up a few tricks that really make a difference. For the cake batter, ensure your eggs and buttermilk are at room temperature. This helps everything emulsify beautifully, leading to a lighter, more evenly textured cake. When you’re mixing the wet and dry ingredients, remember my mantra: “don’t overmix!” Just combine until you don’t see dry streaks of flour. A few lumps are better than a tough cupcake. For the mascarpone filling, using *cold* heavy cream is non-negotiable for getting those lovely soft peaks. If your kitchen is warm, you can even chill your mixing bowl and whisk attachment for about 15 minutes beforehand – it makes a world of difference. When it comes to the coffee flavor, don’t be afraid to use good quality instant espresso powder. It really boosts the coffee notes without adding too much liquid. If you’re adding liqueur, just a tablespoon or two is enough to add complexity without making the filling too runny. For the cocoa dusting, a fine-mesh sieve is your best friend. It ensures an even, beautiful finish that looks like it came straight from a fancy bakery. If you find your cupcakes are sinking in the middle, it’s often a sign of the oven being too hot, or opening the oven door too early. Try baking them at a slightly lower temperature and resisting the urge to peek too soon!
Storing and Reheating Tips
These tiramisu cupcakes are best enjoyed fresh, especially with that creamy filling, but they do store quite well. If you’ve made them and need to keep them at room temperature, I’d say they’re good for about 24 hours, provided your house isn’t too warm. Keep them in an airtight container to prevent them from drying out. For longer storage, the refrigerator is your best bet. Store them in an airtight container in the fridge for up to 3-4 days. They’ll be firmer when chilled, which some people actually prefer! If you need to freeze them, I’d recommend freezing them *before* adding the mascarpone filling. Wrap the cooled cupcakes tightly in plastic wrap, then place them in a freezer-safe bag or container for up to 2-3 months. To thaw, let them come to room temperature, then prepare and add the filling. If you’ve already filled them, you can freeze them, but the texture of the mascarpone might change slightly upon thawing. For reheating, I usually don’t reheat these; they’re meant to be enjoyed at room temperature or chilled. If you do find they’ve gotten a bit dry, a tiny splash of coffee or milk over the cake part can help, but do this sparingly!
Frequently Asked Questions
Final Thoughts
I truly hope you give these tiramisu cupcakes a try. They’re one of those recipes that brings so much joy, both in the making and in the eating. They’re proof that you don’t need to spend hours in the kitchen or use complicated techniques to create something truly memorable and delicious. Whether you’re a seasoned baker or just starting out, these cupcakes are incredibly forgiving and rewarding. They’re perfect for special occasions, a delightful afternoon treat, or just because you deserve something wonderful. If you love this recipe, you might also enjoy my Italian Almond Cookies or my classic Espresso Panna Cotta for more Italian-inspired delights! I can’t wait to hear how yours turn out – please leave a comment below and share your experience, or even your own special tips! Happy baking, my friends!
Tiramisu cupcakes
Ingredients
Cupcakes
- 1.75 cup all-purpose flour
- 0.5 cup unsweetened cocoa powder
- 1.5 tsp baking soda
- 0.25 tsp salt
- 0.5 cup unsalted butter, softened
- 1.5 cup granulated sugar
- 2 large eggs
- 1 tsp vanilla extract
- 1 cup strong brewed coffee, cooled
- 0.5 cup buttermilk
Mascarpone Frosting
- 1 cup unsalted butter, softened
- 4 oz cream cheese, softened
- 1 tsp vanilla extract
- 3 cup powdered sugar
- 0.25 cup strong brewed coffee, cooled
Garnish
- unsweetened cocoa powder, for dusting
Instructions
Preparation Steps
- Preheat oven to 350°F (175°C). Line a 12-cup muffin tin with cupcake liners.
- In a medium bowl, whisk together flour, cocoa powder, baking soda, and salt.
- In a large bowl, cream together softened butter and granulated sugar until light and fluffy.
- Beat in eggs one at a time, then stir in vanilla extract.
- In a small bowl, whisk together the cooled coffee and buttermilk.
- Add the dry ingredients to the wet ingredients alternately with the coffee mixture, beginning and ending with the dry ingredients. Mix until just combined.
- Divide the batter evenly among the prepared muffin cups, filling each about two-thirds full.
- Bake for 18-22 minutes, or until a wooden skewer inserted into the center of a cupcake comes out clean.
- Let the cupcakes cool in the muffin tin for a few minutes before transferring them to a wire rack to cool completely.
- To make the frosting: In a large bowl, beat softened butter and cream cheese until smooth.
- Beat in vanilla extract.
- Gradually add powdered sugar, alternating with the cooled coffee, until the frosting is smooth and spreadable.
- Once the cupcakes are completely cool, frost them generously. Dust with cocoa powder just before serving.
Notes
Featured Comments
“Impressed! Clear steps and quick weeknight win results. Perfect for busy nights.”
“New favorite here — crowd-pleaser. crowd-pleaser was spot on.”
“Super easy and turned out amazing! My family asked for seconds. Saving this one.”
“This sweet treat was absolutely loved — the light really stands out. Thanks!”
“Made it tonight and wow — crowd-pleaser! Will definitely make Tiramisu cupcakes again.”
“Packed with flavor and so simple. Exactly what I wanted from Tiramisu cupcakes.”


