

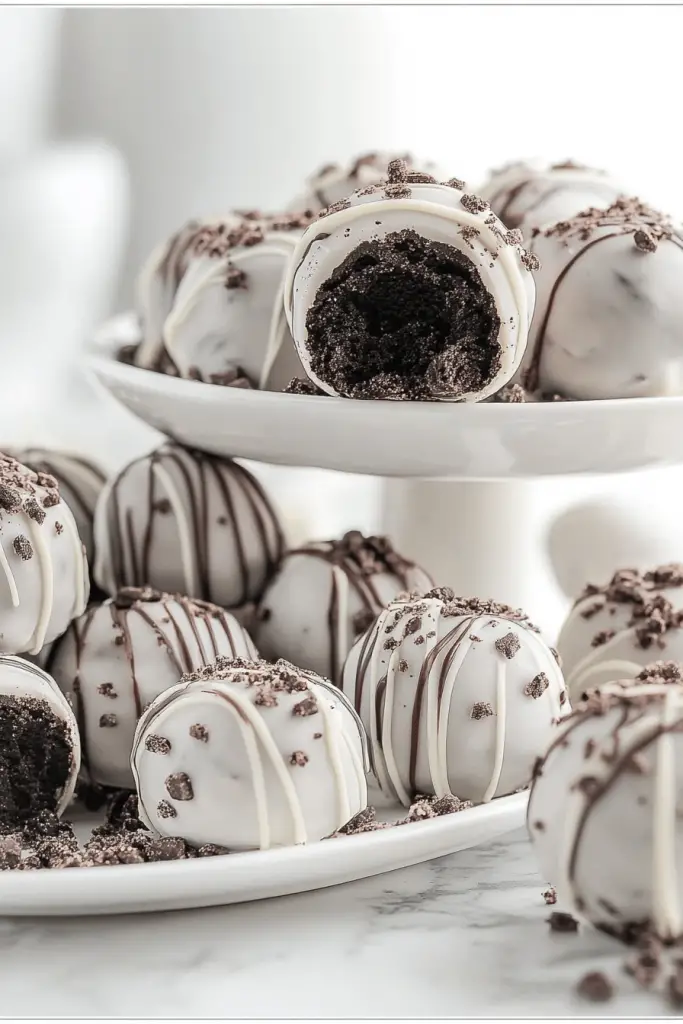
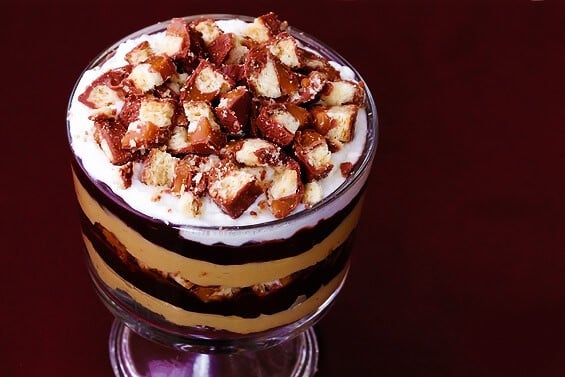
When I think back to the kitchen after school, the air always smells like chocolate and caramel tugging at the senses. That’s the moment Twix Trifles first stole my heart: a no-bake dessert that feels like a secret I tell only to friends over coffee. The first bite cracks with cookie crunch, then melts into a creamy vanilla-honey glow, and the Twix pieces—oh, those little batons of joy—peek through like tiny, delicious green lights. If you’ve ever made a layered dessert and wished it came together without turning your kitchen upside down, this is your answer. Twix Trifles are incredibly forgiving, crowd-pleasing, and oh-so-satisfying. They’re not fussy, but they look incredibly elegant in clear glasses, which makes them perfect for potlucks, weeknight dinners, or a celebratory brunch. I’m sharing this because I know you’ll love how easy it is to assemble, how big the flavor punch feels, and how good it feels to pull off something so decadent with simple pantry staples. It’s basically dessert therapy in a glass, and I’m here for it.
What is Twix Trifles?
Twix Trifles are essentially a layered dessert built in glasses or a big trifle dish, featuring crushed cookies for a buttery crumb, a rich dairy filling, ribbons of caramel, and plentiful chopped Twix bars folding through every layer. The name comes from the star ingredient—Twix bars—tucked into each tier for that familiar cookie-bar crunch with a caramel kiss. It’s basically a no-bake dream that tastes like a candy-bar party in a glass. The concept is simple: you provide texture with a crisp crumb, creaminess with a soft filling, and sweetness balanced by a touch of salt and vanilla. It’s the kind of dessert you can customize for dietary needs or flavor moods—swap in dairy-free cream, or mix in Peanut Butter Cups for a playful twist. Think of it as a grown-up version of your favorite childhood candy, elegantly arranged for guests but perfectly cozy for family movie night.
How do you make Twix Trifles?
Quick Overview
Twix Trifles come together in layers that celebrate crunch, creaminess, and caramel sweetness. There’s no need to heat up the oven, which makes them perfect for a busy weeknight or a make-ahead celebration. The structure is simple: a cookie crumb base, a creamy filling, a shower of chopped Twix, then more crumbs and filling, finished with a caramel-chocolate glaze if you like. Assembly line-style, they look stunning in clear dessert cups or a large glass bowl, and you can tailor the sweetness and texture to your guests’ tastes with a few quick tweaks. This method is forgiving, and the result feels decadent without being overwhelming—a true dessert win in my book.
Ingredients
For the Main Batter:
- 1½ cups crushed shortbread cookies (or graham crackers) for a buttery, crisp base
- 3 tablespoons unsalted butter, melted, then cooled
- 2 tablespoons granulated sugar (optional, depending on sweetness of cookies)
- Pinch of salt
For the Filling:
- 2 cups heavy cream, chilled
- 8 oz cream cheese, softened (or use 1 cup mascarpone for extra richness)
- 1/2 cup powdered sugar (adjust to taste)
- 2 teaspoons Vanilla Extract
- 1 cup prepared vanilla pudding (optional for extra creaminess)
- 6–8 Twix bars, chopped into small bite-sized pieces
For the Glaze:
- 1/2 cup caramel sauce (store-bought or homemade)
- 1/2 cup dark or milk chocolate, melted
- 1 tablespoon heavy cream to loosen the glaze if needed
Step-by-Step Instructions
Step 1: Preheat & Prep Pan
Since these Twix Trifles are mostly no-bake, you don’t need an oven. What you do need is cold glassware and a quiet counter. Chill your serving glasses or a pretty trifle bowl in the freezer for about 10 minutes. While they’re cooling, line up your ingredients and have a few extra Twix bars handy for topping. This little fridge-time helps the layers stay crisp and the filling set beautifully when you assemble.
Step 2: Mix Dry Ingredients
In a bowl, mix the crushed shortbread cookies with a pinch of salt and the melted butter. The goal is a sandy, cohesive crust that holds together when pressed into the bottom of each glass. If you want a little more bite, you can add a tablespoon of finely chopped nuts here. Press a heaping tablespoon of this mixture into the bottom of each serving glass; you want a compact base, not a soggy one.
Step 3: Mix Wet Ingredients
In a separate bowl, whip the heavy cream with the vanilla and powdered sugar until you get soft peaks. If you’re choosing the mascarpone route, beat the Cream Cheese with powdered sugar and vanilla until smooth, then fold in a portion of whipped cream to lighten it. The idea is a creamy, luscious layer that won’t weigh down the dessert.
Step 4: Combine
Fold the whipped cream into the cream cheese mixture gently, until you have a pale, billowy filling. You’re aiming for a light, airy texture that still has substance. If you’re using instant vanilla pudding, whisk it with a cup of milk until smooth and fold a portion into the cream cheese mixture to create extra depth. Remember: don’t overmix. You want smooth, not overly stiff filling.
Step 5: Prepare Filling
Now you’re ready to bring all the elements together. Spoon a generous layer of filling over the cookie crust, then scatter a handful of chopped Twix pieces. If you love deeper caramel, drizzle a little caramel on this layer. Repeat with another crust-crumb layer, another filling layer, and more Twix pieces. The goal is visible, inviting layers with pockets of crunch in every bite.
Step 6: Layer & Swirl
When you’re assembling, think in thirds: crust, filling, Twix, crust, filling, and more Twix. You can swirl a tiny bit of melted chocolate into the filling for a marble effect, or keep the layers clean and even. The swirl is purely optional, but it does look gorgeous in a glass trifle bowl or in clear dessert cups.
Step 7: Bake
Here’s the confession: there’s no baking required for Twix Trifles. Yet, if you want to press a crumbly crust into a firmer shape, you can bake the crust at 350°F (175°C) for 8 minutes and let it cool completely, then proceed with the filling. I almost never bake it, because the no-bake texture is perfect as is. If you do bake, you’ll get a slightly crisper base, which some guests actually prefer.
Step 8: Cool & Glaze
Chill the assembled trifles for at least 2 hours, ideally 4, so the layers set and the flavors meld. When you’re ready to serve, warm the caramel slightly to loosen it for a glossy drizzle. Drizzle caramel in ribbons along the top and finish with a glossy layer of melted chocolate. If you’re making ahead, you can freeze unglazed trifles and glaze just before serving; they thaw beautifully in the fridge with the glaze still gleaming.
Step 9: Slice & Serve
To serve, give each glass a light swirl with a spoon or a decorative straw. If you’re using a large trifle bowl, ladle generously and let guests scoop their own layers. A final sprinkle of chopped Twix and a drizzle of chocolate makes the presentation irresistible. The first bite should reveal the crisp cookie, the mousse-like filling, the swirls of caramel, and those pockets of Twix crunch.
What to Serve It With
Twix Trifles are a dessert that can shine in many settings. They pair just as well with a late-mummer coffee as with a velvet-red wine at a dinner party. Here are a few ideas to consider, organized by mood and moment.
For Breakfast: A light coffee or an almond-milk latte works surprisingly well with this dessert-forward breakfast option. If you’re making a brunch, serve in mini cups with a dollop of whipped cream and a dusting of cocoa for a playful morning treat.
For Brunch: You can elevate the sweetness with an espresso or vanilla bean latte, and present the Twix Trifles in a tray with spoons for a casual, crowd-pleasing dessert that doubles as a coffee bar focal point.
As Dessert: The classic finale—serve alongside a scoop of vanilla or coffee ice cream, or a few fresh raspberries for a tart contrast. The combination of creamy filling and caramel-rich Twix pieces pairs beautifully with a pinch of sea salt and a bit more chocolate drizzle.
For Cozy Snacks: If you’ve got a crowd gathered for movie night, keep the portions small and serve with a warm mug of hot chocolate or spiced chai. My late-night go-to is a tiny glass, a swirl of caramel, and a few extra Twix bits on top for added crunch.
Over the years, I’ve found Twix Trifles suit potlucks and quiet evenings alike. I remember one family gathering where I plated these in mini mason jars; they looked like candy jars, and every guest asked for seconds. It’s those small moments of joy that keep me reaching for that bag of Twix every time I want to bring a little sweetness to the table.
Top Tips for Perfecting Your Twix Trifle
These tips come from years of layering, tasting, and adjusting for crowds. They’ll help you get that flawless balance between crunchy, creamy, and chocolatey every single time.
Cookie Crust Prep: Crush cookies finely, then mix with melted butter until the texture is sandy but cohesive. If the crust seems dry, add a teaspoon of cream or milk to moisten. Press firmly into the bottom of each glass so it doesn’t crumble when you lift the trifle.
Mixing Advice: When folding whipped cream into the cheese filling, use a gentle, figure-eight motion to keep air in the mixture. Don’t overmix; otherwise you’ll deflate the filling. If your cream cheese isn’t soft enough, microwave it for 10 seconds to loosen it a bit before mixing.
Swirl Customization: For a pretty marbled effect, reserve a few spoonfuls of filling before mixing in all the whipped cream. Swirl with caramel as you layer for a visually striking finish. You can also mix in a tablespoon of cocoa powder to the filling for a deeper chocolate note.
Ingredient Swaps: To make it lighter, swap heavy cream for whipped topping, or use half-and-half. For dairy-free versions, use coconut cream whipped with a touch of vanilla and a splash of almond milk; the result is rich and holds its shape. I tested this with almond milk and it actually made it even creamier in the filling because it whips up beautifully with the cream cheese.
Baking Tips: If you do bake the crust for a firmer texture, keep the oven at 350°F and check after 8 minutes. Let the crust cool completely before layering; it will crisp up as it cools. Oven variations mean you might need a minute or two more or less, so watch closely.
Glaze Variations: The glaze can be kept simple and glossy with just caramel and chocolate, or you can add a pinch of sea salt to the glaze for a salted caramel twist. If you want something lighter, a dusting of cocoa powder or shaved chocolate on top looks gorgeous and tastes divine. I love finishing with a thin caramel drizzle that’s just sticky enough to cling to the sides of the glass.
Lessons learned: the best Twix Trifles are not about chasing perfection but about balancing contrast. The crisp cookie base needs enough sweetness to support the filling, the filling should feel airy, and the caramel should whisper rather than shout. I’ve learned that chilling time is sacred—sleep on it if you can, and the next day you’ll have slightly firm layers that slice cleanly and hold their shape.
Storing and Reheating Tips
Twix Trifles are best eaten within 2–3 days when stored properly, though they’re so delicious you might be tempted to gobble them up faster. Here’s how I keep them tasting their best.
Room Temperature: If serving the same day, keep the trifles covered lightly with plastic wrap at room temperature for up to 2 hours. The filling benefits from a cool environment, but you don’t want the cookies to lose their snap entirely, so avoid leaving them out all day long.
Refrigerator Storage: Store in airtight containers or keep in the original serving glasses with lids if possible. The layers will soften slightly in the fridge, but that is part of the charm. They’ll stay fresh for 2–3 days in the fridge, and I prefer to add the glaze just before serving to keep that slick finish.
Freezer Instructions: For longer storage, freeze assembled trifles without glaze. They’ll hold up for up to 1 month. Thaw overnight in the fridge, then drizzle the glaze just before serving; the texture stays surprisingly good, though the cookies may soften a touch.
Glaze Timing Advice: If you’re freezing, glaze after thawing for best shine. If you’re chilling for a party, you can glaze the tops right before serving for an extra-glossy finish. The caramel drizzle tastes like a dream when it’s just warm enough to flow but not so hot that it runs everywhere.
Frequently Asked Questions
Final Thoughts
Twix Trifles are more than a pretty dessert; they’re a tiny celebration you can pull together in just a handful of steps. They remind me that simple ingredients can become something deeply comforting when you layer them with care. The first bite delivers crunch, creaminess, and a kiss of caramel, and the aftertaste lingers with chocolate and tweaking of salt. If you’re new to no-bake desserts, this is the perfect gateway recipe because it’s forgiving and visually stunning. I’m always surprised by how the assembled cups look more special than the sum of their parts, and I’ve seen folks light up when they realize they can make something this indulgent without turning on the oven. If you try one tweak, go for the texture balance: crisp crust, airy filling, and a glossy caramel-chocolate finish. Happy baking!
Twix Trifles
Ingredients
Main Ingredients
- 12 bars Twix candy bars chopped
- 3.4 oz instant chocolate pudding mix
- 2 cups milk cold
- 2 cups whipped cream or cool whip, thawed
- 0.5 cup chocolate syrup for drizzling
Instructions
Preparation Steps
- In a bowl, whisk together the chocolate pudding mix and cold milk until smooth and thickened. Let it sit for 5 minutes.
- In individual serving glasses or a trifle dish, layer the ingredients. Start with a layer of crushed Twix bars.
- Add a layer of chocolate pudding over the Twix.
- Top the pudding with a layer of whipped cream.
- Repeat the layers until the dish is full, finishing with a layer of whipped cream.
- Drizzle with chocolate syrup and garnish with extra crushed Twix bars, if desired.
- Chill for at least 30 minutes before serving to allow the flavors to meld.
Notes
Featured Comments
“I totally get that feeling—chocolate and caramel in the kitchen just hits different. Twix Trifles are such a nostalgic treat!”
“Impressed! Clear steps and so flavorful results. Perfect for busy nights.”
“New favorite here — absolutely loved. crowd-pleaser was spot on.”
“Super easy and turned out amazing! My family asked for seconds. Saving this one.”
“This sweet treat was absolutely loved — the buttery really stands out. Thanks!”
“Made it tonight and wow — perfect for busy nights! Will definitely make Twix Trifles again.”


I totally get that feeling—chocolate and caramel in the kitchen just hits different. Twix Trifles are such a nostalgic treat!