

I’ll be honest: this vegetarian nachos recipe is the one I reach for when the week has been a whirlwind and I need something comforting and crowd-pleasing fast. I can almost smell the cumin sizzling in the pan, hear the clink of the salsa jars, and see my kiddo darting into the kitchen with a hopeful grin. It’s not fancy, but it’s deeply satisfying—the kind of dish that tastes like home even on a Tuesday. If you’ve ever compared nachos to a messy pile of leftovers, this version is different: every bite has a little punch from the beans, a warm hug from the cheese sauce, and a zing from the lime crema. This is vegetarian nachos at their best—easy to riff on, endlessly forgiving, and a total lifesaver on busy nights. I’ve made this countless times, and it never fails to disappear in minutes at my house, even when I’ve got friends dropping by unannounced.

What is vegetarian nachos?
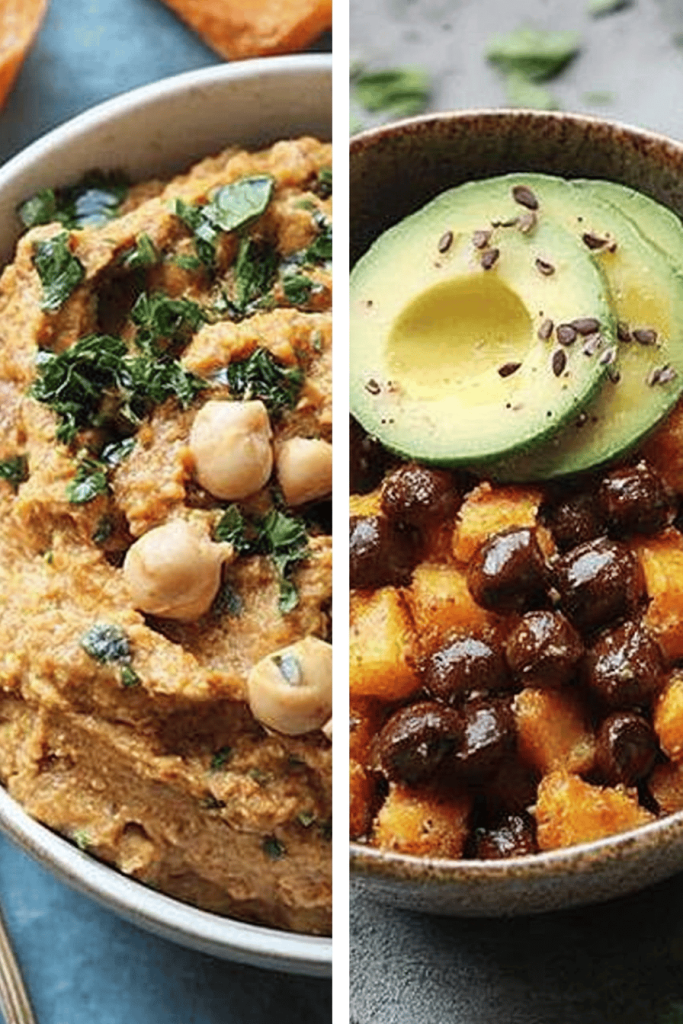
Think of vegetarian nachos as a fun, adaptable playground for bright flavors and textures. It’s essentially a loaded chip platter that leans on a creamy, peppery cheese sauce, hearty beans, roasted vegetables, and a splash of tangy crema. The name doesn’t imply deprivation; it celebrates the colorful toppings that make every bite sing. I love how this dish invites everyone to customize it: you can dial up the heat with jalapeños, swap in a creamy vegan cheese for dairy-free friends, or load it with corn, black-eyed peas, or sautéed mushrooms for depth. The origin story—plain tortilla chips meeting a quick, comforting cheese sauce—feels like a cozy kitchen moment I’d share with a friend over coffee. It’s essentially a nachos night with a little more heart and a lot less stress, perfect for game days, late suppers, or a spontaneous movie night in.
How do I make nachos?
Quick Overview
Here’s the gist: you create a silky cheese sauce, warm up a flavorful bean mixture, and then layer everything over crisp tortilla chips. Bake until everything is hot and bubbly, drizzle with a bright crema, and serve with fresh toppings. The beauty is in the layering—chips stay crisp on the edges while the center stays cozy and melty. You don’t need to overthink it; this comes together in about 40 minutes, and most of that is waiting for the oven to work its magic. If you’re short on time, you can pre-make the cheese sauce and the bean filling earlier in the day, then just assemble and bake when you’re ready.
Ingredients
For the Main Batter:
- 2 cups shredded sharp cheddar cheese (or 1 3/4 cups cheddar + 1/2 cup Monterey Jack for a mellower mix)
- 1 cup milk (whole or 2% works best) or unsweetened almond milk for a lighter version
- 2 tablespoons all-purpose flour (or 1 tablespoon cornstarch for gluten-free)
- 2 teaspoons butter or olive oil
- 1/2 teaspoon garlic powder
- 1/2 teaspoon smoked paprika (optional for a gentle smoky note)
- Salt to taste
- 1/4 teaspoon chili powder or a pinch of cayenne for a gentle kick
For the Filling:
- 1 tablespoon olive oil
- 1 small onion, finely chopped
- 2 cloves garlic, minced
- 1 cup canned black beans, rinsed and drained
- 1 cup canned corn kernels, drained
- 1 red bell pepper, diced
- 1 cup chopped zucchini or yellow squash (optional but delicious)
- 1 teaspoon ground cumin
- 1/2 teaspoon chili powder
- Salt and pepper, to taste
- Juice of 1/2 lime
For the Glaze:
- 1/2 cup sour cream or Greek yogurt (or dairy-free yogurt for a vegan glaze)
- 1 tablespoon lime juice
- 1 teaspoon finely chopped cilantro or parsley (for brightness)
- Pinch of salt
- Optional: 1/2 avocado, mashed, for a creamy swirl
Other toppings and accessories:
- 1–2 jalapeños, thinly sliced
- 1 medium tomato, diced or a few spoonfuls of pico de gallo
- Fresh cilantro leaves, chopped
- 1 ripe avocado, sliced or diced
- Extra tortilla chips for serving
Step-by-Step Instructions
Step 1: Preheat & Prep Pan
Heat your oven to 400°F (200°C). If you’re using a sheet pan, line it with parchment or give it a quick spray of oil so the chips don’t cling. I like a rimmed sheet pan for even baking—trust me, you don’t want a soggy edge with half the pan already eaten before it hits the table. If you’re making a dip-style glaze, line a separate small baking dish for the glaze so you can drizzle after baking without sogging the chips.
Step 2: Make the Cheese “Batter” (Main Sauce)
In a small saucepan, melt the butter or heat the olive oil over medium heat. Stir in the flour and cook for about a minute to get rid of raw flour taste. Slowly whisk in the milk, then add the garlic powder, smoked paprika, chili powder, and a pinch of salt. When the mixture starts to thicken, reduce the heat and add the shredded cheese gradually, whisking until smooth and glossy. If it’s a touch too thick, splash in a little more milk; if it’s too thin, let it simmer a minute longer to thicken. This sauce should be pourable but not runny—think thick enough to cling to a chip, not a pool at the bottom of the pan.
Step 3: Sauté the Filling (Beans & Veggies)
While the cheese sauce forms, heat olive oil in a skillet over medium heat. Add the onion and cook until translucent and just starting to caramelize. Add the garlic, pepper, zucchini, cumin, chili powder, salt, and pepper. Stir until the veggies soften and pick up color. Stir in the black beans and corn, then finish with lime juice. The filling should be bright, a little smoky, and tasting of the lime’s zing. If you want more bite, you can fold in a handful of chopped cilantro at the end.
Step 4: Layer Chips, Cheese, & Filling
Spread a single layer of tortilla chips on your baking sheet. Drizzle or spoon a thin layer of the cheese sauce over the chips, just enough to coat. Then sprinkle half of the filling over the chips. Repeat with another layer of chips, cheese sauce, and the rest of the filling. The goal is to have the edges crisp with cheese hugging the rest, so don’t overdo the sauce on the bottom layer—you want crunch in every bite.
Step 5: Prepare the Filling Notes
Leftovers are a friend here. If you’ve roasted extra peppers or onions earlier in the week, you can toss them into this filling for extra depth. If you’re vegan, you can swap dairy cheese for a strong-flavored vegan cheese and skip the dairy in the glaze. I sometimes add a handful of chopped fresh jalapeño for a hotter kick, or swap in corn kernels for an extra pop of sweetness. This is your playground—make it yours.
Step 6: Layer & Swirl
After you’ve built two layers, drizzle a bit more cheese sauce over the top so the final layer stays creamy. If you like a marbled look, dot small spoonfuls of a lightly seasoned cheese sauce on top and swirl with a toothpick for a rustic pattern. Don’t overdo the swirling, though—the goal is pretty yet easy. Sprinkle a few slices of jalapeño and some chopped tomatoes across the top for color.
Step 7: Bake
Bake for 12–15 minutes, until the edges are crisp and the cheese sauce is bubbling in the center. If you like extra toasty edges, turn the oven to broil for the last 1–2 minutes, watching closely so nothing burns. If you’re cooking for kids, you might want to skip the extra browning and keep it a touch milder. Pull it out when the toppings look glossy and inviting.
Step 8: Cool & Glaze
Let the pan rest 5 minutes before slicing. While it rests, whisk together the glaze ingredients. A spoonful of lime crema or a dollop of yogurt-lime sauce adds brightness and keeps the cheese from feeling too heavy. If you’ve got avocado, you can whisk half into the crema for a creamy swirl or simply layer warm slices on top just before serving. The glaze should have a smooth, pourable consistency—not thin, not a brick, just easy to drizzle.
Step 9: Slice & Serve
Slice with broad, confident strokes—think pizza cutter or a large chef’s knife. Serve with extra bowls of toppings: chopped cilantro, diced tomato, extra hot sauce, Sour Cream or yogurt, and lime wedges. The kids will grab the avocado first; the grown-ups will gravitate toward the crema and a big spoonful of beans. It’s a party on a sheet pan, and everyone gets to assemble how they like it.
What to Serve It With
This isn’t a dish that begs for a single side; it invites you to build a mini feast around it. Here are some ideas organized by occasion.
For Breakfast: Reimagine these nachos with a bright breakfast twist. Top with a fried or poached egg, a dollop of salsa, and a light sprinkle of chives. The creamy cheese sauce still shines, but the egg adds protein and keeps the morning feeling substantial. A mug of strong coffee or a citrusy orange juice helps cut through the richness.
For Brunch: Serve with a pitcher of sparkling water with a splash of lime, plus a side of quick pickled onions for brightness. A sangria or a light white wine can pair nicely if you’re keeping things casual, and the colorful toppings make a simple brunch feel festive and welcoming.
As Dessert: Okay, it’s unconventional, but you can turn this into a sweet-savory platter by swapping out the glaze for a drizzle of salted cacao crema and adding strawberries or mango chunks as a finishing touch. The tortilla chips bring a playful crunch that’s surprisingly delightful with fruit and a touch of dairy or coconut cream.
For Cozy Snacks: This is the perfect crowd-pleaser for a movie night or an impromptu Game Day. Keep a few bowls of salsa, sour cream, and guacamole nearby. A cold beer or a salted lime soda pairs beautifully with the melty richness, while the veggies keep it feeling fresh and balanced.
Family tradition note: I learned to keep a small stash of jalapeños for a quick kick, because my sister always goes for “extra heat” during gatherings. My kids ask for seconds, and I’m secretly grateful that this dish is forgiving enough to feed a hungry crew without turning the kitchen into a science project. It’s funny how such a simple mix of chips, beans, and cheese can become a memory makers’ plate.
Top Tips for Perfecting Your Vegetarian Nachos
Here are the little tricks that have saved me more than once.
Zucchini Prep: Zucchini holds moisture. If you’re adding it, salt and drain a bit or pat dry after sautéing to keep the nachos from becoming soggy. A quick squeeze of lemon or lime after cooking brightens the flavor and helps the zucchini stay crisp-tender.
Mixing Advice: Don’t overmix the cheese sauce once the cheese is melted. A gentle whisk to bring everything together is enough. If you whisk too aggressively, the sauce becomes elastic-y and tougher to scoop. Let it rest 1–2 minutes off heat if it’s too thick, then stir gently.
Swirl Customization: For a prettier marbling effect, spoon a few more dollops of cheese sauce on top and use a skewer to swirl. If you want bold color, swirl in a bit of tomato sauce into half of the top layer before baking and leave the rest plain for contrast.
Ingredient Swaps: This recipe loves substitutions. Use quinoa as a protein boost instead of beans, swap corn for diced peas for sweetness, or use a dairy-free cheese blend for a vegan version. Expect slightly different textures, but still delicious. If you’re substituting with more spicy peppers, start with half and taste as you go—you can always add more heat.
Baking Tips: Oven heat varies. If your oven runs hot, start at 375°F and watch closely; you want the edges to crisp and the cheese to bubble without burning. If you’re baking on a darker sheet pan, you may need to shorten the bake time a bit to avoid burning the bottom layer. Rotate halfway if your oven has hot spots.
Glaze Variations: The glaze can be bright and dairy-based or cool and dairy-free. For a different vibe, try a smoky paprika crema or a yogurt-lime drizzle with a hint of garlic powder. If you’re serving this later, hold the glaze and drizzle right before serving to preserve creaminess and color.
Lessons learned from years of making this: the best nachos happen when there’s a good balance between crispy chips and melty toppings, and when the toppings are evenly distributed so no bite is overwhelmed by one element. My favorite trick is to bake the layers with a light cheese layer between, then finish with a final light drizzle of cheese sauce over the top. It looks restaurant-worthy, and the taste is always just right.
Storing and Reheating Tips
If you’re lucky enough to have leftovers (I rarely do, but it happens), here’s how I handle them so flavors stay bright and texture doesn’t get soggy.
Room Temperature: Best enjoyed fresh, but if you need to cover and keep on the counter, do so for up to 1 hour. The chips will soften a touch, but the flavors remain vibrant.
Refrigerator Storage: Store in an airtight container for up to 2 days. Reheat in a 350°F (175°C) oven or toaster oven for 8–12 minutes until hot and the cheese looks glossy again. If you’ve layered with a lot of veggies, you may need a minute longer to reacquire that bubbling center.
Freezer Instructions: I don’t love freezing nachos because the chips lose their crunch, but if you must, assemble and freeze unbaked, then bake directly from frozen, adding 5–10 minutes. Cheese will firm up, but you’ll have a more crumbled texture. For the glaze, wait to add until after reheating for best texture and flavor.
Glaze Timing Advice: If you’re reheating, drizzle the glaze just before serving to keep it fresh. If you’re serving cold leftovers, you can mix a quick crema with lime and cilantro and serve on the side to keep the dish lively.
Frequently Asked Questions
Final Thoughts
There’s a certain magic in a tray of vegetarian nachos—the way the edges stay crisp, the center stays melty, and the colors come together in a cozy, satisfying mosaic. It’s a recipe that travels well from casual weeknights to game-day gatherings, and it invites people to customize and share. The dish isn’t about perfection; it’s about warmth, memory, and a little bit of indulgence that feels totally doable. If you try this, I’d love to hear which tweaks you loved, what veggies you swapped in, and how you paired it with drinks or sides. My kitchen loves the way this dish morphs with the seasons and the people I share it with. Happy baking, and may your nachos be ever crunchy at the edges and perfectly cheesy in the center!
If you enjoyed this, please drop a comment with your favorite topping or a quick variation you’ve discovered. I’d love to hear how your version turns out and what you served it with. And if you’ve got friends who crave a cozy, veggie-forward night, share this post with them—they’ll thank you for the easy, comforting recipe that feels like a warm hug on a busy night. Don’t forget to rate the recipe and tell me which cheese you used or what glaze you preferred. Can’t wait to hear how yours turns out!

Vegetarian Nachos
Ingredients
Main Ingredients
- 1 package tortilla chips
- 1 can black beans rinsed and drained
- 1 can corn kernels drained
- 1 jar salsa
- 2 cups shredded cheddar cheese
- 1 cup chopped red onion
- 0.5 cup chopped cilantro
- 1 avocado sliced or diced (optional)
- 0.5 cup sour cream (optional)
Instructions
Preparation Steps
- Preheat your oven to 375°F (190°C).
- Spread the tortilla chips evenly on a large baking sheet or in an oven-safe skillet.
- Layer the black beans and corn kernels over the chips.
- Spoon the salsa evenly over the beans and corn.
- Sprinkle the shredded cheddar cheese over the top.
- Bake for 15-20 minutes, or until the cheese is melted and bubbly.
- Remove from the oven and sprinkle with chopped red onion and cilantro.
- Serve immediately with optional sliced avocado and sour cream.
Notes
Featured Comments
“Impressed! Clear steps and crowd-pleaser results. Perfect for busy nights.”
“New favorite here — absolutely loved. crowd-pleaser was spot on.”
“Super easy and turned out amazing! My family asked for seconds. Saving this one.”
“This sweet treat was absolutely loved — the buttery really stands out. Thanks!”
“Made it tonight and wow — so flavorful! Will definitely make vegetarian nachos again.”
“Packed with flavor and so simple. Exactly what I wanted from vegetarian nachos.”


