

There’s something about that burst of bright, tangy flavor that instantly lifts your mood — especially when it’s wrapped up in a warm, buttery cookie. I remember the first time I made these citrus cookies; I was craving something fresh and sweet after a long winter, and boy, did they deliver. The aroma alone—zesty oranges, lively lemons, with just a hint of vanilla—fills the house with a sunshine vibe. Honestly, these cookies became an instant family favorite, disappearing in minutes at my house and leaving everyone asking for more. And believe me, they’re super easy to whip up, so this one’s a lifesaver on busy nights or when unexpected guests drop by. Plus, the recipe is flexible—you can adapt it with whatever citrus you have on hand. Trust me, once you try these, they’ll become a staple in your baking repertoire too. Bright, refreshing, and just the right amount of sweet—these citrus cookies are pure comfort, packed with sunshine in every bite. Let’s get into what makes them so special!
What are Citrus Cookies?
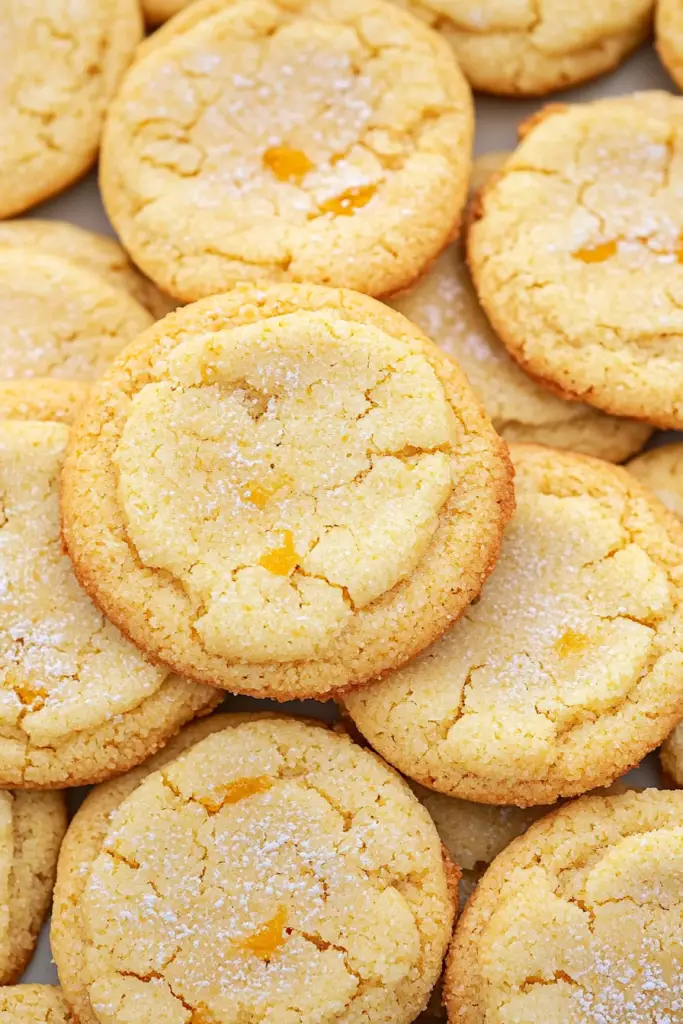
Citrus cookies are simply what their name suggests—delightfully soft cookies infused with fresh citrus zest and juice. Think of them as a portable slice of sunshine that you can grab any time of the day. They’re essentially a classic sugar cookie, but with a bright, citrusy twist that makes them stand out. The name “citrus cookies” covers a broad range, but in my kitchen, I love mixing up bright oranges and tangy lemons, sometimes even a splash of lime. This gives them a vibrant flavor that’s perfect for spring and summer, but honestly, I make them year-round because they’re just so addictive. The recipe is light, not overly sweet, with a smile-inducing aroma. Think of them as a cross between a delicate sugar cookie and a flavorful lemon bar—without the fuss of tart crusts or complicated fillings. Simple, fun, and totally customizable—these cookies are a real showstopper that’s accessible for home bakers of all levels.
How do you make Citrus Cookies?
Quick Overview
This recipe is all about balance—bright citrus zest and juice mixed into a tender cookie dough that’s both easy and forgiving. The process is straightforward: whisk together dry ingredients, cream butter and sugar, add eggs and citrus, then fold everything together. The filling is a simple citrus marmalade or jam, swirled into the dough for a marbled effect that’s as pretty as it is tasty. After a quick bake, you’ll have cookies that are soft, tangy, and just a little chewy around the edges. Trust me, the whole thing comes together in under an hour, and the result is worth every minute. The best part? You can prep these in advance and freeze the dough for a quick bake later. Bright, flavorful, and so gratifying—these citrus cookies are a bakery-worthy treat you can make right in your own kitchen!
Ingredients
For the Main Batter:
– 2 12 cups all-purpose flour (I prefer unbleached for better flavor)
– 1 teaspoon baking powder
– ½ teaspoon salt
– 1 cup unsalted butter, softened (trust me, the softer, the better for that melt-in-your-mouth texture)
– 1 cup granulated sugar
– 1 large egg
– 1 teaspoon vanilla extract
– Zest of 1 large orange and 1 lemon (use a microplane, it’s the secret to vibrant flavor)
– 2 tablespoons fresh orange juice and 1 tablespoon fresh lemon juice (fresh is best—it’s what makes these cookies shine)
For the Filling:
– ¼ cup citrus marmalade or lemon curd (optional, but recommended for that lovely swirl)
– Extra zest for decoration (if you want to sprinkle on top)
For the Glaze:
– ½ cup powdered sugar
– 1-2 teaspoons fresh lemon or orange juice
– Optional: a splash of vanilla or zest for extra flavor
Adjust the consistency with more juice or sugar to get that perfect drizzle or coating texture.
Step-by-Step Instructions
Step 1: Preheat & Prep Pan
Set your oven to 350°F (175°C). Line a baking sheet with parchment paper or a silicone mat—trust me, nothing sticks, and cleanup is a breeze. If you want perfectly round cookies, you can also lightly butter or spray your cookie scoop or hands for shaping later. While the oven heats up, gather all your ingredients—measured and ready to go. This step keeps things flowing smoothly and prevents last-minute scrambling, especially when you’re excited to bake!
Step 2: Mix Dry Ingredients
In a medium bowl, whisk together the flour, baking powder, and salt. I always do this first to make sure everything’s evenly distributed. It’s the foundation for that tender, flaky cookie crumb. A light whisk is enough—no sifting needed unless you like an extra airy texture. Set aside for now—it’s your dry team ready for action.
Step 3: Mix Wet Ingredients
In a larger bowl, cream the softened butter and sugar until it’s pale, fluffy, and smells amazing—that’s your sign it’s ready. I usually do this with a hand mixer on medium speed—it only takes a couple of minutes. Then, beat in the egg, vanilla, citrus zest, and juice until everything looks well combined and a little glossy. The zest and juice not only brighten the flavor but give the dough a lovely aroma that’ll make your kitchen smell like a citrus orchard.
Step 4: Combine
Gradually add your dry ingredients to the wet mixture, mixing on low speed or folding gently with a spatula. Don’t overmix—just until everything’s just combined. This prevents your cookies from turning tough. If your dough seems a little sticky, that’s normal! Chill it for about 15-20 minutes if it feels too soft; it makes scooping easier and results in better cookies.
Step 5: Prepare Filling
If you’re using marmalade or lemon curd, scoop it into a piping bag or just a spoon. Keep it ready for swirling or filling. I love adding a spoonful right in the center of each cookie before baking—it creates that beautiful marbled swirl that adds extra citrusy goodness. For a simple cookie, you can leave out the filling or sprinkle with extra zest after baking.
Step 6: Layer & Swirl
Roll the dough into balls or use a cookie scoop. Flatten slightly, then make a small indent in the center. Fill that indentation with a small spoonful of marmalade or lemon curd. Use a toothpick or end of a skewer to swirl it into the dough, creating a marbled effect. Be gentle—you want minimal mixing to keep the prettiness intact!
Step 7: Bake
Pop them into your preheated oven. Bake for 10-12 minutes, or until the cookies are just starting to turn golden around the edges. Keep an eye on them—overbaking makes them crispy, and I prefer mine soft and chewy. Ovens vary, so if it’s your first time, check at about 10 minutes. The smell alone will make you smile.
Step 8: Cool & Glaze
Let the cookies rest on the baking sheet for a few minutes—this helps them set up. Transfer to a wire rack to cool completely. Once cooled, mix your powdered sugar glaze and drizzle it artfully over the cookies. If you add zest or a tiny splash of flavoring to the glaze, it steps up the elegance—and tastes amazing too.
Step 9: Slice & Serve
If you’ve made larger cookies, slice them just before serving to keep the layers neat. These cookies are best enjoyed within 2-3 days, but honestly, they rarely last that long in my house! Serve them with a cup of tea, a glass of sparkling water, or even as a sweet note after dinner. They look pretty on a plate, stacked or decorated with citrus slices or edible flowers for special occasions.
What to Serve It With
These citrus cookies are pretty versatile—they lighten up breakfast plates, elegant enough for brunch, or a delightful end to any meal. At my house, I often serve them with a side of berries or a dollop of whipped cream for a more indulgent treat. For brunch, I love pairing them with a mimosa or fresh-squeezed juice—talk about bright and refreshing! During the holidays, I’ll drizzle a little dark chocolate on top or sprinkle with chopped pistachios for a little crunch. They’re also perfect with a warm cup of chamomile or herbal tea—my kids love dunking them in milk, too. Honestly, I think they’re the kind of cookie that sparks happiness anytime you bite into them, whether you’re celebrating something special or just need a cozy afternoon pick-me-up.
Top Tips for Perfecting Your Citrus Cookies
Years of baking have taught me a few tricks to make these cookies even better. First, when zesting citrus, try to avoid the bitter white pith—use a fine microplane and zest only the outer peel for the brightest flavor. I’ve also learned to chill the dough thoroughly—about 30 minutes in the fridge helps it firm up, making it easier to handle. If your dough feels sticky, don’t hesitate to dust your hands with flour or pop it back in the fridge. When swirling in the marmalade or lemon curd, don’t overmix—those marbled patterns are what make these cookies so pretty! A little experimentation with citrus varieties can also be fun: pink grapefruit or blood orange zing up the flavor while adding visual drama. Baking at the right temperature is crucial—if your cookies turn out flat, try baking on the middle rack or increasing oven temp by a couple of degrees. And for the glaze, I recommend starting with a soft drizzle—thick glazes can hide the pretty swirl details—and add more juice or sugar as needed. I’ve tested many variations, like swapping in coconut sugar or trying almond extract for a nutty twist, and honestly, each little change makes me fall in love with this recipe all over again. Just trust your instincts, use quality ingredients, and don’t rush. These cookies are resilient, forgiving, and bursting with sunshine — just like a good hug!
Storing and Reheating Tips
These cookies are best enjoyed fresh, but if you need to store leftovers, here’s the scoop: Keep them in an airtight container at room temperature for up to 3 days. I like stacking them with a piece of parchment or wax paper in between, to keep their shapes perfect. For longer storage, pop them in a zip-top bag or container and refrigerate—they stay good for about a week. To freeze, arrange the baked cookies in a single layer on a baking sheet, freeze until firm, then transfer to a freezer-safe bag. They’ll keep well for up to 3 months! When you’re ready to enjoy, thaw at room temperature—warm cookies are delightful. If you’ve added glaze, it’s best to store the cookies unglazed and add the drizzle after they’ve thawed for maximum freshness. Reheating briefly in a low oven or a toaster oven can refresh their soft texture—just a few minutes at 300°F does the trick. Trust me, these cookies hold up pretty well and taste just as good as the day you baked them, with a little warmth and a fresh drizzle of glaze.
Frequently Asked Questions
Final Thoughts
There’s something so joyful about baking these citrus cookies. It’s a simple recipe that packs a punch of flavor and personality—perfect for sharing with friends, packing into lunchboxes, or just indulging in a little self-love with a hot cup of tea. Over the years, I’ve tweaked and played with this recipe, and it’s become one of those dishes that never fails to brighten my day. The combination of sweet, tart, and fragrant citrus reminds me of lazy summer afternoons, or cozy mornings by the window. If you give these a try, I’d love to hear how it goes—add your own twist, swap out the citrus, or decorate them in your style. Baking should be fun and personal, right? So don’t be afraid to experiment! Happy baking, and may your kitchen be filled with sunshine and good smells. Enjoy every bite, and remember—you’re creating something delicious and made with love!

citrus cookies
Ingredients
Main Ingredients
- 0.75 cup unsalted butter (softened)
- 1.5 cups granulated sugar (divided)
- 1 large egg
- 2 cups all-purpose flour
- 1.5 teaspoons baking powder
- 0.5 teaspoon baking soda
- 1 orange zested orange
- 1 lemon zested lemon
- 1 lime zested lime
Instructions
Preparation Steps
- In a small bowl, zest all the citrus. Remove about 2 teaspoons of zest and place in a separate bowl. Add 0.5 cups of granulated sugar to the 2 teaspoons of zest. Combine with a fork and set aside.
- In a mixing bowl, add butter and remaining 1 cup sugar. Beat for 1-2 minutes. Add egg and beat until combined. Add flour, baking powder, and baking soda. Beat until combined. Slowly add in the citrus zest mixture.
- Preheat oven to 350°F. Line a baking sheet with parchment paper. Roll cookies into 0.75-1 inch balls. Roll them in the reserved sugar and zest mixture, coating generously.
- Place the balls on the prepared baking sheet and repeat. Using a flat bottom of a cup, press the balls slightly to form a disc. For extra prettiness, sprinkle a little additional sugar on the tops.
- Bake for 10-12 minutes. Remove from oven and let cool on wire rack.
- Store in an airtight container for up to a week. Enjoy!
Notes
Featured Comments
“These cookies look amazing! That citrus burst sounds so refreshing—perfect for lifting your mood. Can’t wait to try the recipe!”
“Impressed! Clear steps and comforting results. Perfect for busy nights.”
“New favorite here — family favorite. crowd-pleaser was spot on.”
“Super easy and turned out amazing! My family asked for seconds. Saving this one.”
“This sweet treat was absolutely loved — the silky really stands out. Thanks!”
“Made it tonight and wow — super easy! Will definitely make Zesty Citrus Cookies How to Bake Them again.”


These cookies look amazing! That citrus burst sounds so refreshing—perfect for lifting your mood. Can’t wait to try the recipe!