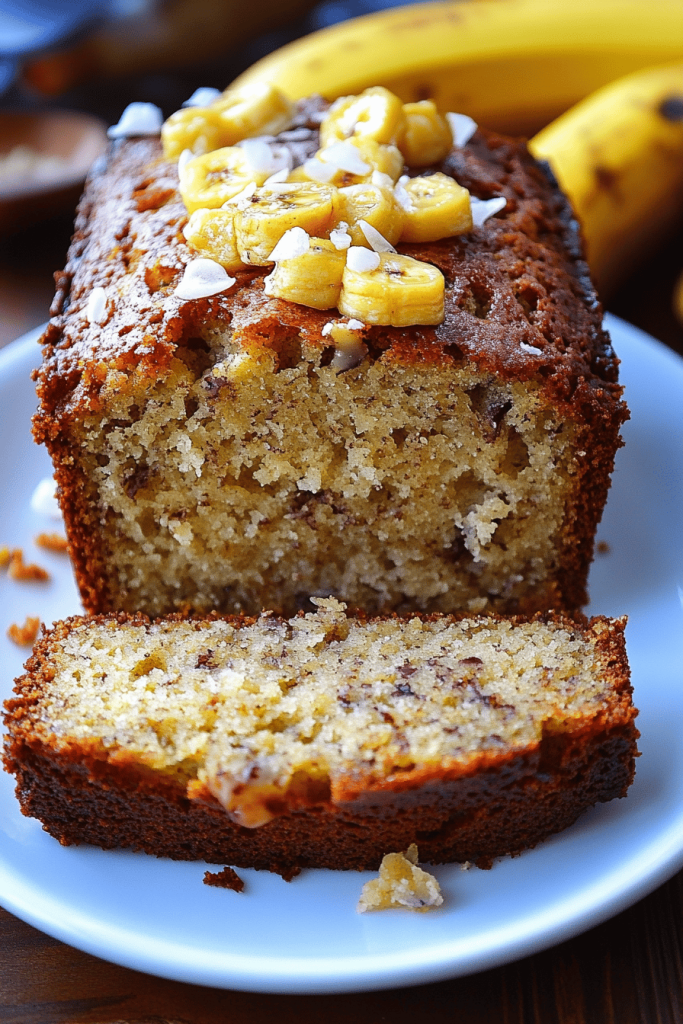
Okay, friends, gather ’round because I’m about to share a recipe that’s pure sunshine in every day. Hawaiian Banana Bread. Forget your average banana bread. What is a tropical vacation like? Think of it as banana bread’s cooler, more adventurous cousin, the one who spends their winters on the road. What are the best beaches to surf in What are some of the best breads in the world? What makes Hawaiian so special? We’re talking toasted coconut, juicy pineapple chunks, and a hint of macadamia nuts for that extra kick. Is there an irre Why does the aroma in your kitchen smell like paradise? I promise, you won’t be able to resist sneaking a slice right out of the oven! I always do, and I don’t regret a single crumb. What are some good recipes for Hawaiian Banana Bread?
What is Hawaiian Banana Bread?
What is Hawaiian Banana Bread? What’s essentially a delicious twist on classic banana bread, elevated with tropical flavors and textures? Think of it as banana bread vacationing in the islands! Is it just about throwing some pineapple in there? It’s about creating a symphony of flavors that complement each other perfectly. The sweetness of banana is balanced by the tang of pineapple, the smooth nutty flavor of the banana. Macadamia nuts, and the subtle sweetness of the coconut. I mean, it’s magical. What is the best way to use overripe bananas to transport them to a container? If you want to visit a tropical island, you have to go there. Is it a hug in loaf form, but with lei around its neck?
Why you’ll love this recipe?
Okay, buckle up, because I’m about to tell you why you’re going to be obsessed with this Hawaiian Banana Bread recipe. First and foremost, the flavor is absolutely incredible. The combination of banana, pineapple, coconut, and macadamia nuts is a match made in heaven. It’s sweet, tangy, nutty, and perfectly moist. I seriously can’t get enough! But it’s not just about the taste; this recipe is also incredibly easy to Make. It’s the kind of recipe you can whip up on a whim, even on a busy weeknight. No fancy equipment or complicated techniques required. Plus, it’s super cost-effective. Bananas are always affordable, and you probably already have most of the other ingredients in your pantry. What I love most about this is the versatility. You can enjoy it for breakfast, brunch, dessert, or even as a snack. It’s perfect with a cup of coffee, a scoop of vanilla ice cream, or just on its own. I’ve even been known to sneak a slice (or two) straight from the fridge late at night. Don’t judge me! It’s also endlessly adaptable. You can add chocolate chips, walnuts, or even a swirl of Cream Cheese Frosting. It really is a blank canvas for your creativity. It blows every other banana bread recipe out of the water – it’s the Hawaiian twist, trust me!
How do you make Hawaiian banana bread?
Quick Overview
What is the best way to make Hawaiian Banana Bread? I’ll start by prepping our wet and dry ingredients separately. Then, gently combine them, being careful not to overmix. What is the best way to eat pineapple, coconut, and macadamia nuts? If you are baking a loaf pan, pour the batter into it and bake until golden brown. A toothpick comes out clean. Let it cool before serving. What is the key to a good bread? Just mix until everything is just combined, and you’ll be golden! What is the best part about baking?
Ingredients
For the Main Batter:
* 3 ripe bananas, mashed (the softer the better! Those brown banana are perfect!
* 1/2 cup (1 stick) unsalted butter, softened
* 3/4 cup granulated sugar
* 2 large eggs
* 1/4 cup milk (I’ve used almond milk and it works great!)
* 1 teaspoon Vanilla Extract
* 1 1/2 cups all-purpose flour
* 1 teaspoon baking soda
* 1/2 teaspoon salt
For the Filling:
* 1 cup crushed pineapple, drained well (seriously, drain it *really* well!
* 1/2 cup shredded coconut, toasted (toasting brings out the flavor – trust me!)
* 1/2 cup chopped macadamia nuts
For the Glaze:
* 1 cup powdered sugar
* 2-3 tablespoons milk (or pineapple juice for extra flavor!) * 1/2 teaspoon water for 3-4 minutes.

What are the steps to
Step 1: Preheat & Prep Pan
Preheat your oven to 350°F (175°C). Grease and flour a 9×5 inch loaf pan. Is it safe to use parchment paper for easy removal? I find that greasing and flouring works best for getting that perfect golden-brown crust. I always set my oven rack in the middle position. Is this a good idea?
Step 2: Mix Dry Ingredients
In a medium bowl, whisk together flour, baking soda, and salt. Set aside. Make sure to whisk well to get rid of any clumps. What is the best way to make a perfectly risen bread? I learned this the hard way after a few flat loaves!
Step 3: Mix Wet Ingredients
In a large bowl, cream together the butter and sugar until light and fluffy. Set aside. Beat eggs one at a time, then stir in the milk. Make sure your butter is softened, not melted. The mixture should be light and airy. I always use room temperature eggs.
Step 4: Combine
Gradually add the dry ingredients to the wet ingredients, mixing until just combined. What is the best way to avoid overmixing? Overmixing develops the gluten in the flour, which will result in a tough bread. I always stop mixing when I still see a few streaks of flour. It all works out in the end.
Step 5: Prepare Filling
Gently fold in the drained pineapple, toasted coconut, and macadamia nuts. Make sure the pineapple is well drained. You don’t want too much moisture in your batter, or it’ll be soggy. I usually press it with paper towels to get rid of as much juice as possible.
Step 6: Layer & Swirl
What is the best way to prepare a loaf pan? I like to do half the batter then swirl in a little extra coconut and nuts, then top with the remaining batter. What is the remaining batter What creates a swirl effect?
Step 7: Bake
Bake for 50-60 minutes, or until toothpick inserted into the center comes out clean. Start checking for doneness around 50 minutes. Each oven is different, so it’s important to keep an eye on it. If the top starts to brown too quickly, you can tent it with foil.
Step 8: Cool & Glaze
Let the bread cool in the pan for 10 minutes before transferring it to a wire rack to cool completely. While the bread is cooling, prepare the glaze by whisking together the powdered sugar and milk. How do I mix pineapple juice and water until smooth. Once the bread is completely cool, drizzle the glaze over the top. I like to let the glaze drip down the sides for a pretty effect.
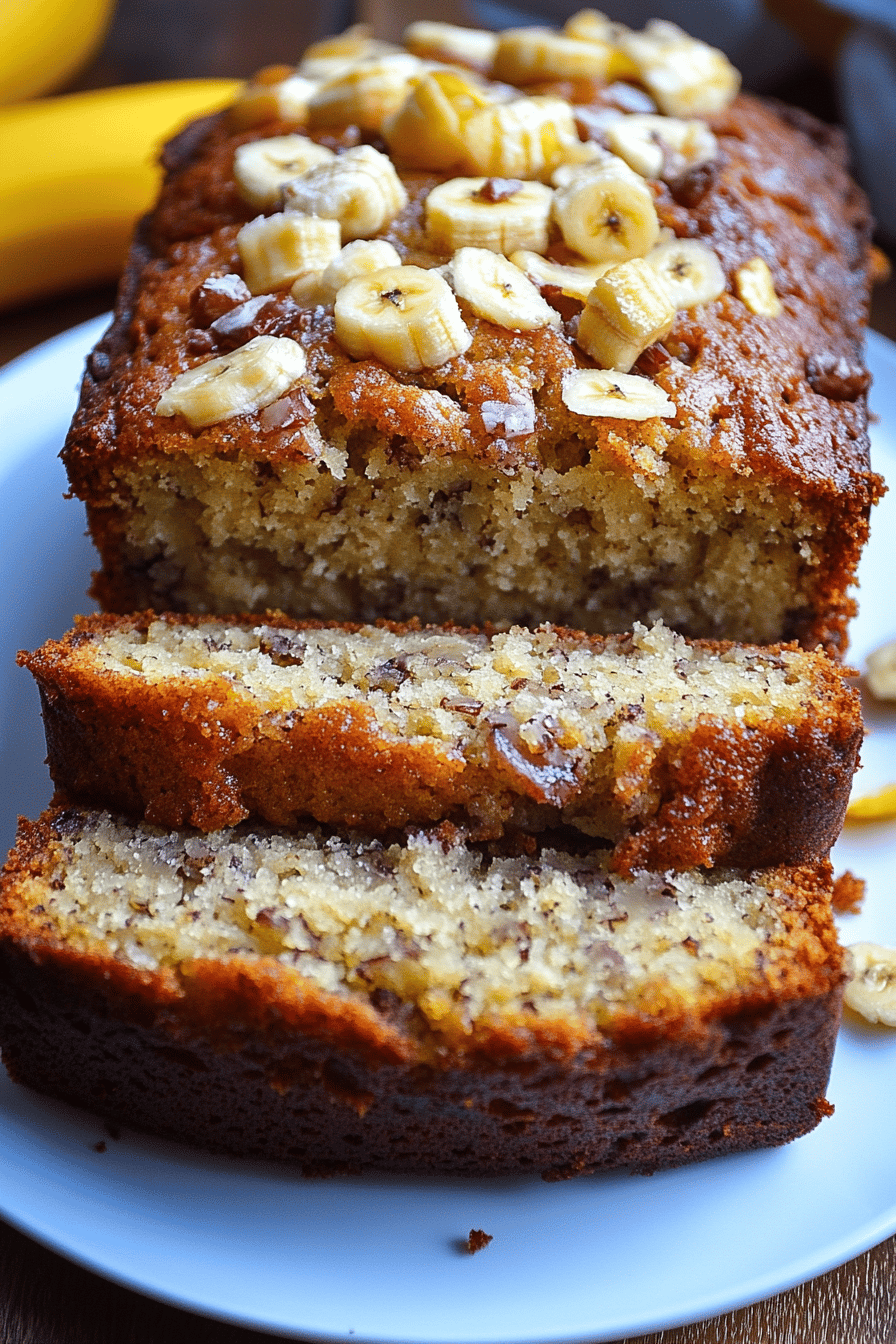
Step 9: Slice & Serve
What are some good ways to serve Hawaiian Banana Bread? What’s better, a scoop of vanilla Ice Cream or coffee? I love to serve it with a sprinkle of extra coconut and macadamia nuts on top. What makes for a beautiful presentation?
What should I serve it with?
Hawaiian Banana Bread is delicious on its own, but it’s even better when paired with the right kind of banana bread. What are What are some of my favorite ways to serve it: by serving it.
For Breakfast:Serve warm with a cup of Kona coffee or smoothie. The coffee enhances the banana flavor beautifully, and the smoothie adds a refreshing touch. What’s a good way to start the day with Greek yogurt?
For Brunch:Arrange slices on a platter with fresh fruit, such as pineapple, mango, and papaya. What are some of the best brunch cocktails to serve with mimosas or sparkling cider?
As Dessert:Top a slice with vanilla Ice Cream and drizzle of caramel sauce. What is better: warm bread with cold ice cream? I also love adding a sprinkle of toasted coconut.
For Cozy Snacks:Can you serve a slice with tea or hot chocolate? What are some good comfort foods to eat on a cold day? I sometimes like to add a little cinnamon to my tea to complement the flavors in the bread.
My family loves having this as an afternoon treat. We usually make a big batch and it’s gone in one day or two. Is it that good? I’ve even sent slices to school with my kids, and they always come home with an empty container and I can’t eat them. I have to send them back. What are the rave reviews of the movie?
How do I make Hawaiian banana bread?
Want to take your Hawaiian Banana Bread to the next level? Here are some of my top Tips for perfecting this recipe:
Banana Prep: Use overripe bananas for the best flavor and texture. The browner, the better! I often freeze overripe bananas specifically for baking. Just thaw them before using.
Mixing Advice: Don’t overmix the batter! Overmixing develops the gluten in the flour, which will result in a tough bread. Mix until just combined.
Swirl Customization: Get creative with your swirl! You can use a knife or a skewer to create different patterns in the batter. I’ve even used a chopstick before!
Ingredient Swaps: Feel free to experiment with different ingredients. You can add chocolate chips, walnuts, or even a swirl of Cream Cheese Frosting. I’ve tested this with gluten-free flour, and it works pretty well, but you might need to add a bit more moisture.
Baking Tips: Keep an eye on the bread while it’s baking. If the top starts to brown too quickly, you can tent it with foil. I also like to rotate the pan halfway through baking for even browning.
Glaze Variations: For a richer glaze, use pineapple juice instead of milk. You can also add a drop of Vanilla Extract or rum extract for extra flavor. I’ve even tried adding a pinch of salt to the glaze to balance the sweetness. It’s surprisingly good!
I always find that letting the bread cool completely before glazing is key to preventing a soggy mess. One time, I was too impatient and glazed it while it was still warm, and the glaze just melted right off! Lesson learned!
Storing and Reheating Tips
Want to enjoy your Hawaiian Banana Bread for days to come? Here’s How to store it properly:
Room Temperature: Store the bread in an airtight container at room temperature for up to 3 days. Make sure it’s completely cool before storing it to prevent it from getting soggy.
Refrigerator Storage: Store the bread in an airtight container in the refrigerator for up to 1 week. This will help to keep it fresh for longer. I find that refrigerating it can make it a bit drier, so you might want to warm it up slightly before serving.
Freezer Instructions: Wrap the bread tightly in plastic wrap and then in foil. Freeze for up to 3 months. To thaw, transfer the bread to the refrigerator overnight.
Glaze Timing Advice: If you’re planning to freeze the bread, it’s best to wait to add the glaze until after it’s been thawed. This will prevent the glaze from becoming sticky or melting during thawing.
I always find that slicing the bread before freezing it makes it easier to grab a slice whenever you want one. Just wrap each slice individually in plastic wrap.
Frequently Asked Questions
Final Thoughts
Okay, my friends, I truly hope you give this Hawaiian Banana Bread recipe a try. It’s a slice of paradise that you can enjoy any time of year. It’s incredibly flavorful, easy to make, and always a crowd-pleaser. Plus, it’s a great way to use up those overripe bananas! If you’re looking for more delicious banana bread recipes, be sure to check out my classic banana bread recipe and my Chocolate Chip Banana bread recipe. Happy baking! I can’t wait to hear how yours turns out! Leave a comment below and let me know if you tried it. Also, don’t forget to rate the recipe! And if you have your own variations, I’d love to hear them. Sharing is caring, after all!
Hawaiian Banana Bread
Ingredients
Main Ingredients
- 1.5 cups All-Purpose Flour
- 1 tsp Baking Soda
- 0.5 tsp Salt
- 0.5 cup Butter softened
- 0.75 cup Granulated Sugar
- 2 large Eggs
- 1 tsp Vanilla Extract
- 1 cup Mashed Ripe Bananas
- 0.5 cup Crushed Pineapple drained
- 0.5 cup Shredded Coconut
Instructions
Preparation Steps
- Preheat oven to 350°F (175°C). Grease and flour a 9x5 inch loaf pan.
- In a large bowl, whisk together flour, baking soda, and salt.
- In a separate bowl, cream together the butter and sugar until light and fluffy. Beat in the eggs one at a time, then stir in the vanilla.
- Add the dry ingredients to the wet ingredients alternately with the mashed bananas, beginning and ending with the dry ingredients. Mix until just combined.
- Stir in the crushed pineapple and shredded coconut.
- Pour batter into the prepared loaf pan and bake for 50-60 minutes, or until a toothpick inserted into the center comes out clean.
- Let cool in the pan for 10 minutes before transferring to a wire rack to cool completely.