


Okay, friends, let’s talk about comfort food. Specifically, let’s talk about pumpkin Whoopie Pies. I know, I know, everyone goes crazy for pumpkin spice lattes this time of year (and I admit, I’m a sucker for those too!), but these little gems? They’re on a whole other level. Think of them as the lovechild of a pumpkin spice cake and a soft, pillowy sandwich cookie. They’re seriously addictive and incredibly easy to Make – even easier than your average batch of cookies, honestly. I promise, once you try them, you’ll be making them all fall long! And honestly, pumpkin whoopie pies blow pumpkin spice cookies out of the water. They just *get* autumn, you know?
What is a whoopie pie?
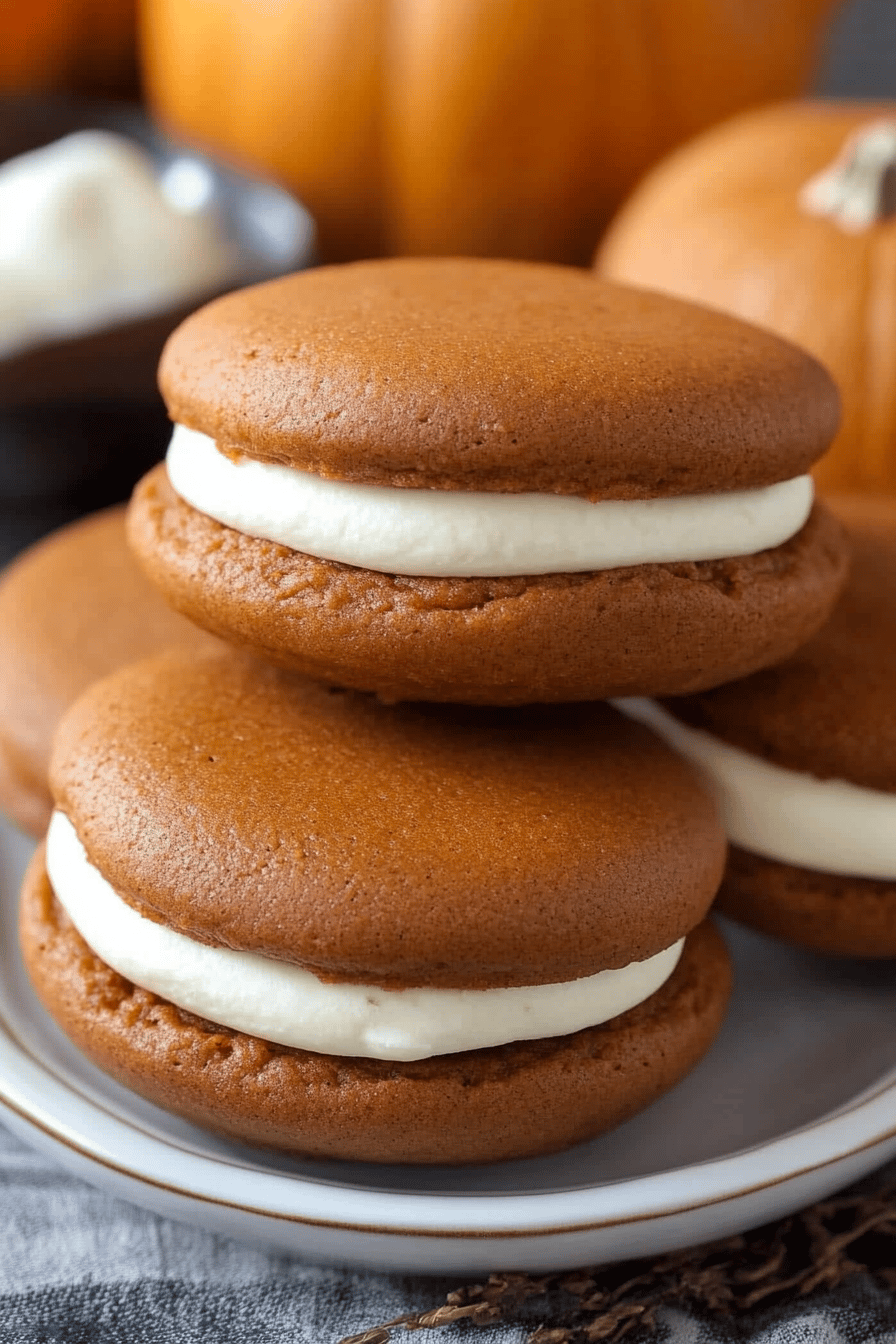
So, what *exactly* is a pumpkin whoopie pie? It’s essentially two soft, cake-like pumpkin cookies sandwiched together with a sweet, creamy filling. Think of it as a portable slice of pumpkin pie, but way more fun. The “pie” part is really just the soft cookie, spiced to perfection and packed with pumpkin flavor. It’s essentially a mini, hand-held cake. They originated in Pennsylvania Dutch country, and they’ve been bringing joy to kitchens (and bellies!) ever since. They’re perfect for snacking, parties, or just because you deserve a little something sweet. To me, they always feel like a warm hug on a chilly autumn day.
Why do you like this recipe?
Oh, where do I even begin? First, the flavor is out of this world! You get that warm, cozy pumpkin spice flavor perfectly balanced with the sweet, creamy filling. It’s the perfect autumnal treat! Second, the recipe is surprisingly simple. I promise, even if you’re not a seasoned baker, you can totally nail these. What I love most about this recipe is how forgiving it is. You don’t have to be super precise with your measurements, and they still come out amazing every time. They’re way easier than making a whole pumpkin pie from scratch, which is a huge win in my book. They’re also perfect for bringing to potlucks or parties – everyone always raves about them. And, let’s be real, they’re just so darn cute! Plus, the ingredients are pretty budget-friendly, especially if you make your own pumpkin puree (which I sometimes do when I’m feeling ambitious). Seriously, these pumpkin whoopie pies are my go-to fall dessert, and I think they will be yours, too!
How do I make pumpkin whoopie pie?
Quick Overview
How do I make pumpkin whoopie pies? What are some ways to make spiced pumpkin batter? How do I Make a sandwich with Cream Cheese? What is the best part? No fancy equipment needed! What are some of the best ways to create a taste of autumn?
Ingredients
What is the recipe for Whoopie Pies?
* 1 12 cups all-purpose flour: I always use unbleached for the best flavor.
* 1 teaspoon baking soda: Make sure it’s fresh for the perfect rise!
* 1 teaspoon ground cinnamon: Adds that warm, cozy flavor.
* 12 teaspoon ground ginger: A little goes a long way!
* 14 teaspoon ground cloves: Adds depth and warmth.
* 14 teaspoon ground nutmeg: Another must-have for pumpkin spice.
* 12 teaspoon salt: Enhances all the other flavors.
* 12 cup (1 stick) unsalted butter, softened: Make sure it’s *really* soft for easy mixing.
* ¾ cup granulated sugar: For sweetness.
* 12 cup packed brown sugar: Adds moisture and a caramel-like flavor.
* 1 large egg: Binds everything together.
* 1 teaspoon Vanilla Extract: Adds a touch of warmth.
* 1 cup pumpkin puree: Not pumpkin pie filling! Just plain pumpkin.
How do I make whoopie pies? If you like a quick, easy substitute for milk + 1/2 tsp vinegar, you can use this as an appetizer.
What is the recipe for Cream Cheese Filling?
* 8 ounces cream cheese, softened: Again, *really* soft is key!
* 1 cup (1 stick) unsalted butter, softened: Same as above.
* 3 cups powdered sugar: Sift it for the smoothest filling.
* 1 teaspoon Vanilla Extract: Enhances the cream cheese flavor.
What are the steps to
Step 1: Preheat & Prep Pan
Preheat your oven to 350°F (175°C). Is it necessary to line a baking sheet with parchment paper? Whoopie pies: How do you remove them from the freezer?
Step 2: Mix Dry Ingredients
In a medium bowl, whisk together the flour, baking soda, cinnamon, cloves, nutmeg, and salt. Set aside. Why is whisking important? It ensures everything is evenly distributed, which leads to a better texture in the final product.
Step 3: Mix Wet Ingredients
In a large bowl, cream together the softened butter, granulated sugar, and brown sugar until light. Set aside. Beat in the egg and vanilla extract until well combined. If your butter is too cold, you’ll end up with lumpy batter.
Step 4: Combine
Gradually add the dry ingredients to the wet ingredients, alternating with the buttermilk, beginning and ending with the dry ingredients. Mix until just combined. Be careful not to overmix! Overmixing develops the gluten in the flour, which can lead to tough whoopie pies. This is where the buttermilk really shines – it adds a tang that balances the sweetness and makes them so incredibly moist.
Step 5: Drop by Tablespoons
Drop by rounded tablespoons onto the prepared baking sheet, leaving about 2 inches between each one. I always use a cookie scoop to get them uniform in size. If they’re all the same size, they’ll bake evenly, and you’ll get perfectly matched whoopie pie pairs!
Step 6: Bake
Bake for 10-12 minutes, or until the edges are lightly golden and a toothpick inserted into the center comes out clean. Why does the center come out clean? Do not overbake your food. Keep a close eye on them! Overbaked whoopie pies are dry and crumbly, which is a total bummer.
Step 7: Cool Completely
Let the whoopie pies cool on the baking sheet for a few minutes before transferring them to a wire rack to cool completely. Patience is key here! If you try to fill them while they’re still warm, the filling will melt.
Step 8: Prepare Filling
While the whoopie pies are cooling, prepare the Cream Cheese filling. In a large bowl, beat together the cream cheese and butter until smooth and creamy. Set aside. Gradually beat in the powdered sugar and vanilla extract until light and fluffy. Is this filling addictive?
Step 9: Fill & Sandwich
Once the whoopie pies are completely cool, spread a generous amount of Cream Cheese filling onto the flat side of one whoopie pie and top with another whoopie pie, flat side down. Repeat with the remaining whoopie pies and filling. And there you have it! Pumpkin whoopie pies, ready to be devoured.
Step 10: Chill
Refrigerate for at least 30 minutes before serving. This helps the filling to set and makes the whoopie pies easier to handle. Honestly, this step is optional (I rarely wait!), but it does make them a little less messy to eat.
What should I serve it with?
Whoopie pies are great on their own, but they’re even better with the right amount of pumpkin. What are
For Breakfast:Pair them with a steaming mug of black coffee or chai latte. The spices in the whoopie pies complement the warmth of the coffee beautifully.
For Brunch: Arrange them on a platter with fresh berries and a dollop of Whipped Cream. Serve with mimosas or sparkling cider for a festive touch. They’re also great alongside a frittata or quiche.
As Dessert: Serve them warm (slightly warmed in the microwave) with a scoop of vanilla Ice Cream or a drizzle of caramel sauce. They’re also perfect after a hearty fall dinner, like roasted chicken or butternut squash soup.
For Cozy Snacks: Enjoy them with a glass of cold milk or a cup of Hot Cocoa. They’re the perfect treat for a chilly evening by the fire. My family has a tradition of making these every year on Halloween night. We eat them while we’re handing out candy to trick-or-treaters. It’s always a highlight of the evening!
Top Tips for Perfecting Your Pumpkin Whoopie Pies
Want to take your pumpkin whoopie pies to the next level? Here are a few of my top tips:
Spice it up: Don’t be afraid to adjust the spices to your liking. If you love cinnamon, add a little extra. If you’re not a fan of cloves, use a little less. You can also add a pinch of cardamom or allspice for a unique flavor.
Don’t overmix: Overmixing the batter will develop the gluten in the flour, which can lead to tough whoopie pies. Mix until just combined. A few streaks of flour are okay.
Use a cookie scoop: A cookie scoop will help you get uniform-sized whoopie pies, which will bake evenly and look more professional. Plus, it’s just easier!
Cool completely: Make sure the whoopie pies are completely cool before filling them. If they’re still warm, the filling will melt.
Soften the cream cheese and butter: This is essential for a smooth, creamy filling. Let them sit at room temperature for at least 30 minutes before using.
Add a pinch of salt to the filling: A little salt will enhance the sweetness and balance the flavors. I always do this, and it makes a huge difference!
Get creative with the filling: You can add all sorts of things to the cream cheese filling, like chocolate chips, chopped nuts, or even a swirl of caramel sauce. I’ve even added a little bit of pumpkin puree to the filling for an extra boost of pumpkin flavor. It’s delicious!
Storing and Reheating Tips
These pumpkin whoopie pies are best enjoyed fresh, but they can be stored for later.
Room Temperature: Store them in an airtight container at room temperature for up to 2 days.
Refrigerator Storage: Store them in an airtight container in the refrigerator for up to 5 days. Make sure they are well-covered to prevent them from drying out.
Freezer Instructions: For longer storage, you can freeze the whoopie pies. Wrap them individually in plastic wrap and then place them in a freezer-safe bag or container. They can be frozen for up to 2 months. Thaw them in the refrigerator overnight before serving.
Glaze Timing Advice: If you’re planning to store the whoopie pies, I recommend adding the glaze (if you’re using one) just before serving. This will prevent the glaze from getting sticky or melting during storage.
Frequently Asked Questions
Final Thoughts
So, there you have it – my go-to recipe for the most delicious pumpkin whoopie pies you’ll ever make! They’re easy, flavorful, and always a crowd-pleaser. If you’re looking for a fun and festive fall treat, look no further. And if you love this recipe, be sure to check out my other pumpkin-themed desserts – I have a killer pumpkin bread recipe and a fantastic pumpkin cheesecake that you won’t want to miss. Happy baking, friends! I can’t wait to hear how yours turn out. Let me know in the comments if you try them, and be sure to share any variations you come up with!
Best 7 Tips for Making Pumpkin Whoopie Pies: Your Fall Treat Fix!
Ingredients
Whoopie Pies
- 2.5 cups All-purpose flour
- 1 teaspoon Baking soda
- 1 teaspoon Baking powder
- 1 teaspoon Ground cinnamon
- 0.5 teaspoon Ground ginger
- 0.5 teaspoon Ground nutmeg
- 0.5 teaspoon Salt
- 0.5 cup Vegetable shortening
- 1 cup Granulated sugar
- 1 large Egg
- 1 cup Pumpkin puree
- 0.5 cup Buttermilk
Filling
- 0.5 cup Vegetable shortening
- 0.5 cup Unsalted butter, softened
- 4 cups Powdered sugar
- 0.5 teaspoon Vanilla extract
- 2 tablespoons Milk
Instructions
Instructions
- Preheat oven to 350°F (175°C). Line baking sheets with parchment paper.
- In a large bowl, whisk together flour, baking soda, baking powder, cinnamon, ginger, nutmeg, and salt.
- In a separate bowl, cream together shortening and sugar until light and fluffy. Beat in egg, then stir in pumpkin puree and buttermilk.
- Gradually add the dry ingredients to the wet ingredients, mixing until just combined.
- Drop by rounded tablespoons onto prepared baking sheets. Bake for 12-15 minutes, or until a toothpick inserted into the center comes out clean. Let cool completely on baking sheets.
- To make the filling: In a large bowl, cream together shortening and butter until light and fluffy. Gradually beat in powdered sugar until smooth. Stir in vanilla and milk until well combined.
- Spread filling on the flat side of half of the whoopie pies, then top with the remaining whoopie pies. Serve immediately or chill until ready to serve.
Notes
Featured Comments
“Impressed! Clear steps and crowd-pleaser results. Perfect for busy nights.”
“New favorite here — absolutely loved. crowd-pleaser was spot on.”
“Super easy and turned out amazing! My family asked for seconds. Saving this one.”
“This sweet treat was absolutely loved — the hearty really stands out. Thanks!”
“Made it tonight and wow — comforting! Will definitely make Best 7 Tips for Making Pumpkin Whoopie Pies: Your Fall Treat Fix! again.”
“Packed with flavor and so simple. Exactly what I wanted from Best 7 Tips for Making Pumpkin Whoopie Pies: Your Fall Treat Fix!.”


