

The first time I baked something that tasted like sunshine and a hug, it was a Caramel Apple dump cake. I pulled it from the oven and the whole kitchen smelled like cinnamon, caramel, and warm fruit. It was a cold fall evening, and there I was, chasing after muddy boots and a mountain of school papers, when this easy dessert saved the night. This caramel apple dump cake isn’t fussy or precious; it’s cozy, it’s forgiving, and it never fails to disappear in minutes at my house. Think of it as the lovechild of an apple crumb cake and a skillet caramel brownie—soft, fruity, and carpeted with caramel, all in one pan. My kids ask for seconds before I’ve even plated the first slice, and honestly, I’m not surprised. This is the kind of dessert that tastes like comfort, no matter your skill level, and it’s a lifesaver on busy weeks when you’re craving something sweet but don’t want to babysit a complicated bake.
What is a caramel apple dump cake?
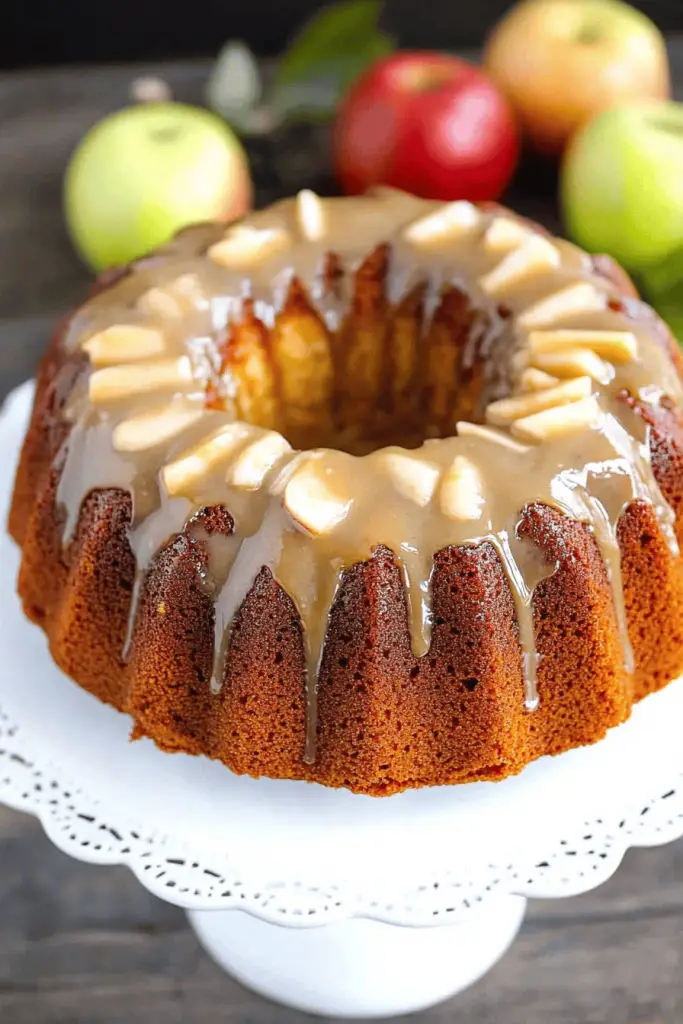
Caramel apple dump cake is essentially a one-pan dessert built from a simple batter that’s “dumped” over apples and cinnamon, then baked until it’s golden and bubbly. The name comes from the classic dump cake method: you mix a few pantry staples, pour them over fruit, and let the oven do all the heavy lifting. Think of it as a cozy, no-fuss version of apple pie in cake form. The apples soften into a tender filling, while the batter bakes to a fluffy, slightly chewy texture that’s studded with pockets of caramel sweetness. It’s what I reach for when I want something that feels homemade and special, without turning the kitchen into a science lab. And yes, it’s absolutely delicious warm with a scoop of vanilla Ice Cream melting over the side.
How do I make caramel apple dump cake?
Quick Overview
Here’s the quick version: whisk dry ingredients for the batter, whisk wet ingredients, and then combine. Pour the batter into a greased pan, scatter or layer sliced apples with a cinnamon-sugar mix, and swirl some of the batter through the fruit so you get ribbons of cinnamon goodness. Bake until the top is golden and a toothpick comes out clean or with just a few moist crumbs. Finish with a warm caramel glaze and serve with Ice Cream or a dollop of whipped cream. It’s almost like a magic trick in a pan—easy, comforting, and deeply satisfying.
Ingredients
For the Main Batter:
- 1 cup (120 g) all-purpose flour or gluten-free blend
- 1 cup (200 g) granulated sugar
- 1/2 teaspoon salt
- 2 teaspoons baking powder
- 2 teaspoons ground cinnamon
- 1/2 cup (115 g) unsalted butter, melted and cooled slightly
- 2 large eggs, room temperature
- 1/2 cup (120 ml) milk or almond milk
- 1 teaspoon Vanilla Extract
For the Filling:
- 5 medium apples, peeled, cored, and sliced (about 4 cups)
- 1/3 cup (70 g) brown sugar
- 1 teaspoon ground cinnamon
- 1 tablespoon lemon juice
- Optional: 1/4 cup chopped walnuts or pecans
For the Glaze:
- 1/2 cup (120 ml) caramel sauce or dulce de leche
- 2 tablespoons cream or milk
- Pinch of sea salt (optional, but I love the contrast)
Step-by-Step Instructions
Step 1: Preheat & Prep Pan
Preheat your oven to 350°F (175°C). Lightly grease a 9×13-inch baking dish with butter or cooking spray. I always line the bottom with parchment for easy lifting, but that’s optional. The scent of melted butter ticking the edge of the pan is the first hint that something delicious is about to happen.
Step 2: Mix Dry Ingredients
In a medium bowl, whisk together flour (or gluten-free blend), sugar, salt, baking powder, and cinnamon. I like to sift once to ensure there are no lumps. This step is small, but it matters—the dry mix should look uniform and airy, not gloppy.
Step 3: Mix Wet Ingredients
In a separate bowl, whisk the melted butter with eggs, milk, and vanilla until everything is smooth. The butter should be warm but not hot, so it doesn’t scramble the eggs. If I’m short on time, I’ll whisk everything directly in the mug I’ll measure from, then pour into the dry mix—cleaner, faster, still delicious.
Step 4: Combine
Pour the wet ingredients into the bowl with the dry ingredients and stir just until combined. A few small lumps are fine—overmixing makes the cake tougher. You’re aiming for a thick, pourable batter, not a cake batter that’s been trained for a marathon.
Step 5: Prepare Filling
In a large bowl, toss the sliced apples with brown sugar, cinnamon, and lemon juice. The lemon hints brighten the fruit as it bakes and keeps the apples from turning brown. If you like extra tang, add a splash of orange juice or a pinch of ground cloves for a holiday vibe.
Step 6: Layer & Swirl
Spread a thin layer of batter in the bottom of the pan. Layer half of the apples over the batter, then drizzle a little more batter over the fruit in about half of the pan. Repeat with the remaining apples and batter, finishing with a gentle swirl or marbling effect. The goal is to have pockets of apple sweetness peeking through, with ribbons of batter for that soft, cake-like texture.
Step 7: Bake
Bake for 40–50 minutes, or until the top is golden brown and a toothpick inserted into the center comes out with a few moist crumbs. Oven hot spots happen; if your edges brown too quickly, cover them loosely with foil for the last 10 minutes. The kitchen should smell like a warm apple orchard and caramel heaven by this point.
Step 8: Cool & Glaze
Let the cake rest for about 15 minutes, then whisk together the glaze ingredients until smooth. Drizzle the caramel glaze over the warm cake. If you want a extra glossy finish, add a splash more cream and a pinch of salt. I love the way the glaze pools in the corners, almost like a tiny caramel river running through the pan.
Step 9: Slice & Serve
Slice into generous squares and serve warm. The best way to cut is with a sharp knife, wiping it clean between cuts for neat edges. I like a scoop of vanilla ice cream or a dollop of whipped cream on top—the cold, creamy contrast makes every bite feel special. If leftovers exist (they rarely do around my house), cover tightly and reheat gently in the microwave with a quick refresh of glaze on top.
What to Serve It With
Caramel apple dump cake shines with a few simple accompaniments that elevate the experience. It’s a dessert designed for sharing, so I always have a few options ready for guests or family nights.
For Breakfast: A slice with a dollop of vanilla yogurt and a steaming cup of coffee is basically autumn in a plate. The warmth from the cinnamon in the cake pairs beautifully with a mug of bold, dark coffee or a lightly sweet chai latte. If you’re in a rush, I’ll warm a slice and drizzle with a touch more caramel for a quick, dessert-for-breakfast moment.
For Brunch: Serve with a drizzle of additional caramel and a handful of toasted pecans for crunch. A side of cinnamon whipped cream makes the edges feel extra indulgent, like you’ve curated a Sunday morning feast without waking up at dawn to prepare it.
As Dessert: A scoop of vanilla ice cream or whipped cream is perfection here. The ice cream’s cold creaminess contrasts with the warm cake, creating the classic comfort-dessert magic. If you’re feeling fancy, a pinch of flaky sea salt on top of the glaze adds a caramelly buzz that guests won’t stop talking about.
For Cozy Snacks: Warm slices eaten straight from the pan with a mug of apple cider is a mood. A handful of chopped walnuts on top adds a toasty note and a little crunch that makes the knife-and-fork moment feel ceremonial, not rushed.
Top Tips for Perfecting Your Caramel Apple Dump Cake
These are the little tricks I’ve learned after making this caramel apple dump cake dozens of times. They’re simple, but they make a big difference in texture and flavor.
Apple Prep: I always toss sliced apples with lemon juice to keep them bright and tender. If you’re using especially juicy apples, toss with a teaspoon of cornstarch to prevent soggy slices. Peel or leave the skin on—my family loves the texture and color the skins bring, but if you’re aiming for a paler, uniform crumb, go ahead and peel.
Mixing Advice: Don’t overmix the batter once you add the wet to dry. A few lumps mean the cake will be light and moist instead of dense. If your batter looks a bit thick, add a splash more milk to loosen it up. Conversely, if it’s too runny, a tablespoon or two of flour can bring it back to the right consistency.
Swirl Customization: For a prettier marbling, reserve a couple of spoonfuls of batter and dollop it on top in random spots, then swirl gently with a knife. You’ll get pretty pockets of cinnamon-scented batter that caramelize beautifully as they bake.
Ingredient Swaps: Try gluten-free flour blends or almond milk for a dairy-light version. You can also swap caramel with a spiced honey glaze for a different kind of sweetness. If you want more caramel flavor, add a teaspoon of caramel extract to the batter or drizzle extra caramel after baking.
Baking Tips: Use a light-colored pan to help the top brown evenly. If your oven runs hot, check at the 30-minute mark and cover the top with foil if it’s browning too fast. Don’t skip cooling time; a few minutes of rest helps the cake set and makes slicing neater.
Glaze Variations: For a richer finish, whisk in a teaspoon of cream cheese to the glaze. If you’re serving a dairy-free crowd, use coconut cream and a pinch of sea salt for a nearly identical effect.
Storing and Reheating Tips
Caramel apple dump cake keeps surprisingly well, and you can keep it tasting close to fresh with a few simple storage tricks. I’ve found these tips make a big difference in texture and aroma after a day or two.
Room Temperature: If you’re planning to serve within a day, you can store the cake loosely covered at room temperature for up to 2 days. Wrap tightly if your climate is humid to prevent the top from drying out.
Refrigerator Storage: For longer storage, increase life to about 4–5 days in the refrigerator. Slice before storing so you can grab a piece easily without exposing the entire cake to air. Reheat individual portions gently in the microwave or in a low oven (300°F/150°C) until warm, then drizzle with fresh glaze.
Freezer Instructions: Freeze the whole cake or individual slices for up to 2–3 months. Wrap tightly in plastic wrap and then in foil to prevent freezer burn. Thaw in the fridge overnight and rewarm gently. If you’re glazing after freezing, drizzle a little extra glaze over the top to revive the gloss.
Glaze Timing Advice: If you’re freezing, hold off on applying the glaze and add it after reheating to avoid soggy texture. If you’re storing in the fridge, you can keep the glaze on or reheat and then re-drizzle for shine and flavor.
Frequently Asked Questions
Final Thoughts
Caramel apple dump cake is one of those recipes that feels like a warm conversation with a friend—friendly, forgiving, and deeply satisfying. It’s the kind of dessert I reach for when the day felt long, when the apples are perfectly crisp, and when I want the kitchen to do the heavy lifting for me. The scent alone is a mood lifter, and the first bite tastes like autumn in a single square. If you’re new to dump cakes, this is a friendly place to start: simple ingredients, straightforward steps, and a result that makes people smile. I’m excited for you to try it and to hear how you customize it—tell me if you swap in a different fruit, tweak the glaze, or add nuts for extra crunch. Happy baking!
Love this caramel apple dump cake? I’d be thrilled to hear your variations in the comments below. If you try a tweak or two, share your notes so others can benefit from your kitchen wisdom. And if you’d like more cozy dessert ideas, I’ve got a handful of family-favorite treats waiting in the wings—all designed to be easy, comforting, and utterly delicious. Thanks for baking along with me, friend. Enjoy every bite, and may your kitchen always smell like caramel and apples at dinnertime.

Caramel Apple Dump Cake
Ingredients
Main Ingredients
- 2 21 oz cans apple pie filling
- 0.75 cup caramel sauce plus additional for topping
- 1 box yellow cake mix
- 1 tsp ground cinnamon
- 0.75 cup salted butter melted
- ice cream optional
Instructions
Preparation Steps
- Preheat oven to 350°F and spray a 9" x 13" baking dish with non-stick cooking spray.
- Spread apple pie filling evenly over the bottom of the prepared baking dish.
- Pour the caramel sauce evenly over the apple pie filling.
- In a medium bowl, combine the dry cake mix and cinnamon. Sprinkle this mixture evenly over the apple pie filling and caramel sauce.
- Pour the melted butter evenly over the cake mix. Place the dish in the oven and bake for 45-50 minutes, or until bubbly and the top is golden brown.
- Let the dump cake cool for 15 minutes before serving. Serve warm with a scoop of ice cream and additional caramel sauce drizzled on top, if desired.
Notes
Featured Comments
“That sounds absolutely delicious—comfort food at its finest! I can almost smell it baking in my kitchen now.”
“Impressed! Clear steps and quick weeknight win results. Perfect for busy nights.”
“New favorite here — quick weeknight win. crowd-pleaser was spot on.”
“Super easy and turned out amazing! My family asked for seconds. Saving this one.”
“This sweet treat was absolutely loved — the zingy really stands out. Thanks!”
“Made it tonight and wow — super easy! Will definitely make caramel apple dump cake again.”


That sounds absolutely delicious—comfort food at its finest! I can almost smell it baking in my kitchen now.