

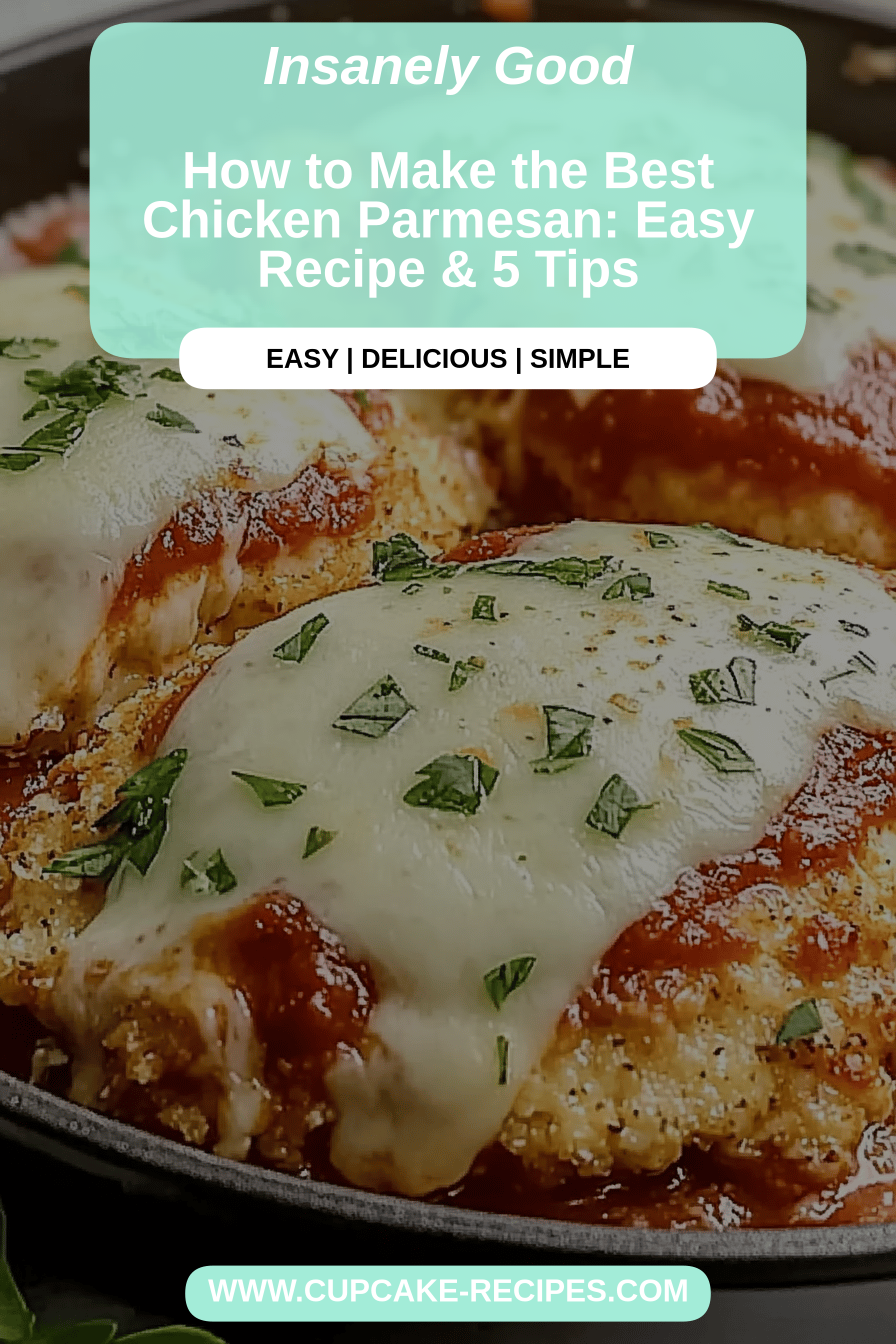
Oh, Chicken Parmesan! Just saying the name brings back a flood of memories. Growing up, it was *the* dish my mom would make whenever we had a special occasion, or honestly, whenever I just needed a little extra comfort. There’s something about that crispy, golden-brown chicken coated in rich tomato sauce and melted cheese that just screams “home.” It’s not just food; it’s a warm hug on a plate. And let me tell you, I’ve tried a lot of Chicken Parmesan recipes over the years, but this one, this is the one that my family asks for again and again. It’s got that perfect balance of textures and flavors, and while it seems fancy, it’s surprisingly doable even on a weeknight. Forget those sad, soggy versions you might have encountered; this recipe delivers pure, unadulterated cheesy, chickeny bliss. It’s the kind of meal that makes everyone gather around the table, happy and full.
What is chicken parmesan?
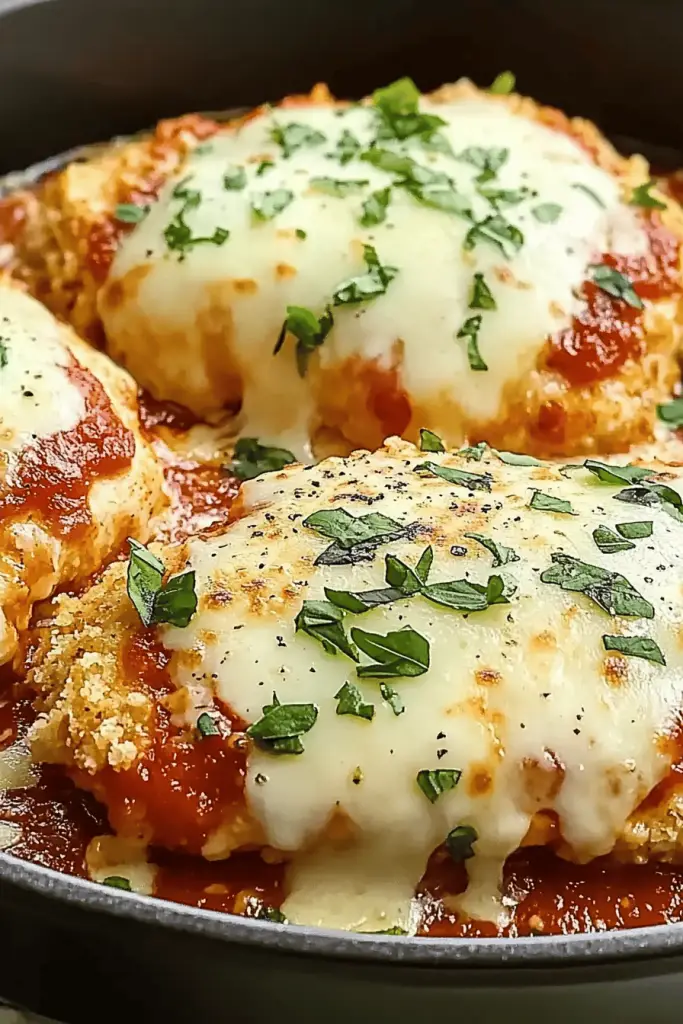
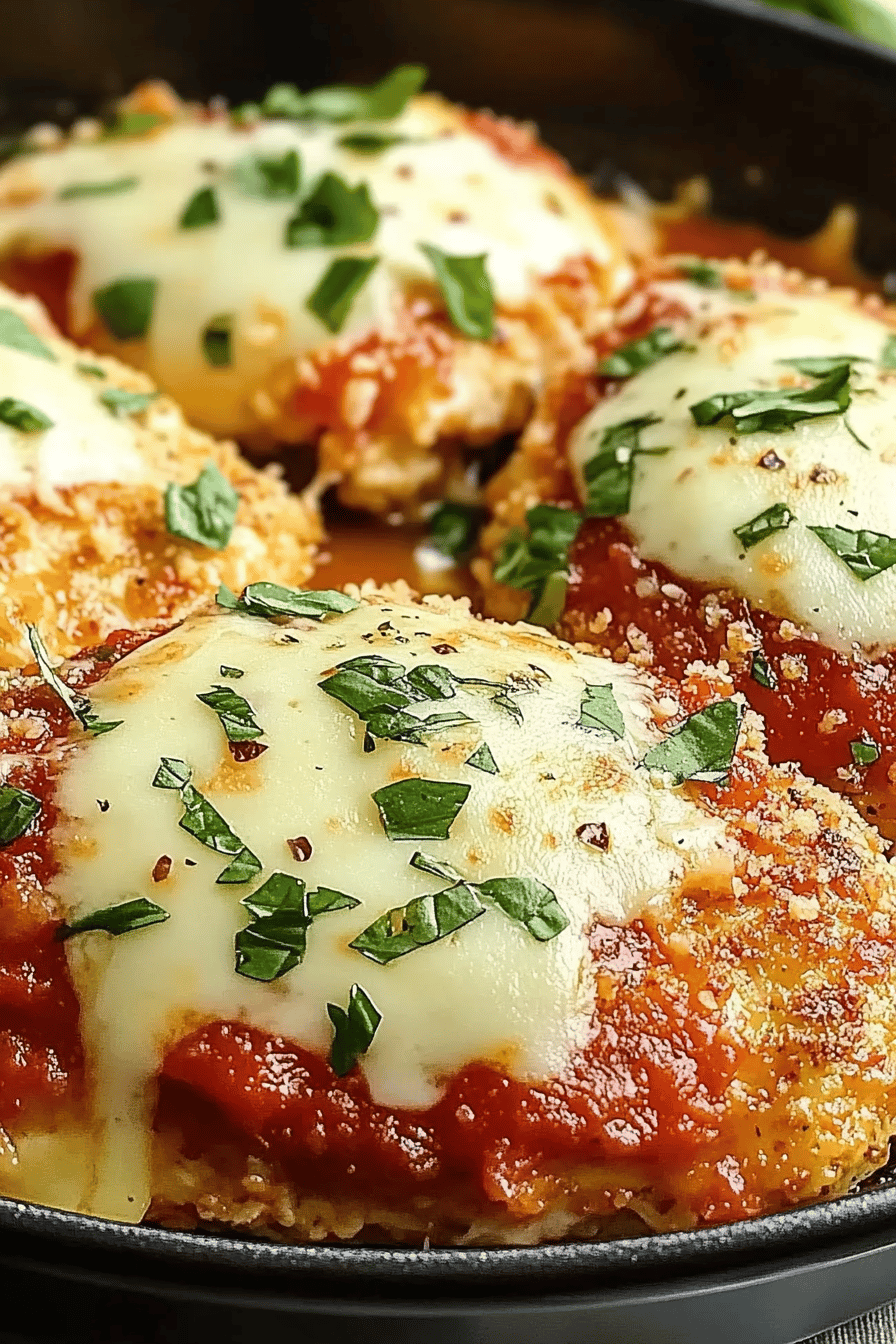
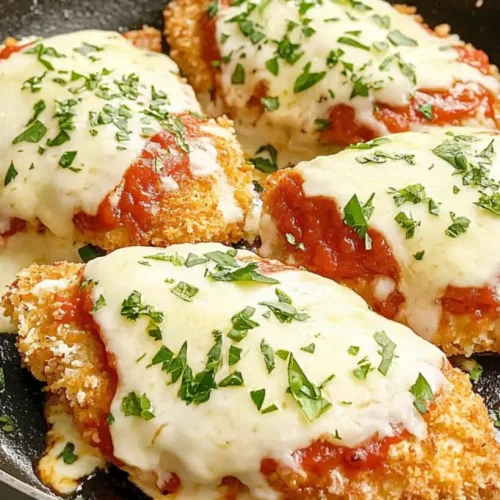
So, what exactly is this glorious dish we call Chicken Parmesan? At its heart, it’s a classic Italian-American comfort food. Think of it as a symphony of deliciousness: tender chicken cutlets, breaded and pan-fried to golden perfection, then smothered in a vibrant marinara sauce and topped with a generous blanket of melted mozzarella and Parmesan cheese. It’s often baked for a few minutes just to make sure everything is bubbly and melty, creating that irresistible cheese pull. It’s simple, elegant, and incredibly satisfying. The name itself, “Chicken Parmesan,” tells you the main players: chicken and Parmesan cheese. But when you add that tangy marinara and gooey mozzarella, it transforms into something truly magical. It’s not meant to be complicated; it’s meant to be deeply flavorful and utterly comforting.
How do I make Parmesan Chicken?
Quick Overview
Making this incredible Chicken Parmesan is a straightforward process that you can totally master. We’ll start by preparing our chicken cutlets, then move on to creating that perfect crispy coating. The chicken gets a quick pan-fry for extra crunch, followed by a warm bath in our delicious marinara sauce, and finally, a luxurious topping of cheeses before a quick bake. It’s a dance of textures and flavors that comes together beautifully, resulting in a dish that’s both rustic and elegant. Trust me, the aroma filling your kitchen during this process is just heavenly!
Ingredients
For the Main Dish:
2 boneless, skinless chicken breasts (about 1.5 lbs total)
1 cup all-purpose flour
2 large eggs, lightly beaten
1.5 cups panko breadcrumbs (these give the best crunch!)
1/2 cup grated Parmesan cheese, plus more for serving
1 teaspoon garlic powder
1/2 teaspoon dried oregano
1/4 teaspoon Black Pepper
Salt to taste
Olive oil or vegetable oil, for frying
2 cups your favorite marinara sauce (store-bought is fine, but homemade is even better!)
8 ounces fresh mozzarella cheese, thinly sliced or shredded
Fresh basil leaves, for garnish (optional, but highly recommended!)
Cooked pasta, for serving (spaghetti or linguine are classics)
Quality Tips: For the chicken, aim for breasts that are relatively uniform in thickness. If they’re super thick, you can pound them gently to about 1/2-inch thickness for even cooking. For the breadcrumbs, panko is my go-to because it creates a superior crunch. If you can’t find it, regular breadcrumbs work, but you might not get quite the same crispiness. And for the marinara, use one you genuinely love the taste of, as it’s a star player here. Homemade marinara is fantastic if you have the time – just a simple sauce with good tomatoes, garlic, and herbs makes a world of difference!
Step-by-Step Instructions
Step 1: Preheat & Prep Pan
First things first, let’s get our oven preheated to 400°F (200°C). This ensures it’s nice and hot when our Chicken Parmesan is ready for its cheesy finale. Now, grab a large oven-safe skillet or a baking dish. If you’re using a skillet, you’ll want one that’s about 10-12 inches wide. If you’re using a baking dish, a 9×13 inch size is perfect. Lightly grease your chosen vessel with a little olive oil or cooking spray – just enough to prevent sticking. This step is crucial for a clean release and easy serving later on!
Step 2: Mix Dry Ingredients
In a shallow dish, like a pie plate or a baking dish, whisk together the panko breadcrumbs, 1/2 cup of grated Parmesan cheese, garlic powder, dried oregano, black pepper, and a good pinch of salt. Give it all a good stir with a fork or whisk until everything is evenly combined. You want those spices to be distributed throughout the breadcrumbs so every bite is flavorful. This dry mixture is what’s going to give our chicken that irresistible golden crust.
Step 3: Mix Wet Ingredients
In a separate shallow dish, crack your two large eggs and beat them lightly with a fork. You just want to break up the yolks and whites and combine them. Some folks like to add a splash of milk or water here, but I find just the eggs work perfectly to create a sticky coating for the breadcrumbs to adhere to. Make sure you have enough egg wash to thoroughly coat each piece of chicken.
Step 4: Prepare the Chicken & Breading Station
Now, let’s prepare our chicken. If your chicken breasts are very thick, you can slice them horizontally to create thinner cutlets, or place them between two pieces of plastic wrap and gently pound them with a meat mallet or the bottom of a heavy pan until they are about 1/2 inch thick. This ensures they cook evenly and quickly. Pat the chicken cutlets dry with paper towels – this is a little trick that helps the breading stick better. Now, set up your breading station: first the flour (seasoned with a little salt and pepper), then the beaten eggs, and finally, the breadcrumb mixture. Dredge each chicken cutlet first in the seasoned flour, shaking off any excess. Then, dip it into the egg wash, letting any excess drip off. Finally, press the chicken firmly into the breadcrumb mixture, ensuring it’s completely coated on all sides. Repeat with all the chicken cutlets. This whole process might seem a bit messy, but it’s so worth it for that amazing crispy exterior!
Step 5: Prepare Filling (Sauce & Cheese)
While you’re breading the chicken, go ahead and get your marinara sauce ready. If you’re using store-bought, open the jar. If you’re using homemade, make sure it’s warm. Now, arrange your mozzarella cheese. If you’re using fresh mozzarella, slice it thinly. If you’re using shredded, have it ready. This is the cheesy crown jewel that makes Chicken Parmesan so beloved.
Step 6: Pan-Fry the Chicken
Heat about 1/4 inch of olive oil or vegetable oil in a large skillet over medium-high heat. You know the oil is hot enough when a few breadcrumbs dropped in sizzle immediately. Carefully add the breaded chicken cutlets to the hot oil, making sure not to overcrowd the pan (cook in batches if necessary). Fry for about 2-3 minutes per side, until golden brown and crispy. You’re not cooking them all the way through at this stage, just getting that beautiful crust. Use tongs to remove the chicken from the skillet and place them on a wire rack set over a baking sheet or on a plate lined with paper towels to drain any excess oil. This ensures they stay nice and crispy.
Step 7: Assemble and Bake
Now for the magic! Pour about half of your marinara sauce into the bottom of your prepared oven-safe skillet or baking dish and spread it evenly. Arrange the golden-brown chicken cutlets on top of the sauce. Spoon the remaining marinara sauce over the chicken, making sure to cover each piece generously. Finally, top each chicken cutlet with slices or shreds of mozzarella cheese and a sprinkle of extra Parmesan. Pop the skillet or dish into your preheated oven and bake for about 15-20 minutes, or until the cheese is melted, bubbly, and lightly golden, and the chicken is cooked through (internal temperature should reach 165°F or 74°C). The smell that will fill your kitchen right now is absolutely divine!
Step 8: Cool & Rest (Briefly!)
Once it’s out of the oven, let the Chicken Parmesan rest for about 5-10 minutes before serving. This allows the cheese to set slightly and the juices in the chicken to redistribute, making it more tender and flavorful. It’s also a good time to quickly chop some fresh basil if you’re using it for garnish. Trust me, the temptation to dive right in will be strong, but this little rest makes a difference!
Step 9: Slice & Serve
This is the moment we’ve all been waiting for! Carefully slice the chicken if you used larger breasts, or just serve the cutlets whole. Plate it up beautifully over a bed of your favorite cooked pasta. Garnish with fresh basil leaves and an extra sprinkle of Parmesan cheese if you like. Serve immediately and watch the smiles appear!
What to Serve It With
Oh, the possibilities are endless when it comes to serving this glorious Chicken Parmesan! For a classic, comforting **dinner**, there’s nothing better than a generous pile of perfectly cooked spaghetti or linguine tossed with a little olive oil and garlic, or simply plain to let the Chicken Parm shine. We often have a simple green salad with a light vinaigrette on the side to cut through the richness. If you’re feeling a bit more adventurous, consider serving it with some Roasted vegetables like broccoli or asparagus – they add a lovely freshness and a bit of color. For a more casual **meal**, imagine tucking a piece of this Chicken Parmesan into a crusty Italian roll with a little extra sauce and cheese. It makes for the most incredible, messy, and delicious sandwich you’ll ever have! My kids absolutely adore these as “Chicken Parm Subs.”
Top Tips for Perfecting Your Chicken Parmesan
I’ve made this Chicken Parmesan more times than I can count, and over the years, I’ve picked up a few tricks that I think really elevate it. First, when you’re preparing the chicken, don’t skip patting it dry with paper towels after you pound it. It seems like a small thing, but it really helps the breading adhere better and get that super crispy crust. Speaking of the crust, use panko breadcrumbs if you can! They are lighter and crispier than regular breadcrumbs, and they make a world of difference. I also like to mix a little grated Parmesan cheese right into my panko mixture for extra flavor. When you’re pan-frying, make sure your oil is hot enough before adding the chicken. If the oil isn’t hot, the breading will absorb too much oil and become greasy instead of crispy. Don’t overcrowd the pan, either; this lowers the oil temperature and leads to soggy chicken. Cook in batches if you need to! For the sauce, I’m a big believer in using a marinara sauce that you truly enjoy. Whether it’s your favorite store-bought brand or a cherished homemade recipe, a good sauce is key. Don’t be shy with the cheese, either! A good layer of mozzarella and Parmesan is non-negotiable for that perfect cheesy pull. And a final little tip: if you find your chicken is cooking too quickly on the outside before the inside is done during baking, you can always finish it off under the broiler for a minute or two, watching it *very* closely, to get that golden bubbly cheese.
Storing and Reheating Tips
This Chicken Parmesan is so good, you might actually have leftovers (though it rarely happens in my house!). If you do, don’t worry! It stores and reheats beautifully. For refrigerator storage, let the cooked Chicken Parmesan cool completely, then transfer it to an airtight container. It should stay good in the fridge for about 3-4 days. The crispy coating might soften a bit, but the flavor will still be fantastic. When you’re ready to reheat, the best method for preserving some crispiness is in a toaster oven or a regular oven. Place the Chicken Parmesan on a baking sheet and reheat at around 350°F (175°C) for about 10-15 minutes, or until heated through and the cheese is melty again. You can also reheat it in the microwave, but the breading will definitely be softer – it’s still delicious, just less crispy. I’ve even tried freezing leftovers! Let it cool completely, then wrap individual portions tightly in plastic wrap and then in foil, or place them in freezer-safe containers. It can be stored in the freezer for up to 2-3 months. Thaw overnight in the refrigerator before reheating as directed above. For best results, I usually don’t add the marinara sauce or cheese until reheating if I’m freezing it, but it’s usually fine to leave it all on.
Frequently Asked Questions
Final Thoughts
So there you have it – my absolute go-to recipe for Chicken Parmesan! It’s a dish that has brought so much joy to my table, and I truly hope it does the same for yours. It’s proof that you don’t need complicated steps or fancy ingredients to create something truly spectacular and comforting. The blend of crispy chicken, savory marinara, and gooey cheese is just pure magic. It’s a meal that’s perfect for a cozy family dinner, a celebration, or even just when you need a little bit of deliciousness to brighten your day. If you love this recipe, you might also enjoy my [Link to Another Recipe, e.g., Baked Ziti or Lasagna] for more Italian-inspired comfort food! Don’t be a stranger – I’d absolutely love to hear how your Chicken Parmesan turns out! Feel free to leave a comment below with your thoughts, any variations you tried, or even just to say hello. Happy cooking, and happy eating!
Chicken Parmesan
Ingredients
Chicken Cutlets
- 2 pound boneless, skinless chicken breasts thinly sliced
- 1 cup all-purpose flour
- 2 large eggs beaten
- 1.5 cup Italian-style breadcrumbs
- 0.5 cup grated Parmesan cheese
- 0.5 teaspoon salt
- 0.25 teaspoon black pepper
- 0.5 cup olive oil for frying
Sauce and Topping
- 2 cup marinara sauce
- 8 ounce mozzarella cheese shredded
- 0.25 cup grated Parmesan cheese for topping
- fresh basil leaves for garnish (optional)
Instructions
Preparation Steps
- Preheat oven to 400°F (200°C).
- Set up three shallow dishes: one with flour, one with beaten eggs, and one with breadcrumbs mixed with 0.5 cup Parmesan cheese, salt, and pepper.
- Dredge each chicken cutlet first in flour, then dip in the beaten eggs, and finally coat thoroughly with the breadcrumb mixture.
- Heat olive oil in a large oven-safe skillet over medium-high heat. Fry the chicken cutlets for about 3-4 minutes per side until golden brown and cooked through.
- Remove chicken from the skillet and place in a baking dish. Spoon marinara sauce over each cutlet, then top with shredded mozzarella and the remaining 0.25 cup Parmesan cheese.
- Bake in the preheated oven for 10-15 minutes, or until the cheese is melted and bubbly and the sauce is heated through.
- Garnish with fresh basil leaves, if desired, before serving.
Notes
Featured Comments
“Impressed! Clear steps and family favorite results. Perfect for busy nights.”
“New favorite here — creamy. crowd-pleaser was spot on.”
“Super easy and turned out amazing! My family asked for seconds. Saving this one.”
“This sweet treat was absolutely loved — the hearty really stands out. Thanks!”
“Made it tonight and wow — crowd-pleaser! Will definitely make Chicken Parmesan again.”
“Packed with flavor and so simple. Exactly what I wanted from Chicken Parmesan.”


