

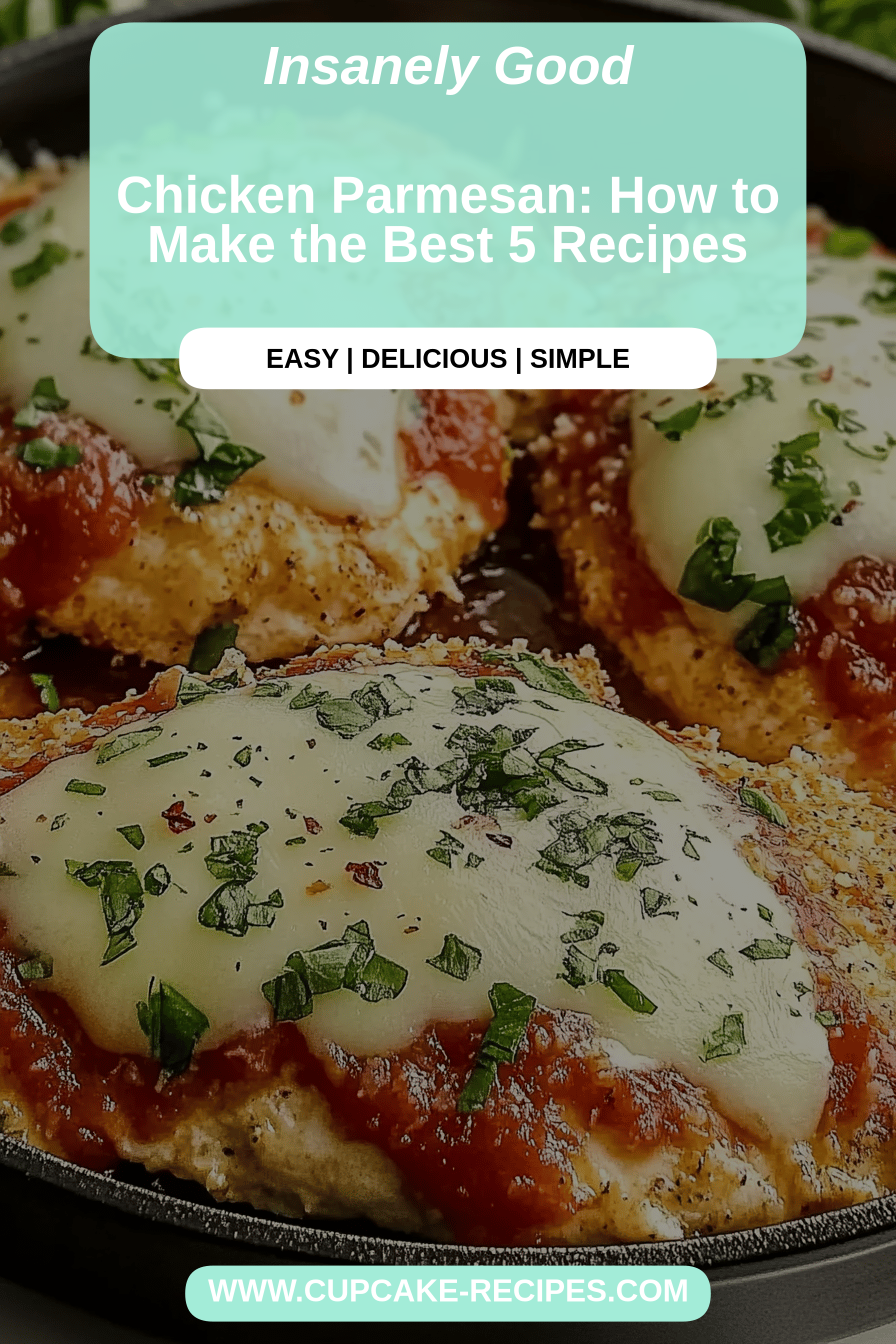
Oh, Chicken Parmesan! Just hearing those words makes my heart do a little happy dance. It’s one of those dishes that feels like a warm hug on a plate. You know, the kind of meal that transports you back to your childhood kitchen, with the aroma of garlic and tomato wafting through the air? That’s exactly what this recipe does for me. It’s not just *any* chicken parmesan, mind you. This is my tried-and-true, “company’s coming over and I need something impressive but surprisingly easy” chicken parmesan. It’s the same one my kids clamor for, the one that always disappears in record time. If you’ve ever felt intimidated by making classic chicken parmesan from scratch, or if you’ve had mediocre results in the past, trust me, you’re going to adore this version. It’s got all the comforting flavors you expect, but with a little something extra that makes it truly special.
What is chicken parmesan?
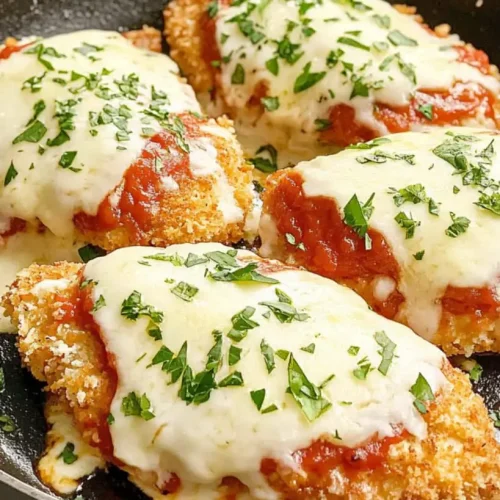
So, what exactly *is* Chicken Parmesan, or ‘parmigiana’ as it’s sometimes called? At its heart, it’s a wonderfully simple yet utterly satisfying Italian-American dish. Think of it as crispy, golden-brown chicken cutlets, generously topped with a rich, savory tomato sauce and blanketed with gooey, melted mozzarella cheese, often with a sprinkle of Parmesan for that extra salty kick. It’s usually baked until the cheese is bubbly and irresistible. The name itself, ‘parmigiana,’ refers to the region in Italy where eggplant parmesan is a beloved specialty, and this chicken version is essentially its poultry cousin. It’s the ultimate comfort food, a dish that’s both hearty and elegant, making it perfect for a weeknight family dinner or a special occasion. It’s the kind of food that just makes everyone feel good.
How do I make Parmesan Chicken?
Quick Overview
The process for making this chicken parmesan is wonderfully straightforward, and that’s a huge part of its charm. We’ll start by preparing the chicken cutlets, giving them a glorious crispy coating. Then, we’ll nestle them into a baking dish, smother them in a homemade-ish, incredibly flavorful tomato sauce, and top generously with a blend of mozzarella and Parmesan cheeses. A short bake in a hot oven does the rest, creating that bubbly, golden-brown perfection we all dream of. It’s a method that ensures a fantastic result with minimal fuss, so you can spend less time in the kitchen and more time enjoying your delicious creation.
Ingredients
For the Chicken:
We need about 1.5 pounds of boneless, skinless Chicken Breasts. I usually buy them already trimmed, but if yours have any extra fat, just trim that off. You’ll want to slice them horizontally to make thinner cutlets, or pound them to about ½-inch thickness. This helps them cook evenly and get nice and crispy. For the breading, we’ll use 1 cup of all-purpose flour, 2 large eggs, and about 2 cups of panko breadcrumbs. Panko is my secret weapon here – it gives the chicken that extra-crispy texture that’s just divine. I also like to mix in about ¼ cup of grated Parmesan cheese with the panko for added flavor, plus a teaspoon of salt and ½ teaspoon of black pepper. And of course, you’ll need about ½ cup of olive oil for frying – or a good neutral oil like canola if you prefer.
For the Sauce:
For a quick and delicious sauce, I often use a 28-ounce can of crushed tomatoes – good quality makes a difference here! You’ll also need 2-3 cloves of garlic, minced nice and fine. A tablespoon of olive oil to sauté the garlic, a pinch of Red Pepper flakes for a tiny bit of warmth (optional, but I love it!), and about ½ teaspoon of dried oregano. Salt and pepper to taste, naturally. Sometimes, if I have a fresh basil plant, I’ll throw in a few torn leaves at the end for an extra layer of freshness.
For the Topping:
This is where the magic happens! We need about 8 ounces of shredded mozzarella cheese – I prefer whole milk mozzarella for the best meltiness. And another ¼ cup of grated Parmesan cheese for that salty, sharp bite.
Step-by-Step Instructions
Step 1: Preheat & Prep Pan
First things first, let’s get that oven preheated to 400°F (200°C). While it’s heating up, grab a 9×13 inch baking dish. You can lightly grease it with a little olive oil or cooking spray, but it’s not strictly necessary since the sauce and cheese will help prevent sticking. Just have it ready to go – it makes the assembly process so much smoother.
Step 2: Mix Dry Ingredients
Now, let’s set up our breading station. In one shallow dish (like a pie plate or a wide bowl), whisk together your flour with a pinch of salt and pepper. In a second dish, whisk up your two eggs with a tablespoon of water. This little bit of water helps make the egg wash a bit thinner, which helps the breadcrumbs stick better. In a third dish, combine your panko breadcrumbs with the ¼ cup of grated Parmesan cheese, a teaspoon of salt, and ½ teaspoon of black pepper. Give it all a good mix so everything is evenly distributed. The smell of the Parmesan mixing with the panko is already making me hungry!
Step 3: Mix Wet Ingredients
This step is actually for the sauce, not the chicken breading. So, while your oven is preheating and you’re getting your breading station ready, let’s quickly whip up that sauce. Grab a medium saucepan. Add a tablespoon of olive oil and heat it over medium heat. Toss in your minced garlic and sauté for about 30 seconds until fragrant – be careful not to burn it! Add the crushed tomatoes, oregano, red pepper flakes (if using), salt, and pepper. Give it a good stir, bring it to a gentle simmer, then reduce the heat to low and let it cook for about 10-15 minutes, stirring occasionally. This allows the flavors to meld beautifully. If you’re adding fresh basil, stir it in right at the end.
Step 4: Combine
This step is actually about preparing the chicken before breading. Take your chicken cutlets, pat them dry with paper towels. This is a really important step to help the breading stick! Dredge each chicken cutlet first in the seasoned flour, shaking off any excess. Then dip it into the egg wash, letting any excess drip off. Finally, press it firmly into the panko and Parmesan mixture, making sure it’s completely coated on all sides. I like to press down a little to really get those crumbs to adhere. Place the breaded cutlets on a clean plate or baking sheet. You can do this in batches, and if you have time, letting them rest in the fridge for about 15-20 minutes can help the breading stay on even better during cooking.
Step 5: Prepare Filling
In this recipe, the “filling” is essentially the delicious sauce and cheese that we’ll be layering over the chicken. So, our sauce is already simmering away beautifully, and our cheeses are shredded and ready to go. There’s no separate preparation needed for the filling itself, as we’ll be assembling it directly in the baking dish.
Step 6: Layer & Swirl
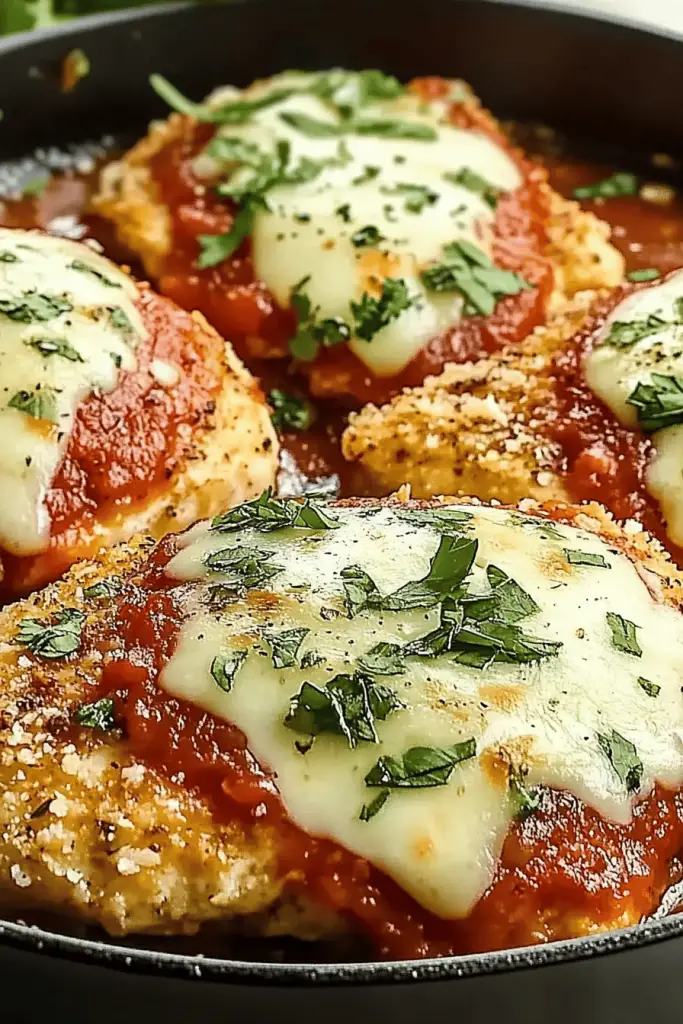
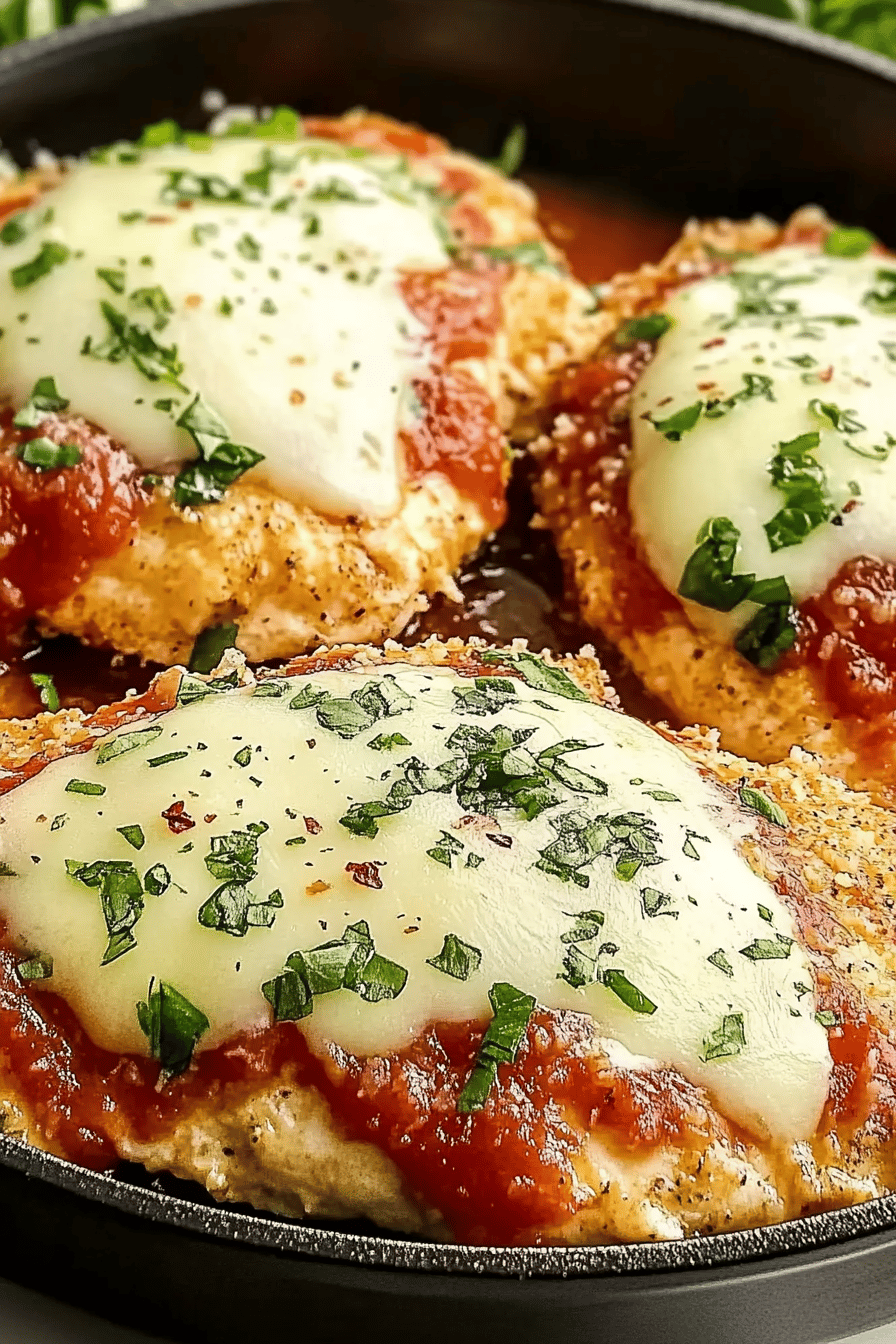
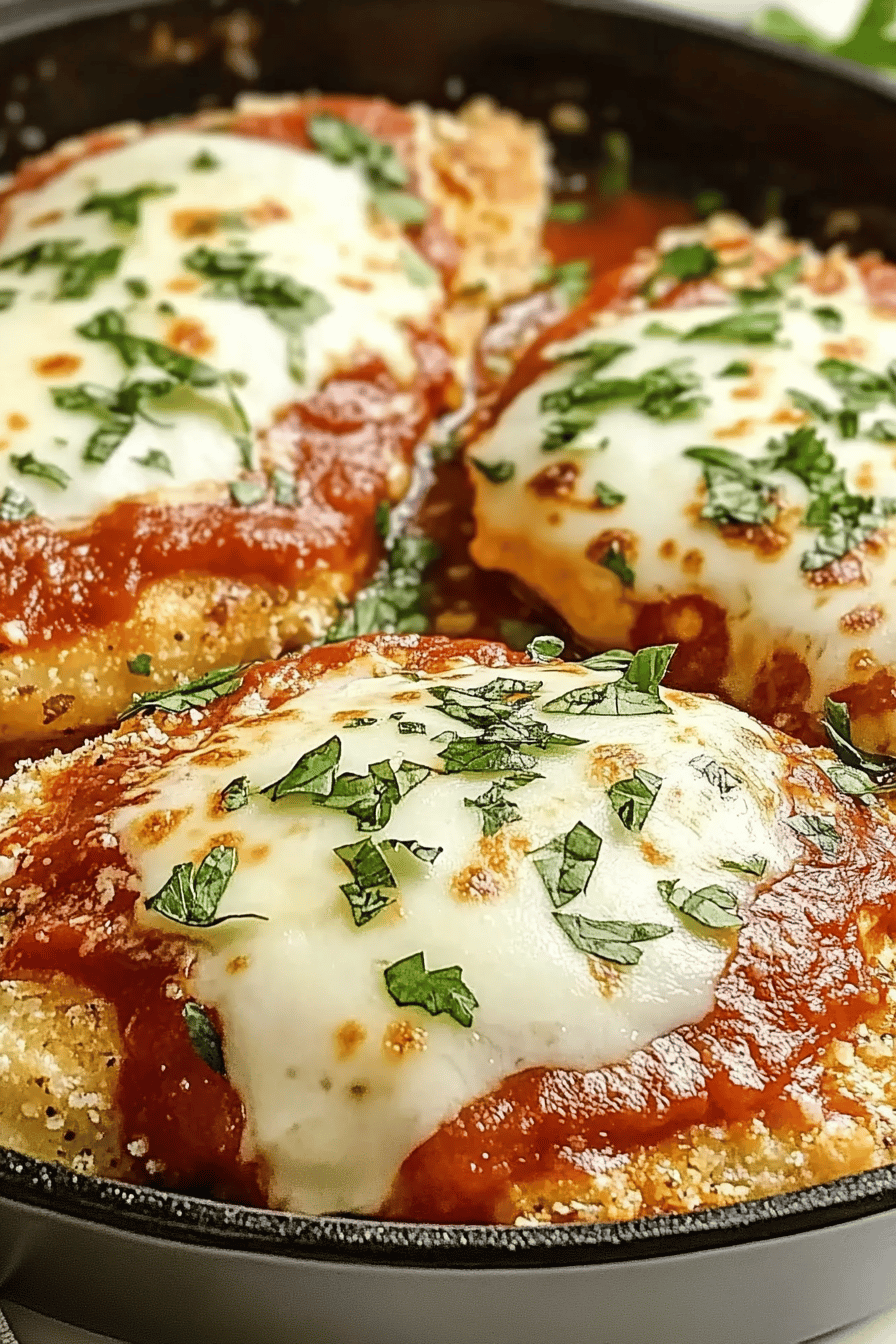
Now for the fun part: assembly! Pour about half of your tomato sauce into the bottom of your prepared baking dish, spreading it out evenly. Arrange your breaded chicken cutlets on top of the sauce, making sure they’re in a single layer. Don’t overcrowd the dish; if necessary, use two smaller dishes. Spoon the remaining sauce over the chicken cutlets, making sure to cover them well. Finally, sprinkle the shredded mozzarella cheese evenly over the top, followed by the grated Parmesan cheese. You want to create a beautiful, cheesy blanket that will bubble and brown in the oven. I love seeing the cheese just start to melt even before it goes into the oven!
Step 7: Bake
Pop that glorious dish into your preheated 400°F (200°C) oven. Bake for about 20-25 minutes, or until the chicken is cooked through and the cheese is melted, bubbly, and starting to turn a beautiful golden brown. The exact time will depend on the thickness of your chicken cutlets. You can check for doneness by gently piercing the thickest part of a cutlet with a knife – the juices should run clear. I usually keep an eye on it towards the end to make sure the cheese doesn’t get too dark, unless I’m going for that extra crispy edge!
Step 8: Cool & Glaze
Once it’s out of the oven, let the chicken parmesan rest for about 5-10 minutes before slicing and serving. This allows the juices to redistribute in the chicken, making it more tender and flavorful. The cheese will also set up a little, making it easier to cut. There’s no separate “glaze” in this recipe, as the tomato sauce acts as the perfect flavorful coating. The residual heat will continue to work its magic on the cheese.
Step 9: Slice & Serve
Using a sharp knife or a spatula, carefully cut the chicken parmesan into individual portions. Serve immediately while it’s hot and bubbly. The aroma alone will have everyone at the table eagerly anticipating their plate. It’s truly a showstopper, and the slice will reveal that perfectly cooked chicken beneath all that delicious cheese and sauce.
What to Serve It With
This chicken parmesan is so versatile, it’s almost a meal in itself! But if you’re looking to round out the plate, here are some of my favorite pairings. For a classic, comforting Italian dinner, you absolutely can’t go wrong with a side of spaghetti or linguine tossed with a little garlic and olive oil, or even just a simple marinara. My kids absolutely love it with pasta, and it’s a guaranteed hit every single time. If you’re going for something a bit lighter, a big, fresh green salad with a zesty vinaigrette is a wonderful contrast to the richness of the chicken. Roasted vegetables like broccoli, asparagus, or zucchini also make a fantastic accompaniment. For a more casual approach, I’ve even piled leftover chicken parmesan onto toasted ciabatta rolls for amazing sandwiches. And for a true taste of comfort, a side of creamy mashed potatoes or some garlic bread for soaking up all that delicious sauce is simply divine. It’s all about creating a balanced meal that lets this star dish shine!
Top Tips for Perfecting Your Chicken Parmesan
Over the years, I’ve learned a few little tricks that make this chicken parmesan recipe even better. First off, when you’re preparing the chicken, make sure those cutlets are evenly pounded or sliced. If one piece is super thick and another is paper-thin, they won’t cook at the same rate, and you’ll end up with either undercooked or overcooked chicken. A meat mallet or even the bottom of a heavy pan works wonders for pounding. For the breading, don’t skip patting the chicken dry with paper towels before you start; it’s crucial for getting that crispy coating to stick. And speaking of the breading, I highly recommend using panko breadcrumbs. They are lighter and airier than regular breadcrumbs, giving you a much crispier finish that holds up beautifully. If you find your breading isn’t sticking well, make sure your egg wash isn’t too thick or watery – aim for a consistency that coats the chicken evenly. For the sauce, don’t be afraid to taste and adjust the seasonings. Everyone’s palate is different! A little extra salt, pepper, or even a pinch of sugar can make a big difference. When it comes to baking, keep an eye on your oven. If your broiler is particularly strong, you might want to shield the cheese with foil for the last few minutes to prevent it from burning. And for the ultimate cheesiness, I always use whole milk mozzarella; it melts better and has a richer flavor than part-skim. Lastly, don’t rush the resting period after baking! That 5-10 minutes makes a world of difference in the texture and juiciness of the chicken.
Storing and Reheating Tips
This chicken parmesan is fantastic fresh, but leftovers are also pretty darn good, which is a lifesaver! If you happen to have any (and that’s a big ‘if’ in my house!), store it in an airtight container in the refrigerator for up to 3-4 days. Make sure it has cooled down completely before putting the lid on to prevent any condensation. When you’re ready to reheat, I find that the oven is your best friend. Pop individual portions back into a preheated oven at around 350°F (175°C) for about 10-15 minutes, or until heated through and the cheese is melty again. This method helps maintain some of that crispiness. You can also reheat it gently on the stovetop over medium-low heat in a skillet with a lid, adding a splash of water or broth to create some steam to help it heat evenly. If you’re in a real pinch, the microwave works, but the chicken might be a little softer. For long-term storage, you can absolutely freeze chicken parmesan! Let it cool completely, then wrap individual portions tightly in plastic wrap, followed by a layer of aluminum foil or placing them in a freezer-safe bag. It should keep well in the freezer for about 2-3 months. To reheat from frozen, you can either thaw it in the refrigerator overnight and then reheat as directed above, or bake it directly from frozen at a slightly lower temperature (around 325°F or 160°C) for a longer period, until thoroughly heated.
Frequently Asked Questions
Final Thoughts
So there you have it – my tried-and-true recipe for chicken parmesan that I just absolutely adore. It’s a dish that brings smiles to faces, fills the house with incredible aromas, and always hits the spot. It proves that you don’t need complicated steps or fancy ingredients to create something truly special and delicious. It’s that perfect balance of crispy, savory, cheesy, and comforting that makes it a winner every single time. I really hope you give this chicken parmesan a try; I have a feeling it might just become a new favorite in your home too! If you do make it, I’d be absolutely thrilled to hear all about it in the comments below. Tell me what you think, any tweaks you made, or how your family enjoyed it. Happy cooking, everyone!
Classic Chicken Parmesan
Ingredients
Chicken & Breading
- 4 boneless, skinless chicken breasts Chicken Pounded to 0.5 inch thickness
- 1 cup All-purpose flour
- 2 large Eggs beaten
- 1.5 cup Breadcrumbs Panko or Italian seasoned
- 0.5 cup Grated Parmesan cheese
- 0.5 teaspoon Salt
- 0.25 teaspoon Black pepper
Sauce & Toppings
- 24 ounces Marinara sauce store-bought or homemade
- 8 ounces Mozzarella cheese shredded
- 0.25 cup Grated Parmesan cheese for topping
- 2 tablespoons Olive oil for frying
- Fresh basil leaves optional, for garnish
Instructions
Preparation Steps
- Preheat your oven to 400°F (200°C).
- Set up three shallow dishes: one with flour, one with beaten eggs, and one with breadcrumbs mixed with 0.5 cup Parmesan cheese, salt, and pepper.
- Dredge each chicken breast in the flour, then dip in the egg, and finally coat with the breadcrumb mixture, pressing gently to adhere.
- Heat olive oil in a large oven-safe skillet over medium-high heat.
- Carefully place the breaded chicken cutlets in the hot skillet and cook for 2-3 minutes per side until golden brown.
- Remove the chicken from the skillet and set aside. If your skillet is not oven-safe, transfer the chicken to a baking dish.
- Pour the marinara sauce into the skillet (or baking dish) around the chicken.
- Top each chicken cutlet with marinara sauce and shredded mozzarella cheese. Sprinkle with the remaining 0.25 cup Parmesan cheese.
- Bake in the preheated oven for 15-20 minutes, or until the chicken is cooked through and the cheese is melted and bubbly.
- Garnish with fresh basil leaves, if desired, before serving.
Notes
Featured Comments
“Impressed! Clear steps and restaurant-level results. Perfect for busy nights.”
“New favorite here — absolutely loved. crowd-pleaser was spot on.”
“Super easy and turned out amazing! My family asked for seconds. Saving this one.”
“This sweet treat was absolutely loved — the silky really stands out. Thanks!”
“Made it tonight and wow — family favorite! Will definitely make Chicken Parmesan recipes again.”
“Packed with flavor and so simple. Exactly what I wanted from Chicken Parmesan recipes.”


