Oh, chocolate chip cookies. Just saying the words feels like a warm hug, doesn’t it? For me, it’s instantly transportive. I can practically smell the sweet, buttery aroma wafting from my grandma’s kitchen, a scent that always meant comfort, celebration, and pure, unadulterated happiness. This recipe, my friends, is that feeling captured in a cookie. Forget those flat, sad discs that crumble at the first touch or those rock-hard ones that could break a tooth. We’re talking about the perfect balance: slightly crisp edges, a soft and chewy center, and generous pockets of melty, gooey chocolate that make you want to close your eyes and savor every single bite. I’ve tried countless Chocolate Chip Cookie recipes over the years – from super simple ones that claim to be “foolproof” to more involved techniques that require chilling the dough for days. But this one? This is the one that won. It’s the one I turn to when I need a little pick-me-up, the one that disappears faster than you can say “more, please” at family gatherings, and the one that even my picky eaters rave about. It’s truly the best chocolate chip cookies I’ve ever made, and I’m so excited to share it with you.
What are chocolate chip cookies?
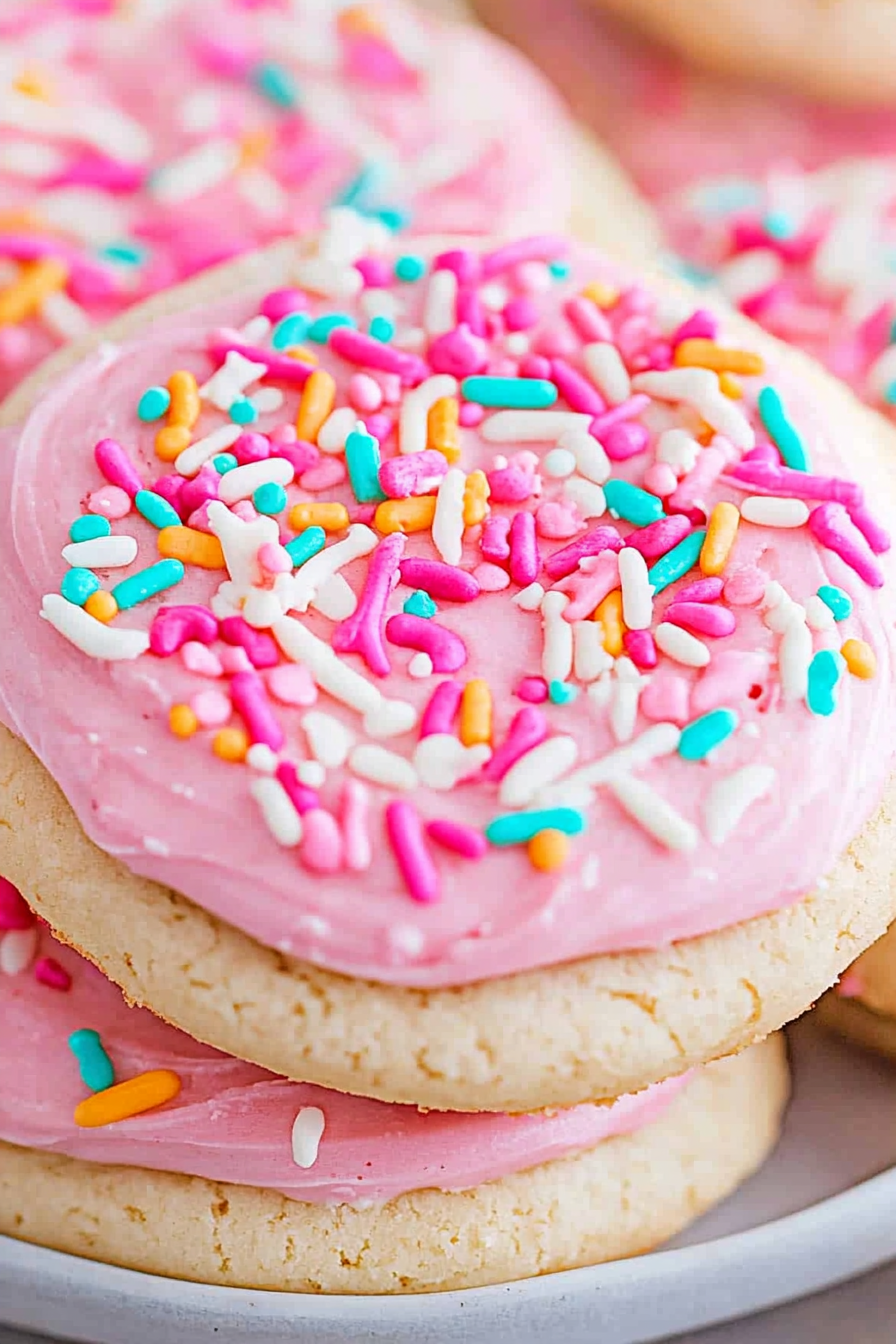
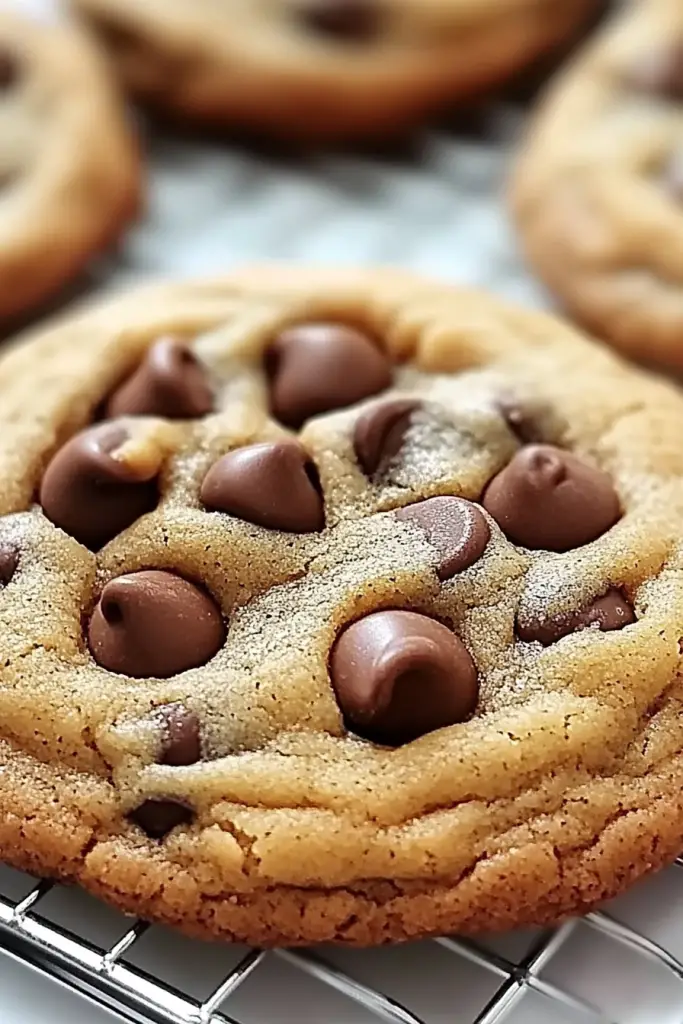
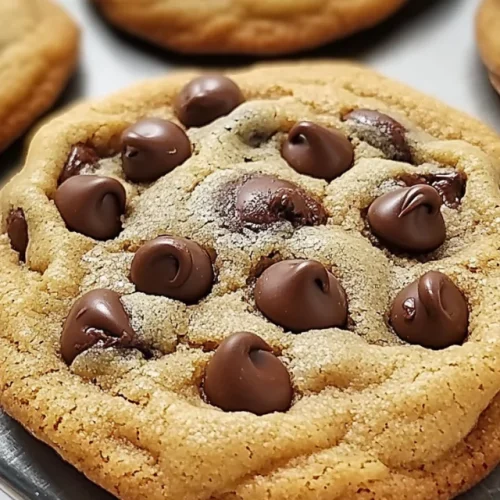
So, what makes these Chocolate Chip Cookies so special? Think of them as the gold standard. They’re your classic, beloved chocolate chip cookies, elevated. It’s not about reinventing the wheel here; it’s about perfecting it. The name itself, “The Ultimate Chocolate Chip Cookies,” isn’t just for show – it’s what they deliver. They’re the kind of cookies that make you feel like you’ve achieved something magical in the kitchen, even if you’ve only been baking for a short while. They’re essentially a warm, comforting hug in edible form, designed to bring smiles and happy sighs. They embody everything you’d want in a cookie: a delightful chewiness, a rich chocolate flavor, and that irresistible aroma that fills your home. It’s that perfect bite that has a slight crispness on the edge, giving way to a wonderfully soft and chewy center, studded with pools of glorious, melted chocolate. They’re not too thin, not too thick, just… right.
How do you make chocolate chip cookies?
Quick Overview
This recipe is all about simplicity and incredible results. We’ll cream butter and sugars until light and fluffy, then add eggs and vanilla. Dry ingredients get whisked together separately before being combined gently with the wet. Then, we stir in those glorious chocolate chips, scoop them onto a baking sheet, and bake until golden brown. The key here is not to overmix and to bake them just until the edges are set but the centers still look a little soft. They’ll continue to bake a bit on the hot baking sheet, ensuring that perfect chewy texture. It’s straightforward, fuss-free, and delivers spectacular results every single time.
Ingredients
For the Cookie Dough: For the Cookie Dough: For the Cookie Dough: For the Cookie Dough: For the Cookie Dough: For
Butter: You’ll want unsalted butter, softened but not melted. This is key for proper creaming. About 1 cup (2 sticks) is perfect. Make sure it’s been sitting out for about an hour before you start.
Granulated Sugar: About 3/4 cup. This helps with crispness and structure.
Packed Light Brown Sugar: About 3/4 cup. This is crucial for chewiness and that lovely caramel undertone. Make sure it’s packed firmly.
Eggs: 2 large eggs. Room temperature is best! They emulsify better with the butter and sugar.
Vanilla Extract: 1 to 2 teaspoons. Don’t skimp here! Good quality vanilla makes a world of difference. I usually lean towards 2 teaspoons for that extra warmth.
All-Purpose Flour: 2 1/4 cups. Spooned and leveled, not scooped. Scooping can pack too much flour in, leading to dry cookies.
Baking Soda: 1 teaspoon. This is what gives them their lift and helps them spread.
Salt: 1/2 teaspoon. Essential for balancing the sweetness and enhancing the chocolate flavor. Use fine sea salt or kosher salt.
Chocolate Chips: 2 cups. I love a mix of semi-sweet and milk chocolate chips for complexity, but use your favorite! Chocolate chunks are also amazing if you have them. You can even add a sprinkle of flaky sea salt on top before baking for an extra touch.
Step-by-Step Instructions
Step 1: Preheat & Prep Pan
First things first, get that oven preheating to 375°F (190°C). While it’s warming up, line a couple of baking sheets with parchment paper. This is a game-changer! It prevents sticking, makes for easy cleanup, and helps the cookies bake more evenly. Don’t skip the parchment!
Step 2: Mix Dry Ingredients
In a medium bowl, whisk together your flour, baking soda, and salt. Whisking them thoroughly ensures the leavening agent and salt are evenly distributed throughout the flour. This is a small step but it really contributes to consistent cookies. You want to see no clumps of baking soda.
Step 3: Mix Wet Ingredients
In a large bowl, cream together the softened butter, granulated sugar, and packed brown sugar using an electric mixer (or a sturdy whisk and some arm power!) until it’s light and fluffy. This usually takes about 2-3 minutes. Then, beat in the eggs one at a time, making sure each is incorporated before adding the next. Stir in the vanilla extract.
Step 4: Combine
Gradually add the dry ingredients to the wet ingredients, mixing on low speed (or stirring with a spatula) until *just* combined. Be careful not to overmix here! Overmixing develops the gluten too much, which can lead to tough cookies. Stop mixing as soon as you no longer see streaks of dry flour. A few little streaks are actually okay.
Step 5: Prepare Filling
(This step is for recipes that have a filling, not for standard chocolate chip cookies. Skip if not applicable.)
Step 6: Layer & Swirl
(This step is for recipes that have a filling or swirl, not for standard chocolate chip cookies. Skip if not applicable.)
Step 7: Bake
Drop rounded tablespoons of dough onto the prepared baking sheets, spacing them about 2 inches apart. I like to use a cookie scoop for uniformity. Bake for 9-11 minutes, or until the edges are golden brown and the centers still look slightly underbaked. They’ll continue to set up as they cool.
Step 8: Cool & Glaze
Let the cookies cool on the baking sheets for about 5 minutes before transferring them to a wire rack to cool completely. If you’re adding a glaze or topping, this is when you’d do it, but honestly, these cookies are perfect just as they are!
Step 9: Slice & Serve
Once completely cooled (if you can wait that long!), these chocolate chip cookies are ready to be devoured. They’re best enjoyed at room temperature. Serve them with a cold glass of milk for the ultimate classic experience.
What to Serve It With
While these chocolate chip cookies are absolutely divine on their own – truly, a culinary masterpiece in their own right – they also pair wonderfully with a variety of beverages and occasions. For a cozy morning treat, nothing beats a warm cookie alongside a steaming mug of freshly brewed coffee. The rich, robust flavor of the coffee cuts through the sweetness perfectly. If you’re hosting a brunch, I love serving these alongside some fresh fruit salad or a light yogurt parfait. They add a touch of indulgence without being too heavy. For dessert, they’re the star of the show, of course! Serve them warm with a scoop of vanilla bean ice cream for an instant ice cream sandwich, or perhaps with a drizzle of caramel sauce. They are also incredible alongside a hot chocolate on a chilly evening. My kids absolutely love them as a simple snack after school with a glass of milk. We also have a tradition of making them during holiday movie nights, and they’re always the first treat to disappear. They really are the perfect accompaniment to any moment you want to make a little sweeter and more special.
Top Tips for Perfecting Your Chocolate Chip Cookies
Over the years, I’ve picked up a few tricks that I think make these chocolate chip cookies truly shine. The first is about the butter: make sure it’s softened, not melted. If it’s too soft, your cookies will spread too much and become flat. If it’s too cold, they won’t cream properly, and your texture will be off. I always, always use parchment paper on my baking sheets. It’s a lifesaver for clean-up and ensures even baking. For the flour, spoon it into your measuring cup and level it off with a straight edge. Don’t scoop directly from the bag, as this compacts the flour and can lead to dry, dense cookies. I’ve also learned that chilling the dough can make a difference if you have the time. Even just 30 minutes in the fridge firms up the dough, prevents excessive spreading, and intensifies the flavors. If you’re feeling fancy, try using a mix of chocolate chips and chunks – the different sizes melt at different rates, creating pockets of gooeyness. When it comes to baking, don’t overbake them! Pull them out when the edges are set but the centers still look a little soft. They’ll continue to bake on the hot cookie sheet. And for that extra flavor boost? A little sprinkle of flaky sea salt on top just before they go into the oven takes them to a whole new level. Trust me on this one!
Storing and Reheating Tips
One of the best things about these chocolate chip cookies is how well they store, meaning you can have deliciousness on demand! At room temperature, they’ll stay wonderfully fresh in an airtight container for about 3-4 days. Just make sure they’ve cooled completely before sealing them up. If you live in a warm climate or just want them to last a bit longer, you can store them in the refrigerator for up to a week. They might become a little firmer in the fridge, but they’ll soften up at room temperature. For longer storage, freezing is your best friend. You can freeze the baked cookies in a single layer on a baking sheet until firm, then transfer them to a freezer-safe bag or container for up to 2-3 months. They thaw beautifully at room temperature. If you want that fresh-baked experience, you can pop a frozen cookie in a warm oven (around 300°F or 150°C) for a few minutes until it’s warmed through and the chocolate is gooey again. For individual cookies, I usually just let them sit out for about 15-20 minutes to come back to room temperature. If you’ve glazed them, try to glaze them just before serving if you’re storing them at room temperature for more than a day, as the glaze can get sticky.
Frequently Asked Questions
Final Thoughts
So there you have it – my absolute favorite recipe for chocolate chip cookies. I truly believe these are the best you’ll ever make. They’re simple enough for any weeknight baking urge, yet special enough to be a showstopper at any gathering. The magic is in the balance of chewy and crisp, the rich chocolate, and that undeniable homemade goodness that just warms the soul. If you’re a fan of classic chocolate chip cookies, I promise you won’t be disappointed. Give them a try, and I can’t wait to hear how they turn out for you! Let me know in the comments below what you think, and if you have any special variations or tips you’d like to share. Happy baking!
Classic Chocolate Chip Cookies
Ingredients
Main Ingredients
- 2.25 cups all-purpose flour
- 1 teaspoon baking soda
- 1 teaspoon salt
- 1 cup unsalted butter, softened
- 0.75 cup granulated sugar
- 0.75 cup packed brown sugar
- 1 teaspoon vanilla extract
- 3 large eggs
- 2 cups semi-sweet chocolate chips
Instructions
Preparation Steps
- Preheat oven to 375°F (190°C). Line baking sheets with parchment paper.
- In a small bowl, whisk together flour, baking soda, and salt. Set aside.
- In a large bowl, cream together softened butter, granulated sugar, and brown sugar until light and fluffy.
- Beat in the vanilla extract and then the eggs, one at a time, until well combined.
- Gradually add the dry ingredients to the wet ingredients, mixing until just combined. Do not overmix.
- Stir in the chocolate chips.
- Drop rounded tablespoons of dough onto the prepared baking sheets, about 2 inches apart.
- Bake for 9 to 11 minutes, or until the edges are golden brown and the centers are still slightly soft.
- Let the cookies cool on the baking sheets for a few minutes before transferring them to a wire rack to cool completely.
Notes
Featured Comments
“Impressed! Clear steps and absolutely loved results. Perfect for busy nights.”
“New favorite here — creamy. crowd-pleaser was spot on.”
“Super easy and turned out amazing! My family asked for seconds. Saving this one.”
“This sweet treat was absolutely loved — the hearty really stands out. Thanks!”
“Made it tonight and wow — so flavorful! Will definitely make Chocolate chip cookies again.”
“Packed with flavor and so simple. Exactly what I wanted from Chocolate chip cookies.”