

There are moments, aren’t there? Those late-night cravings that hit you like a freight train, or the sudden urge to bake something decadent when you *really* don’t have the time (or the energy) to pull out all the stops. For me, those moments used to be a source of mild panic. I’d stare longingly at my pantry, dreaming of a rich, gooey chocolate cake, but the thought of mixing, greasing pans, and waiting for a whole cake to bake was just too much. That’s precisely when I stumbled upon, and then perfected, this absolute gem: the chocolate mug cake. It’s not just a quick fix; it’s a genuine, soul-satisfying dessert that tastes like it took hours. Seriously, it’s like magic in a mug, and it’s become my go-to when I need a little chocolate therapy, stat! Forget those dusty box mixes; this is the real deal, a hug in edible form, and it’s about to become your new best friend, too.

What is a chocolate mug cake?
So, what exactly is this magical chocolate mug cake? Think of it as your personal, single-serving chocolate cake, made right in your favorite coffee mug in the microwave. That’s it! The name itself pretty much sums it up, but the reality is so much more delicious. It’s essentially a simplified cake batter, scaled down to fit into a mug, that cooks in a minute or two. The beauty lies in its miniature size and lightning-fast preparation. It’s not trying to be a fancy, tiered confection; it’s aiming for pure, unadulterated chocolate bliss, delivered almost instantly. It’s the perfect solution for when you want that homemade cake experience without the commitment of baking a whole one. It’s comfort food in its most concentrated, convenient form, and honestly, what’s not to love about that?
How do I make a chocolate mug cake?
Quick Overview
This chocolate mug cake is all about speed and ease. You’ll simply whisk together a few dry ingredients in your mug, stir in the wet ingredients until just combined, and then microwave it for about 90 seconds. That’s it! The magic happens as it cooks, puffing up into a delightfully tender chocolate cake. It’s so straightforward that even the most novice baker can nail it on the first try. The key is not to overmix and to stop cooking it at just the right moment to achieve that perfect, fudgy texture. It’s the ultimate in instant gratification dessert-making, and it never fails to deliver a smile.
Ingredients
For the Main Batter:
You’ll need 4 tablespoons of all-purpose flour. I’ve tried using gluten-free blends, and they work well, but stick to a good quality 1:1 baking blend for best results. Next, add 2 tablespoons of granulated sugar. You can adjust this slightly if you prefer it a bit sweeter or less sweet, but this is the sweet spot for me. Then comes the star: 2 tablespoons of unsweetened cocoa powder. Dutch-processed cocoa will give you a deeper, richer flavor, but natural cocoa powder works just fine too. A tiny pinch of salt is crucial to balance the sweetness and enhance the chocolate flavor. And finally, 1/4 teaspoon of baking powder for a little lift – don’t skip this, it makes a difference in texture!
For the Filling:
This is where you can really play! While the cake is delicious on its own, adding a little something in the center takes it to the next level. My personal favorite is a tablespoon of chocolate chips or a small dollop of Peanut Butter. You could also use a spoonful of Nutella or even a few fresh raspberries. If you’re feeling fancy, a small square of dark chocolate placed in the center before microwaving creates an amazing molten core.
For the Glaze:
This is optional, but highly recommended for that extra touch of indulgence. For a simple chocolate glaze, mix 1 tablespoon of melted butter or vegetable oil with 1 tablespoon of cocoa powder and 2 tablespoons of powdered sugar. Stir until smooth. You can add a tiny splash of milk or water if it’s too thick. Alternatively, a dusting of powdered sugar or a drizzle of your favorite chocolate sauce works beautifully too!
Step-by-Step Instructions
Step 1: Preheat & Prep Pan
Okay, so we’re not technically preheating an oven here, but the principle is the same! Grab your favorite microwave-safe mug. A standard 10-12 ounce mug is perfect. Make sure it’s clean and dry. There’s no need to grease it because the cake is made and eaten right out of the mug, and it’s such a small amount, it won’t stick much. Just have your mug ready to go – that’s all the prep you need for this step!
Step 2: Mix Dry Ingredients
This is where the magic really starts. In your mug, add the flour, granulated sugar, unsweetened cocoa powder, salt, and baking powder. Now, take a small whisk or a fork and mix them all together really well. You want to make sure there are no lumps of cocoa powder and that everything is evenly distributed. This step is important because it ensures your cake has a consistent texture and flavor throughout. Give it a good stir until it looks like a uniform, sandy brown powder.
Step 3: Mix Wet Ingredients
Now for the liquid! Add the milk and vegetable oil (or melted butter) directly into the mug with the dry ingredients. If you’re using an egg, you’d typically whisk it separately, but for this super simple version, we’re skipping the egg to keep it even quicker and simpler, which means no egg cleanup! So, just pour in your milk and oil. I usually use whole milk, but almond milk or soy milk work wonderfully too – I’ve tested this with almond milk and it actually made it even creamier! The oil keeps it wonderfully moist.
Step 4: Combine
This is the crucial part: combine the wet and dry ingredients *gently*. Using your fork or whisk, stir everything together until you just barely see any dry streaks of flour. Be careful not to overmix! Overmixing develops the gluten in the flour, which can lead to a tough, rubbery cake. A few small lumps are totally fine – in fact, they’re a good sign that you haven’t overworked the batter. The batter should be thick but pourable, like a very thick pancake batter.
Step 5: Prepare Filling
If you’re adding a filling, this is the time to get it ready. If you’re using chocolate chips, just grab a tablespoonful. If you’re using Peanut Butter or Nutella, scoop about a tablespoon into the center of the batter. If you’re using a piece of chocolate, just have it handy. Gently press your chosen filling into the center of the batter, making sure it’s mostly submerged but not touching the sides of the mug if you can help it. This helps create that lovely molten center effect.
Step 6: Layer & Swirl
If you added a filling, you might want to spoon a little more batter over the top to cover it, especially if it’s sticking out. If you’re not using a filling, just ensure the batter is relatively level in the mug. For a swirl effect, you could add a tiny bit more batter on top and then use a toothpick to gently swirl it. But honestly, for a simple chocolate mug cake, this step is totally optional. Just aim for a smooth surface so it bakes evenly.
Step 7: Bake
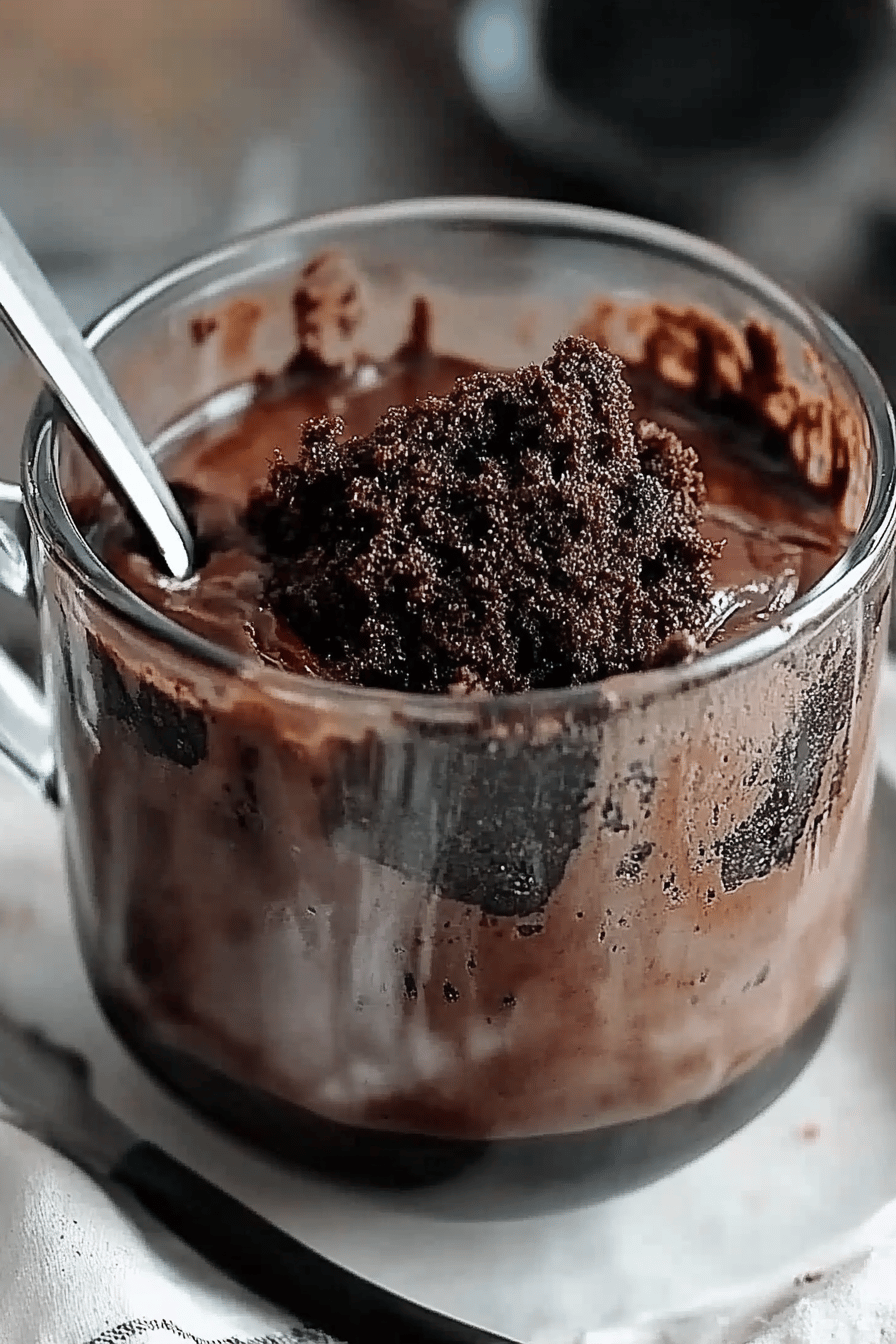
Now for the exciting part! Pop your mug into the microwave. Microwave on high power for about 60 to 90 seconds. The exact time will vary depending on your microwave’s wattage, so start with 60 seconds. The cake should look set around the edges and slightly gooey in the very center. It will continue to cook a bit as it cools. If it looks too wet after 60 seconds, give it another 10-15 seconds. Be careful not to overcook it, as that’s the quickest way to a dry mug cake!
Step 8: Cool & Glaze
Carefully remove the mug from the microwave – it will be hot! Let it cool for just a minute or two. This is important because it allows the cake to finish cooking and prevents you from burning your mouth. While it’s cooling, quickly whip up your glaze if you’re using one. Once the cake has cooled slightly, drizzle your glaze over the top. You can also just dust it with powdered sugar or skip the topping altogether if you’re in a hurry!
Step 9: Slice & Serve
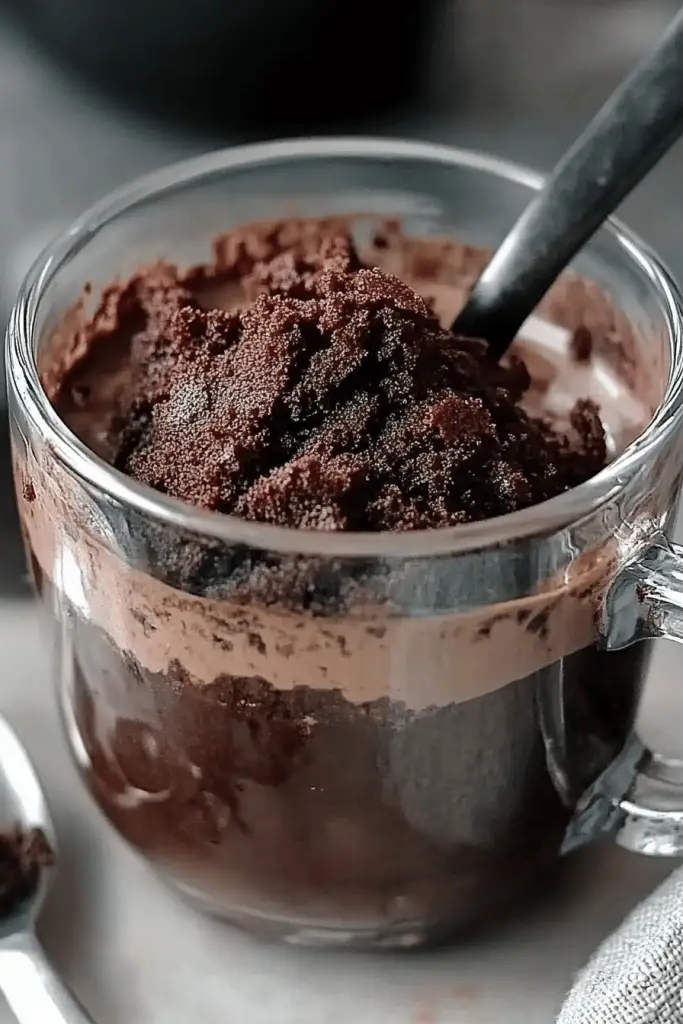
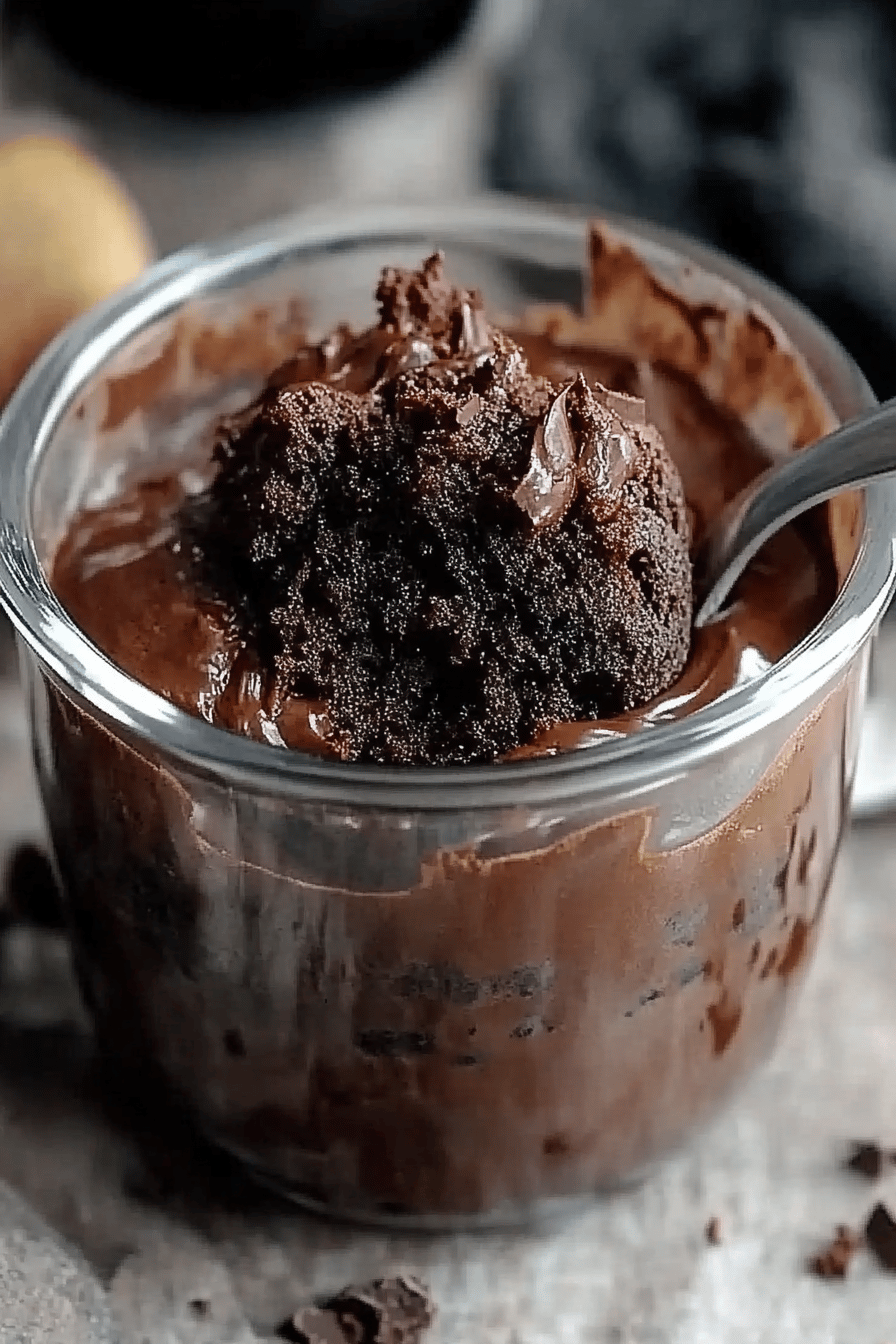
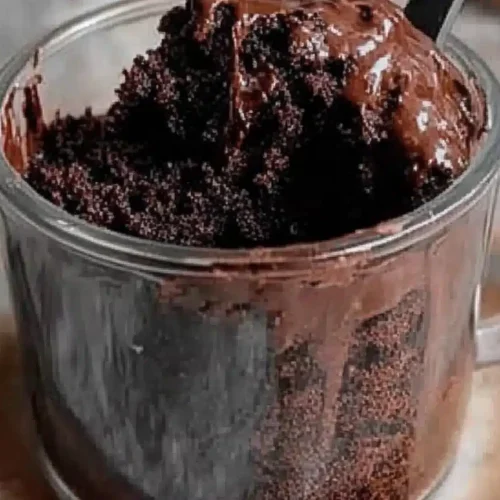
This is the best part! Grab a spoon and dig in. You can eat it right out of the mug – it’s designed for that! The edges will be cakey, and the center will be wonderfully moist and fudgy. It’s perfect served warm. If you want to get fancy, you can carefully run a knife around the edge of the mug and invert it onto a small plate, but I usually just eat it straight from the mug. Enjoy every single bite of your instant chocolatey heaven!
What to Serve It With
While this chocolate mug cake is a star all on its own, there are definitely ways to elevate the experience depending on the occasion. For a quick breakfast treat, I sometimes pair it with a strong cup of coffee. The richness of the cake and the bitterness of the coffee are a match made in heaven. For a more leisurely brunch, I might serve it warm with a small scoop of vanilla bean Ice Cream melting on top, or perhaps some fresh berries on the side. It adds a touch of elegance without much effort. As a dessert, it’s incredible served warm with a dusting of powdered sugar, a drizzle of raspberry coulis, or a dollop of whipped cream. The contrast of temperatures and textures is just divine. And for those cozy snack times when you just need comfort? A tall glass of cold milk is my absolute go-to. My kids actually ask for this all the time, usually with a dollop of whipped cream because, well, it’s a special treat! I’ve also found that a tiny sprinkle of sea salt on top of the glaze really brings out the chocolate flavor, making it taste even more gourmet.
Top Tips for Perfecting Your Chocolate Mug Cake
I’ve made this chocolate mug cake more times than I can count, and over those many, many delicious batches, I’ve picked up a few tricks that guarantee a perfect result every single time. First, about the cocoa powder: I highly recommend using a good quality Dutch-processed cocoa for a really deep, rich chocolate flavor. Natural cocoa works, but the color and taste won’t be quite as intense. When you’re mixing the dry ingredients, really take your time to whisk them together thoroughly. This ensures the baking powder is evenly distributed, which prevents any weird, dense spots in your cake. When it comes to combining the wet and dry ingredients, this is my biggest tip: stop mixing as soon as you don’t see any dry flour. Seriously, a few tiny lumps are your friend here! Overmixing is the number one culprit for a tough mug cake, so resist the urge to keep stirring until it’s perfectly smooth. For that molten center, I learned this trick after years of making it: don’t put the filling right on the bottom of the mug. Spoon it in about halfway through your batter, or place it in the center and then gently cover it with a little more batter. This helps it melt beautifully without burning on the bottom. When it comes to baking, microwaves vary wildly! So, I always start with 60 seconds and then check. You want the edges to look set, but the very center should still look a little moist or underdone. It will continue to cook from residual heat. Trust me on this one, it makes all the difference between a moist cake and a dry one. If you’re making a glaze, and it seems too thick, a tiny splash of milk or water will loosen it right up. If it’s too thin, just whisk in a bit more powdered sugar. Experiment with your add-ins – chocolate chips, Peanut Butter cups, chopped nuts, a swirl of caramel – the possibilities are endless and equally delicious!
Storing and Reheating Tips
Honestly, the best way to enjoy this chocolate mug cake is fresh and warm, straight from the microwave. It’s designed to be made and eaten immediately. However, if you happen to have any leftovers (which is rare in my house!), you can store them. At room temperature, it’s best eaten within a few hours. If you do need to store it longer, cover the mug loosely with plastic wrap or foil to prevent it from drying out. It will start to lose its ideal texture after a few hours. For longer storage, the refrigerator is your best bet. You can store the mug cake in the fridge for up to 2 days. Make sure it’s covered well. When you’re ready to reheat, you can pop the mug back into the microwave for about 20-30 seconds, or until warmed through. Be careful not to overheat it, or it might become tough. I generally advise against freezing mug cakes. Because they are so small and delicate, they tend to get a bit gummy or lose their texture after thawing. The glaze is best applied right before serving for the freshest taste and appearance, especially if you plan to eat it right away. If you do need to store it with glaze, it’s better to re-glaze after reheating.
Frequently Asked Questions
Final Thoughts
So there you have it – the ultimate, five-minute chocolate mug cake that’s guaranteed to satisfy your deepest chocolate cravings. It’s proof that you don’t need a lot of time, fancy ingredients, or complicated techniques to create something truly delicious and comforting. This recipe has been a lifesaver for me on countless occasions, bringing a smile to my face (and everyone else’s!) when only a chocolate fix will do. I really hope you’ll give this a try the next time that chocolate urge strikes. It’s so easy, so quick, and so utterly satisfying. If you loved this, you might also enjoy my recipe for quick chocolate chip cookies or my easy one-bowl brownies. Let me know in the comments below how yours turns out, what add-ins you tried, or any other genius customizations you come up with! Happy baking, and more importantly, happy eating!
Chocolate Mug Cake
Ingredients
Main Ingredients
- 4 tablespoon all-purpose flour
- 2 tablespoon granulated sugar
- 1 tablespoon unsweetened cocoa powder
- 0.25 teaspoon baking powder
- 0.125 teaspoon salt
- 3 tablespoon milk
- 1 tablespoon vegetable oil
- 0.5 teaspoon vanilla extract
- 1 tablespoon chocolate chips optional
Instructions
Preparation Steps
- In a microwave-safe mug, whisk together the flour, sugar, cocoa powder, baking powder, and salt.
- Add the milk, vegetable oil, and vanilla extract. Stir until just combined and no dry spots remain.
- If using, stir in the chocolate chips.
- Microwave on high for 1 to 1.5 minutes, or until the cake is cooked through. Be careful not to overcook.
- Let it cool slightly before enjoying directly from the mug.
Notes
Featured Comments
“Impressed! Clear steps and super easy results. Perfect for busy nights.”
“New favorite here — spot on. crowd-pleaser was spot on.”
“Super easy and turned out amazing! My family asked for seconds. Saving this one.”
“This sweet treat was absolutely loved — the zingy really stands out. Thanks!”
“Made it tonight and wow — crowd-pleaser! Will definitely make Chocolate mug cake again.”
“Packed with flavor and so simple. Exactly what I wanted from Chocolate mug cake.”


