

Oh, you guys. I have a confession. There are some recipes that just… stick with you. They become your go-tos, the ones you whip up when you need a little bit of magic in your day, or the ones you proudly present when friends come over and you want to impress them without breaking a sweat. This coffee toffee ice cream? It’s *that* recipe for me. I’m talking about a flavor explosion that’s both sophisticated and comforting, a perfect balance of rich coffee notes and that delightful crunchy, buttery toffee crunch. It’s honestly better than any store-bought version I’ve ever tried, and believe me, I’ve tried a lot! If you love a good Coffee Ice Cream but crave that extra bit of texture and sweetness, this is your new obsession. It’s the kind of dessert that makes your whole kitchen smell amazing and disappear in about five minutes flat at my house. I’m so excited to share this with you!
What is coffee toffee ice cream?
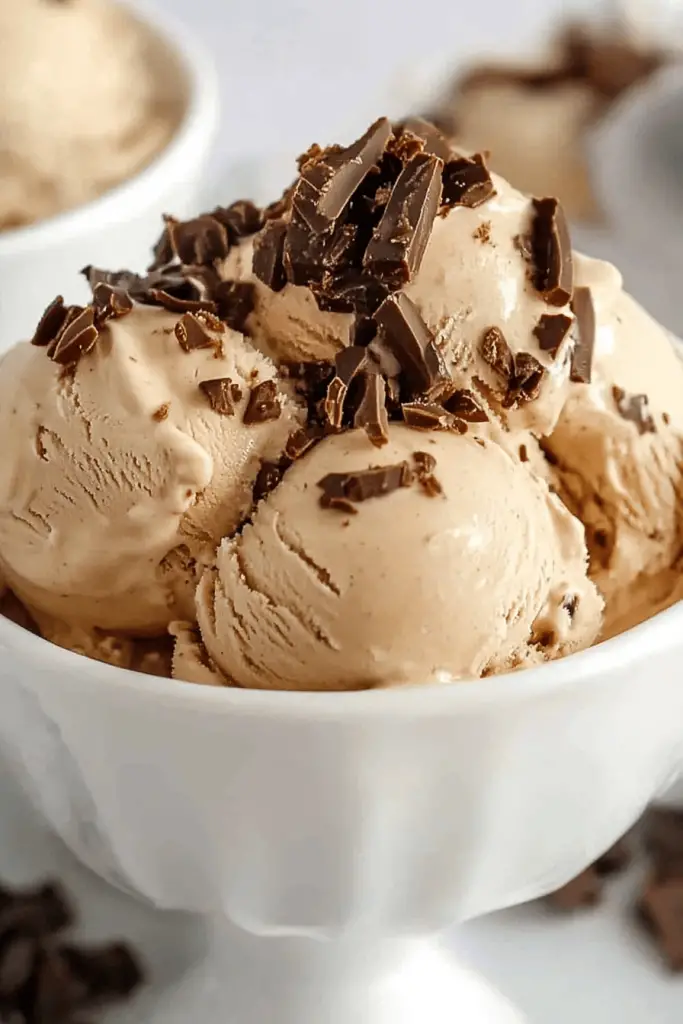
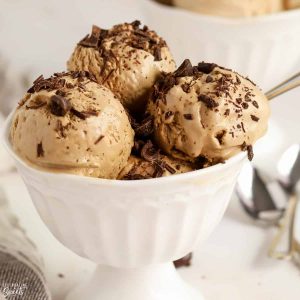
So, what exactly *is* this delightful creation we’re diving into? Think of it as your favorite creamy, dreamy Ice Cream base, but with a serious upgrade. We’re talking about infusing that smooth, cool creaminess with the bold, aromatic essence of good coffee. But we don’t stop there! The real star of the show, aside from the coffee, is the generous swirl of crunchy, buttery toffee pieces that give it that irresistible texture and a sweet, caramel-like punch. It’s not just “coffee flavored” ice cream; it’s a symphony of coffee and toffee working together. The name itself says it all – it’s the luxurious marriage of two beloved flavors, elevated into a frozen dessert that’s pure bliss. It’s essentially the sophisticated older sibling of a simple vanilla, and trust me, it’s just as approachable and much more exciting!
How to Make Coffee Toffee Ice Cream
Quick Overview
The process for this dreamy coffee toffee Ice Cream is wonderfully simple, focusing on layering incredible flavors and textures. We start by creating a smooth, coffee-infused ice cream base, then we prepare the crunchy toffee pieces, and finally, we bring it all together in a beautiful swirl. It’s less about complex techniques and more about thoughtful assembly. The result is a wonderfully creamy, satisfyingly crunchy, and deeply flavorful frozen treat that will have everyone asking for the recipe. It’s truly a lifesaver when you need an impressive dessert without all the fuss.
Ingredients
For the Main Batter:
- 4 cups heavy cream: This is non-negotiable for that luxuriously creamy texture. Don’t skimp here!
- 2 cups whole milk: Balances the richness of the cream.
- 1 ½ cups granulated sugar: For sweetness, of course! You can adjust this slightly if you prefer it less sweet.
- ⅓ cup instant espresso powder: The key to that deep, authentic coffee flavor. Make sure it’s *instant* so it dissolves beautifully.
- 8 large egg yolks: These are our emulsifiers, creating that silky smooth custard base.
- 1 teaspoon vanilla extract: A little goes a long way to enhance all the other flavors.
For the Toffee Crunch:
- 1 cup packed light brown sugar: Gives that lovely caramel note.
- ½ cup unsalted butter, cut into cubes: Essential for that rich, buttery toffee flavor.
- ¼ cup water: Helps the sugar dissolve and prevents burning.
- 1 teaspoon sea salt: Crucial for balancing the sweetness and bringing out the toffee flavor.
- 1 cup crushed toffee bits (store-bought or homemade): These are the gems that make this ice cream so special!
For the Swirl (Optional but highly recommended!):
- ½ cup caramel sauce (store-bought or homemade): For an extra layer of gooey deliciousness.
- Extra crushed toffee bits: For topping and textural contrast.
Step-by-Step Instructions
Step 1: Preheat & Prep Pan
Okay, first things first, let’s get our Ice Cream maker ready. If you have a machine with a pre-freeze bowl, make sure that bowl has been chilling in your freezer for at least 24 hours. If you have an ice cream maker that uses ice and salt, gather those supplies. We’re not baking anything right now, so no oven preheating needed, but having your ice cream maker prepped is key to a smooth process.
Step 2: Mix Dry Ingredients
In a large, heavy-bottomed saucepan (this is important to prevent scorching), whisk together the granulated sugar and the instant espresso powder. Make sure there are no lumps of espresso powder – we want that coffee flavor to be uniform. Then, in a separate bowl, whisk the egg yolks until they’re pale and slightly thickened. This is going to be the base for our custard.
Step 3: Mix Wet Ingredients
Pour the heavy cream and whole milk into the saucepan with the sugar and espresso mixture. Heat this over medium heat, stirring occasionally, until it just begins to simmer around the edges. Don’t let it come to a rolling boil! We’re just warming it up to dissolve the sugar and infuse the coffee flavor.
Step 4: Combine
Now for the tempering! This is where we gently introduce the warm cream mixture to the egg yolks. Slowly ladle about a cup of the warm cream mixture into the egg yolks, whisking constantly. This gradually raises the temperature of the yolks, preventing them from scrambling. Once tempered, pour the yolk mixture back into the saucepan with the remaining cream mixture. Continue to cook over medium-low heat, stirring constantly with a wooden spoon or heatproof spatula, until the custard thickens enough to coat the back of the spoon. This usually takes about 5-8 minutes. It’s super important not to let it boil, or you’ll end up with scrambled eggs in your ice cream base, which is a mistake I’ve definitely made early on! You’ll see it start to coat the back of a spoon when it’s ready.
Step 5: Prepare Filling
While the custard is cooking, let’s get our toffee crunch ready. In a clean saucepan, combine the brown sugar, butter, and water. Cook over medium heat, stirring until the butter melts and the sugar dissolves. Bring this mixture to a boil and let it bubble for about 3-5 minutes, stirring occasionally, until it reaches a deep amber color. Be careful, as it gets hot very quickly! Remove from the heat and stir in the sea salt and crushed toffee bits. Be careful, it will bubble up a bit! Let this mixture cool slightly, but not so much that it hardens completely. We want it to be a spreadable, crumbly texture.
Step 6: Layer & Swirl
Once your custard base has thickened, strain it through a fine-mesh sieve into a clean bowl. This removes any tiny bits of cooked egg and ensures a super smooth texture. Stir in the vanilla extract. Cover the surface of the custard directly with plastic wrap to prevent a skin from forming, and let it cool in the refrigerator for at least 4 hours, or preferably overnight, until it’s thoroughly chilled. Once chilled, churn the ice cream base in your ice cream maker according to the manufacturer’s instructions. During the last 5 minutes of churning, add the prepared toffee crunch mixture. If you’re adding caramel sauce, you can do this now too, or swirl it in when you transfer the ice cream to its storage container. The goal is to get those delightful toffee pieces distributed throughout.
Step 7: Bake
Wait, bake? Nope, no baking involved in ice cream! My apologies, sometimes my brain gets ahead of itself. The “baking” stage for ice cream is really about letting it firm up in the freezer after churning. Once churned and the toffee bits are incorporated, transfer the ice cream to a freezer-safe container. If you’re adding extra caramel sauce, now’s the time to drizzle it over the top and gently swirl it in with a knife or skewer. Sprinkle with a few extra toffee bits for good measure! Press a piece of parchment paper directly onto the surface of the ice cream to prevent ice crystals from forming, then cover tightly with a lid or plastic wrap.
Step 8: Cool & Glaze
Now, this is the crucial “freezing” or “hardening” stage. Pop the container into your freezer for at least 4-6 hours, or until the ice cream is firm. This allows the flavors to meld and the texture to set properly. The “glaze” here is essentially the toffee crunch and optional caramel sauce, and we add them towards the end of the churning or when transferring to the container so they don’t get completely pulverized during the churning process. We want those lovely chunks!
Step 9: Slice & Serve
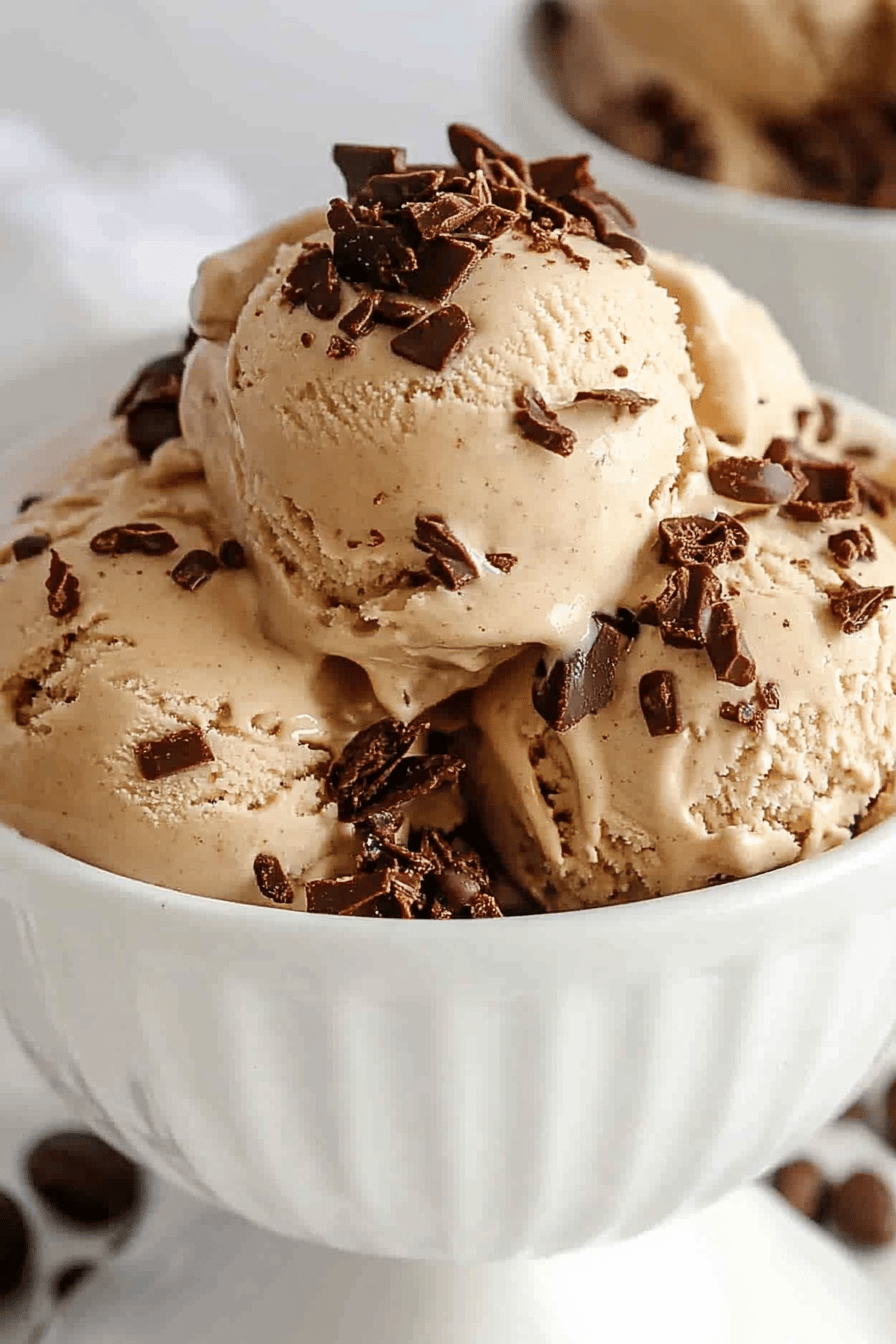
When your coffee toffee ice cream is perfectly firm, let it sit at room temperature for about 5-10 minutes before scooping. This makes it easier to get those beautiful, clean scoops. Serve it up in bowls or cones. The contrast between the cold, creamy ice cream and the crunchy toffee is just divine. For an extra special touch, a drizzle of extra caramel sauce and a sprinkle of toffee bits on top is never a bad idea!
What to Serve It With
This coffee toffee ice cream is a star all on its own, but it also plays beautifully with other flavors and treats. For breakfast, believe it or not, a small scoop alongside a freshly brewed cup of coffee can be a real treat. Or, if you’re feeling adventurous, dollop a little on top of your pancakes or waffles – it’s like a decadent morning dessert! For brunch, imagine serving a perfect scoop next to a slice of decadent chocolate cake or a light, airy angel food cake. The coffee notes will complement any chocolatey or fruity dessert wonderfully. And, of course, as a classic dessert, it’s a dream. Serve it after a rich meal like a steak or a hearty pasta, and it cuts through the richness perfectly. It’s also phenomenal alongside a warm apple crumble or a pecan pie. For those cozy snacks I mentioned, honestly, just a bowl of this on a chilly evening with a good book is pure heaven. My family also loves it piled high on a warm chocolate chip cookie – talk about a flavor and texture overload in the best way possible!
Top Tips for Perfecting Your Coffee Toffee Ice Cream
I’ve made this coffee toffee ice cream more times than I can count, and over the years, I’ve picked up a few tricks that really make a difference. For the coffee base, make sure you’re using good quality instant espresso powder. Regular instant coffee granules can sometimes leave a slightly bitter aftertaste, and we want that smooth, rich coffee flavor. Don’t be afraid to taste your custard base *before* you chill it; you can adjust the sweetness or coffee intensity then. When it comes to the toffee crunch, I’ve learned that making it slightly softer than you might normally would for candy is a good idea, because it will harden up even more once frozen. If it gets too hard, it can be difficult to scoop. Also, try not to overcook your toffee, or it might taste burnt rather than caramelly. For mixing, the key is to chill that base thoroughly. A warm base won’t churn properly and will result in icy ice cream. I always make my base the day before I plan to churn, just to be sure. If your toffee bits seem too large or clumpy after cooling, give them a quick pulse in a food processor or chop them a bit more with a knife. This ensures they distribute evenly without creating giant, unmanageable chunks. For the swirl, don’t go crazy with the caramel sauce; a little goes a long way, and you don’t want it to overpower the coffee and toffee. And remember, ice cream hardens *fast* in the freezer, so have your container ready to go as soon as it’s churned. A metal container tends to chill the ice cream faster, which is great for texture!
Storing and Reheating Tips
Storing homemade ice cream can be a bit tricky, but with a few pointers, you can keep this coffee toffee ice cream tasting amazing. At room temperature, it’s obviously going to melt pretty quickly, so we’re talking about a serving window of maybe 15-20 minutes before it becomes a pool. If you have leftovers that you need to keep out for a short while, a cooler with ice packs can help, but it’s really best enjoyed right away. For refrigerator storage, well, ice cream doesn’t do well in the fridge – it’s just not cold enough to keep it frozen. So, we’re strictly talking about freezer storage. To keep it fresh in the freezer, the best way is to use an airtight container. I love using shallow, rectangular metal pans because they chill the ice cream quickly and evenly. Cover the surface directly with parchment paper or wax paper, pressing it down to eliminate air pockets, then secure the lid tightly. This prevents those dreaded ice crystals from forming and keeps the ice cream from absorbing freezer odors. Stored this way, it should last for about 2-3 weeks before the texture starts to change noticeably. Beyond that, it’s still edible, but might not be as smooth. For the glaze timing, it’s best to add any caramel swirl and extra toffee bits just before the final freeze, or even on top when serving, rather than churning them in completely. This preserves their texture and distinctiveness.
Frequently Asked Questions
Final Thoughts
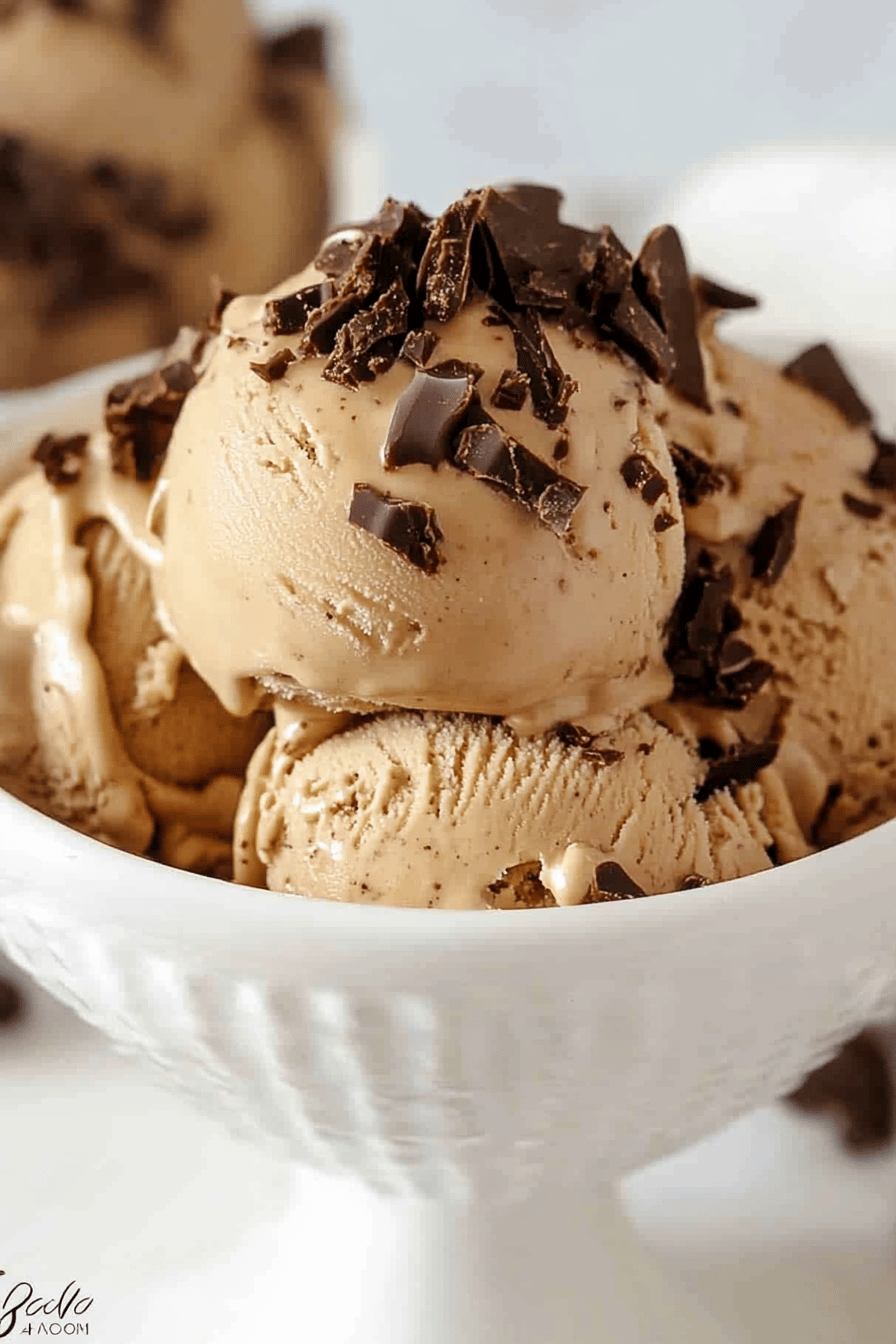
So there you have it – my absolute favorite coffee toffee ice cream recipe. It’s a labor of love, yes, but one that’s so incredibly rewarding. The depth of flavor, the satisfying crunch of the toffee, and that pure, unadulterated creaminess… it’s truly something special. This recipe has brought so much joy to my kitchen and to my family’s table, and I’m genuinely excited for you to experience it too. It’s proof that you don’t need an ice cream machine to make incredible frozen desserts, and that simple, high-quality ingredients can create pure magic. If you’re a coffee lover or just adore that sweet, crunchy toffee goodness, this is a must-try. Don’t be intimidated; embrace the process and have fun with it! I can’t wait to hear how yours turns out, and what delicious ways you find to serve it. Please leave a comment below and let me know what you think, or share your own little twists on this recipe!
Coffee Toffee Ice Cream
Ingredients
Main Ingredients
- 2 cups heavy cream
- 1 can sweetened condensed milk 14 oz
- 0.5 cup strong brewed coffee chilled
- 1 teaspoon vanilla extract
- 1 cup toffee bits crushed
Instructions
Preparation Steps
- In a large bowl, whip the heavy cream until stiff peaks form.
- Gently fold in the sweetened condensed milk, chilled coffee, and vanilla extract until just combined.
- Fold in the crushed toffee bits.
- Pour the mixture into a freezer-safe container.
- Cover and freeze for at least 6-8 hours, or until firm.
- Scoop and serve.
Notes
Featured Comments
“I totally get that — some recipes just feel like they’re made for you, and this one sounds perfect for a cozy evening. Thanks for sharing!”
“I love this! Coffee toffee ice cream is my go-to comfort dessert too—simple but so rich and satisfying. Thanks for the inspiration!”
“I love how comforting homemade ice cream is—this recipe sounds like it’s made with so much love and flavor!”
“Impressed! Clear steps and turned out amazing results. Perfect for busy nights.”
“New favorite here — restaurant-level. crowd-pleaser was spot on.”
“Super easy and turned out amazing! My family asked for seconds. Saving this one.”


I love how comforting homemade ice cream is—this recipe sounds like it’s made with so much love and flavor!
I love this! Coffee toffee ice cream is my go-to comfort dessert too—simple but so rich and satisfying. Thanks for the inspiration!
I totally get that — some recipes just feel like they’re made for you, and this one sounds perfect for a cozy evening. Thanks for sharing!