

You know those recipes that just feel like a warm hug? The ones you turn to when you need a little comfort, or when you want to impress without a fuss? Well, this strawberry shortcake dessert is exactly that for me. It’s not quite the traditional biscuit-style shortcake, and it’s definitely not a cake-cake, but it’s the perfect hybrid. Think of it as a delightful celebration of fresh strawberries and a tender, crumbly cake base that’s just begging to be smothered in Whipped Cream. I remember the first time I made this; it was for a summer barbecue, and it absolutely vanished. People kept asking for the recipe, and honestly, I was a little hesitant to share my secret weapon. But it’s too good not to! If you’re like me and crave a really satisfying strawberry shortcake dessert that’s a little bit special but surprisingly easy, you’ve come to the right place.
What is a strawberry
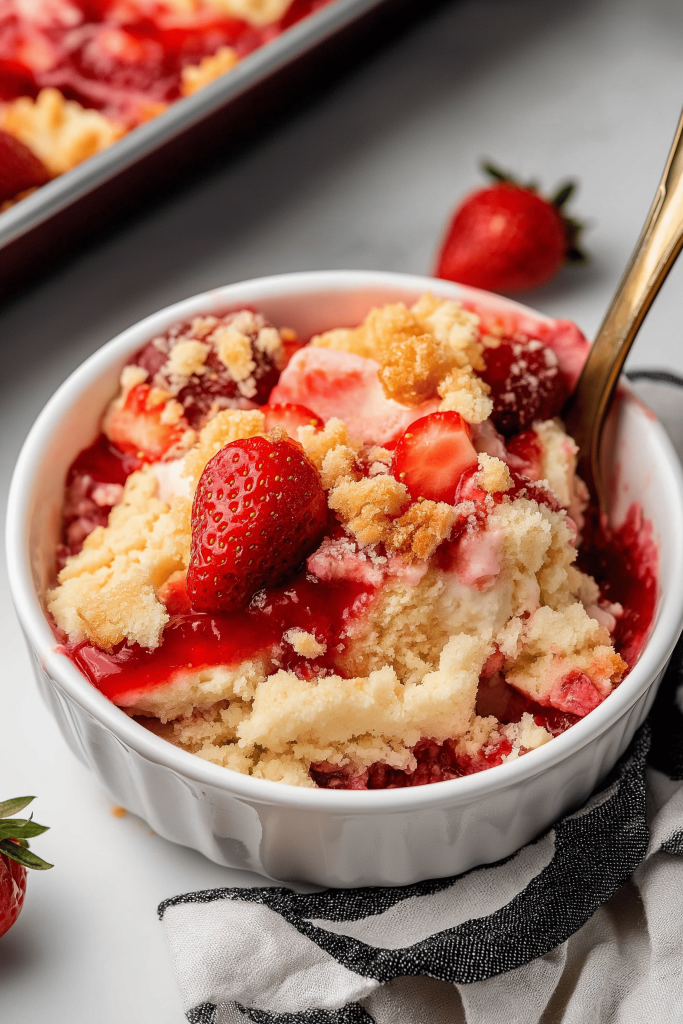
So, what exactly is this magical creation? It’s my take on a classic Strawberry shortcake dessert, but with a twist that makes it incredibly forgiving and downright delicious. Instead of individual biscuits, we’re making a single, beautiful cake that bakes up with a lovely, slightly crumbly texture, almost like a giant scone but with a finer crumb. The strawberries are macerated until they’re juicy and sweet, and then it’s all topped with a cloud of freshly whipped cream. It’s the kind of dessert that tastes like sunshine and happiness. It’s essentially a deconstructed shortcake experience, but all in one glorious pan, making it so much easier to serve a crowd. It’s my go-to when I want that iconic strawberry shortcake flavor without the fuss of shaping individual biscuits, which, let’s be honest, can sometimes be a bit finicky.
Why you’
There are so many reasons why this particular strawberry shortcake dessert has earned a permanent spot in my recipe binder, and why I think you’ll adore it too. First and foremost, the flavor is just out of this world. The sweet, slightly tart burst of macerated strawberries against that tender, buttery cake base, all softened by cool, creamy whipped cream? It’s pure bliss. It’s a symphony of textures and tastes that just sings of summer, but honestly, I make it year-round. Then there’s the simplicity. I know “dessert” can sometimes sound intimidating, but this one is a lifesaver on busy nights. It uses pretty standard pantry staples, and the steps are straightforward enough that even a beginner can achieve stunning results. I’ve even made it with my nieces and nephews, and they had a blast helping out. It’s also surprisingly cost-effective. Unlike some fancy desserts, the ingredients are all pretty budget-friendly, making it a wonderful option for feeding a crowd without breaking the bank. And versatility? Oh, absolutely! You can dress this up or down. Serve it warm from the oven with a dollop of cream for a cozy evening treat, or let it cool completely and serve it chilled for a more elegant finish. It’s perfect for picnics, potlucks, or just a spontaneous craving. What I love most about this strawberry shortcake dessert is that it feels special without requiring hours of effort. It delivers big on flavor and presentation, and that’s a win-win in my book!
How to Make This Strawberry Shortcake Dessert
Quick Overview
This strawberry shortcake dessert comes together in a few easy stages. We’ll macerate the strawberries to bring out their natural sweetness and juices, whip up a simple, tender cake batter, bake it until golden, and then assemble it all with a generous swirl of whipped cream. It’s designed to be incredibly forgiving, meaning even if you’re not an experienced baker, you’ll get fantastic results. The beauty of this recipe is its straightforwardness; it’s more about assembly and fresh flavors than complicated techniques.
Ingredients
For the Glor
2 pounds fresh strawberries, hulled and sliced or quartered (depending on size)
1/4 cup granulated sugar (adjust to your sweetness preference)
1 tablespoon fresh lemon juice (optional, but it really brightens the flavor)
For the Tender Cake Base:
2 1/4 cups all-purpose flour
1/2 cup granulated sugar
2 1/2 teaspoons baking powder
1/4 teaspoon salt
1/2 cup (1 stick) cold unsalted butter, cut into small cubes
2 large eggs, at room temperature
3/4 cup milk (whole milk or 2% is best for richness)
1 teaspoon Vanilla Extract
For the Dreamy Whipped Cream:
2 cups heavy whipping cream, very cold
1/4 cup powdered sugar (or to taste)
1 teaspoon vanilla extract
Step-by-Step Instructions
Step 1: Preheat & Prep Pan
First things first, let’s get our oven warmed up and our pan ready. Preheat your oven to 375°F (190°C). I like to use a 9-inch round cake pan or an 8×8 inch square pan for this. Grease and flour it really well, or better yet, line it with parchment paper, leaving an overhang on two sides. This makes lifting the cake out so much easier. If you’re not using parchment, a good spray of baking spray with flour works wonders. This prep ensures our cake base doesn’t stick and has a beautiful golden crust.
Step 2: Mix Dry Ingredients
In a large bowl, whisk together the flour, granulated sugar, baking powder, and salt. Give it a good whisk to make sure everything is evenly distributed. This step is crucial for ensuring your cake rises evenly. No one wants a cake with a dense, sunken middle! Make sure there are no lumps of baking powder lurking in there.
Step 3: Mix Wet Ingredients
In a separate medium bowl or a large liquid measuring cup, whisk together the eggs, milk, and vanilla extract until just combined. Don’t go crazy beating them; we just want them nicely incorporated. Using room temperature eggs and milk helps everything emulsify better, leading to a smoother batter.
Step 4: Combine
Now for the magic moment! Add the cold, cubed butter to the dry ingredients. Use your fingertips, a pastry blender, or a food processor to cut the butter into the flour mixture until it resembles coarse crumbs, like small peas. Then, pour the wet ingredients into the dry mixture. Stir everything together with a spatula or wooden spoon until just combined. It’s really important not to overmix here! A few lumps are totally fine; in fact, they’re a good sign that you haven’t overworked the gluten, which keeps the cake tender. Overmixing will result in a tough shortcake, and we definitely don’t want that.
Step 5: Prepare Filling
While the cake is baking, let’s get those strawberries ready. In a medium bowl, gently toss the sliced or quartered strawberries with the granulated sugar and lemon juice (if using). Let them sit at room temperature for at least 15-20 minutes, or even longer if you have the time. This process, called maceration, draws out the natural juices from the strawberries, creating a delicious syrupy sauce that’s an essential part of this dessert. Give them a gentle stir every now and then. You’ll see them start to glisten and release their ruby-red liquid.
Step 6: Layer & Swirl
Once your strawberries are happily macerating, pour the cake batter into your prepared pan, spreading it evenly. Don’t worry if it seems a bit thick; that’s what we want for this style of shortcake. You can even give it a gentle swirl with your spatula. If you want to get fancy, you can add dollops of the macerated strawberries (not the juice just yet!) directly into the batter and gently swirl them in with a knife for a marbled effect. Be careful not to over-swirl, though; we still want distinct layers.
Step 7: Bake
Pop the pan into your preheated oven. Bake for 30-35 minutes, or until a wooden skewer or toothpick inserted into the center comes out clean and the top is golden brown. The edges should be pulling away slightly from the sides of the pan. Keep an eye on it in the last 10 minutes, as ovens can vary. If it’s browning too quickly, you can loosely tent it with foil.
Step 8: Cool & Glaze
Once baked, let the cake cool in the pan on a wire rack for about 10-15 minutes. This helps it set up properly. Then, using the parchment paper overhangs (if you used them), carefully lift the cake out and place it on the wire rack to cool completely. Once it’s fully cooled, you can either pour the reserved strawberry juice over the top, or you can make the whipped cream and assemble it that way. My personal preference is to let it cool completely before slicing and serving.
For the whipped cream: In a chilled bowl, whip the heavy cream, powdered sugar, and vanilla extract on medium-high speed until stiff peaks form. Be careful not to over-whip, or you’ll end up with butter! It should be thick and billowy.
Step 9: Slice & Serve
Once the cake is completely cool, you can slice it into wedges. Top each slice generously with a spoonful of the macerated strawberries, making sure to get plenty of that delicious juice. Then, pile on a big dollop of the fresh whipped cream. It’s that simple! The contrast between the warm (or room temperature) cake, the cool berries, and the fluffy cream is divine.
What to Serve It With
This strawberry shortcake dessert is so versatile, it’s practically a dessert chameleon! For a truly decadent breakfast, I love serving a smaller wedge with a side of strong coffee. It’s a treat that feels incredibly indulgent to start the day. At brunch, it’s always a showstopper. I’ll plate it up with a few fresh mint leaves for a pop of color and serve it alongside a light mimosa or a sparkling rosé. The sweetness of the strawberries complements bubbly beverages beautifully. As a formal dessert after a special dinner, I like to slice it a little more neatly, perhaps add a sprinkle of finely chopped pistachios for a little crunch, and pair it with a dessert wine or a rich espresso. It’s elegant without being stuffy. And for those cozy, low-key evenings when you just need a little something sweet? This is your answer. A slice with a glass of milk or a cup of herbal tea is pure comfort. My kids also love it with a scoop of vanilla bean Ice Cream if they’re feeling extra adventurous. It’s all about fresh, vibrant flavors that don’t need much fuss to shine.
Top Tips for Perfecting Your Strawberry Shortcake Dessert
Over the years, I’ve picked up a few little tricks that make this strawberry shortcake dessert even better, and I’m happy to share them with you! For the strawberries, I always say it’s worth the wait for them to macerate properly. The longer they sit (up to a couple of hours is great), the more syrupy and flavorful they become. If you’re in a real pinch, you can gently warm them for a minute or two, but the texture is best when it happens naturally at room temperature. When mixing the cake batter, seriously, don’t overmix! I learned this the hard way many years ago, ending up with a tough, brick-like cake. Just stir until you no longer see dry flour. A few lumps are your friend here. For the butter in the batter, make sure it’s really cold and cut into small cubes. This is what creates those lovely tender pockets in the cake. Some people like to use a pastry blender, but I often just use my fingertips, rubbing the butter into the flour until it looks like coarse meal. If you’re feeling fancy with the swirling, try not to overdo it. You want distinct ribbons of strawberry, not a muddy mess. For baking, pay attention to your oven. If it tends to run hot, you might need to reduce the temperature by 10-15 degrees or start checking for doneness a few minutes earlier. The toothpick test is your best friend here! When it comes to the whipped cream, make sure your bowl and whisk attachment (if using a mixer) are chilled. This helps the cream whip up faster and achieve those lovely stiff peaks without turning into butter. If you don’t have a pastry blender, you can pulse the flour and butter in a food processor a few times until you get that coarse crumb texture – it’s a great shortcut. And for ingredient swaps, if you don’t have milk, buttermilk or even Greek yogurt thinned with a little water can work beautifully, adding a nice tang. I’ve even experimented with a splash of almond extract in the whipped cream for a different flavor profile, which was lovely.
Storing and Reheating Tips
This strawberry shortcake dessert is definitely best enjoyed fresh, but it does store reasonably well, and I’ve got some tips to help you keep it delicious. If you have any leftovers (which is rare in my house!), store the unfrosted cake at room temperature in an airtight container for up to 2 days. The moisture from the cake will keep it from drying out too much. The macerated strawberries should be stored separately in an airtight container in the refrigerator for up to 3-4 days. They’ll continue to get even juicier. The whipped cream is best made fresh, but if you have leftovers, store it in an airtight container in the fridge and it should be good for about 2 days, though it might deflate a bit. If you want to assemble a portion for later, keep everything separate and assemble right before serving. For reheating, I wouldn’t typically reheat the entire cake, as it can make the texture a bit soggy. However, if you have a single slice and want it warm, you can gently microwave it for about 10-15 seconds, or pop it in a toaster oven for a minute or two. Then, top with fresh strawberries and cream. If you freeze the cake base, make sure it’s completely cooled and wrap it tightly in plastic wrap, then aluminum foil. It should keep well in the freezer for up to 2 months. Thaw it overnight in the refrigerator before serving. I generally don’t recommend freezing the macerated strawberries or the whipped cream, as their texture can change quite a bit.
Frequently Asked Questions
Final Thoughts
Honestly, this strawberry shortcake dessert is more than just a recipe for me; it’s a little slice of pure joy. It’s that perfect balance of simple ingredients coming together to create something truly magical. It’s the kind of dessert that makes people close their eyes and savor each bite, and that’s what cooking is all about, right? The way the tender cake soaks up the juicy strawberries and the light, airy whipped cream is just heavenly. If you love classic strawberry shortcake but want a version that’s a bit more foolproof and just as delicious, you’ve got to give this one a try. It’s become a staple in my kitchen, and I have a feeling it will in yours too. Don’t forget to let me know how yours turns out in the comments below! I love hearing about your baking adventures and any personal twists you add. Happy baking, and enjoy every single delightful bite!
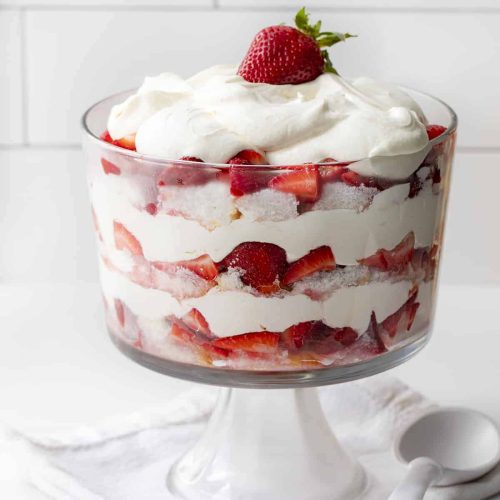
Strawberry Shortcake Trifle
Ingredients
Strawberry Mixture
- 2 pounds fresh strawberries cut into quarters (approximately 4.5 cups)
- 0.5 cup granulated sugar
- 0.25 cup strawberry preserves
Cream Cheese Filling
- 4 ounces cream cheese softened
- 0.5 can sweetened condensed milk 7 ounces
- 8 ounces whipped cream
Cake
- 1 angel food cake cut into bite sized cubes
Instructions
Preparation Steps
- In a medium bowl, mix together the strawberries, sugar, and preserves. Place in the refrigerator to chill while you prepare the remaining ingredients.
- In a separate medium mixing bowl, combine cream cheese and sweetened condensed milk with a hand mixer. Fold in whipped cream.
- To assemble: In a large trifle bowl, add 1/3 of the angel food cake, 1/3 of the strawberry mixture, and 1/3 of the cream cheese mixture. Repeat the layers two more times.
- Refrigerate until ready to serve.
Notes
Featured Comments
“Impressed! Clear steps and absolutely loved results. Perfect for busy nights.”
“New favorite here — perfect for busy nights. crowd-pleaser was spot on.”
“Super easy and turned out amazing! My family asked for seconds. Saving this one.”
“This sweet treat was absolutely loved — the rich really stands out. Thanks!”
“Made it tonight and wow — restaurant-level! Will definitely make Easy Strawberry Shortcake Dessert Perfection again.”
“Packed with flavor and so simple. Exactly what I wanted from Easy Strawberry Shortcake Dessert Perfection.”


