

There’s something about the first bite of a s’more that instantly takes me back—campfire nights, the crackling flames, and that gooey, toasted marshmallow melty against the crunch of graham crackers. But what if I told you that you can have all that sweet, smoky goodness in a cookie, anytime you want? That’s exactly what these s’more cookies are all about—bringing the beloved flavors of a s’more into a warm, soft-baked treat you can enjoy any day of the year. Honestly, I’ve tested dozens of variations, and this one’s a lifesaver on busy nights, especially when I want that nostalgic pull but don’t want to fire up the grill! My kids ask for these all the time, and I swear, they disappear in minutes at my house. Whether you’re craving a mid-afternoon pick-me-up or something sweet for a crowd, these cookies hit every sweet spot—and trust me, they’re ridiculously easy to make. Grab your ingredients, and let’s dive into the magic of s’more cookies!
What are S’more cookies?
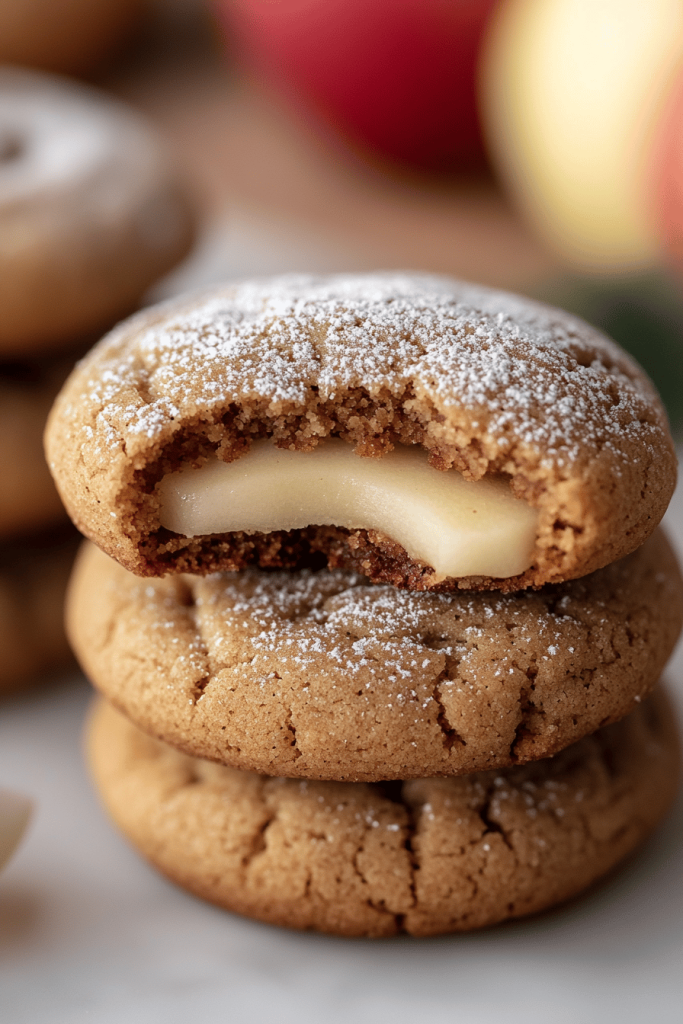
Think of s’more cookies as the perfect mash-up of your favorite campfire treat and a bakery-style dessert. It’s essentially a soft, chewy cookie infused with graham cracker crumbs, topped with melty chocolate chunks, and sprinkled with toasted marshmallows—just like the classic s’more but in cookie form. The name “s’more” comes from a shortened combo of “some more,” which is exactly how everyone feels once they take a bite. These cookies are the kind of sweet comfort food that instantly transports you to summer nights by the fire, minus the smoky smell lingering on your clothes. They’re friendly enough to serve for a casual family gathering, but impressive enough to wow guests at a weekend brunch. I love how versatile they are—crack a few open and mix in nuts, caramel bits, or even peanut butter for a twist. Basically, they’re a cozy, nostalgic hug in cookie form.
How do I make S’more cookies?
Quick Overview
These cookies come together in just a few simple steps—mixing your dry ingredients, creaming together butter and sugar, then combining everything. The fun part is layering the cookie dough with chunks of chocolate and toasted marshmallows before baking. The key is not overmixing your dough to keep them soft and chewy. Bake until they’re just golden around the edges, then add a few extra marshmallows on top during the last minute for that perfect toasted tops. A quick cool-down period helps set the gooey marshmallow and chocolate, so you get that impeccable s’more flavor in every bite. Once they’re cooled, a light drizzle of chocolate or even a dusting of powdered sugar makes them look so irresistible—I swear, these cookies are part comfort, part showstopper. Best of all, they only take about 20-25 minutes total from start to finish. Yes, they’re that easy—and so worth every minute of your oven time!
Ingredients
For the Main Batter:
– 1 cup (2 sticks) unsalted butter, softened (trust me, don’t substitute cold butter here)
– 1 cup packed light brown sugar
– 1/2 cup granulated sugar
– 2 large eggs
– 2 teaspoons vanilla extract
– 2 cups all-purpose flour
– 1 cup graham cracker crumbs (I like to pulse regular graham crackers in the food processor until fine)
– 1 teaspoon baking soda
– 1/2 teaspoon salt
For the Filling:
– 1 1/2 cups semi-sweet chocolate chunks or chips (go for the good stuff, it melts so nicely!)
– 1 1/2 cups mini marshmallows (or large ones sliced if you prefer)
– Optional: chopped nuts or caramel bits for extra texture and flavor
For the Glaze or Top Layer:
– Optional drizzle of melted chocolate or a sprinkle of toasted marshmallows for topping
Step-by-Step Instructions
Step 1: Preheat & Prep Pan
Set your oven to 350°F (175°C). Line a baking sheet with parchment paper or silicone baking mats—no sticking and easy cleanup! If you want to make your marshmallows extra golden, have a small butane torch nearby for a quick flame torching after baking. I always do this for that perfect s’more look and taste—the kind of caramelization that makes everyone want to grab seconds.
Step 2: Mix Dry Ingredients
In a small bowl, whisk together the flour, graham cracker crumbs, baking soda, and salt. I actually like to sift these together to avoid lumps and get an even mix—trust me, it makes a difference in the texture of your cookies. Set aside.
Step 3: Mix Wet Ingredients
In a large bowl, cream the softened butter with the sugars until light and fluffy—this takes about 2-3 minutes with an electric mixer. It should look pale and airy. Beat in the eggs one at a time, then add vanilla. This mixture should look smooth and glossy—don’t rush this step, because a good creaming sets the stage for soft cookies.
Step 4: Combine
Gradually add in your dry ingredients, mixing on low until just combined—avoid overmixing, or your cookies might turn tough. It’s okay if some flour streaks remain; I always do this slowly and check the dough’s texture—it should be soft, slightly sticky, but manageable. Fold in your chocolate chunks gently, then set aside.
Step 5: Prepare Filling
For the filling, you can keep it simple with mini marshmallows, or if you’re feeling fancy, toss in some caramel bits or chopped nuts. I prefer mini marshmallows because they melt and toast beautifully during baking, giving that signature s’more gooeyness. I like to keep some marshmallows aside for topping later—this way, I can achieve that toasted, caramelized look on top.
Step 6: Layer & Swirl
Scoop out cookie dough onto your prepared baking sheet—about a heaping tablespoon each. Gently press a few marshmallows into the tops and sprinkle with chocolate chunks. If you want, add a second layer of dough on top to make sandwich cookies—this is fun and yields a different texture. Use the back of a spoon to swirl the chocolate and marshmallows slightly into the dough—it looks pretty and helps distribute the flavors evenly.
Step 7: Bake
Bake for about 12-15 minutes, or until the edges are golden and crispy but the centers still look soft. In the last 2 minutes, sprinkle a few extra marshmallows on top and watch them puff and toast—if you have a torch, now’s the time to give them that caramelization. Keep a close eye—they can go from perfect to burnt pretty fast! When done, remove from oven and let cool on a wire rack for at least 10 minutes. This helps the cookies set properly and prevents the marshmallow topping from being too gooey to handle.
Step 8: Cool & Glaze
Once cooled down a bit, if you want to add a chocolate drizzle or extra toasted marshmallows on top, now’s your chance. Melt some chocolate and drizzle it over the cookies, or sprinkle toasted marshmallows for a pretty finish. This step really makes the cookies look as good as they taste.
Step 9: Slice & Serve
Pick a pretty plate, and slice these cookies carefully—they’re soft and gooey, so use a sharp serrated knife. Serve slightly warm or at room temperature. Pair with a cold glass of milk or a cup of coffee, and watch everyone’s face light up. Trust me, these s’more cookies are a hearty, nostalgic treat that everyone will ask for again and again.
What to Serve It With
These cookies are pretty much perfect on their own, but here are a few ideas to make them even more memorable:
For Breakfast: Pair a warm cookie with a mug of rich coffee or hot cocoa. They’re surprisingly cozy for a weekend brunch—just warm them slightly and add a dollop of whipped cream or a sprinkle of cinnamon. My kids love to have a mini s’more cookie next to their scrambled eggs; it feels like a sweet little indulgence to start the day.
For Brunch: Stack a couple of cookies with fresh berries and whipped cream—transform them into an elegant thumbprint-style treat. Serve with sparkling water infused with citrus or a mimosa for a special touch.
As Dessert: Turn these cookies into a layered ice cream sandwich by adding a scoop of vanilla or toasted marshmallow ice cream between two cookies. Top with more chocolate drizzle and a mini marshmallow or two. They’re perfect for summer potlucks or family gatherings.
For Cozy Snacks: Nothing beats tearing into a warm, gooey cookie with a blanket on the couch during movie night. Pair with a hot toddy or a glass of milk—your call. These cookies bring comfort and joy in every bite, and I love how they turn any ordinary evening into a little celebration.
Top Tips for Perfecting Your S’more Cookies
After making these a dozen times, I’ve picked up a few tricks that might help you get them just right:
Zucchini Prep: Some recipes add chopped nuts or shredded zucchini for extra moisture, but I find that small marshmallows already give enough gooey texture. If you do add zucchini, squeeze out excess moisture first by patting with paper towels, or your cookies might turn out too cakey and wet.
Mixing Advice: Always cream your butter and sugar well—this is the secret to soft, chewy cookies. Overmixing once you add the flour can make them dense, so mix just until combined. A gentle fold-in of the chocolate chunks keeps their shape and prevents melting too much into the dough before baking.
Swirl Customization: For a prettier look, try swirling melted white chocolate or peanut butter into the dough before baking—just a quick swirl with a toothpick makes a stunning pattern and adds delicious flavor layers.
Ingredient Swaps: Want to make vegan s’more cookies? Swap the butter for coconut oil or vegan butter, and use dairy-free chocolate—still super tasty! Whole wheat graham crackers can work instead of regular for a nuttier flavor, but they might change the texture slightly. Experiment and do what suits your taste buds!
Baking Tips: Oven temps can vary, so keep an eye on your cookies around the 12-minute mark. If you prefer softer, chewier cookies, take them out a minute earlier. For crisper edges, leave them in a little longer. Don’t forget to cool them on a rack so they set properly and don’t turn soggy.
Glaze Variations: Instead of chocolate, try drizzling caramel sauce or sprinkling toasted coconut on top for different flavor adventures. I’ve also pressed a piece of caramel or a small cookie butter dollop on top before baking for an extra indulgence.
Over the years, I’ve learned that patience with baking and a little creative flair make all the difference. These cookies are forgiving and flexible, so don’t be afraid to tweak the ingredients or presentation—it’s part of the fun!
Storing and Reheating Tips
If you have leftovers (which is rare in my house!), here’s how I keep them fresh:
Room Temperature: Store in an airtight container for up to 2 days. Keep in mind the marshmallows might get a little sticky, so a quick rewarm in the microwave for 10 seconds can revive their gooeyness.
Refrigerator Storage: Keep in a sealed container for up to a week. To enjoy them as soft as when fresh, pop them in the microwave for about 10-15 seconds—watch for that melty magic again!
Freezer Instructions: Wrap each cookie tightly in plastic wrap, then put them in a freezer bag for up to 3 months. To thaw, leave at room temperature or microwave on a low setting until warm and gooey. I like to reheat with a sprinkle of marshmallows on top for that freshly toasted effect.
Glaze Timing: If you’re adding a fresh glaze or drizzle, do it just before serving—this keeps the toppings crisp and appealing. If you want to reheat, skip the glaze or add it after warming to keep the toppings from becoming soggy.
Frequently Asked Questions
Final Thoughts
If there’s one recipe I keep coming back to, it’s these s’more cookies. They’re more than just a sweet treat—they’re a little piece of summer, childhood, and comfort all in one. I love how they smell out of the oven—sweet, toasted marshmallows and melted chocolate filling the kitchen—and how they taste even better than they look. They remind me that the simplest ingredients can create the most magical moments. Whether you’re baking for your family, friends, or just yourself (because, honestly, who’s judging?), this recipe is a guaranteed crowd-pleaser. So melt some butter, toast a marshmallow or two, and get ready—you’re about to make memories with every bite. Happy baking, and I can’t wait to hear how yours turns out! Feel free to share your own twists or photos—I love hearing about your s’more adventures!

s'more cookies
Ingredients
Main Ingredients
- 48 pieces Ritz Crackers
- 7 oz Marshmallow Creme
- 24 oz Chocolate Almond Bark
- 1 cup Graham Crackers (crushed)
- Marshmallow Bits (optional)
- Mini Chocolate Chips (optional)
Instructions
Preparation Steps
- In a microwave-safe bowl, melt chocolate almond bark, in 40-second intervals, until completely melted.
- Place Ritz's crackers on a long sheet of wax paper.
- Add a small dollop of marshmallow crème to the center of half the crackers.
- Place another cracker on top of the marshmallow crème. Press crackers together, ensuring the marshmallow crème has been distributed evenly.
- Use tongs to grab a cracker sandwich and dip it into melted chocolate.
- Carefully tap tongs on the side of the bowl, removing extra chocolate from the crackers.
- Place dipped cracker onto the wax paper.
- Sprinkle graham cracker crumbles, tiny marshmallows, and mini chocolate chips on top, if you choose.
- Allow chocolate to harden.
Notes
Featured Comments
“I love this—it brings back so many camping memories! Perfect for anyone craving a nostalgic treat.”
“Impressed! Clear steps and family favorite results. Perfect for busy nights.”
“New favorite here — creamy. crowd-pleaser was spot on.”
“Super easy and turned out amazing! My family asked for seconds. Saving this one.”
“This sweet treat was absolutely loved — the rich really stands out. Thanks!”
“Made it tonight and wow — perfect for busy nights! Will definitely make Graham Cracker Cookies How to Make Them again.”


I love this—it brings back so many camping memories! Perfect for anyone craving a nostalgic treat.