

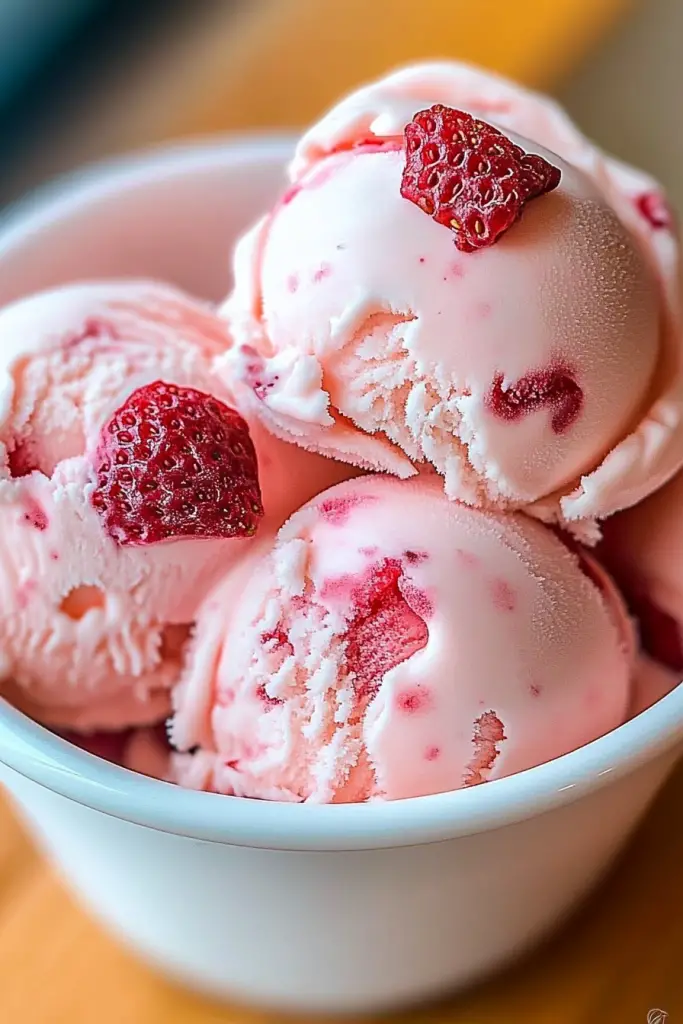
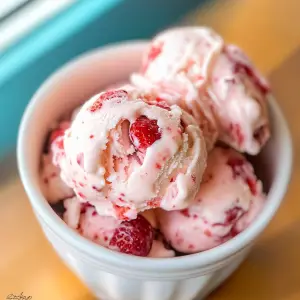
Oh, homemade strawberry Ice Cream! Just saying those words brings back the warmest memories. I can almost taste that first bite of summer, that sweet, cold perfection melting on my tongue. This isn’t just any ice cream; it’s the kind that makes you close your eyes with pure joy. When I was a kid, my mom would make a version of this, and it was always the highlight of our family gatherings. Now, when the craving hits, especially on those sweltering afternoons where the thought of turning on the oven is just too much, this is my go-to. It’s surprisingly simple, and the flavor… well, it blows anything store-bought out of the water. Forget those ice crystals and that artificial taste; this is the real deal, folks. It’s like sunshine in a bowl, a creamy, dreamy delight that’s perfect for any occasion, really, but especially when you just need a little bit of magic.
What is homemade strawberry ice cream?
So, what exactly is this magical concoction we’re talking about? Think of it as the purest expression of summer in frozen form. Homemade strawberry Ice Cream is essentially a luscious blend of ripe, sweet strawberries, rich cream, and a touch of sweetness, all churned together until it reaches that impossibly smooth, creamy texture we all adore. Unlike those fancy, overly complicated recipes you might see, this one is designed for home cooks, for real kitchens, and for real families. It’s about capturing the essence of fresh strawberries, letting their natural flavor shine through without being overpowered by artificial flavors or excessive additives. It’s the kind of dessert that feels both incredibly indulgent and refreshingly wholesome, a true celebration of simple, beautiful ingredients working in harmony. It’s essentially the happy place of desserts.
How do I make homemade strawberry ice cream?
Quick Overview
Making this homemade strawberry Ice Cream is surprisingly straightforward. The process involves cooking down fresh strawberries to intensify their flavor, then blending them with a simple custard base. After chilling the mixture, you churn it in an ice cream maker until it’s thick and creamy. The beauty of this method is that it guarantees a smooth texture and an intense strawberry flavor without any fuss. It’s a technique that I’ve refined over years, and it never fails to deliver that perfect, scoopable consistency. It’s a recipe that proves you don’t need a fancy degree in culinary arts to make incredible ice cream at home.
Ingredients
For the Strawberry Base: For the Strawberry Base: For the Strawberry Base: For the Strawberry Base: For the Strawberry Base: For the Strawberry Base: For
2 pounds fresh strawberries, hulled and sliced (I always look for the ripest, most fragrant ones I can find. If they’re on sale, even better!)
1/2 cup granulated sugar (adjust to your sweetness preference and the ripeness of your berries)
2 tablespoons fresh lemon juice (this brightens up the strawberry flavor beautifully)
For the Ice Cream Base:
2 cups heavy cream (for that luxurious, rich texture)
1 cup whole milk (balances the richness of the cream)
3/4 cup granulated sugar (this ensures sweetness without being cloying)
1/4 teaspoon salt (just a pinch to enhance all the flavors)
1 teaspoon pure Vanilla Extract (don’t skip this, it rounds everything out!)
1 tablespoon cornstarch (this is my little secret for an extra creamy texture, though some recipes use egg yolks. I find cornstarch simpler and less prone to scrambling.)
Step-by-Step Instructions
Step 1: Prepare the Strawberry Base
In a medium saucepan, combine the sliced strawberries, 1/2 cup sugar, and lemon juice. Cook over medium heat, stirring occasionally, until the strawberries break down and release their juices, and the mixture thickens slightly. This usually takes about 10-15 minutes. You want a jam-like consistency. Once done, remove from heat and let it cool completely. You can mash some of the berries with a fork if you prefer a smoother texture, or leave them chunkier for more strawberry bits in your ice cream. I sometimes like to use an immersion blender briefly to get a semi-smooth puree. Once cooled, I often strain about half of it to get a super smooth ice cream, leaving the rest a bit chunkier.
Step 2: Whisk Together Dry Ingredients
In a large bowl, whisk together the 3/4 cup sugar, salt, and cornstarch. Make sure there are no lumps of cornstarch. This step is important for ensuring a smooth, lump-free ice cream base.
Step 3: Warm Dairy and Combine
In a separate medium saucepan, heat the heavy cream and whole milk over medium heat until it’s steaming and small bubbles form around the edges, but don’t let it boil. Slowly ladle about a cup of the warm cream mixture into the dry ingredients, whisking constantly to create a smooth paste. This is called tempering, and it prevents the cornstarch from clumping. Then, pour this tempered mixture back into the saucepan with the remaining cream and milk. Cook over medium-low heat, stirring constantly with a whisk, until the mixture thickens enough to coat the back of a spoon. This usually takes about 5-8 minutes. Be patient here; you don’t want it to scorch.
Step 4: Finish the Base and Chill
Remove the saucepan from the heat. Stir in the vanilla extract. Pour the custard base through a fine-mesh sieve into a clean bowl. This catches any potential lumps and ensures a silky-smooth texture. Cover the surface of the custard directly with plastic wrap (this prevents a skin from forming) and refrigerate for at least 4 hours, or preferably overnight, until thoroughly chilled. This chilling step is crucial for the ice cream maker to work effectively and for achieving the best texture.
Step 5: Combine and Churn
Once the custard base is completely chilled, gently fold in about 3/4 of the cooled strawberry mixture. You can swirl it in for a marbled effect or mix it in more thoroughly for a uniform pink hue. Pour the combined mixture into your ice cream maker and churn according to the manufacturer’s instructions. This typically takes about 20-30 minutes. The ice cream should be thick and have a soft-serve consistency.
Step 6: Layer and Swirl (Optional)
If you want extra strawberry goodness or a beautiful marbled look, gently fold in the remaining strawberry mixture during the last few minutes of churning, or layer it into your storage container after churning. You can use a spoon or knife to swirl the strawberry bits and puree through the ice cream for those gorgeous ribbons of flavor.
Step 7: Freeze for Firmness
Transfer the churned ice cream to an airtight container. Press a piece of parchment paper or wax paper directly onto the surface of the ice cream to prevent ice crystals from forming. Cover with the lid. Freeze for at least 2-4 hours, or until firm enough to scoop. The longer it freezes, the firmer it will become, so adjust to your preference.
Step 8: Scoop and Serve
When you’re ready to serve, let the ice cream sit at room temperature for a few minutes to soften slightly, making it easier to scoop. Enjoy this delightful homemade strawberry ice cream! It’s truly a labor of love that tastes like pure sunshine.
What to Serve It With
This homemade strawberry ice cream is so delicious, it truly shines on its own. But if you’re feeling a bit fancy or want to create a full dessert experience, there are so many wonderful pairings! For breakfast (yes, breakfast!), a scoop atop a warm, fluffy stack of pancakes or waffles is divine. The contrast of the warm baked goods with the cold, fruity ice cream is just heavenly. I sometimes drizzle a little extra strawberry puree on top for good measure. For brunch, it’s lovely served alongside a light angel food cake or a simple pound cake. The airy texture of angel food cake is a perfect complement to the creamy ice cream. As a dessert, it’s a classic for a reason. It’s incredible on its own, but for something a bit more decadent, try it with a warm chocolate brownie or a slice of my famous lemon drizzle cake. The tartness of the lemon cuts through the richness beautifully. And for those cozy evenings when you just need a little sweet treat, a scoop in a bowl with a sprinkle of fresh mint leaves is simple perfection. My family also loves it sandwiched between two thin, crisp cookies – it’s like a homemade ice cream sandwich!
Top Tips for Perfecting Your Homemade Strawberry Ice Cream
Over the years, I’ve learned a few things that really make a difference when making this homemade strawberry ice cream. For the strawberries, make sure they are ripe and sweet. If they’re a bit tart, you might need to add a touch more sugar to the base. Cooking them down is key; don’t skip that step! It concentrates their flavor and removes excess water, which can lead to icy ice cream. For the custard base, patience is a virtue. Whisk constantly as it thickens, and don’t let it boil vigorously. A gentle simmer is all you need. The chilling step is non-negotiable; a thoroughly chilled base churns better and faster, resulting in a creamier texture. I’ve learned the hard way that rushing this step leads to a less-than-ideal outcome. When it comes to the ice cream maker, make sure your bowl is frozen solid for at least 24 hours if you have a freezer-bowl model. If you don’t have an ice cream maker, don’t despair! You can achieve a decent result by freezing the mixture in a shallow pan and stirring it vigorously every 30-45 minutes for the first few hours until it’s frozen and somewhat creamy. It’s more work, but it’s still delicious! For ingredient swaps, if you’re out of whole milk, you can use 2% milk, but the texture might be slightly less rich. For an even richer, more traditional French-style ice cream, you could swap the cornstarch and some of the cream for egg yolks, making a true custard base, but I find this cornstarch method much simpler and equally delicious. Don’t be afraid to play with the sweetness! Taste your strawberry mixture and your custard base before churning and adjust sugar to your liking. Some like it sweeter, some prefer it a bit more tart. My kids usually prefer it a bit sweeter, while I enjoy it a little less so.
Storing and Reheating Tips
Proper storage is key to enjoying your homemade strawberry ice cream for days to come. Once it’s churned and frozen to your desired firmness, transfer it to an airtight container. A good quality plastic container with a tight-fitting lid is perfect. The trick I always use to prevent ice crystals is to press a piece of parchment paper or wax paper directly onto the surface of the ice cream before putting on the lid. This creates a barrier and helps maintain that creamy texture. Stored this way in the freezer, it should stay delicious for about 1 to 2 weeks. After that, while it’s still safe to eat, the texture might start to degrade a bit. For refrigerator storage, this isn’t really applicable for ice cream, as it will melt! However, if you happen to have any leftover strawberry base that you haven’t churned yet, it will keep in an airtight container in the fridge for about 3-4 days. Reheating isn’t really a concept for ice cream, as it’s meant to be enjoyed cold! The best “reheating” is simply letting it sit at room temperature for a few minutes before scooping to achieve that perfect, scoopable consistency. If it gets rock solid in the freezer, 5-10 minutes is usually enough to soften it up without it turning into soup.
Frequently Asked Questions
Final Thoughts
There you have it – my tried-and-true recipe for the most delightful homemade strawberry ice cream. It’s a recipe that embodies simplicity, flavor, and pure joy. I really believe that making your own ice cream is one of the most rewarding kitchen adventures you can embark on, and this strawberry version is the perfect place to start. It’s a taste of summer, a hug in a bowl, and a guaranteed smile-maker for everyone who tries it. If you love this recipe, you might also enjoy my no-churn raspberry sorbet for a lighter, tangier treat, or my classic vanilla bean ice cream as a foundation for all sorts of delicious additions. Don’t be shy about leaving comments below with your own experiences or any variations you try! I absolutely love hearing how your creations turn out. Happy scooping, and happy summer!
Homemade Strawberry Ice Cream
Ingredients
Main Ingredients
- 1000 grams Fresh Strawberries hulled and quartered
- 200 grams Granulated Sugar
- 400 ml Heavy Cream cold
- 400 ml Whole Milk
- 2 Egg Yolks
- 1 teaspoon Vanilla Extract
Instructions
Preparation Steps
- Puree the strawberries with half of the granulated sugar until smooth. If you prefer a smoother texture, you can strain the puree to remove seeds.
- In a medium bowl, whisk the egg yolks with the remaining granulated sugar until pale and slightly thickened.
- In a saucepan, heat the whole milk and heavy cream over medium heat until simmering. Do not boil.
- Slowly temper the egg yolk mixture by whisking in about half of the hot milk and cream mixture. Then, pour the tempered egg mixture back into the saucepan with the remaining milk and cream.
- Cook the custard over low heat, stirring constantly, until it thickens enough to coat the back of a spoon. Do not let it boil. This should take about 5-8 minutes.
- Remove from heat and stir in the vanilla extract. Strain the custard through a fine-mesh sieve into a clean bowl. Let it cool completely, then cover and refrigerate for at least 4 hours, or preferably overnight.
- Once the custard is thoroughly chilled, combine it with the strawberry puree. Whisk until well combined.
- Pour the mixture into an ice cream maker and churn according to the manufacturer's instructions. This usually takes about 20-30 minutes.
- Transfer the ice cream to an airtight container and freeze for at least 2-4 hours to firm up before serving.
Notes
Featured Comments
“Impressed! Clear steps and turned out amazing results. Perfect for busy nights.”
“New favorite here — creamy. crowd-pleaser was spot on.”
“Super easy and turned out amazing! My family asked for seconds. Saving this one.”
“This sweet treat was absolutely loved — the bright really stands out. Thanks!”
“Made it tonight and wow — perfect for busy nights! Will definitely make Homemade strawberry ice cream again.”
“Packed with flavor and so simple. Exactly what I wanted from Homemade strawberry ice cream.”


