

Oh, you guys. I have to tell you about this honey butter Garlic Chicken. It’s one of those recipes that just… happens. You know, when you’re rummaging through the pantry and fridge, not entirely sure what you’re going to end up with, but you’ve got a craving for something that hits all the right notes? Sweet, savory, a little bit of tang, and that irresistible garlic goodness. This honey butter garlic chicken is that happy accident, turned into a guaranteed winner. My kids ask for this at least once a week, and honestly, I don’t blame them. It’s so much more than just chicken; it’s pure comfort on a plate. If you’ve ever loved those sticky, sweet, garlicky wings you get at a restaurant, imagine that flavor profile but on tender, juicy chicken pieces that practically melt in your mouth. It’s like a hug for your taste buds, and it’s ridiculously easy to make, which is always a huge win in my book, especially on those chaotic weeknights when dinner feels like a marathon.

What is honey butter garlic chicken?
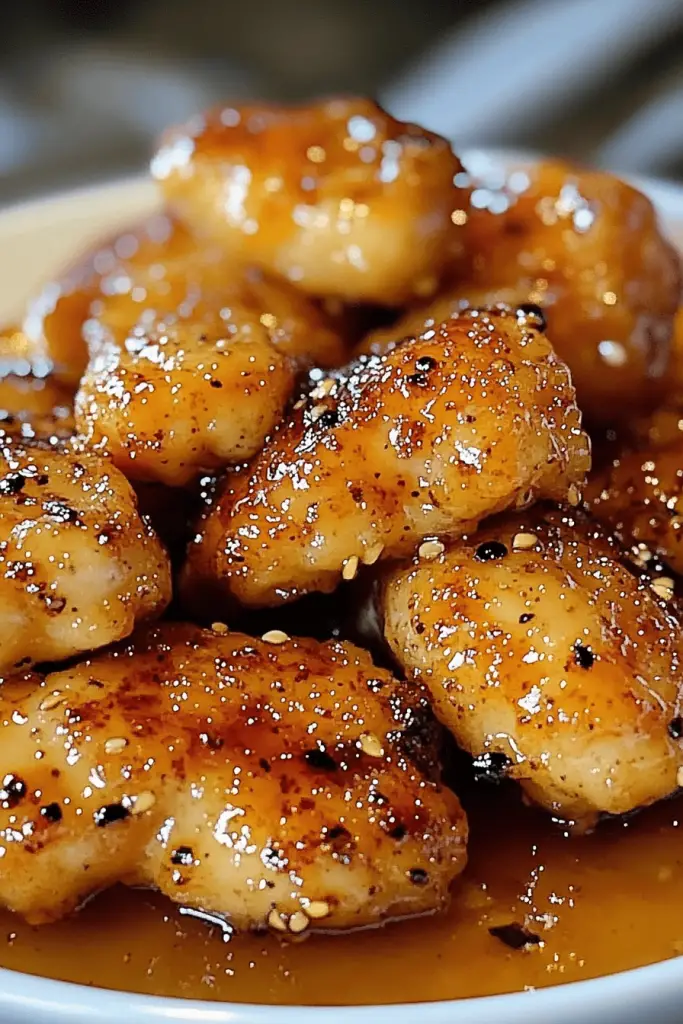
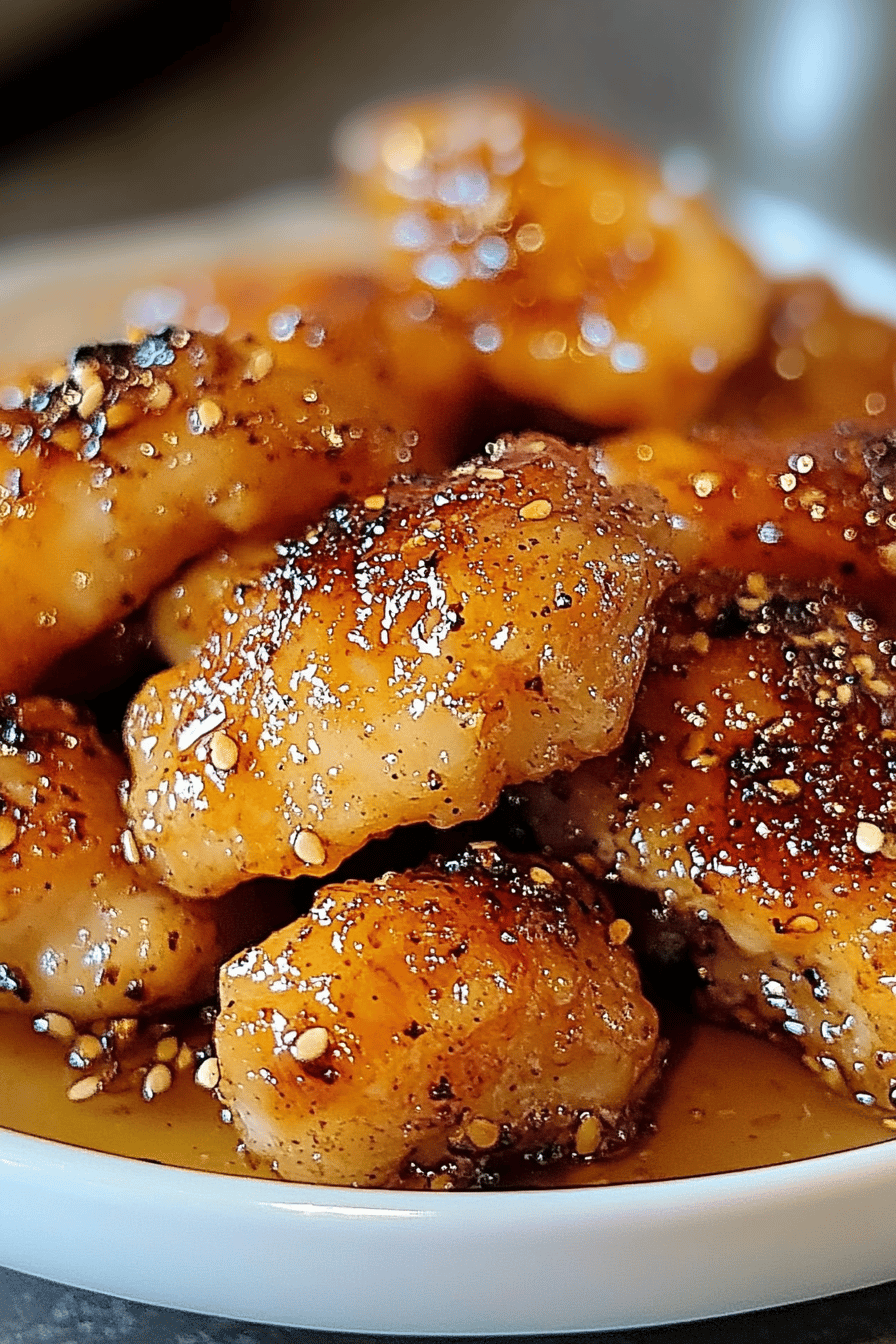
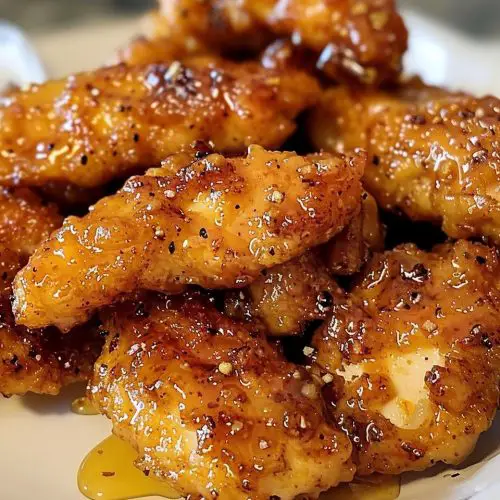
So, what exactly is this magical honey butter Garlic Chicken we’re talking about? At its heart, it’s pretty straightforward: tender pieces of chicken are cooked until they’re perfectly golden brown and juicy, then they get tossed in a luscious sauce made from the dreamy trio of honey, butter, and garlic. Think of it as a flavor bomb that coats every single bite with pure deliciousness. It’s not just about the ingredients, though. It’s about how they come together to create this incredibly satisfying dish. The honey brings that lovely sweetness that balances out the savory chicken and the pungent garlic. The butter? Well, butter makes everything better, right? It adds richness and helps create that glossy, irresistible sauce that clings to the chicken. And the garlic… oh, the garlic! It’s the star that gives this dish its unforgettable aroma and depth. It’s not overly spicy, not too sweet, but perfectly balanced. This isn’t your average weeknight chicken; it’s something special, something that makes everyone at the table smile.
How do I make Honey Butter Garlic Chicken?
Quick Overview
This honey butter garlic Chicken Recipe is all about building layers of flavor with minimal fuss. You’ll basically sear your chicken pieces until they’re golden, then create a quick, luscious sauce right in the same pan. It’s a one-pan wonder that simplifies cleanup immensely. The key is to get a nice sear on the chicken first, which locks in the juices and gives you those tasty browned bits to work with for the sauce. Then, a few simple pantry staples come together to create that irresistible glaze. It’s genuinely a speedy weeknight meal that tastes like you spent hours in the kitchen, and that’s always a win, right?
Ingredients
For the Chicken:
1.5 lbs boneless, skinless chicken thighs or breasts, cut into bite-sized pieces. Thighs are my absolute favorite here because they stay so incredibly tender and juicy, even if you accidentally leave them in the pan a minute too long. But breasts work great too, just be a little more mindful of cooking time to avoid them drying out. Make sure they’re all roughly the same size so they cook evenly.
For the Garlic Butter Sauce:
4 tablespoons unsalted butter. Because we’re making a sauce, good quality butter really makes a difference in flavor.
4-5 cloves garlic, minced. Don’t be shy with the garlic! The more, the merrier, in my opinion. I like to mince it finely so it disperses evenly throughout the sauce.
1/4 cup honey. This is where the sweetness comes from, and it’s crucial for that signature glaze. You can use any kind of honey you have, but a mild wildflower honey is lovely.
2 tablespoons soy sauce (or tamari for gluten-free). This adds a wonderful savory depth and umami.
1 tablespoon fresh lemon juice. Just a little bit of acidity brightens up all the flavors and cuts through the richness of the butter and honey.
1 teaspoon cornstarch (optional, for thickening). If you like a thicker, more coating sauce, a little cornstarch slurry (mix with 1 tablespoon water first) does the trick beautifully.
Salt and freshly ground black pepper, to taste. Seasoning is key at every step!
Step-by-Step Instructions
Step 1: Preheat & Prep Pan
Grab a large skillet or frying pan – one that’s big enough to comfortably hold all your chicken without crowding it. If you crowd the pan, the chicken will steam instead of sear, and we definitely want that lovely golden-brown crust! Place it over medium-high heat. Let it get nice and hot before you add anything. This initial heat is what gives you that beautiful sear.
Step 2: Season & Sear the Chicken
While your pan is heating up, pat your chicken pieces dry with paper towels. This is a crucial step for getting a good sear! Season the chicken generously with salt and freshly ground black pepper. Once the pan is hot, add about 1 tablespoon of olive oil or any cooking oil you prefer. Carefully add the chicken pieces in a single layer. Don’t overcrowd the pan; cook in batches if necessary. Let the chicken sear for about 3-4 minutes per side, until it’s nicely browned and cooked through. The exact time will depend on the size of your pieces. Once cooked, remove the chicken from the pan and set it aside on a plate. Don’t wipe out the pan – those little browned bits are pure gold for our sauce!
Step 3: Sauté the Garlic
Reduce the heat to medium. Add the 4 tablespoons of butter to the same skillet. Let it melt completely. Once the butter is melted and just starting to bubble, add your minced garlic. Sauté the garlic for about 30-60 seconds, stirring constantly. You want it to become fragrant but not brown or burnt, as burnt garlic can taste bitter. Keep an eye on it!
Step 4: Create the Glaze
Pour in the honey and soy sauce (or tamari). Stir well to combine everything with the garlic butter. Let this mixture simmer for about 1-2 minutes, allowing the flavors to meld and the honey to incorporate fully. If you’re using cornstarch to thicken, this is the time to do it. In a small bowl, whisk together the cornstarch and 1 tablespoon of water until smooth. Pour this slurry into the simmering sauce, whisking continuously. The sauce should start to thicken slightly within a minute or two. Be careful not to let it boil vigorously once the cornstarch is in.
Step 5: Bring it All Together
Add the seared chicken back into the pan with the sauce. Stir gently to coat every piece of chicken evenly. Let it simmer for another 1-2 minutes, allowing the chicken to absorb all those delicious flavors and the sauce to become wonderfully glossy. Stir in the fresh lemon juice for a burst of brightness. Taste the sauce and adjust seasoning with more salt, pepper, or even a touch more honey if you prefer it sweeter.
Step 6: Final Touches
Once the chicken is beautifully coated and the sauce is perfect, remove the pan from the heat. You can garnish with some fresh chopped parsley or chives if you like, for a pop of color and freshness. This adds such a lovely finishing touch!
Step 7: Serve Immediately
This honey butter garlic chicken is best served piping hot, right from the pan. The sauce will be wonderfully gooey and delicious.
What to Serve It With
This honey butter garlic chicken is so incredibly versatile, it’s almost a crime! I love how it can transform from a quick weeknight meal into something a bit more elegant with just a few smart pairings. For a simple, no-fuss dinner, I usually serve it with fluffy steamed white or brown rice. The rice is perfect for soaking up every last drop of that incredible sauce – it’s practically mandatory! Another favorite is serving it alongside some simple roasted vegetables. Broccoli, green beans, or asparagus tossed with a little olive oil, salt, and pepper and roasted until tender-crisp are fantastic. If I’m feeling a bit fancier, or if we have guests, I’ll pair it with creamy mashed potatoes or even some buttery noodles. The richness of the potatoes or the slight chew of the pasta is a perfect complement to the sweet and savory chicken. And for a lighter option, a big, fresh salad with a bright vinaigrette really cuts through the richness of the dish beautifully. My kids especially love it when I serve it over mac and cheese – it’s their ultimate comfort food indulgence!
Top Tips for Perfecting Your Honey Butter Garlic Chicken
Over the years, I’ve picked up a few tricks that I think really make a difference in getting this honey butter garlic chicken just right. First, and this is a big one, *don’t overcrowd the pan* when you’re searing the chicken. I know it’s tempting to get it all in there at once to save time, but trust me on this. If the pan is too full, the chicken steams instead of searing, and you won’t get those lovely golden-brown bits that are so crucial for building flavor in the sauce. Cook in batches if you have to! Another tip: *mince your garlic finely*. Big chunks of garlic can sometimes burn before the rest of the sauce is ready, or they can be overpowering. Fine mince ensures it infuses evenly and becomes wonderfully tender and sweet. When it comes to the sauce itself, *don’t be afraid to taste and adjust*. That’s the beauty of making it yourself. Does it need a bit more sweetness? Add a touch more honey. A little too sweet? A squeeze more lemon juice or a splash more soy sauce will balance it out. If you like your sauce thicker, the cornstarch slurry is your best friend. Just remember to whisk it into a little cold water first to avoid lumps! And finally, a little fresh herb garnish, like chopped parsley or chives, really elevates the dish. It adds a pop of color and a freshness that makes it look and taste even more special, like you really went the extra mile.
Storing and Reheating Tips
So, you’ve made this amazing honey butter garlic chicken, and there are leftovers (which is a rare but wonderful occurrence in my house!). Storing it is super simple. Once it has cooled down a bit, transfer the chicken and any remaining sauce to an airtight container. It’ll keep beautifully in the refrigerator for about 3-4 days. The flavors actually tend to meld even more, making leftovers sometimes taste even better! When it comes to reheating, I usually opt for the stovetop. Pop the leftovers back into a skillet over medium-low heat. You might need to add a tiny splash of water or broth to loosen up the sauce if it’s thickened too much. Stir gently until everything is heated through. This method helps maintain the texture of the chicken without drying it out. If you’re in a real hurry, the microwave works too, just be sure to cover it to prevent splattering and heat in short bursts, stirring in between. For the glaze, it’s best to add it after reheating if you’re storing it separately or if the sauce has really congealed. For both fridge and freezer storage, I usually add the glaze right before serving or while reheating to ensure it’s still glossy and coats the chicken nicely. I haven’t personally frozen this dish because it usually disappears too quickly, but I imagine it would freeze well for up to 2-3 months if properly wrapped in airtight containers or freezer bags.
Frequently Asked Questions
Final Thoughts

So there you have it – my absolute favorite honey butter garlic chicken recipe. It’s one of those dishes that just brings a smile to everyone’s face, mine included. The combination of sweet honey, rich butter, and aromatic garlic with tender chicken is simply irresistible. It’s proof that you don’t need a complicated recipe to create something truly delicious and impressive. Whether you’re looking for a quick weeknight dinner, a crowd-pleasing dish for friends, or just something to satisfy that craving for something comforting and flavorful, this honey butter garlic chicken is your answer. I really hope you give it a try and that it becomes a go-to in your kitchen just like it is in mine. If you do make it, please, please let me know how it turns out in the comments below! I love hearing your feedback and seeing your creations. And if you’re looking for more easy and delicious recipes, be sure to check out my other favorites here on the blog. Happy cooking!
Honey Butter Garlic Chicken
Ingredients
Main Ingredients
- 1.5 pounds chicken tenders
- 0.5 cup unsalted butter
- 4 cloves garlic, minced
- 0.25 cup honey
- 1 tablespoon soy sauce
- 1 teaspoon paprika
- 0.5 teaspoon salt
- 0.25 teaspoon black pepper
- fresh parsley, chopped (for garnish)
Instructions
Preparation Steps
- Pat the chicken tenders dry with paper towels. Season them with salt, pepper, and paprika.
- In a large skillet, melt the butter over medium heat. Add the minced garlic and sauté for about 1 minute until fragrant, being careful not to burn it.
- Add the seasoned chicken tenders to the skillet and cook for 5-7 minutes per side, or until golden brown and cooked through.
- In a small bowl, whisk together the honey and soy sauce. Pour this mixture into the skillet with the chicken.
- Simmer the sauce for another 2-3 minutes, stirring occasionally, until it thickens and coats the chicken.
- Garnish with fresh chopped parsley before serving.
Notes
Featured Comments
“Impressed! Clear steps and restaurant-level results. Perfect for busy nights.”
“New favorite here — so flavorful. crowd-pleaser was spot on.”
“Super easy and turned out amazing! My family asked for seconds. Saving this one.”
“This sweet treat was absolutely loved — the hearty really stands out. Thanks!”
“Made it tonight and wow — family favorite! Will definitely make Honey butter garlic chicken again.”
“Packed with flavor and so simple. Exactly what I wanted from Honey butter garlic chicken.”


