

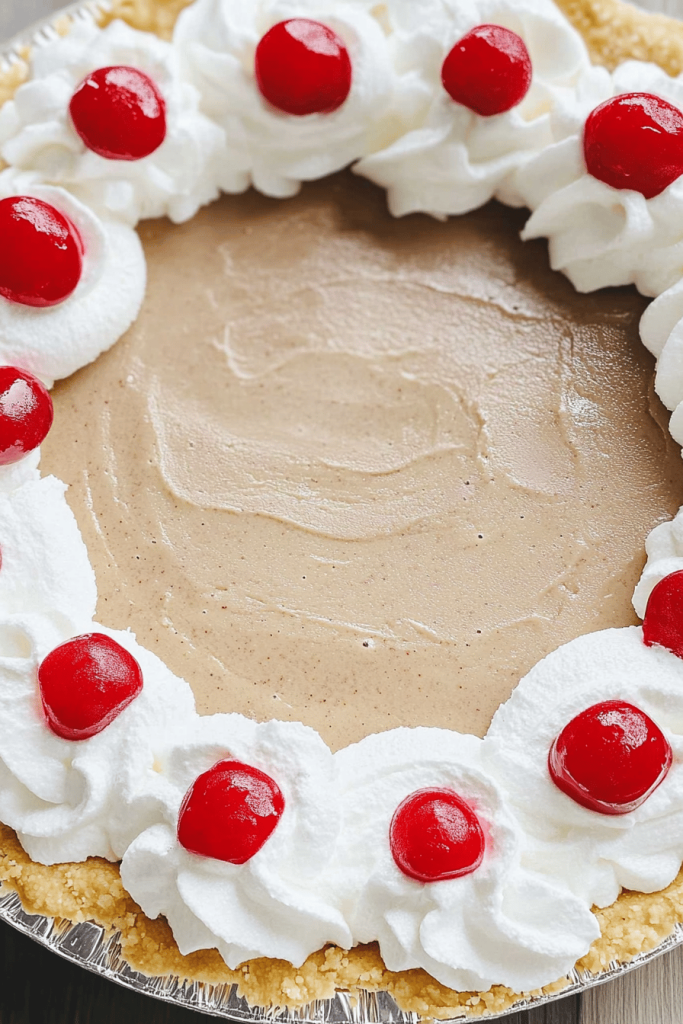
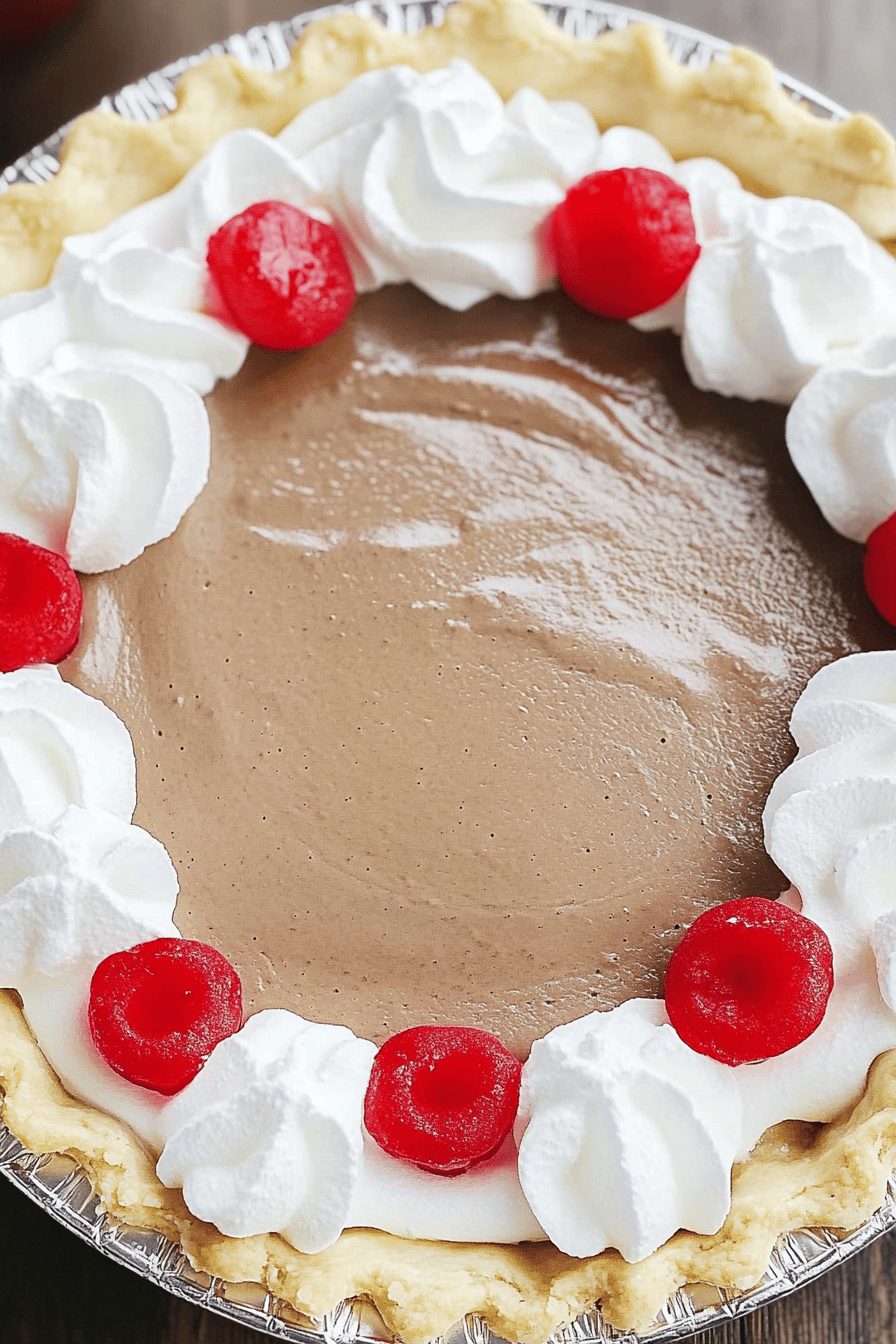
Okay, you guys, get ready! This Root Beer Float Pie is about to become your new obsession. Seriously. I know, I know, pie usually means hours in the kitchen, but this one? It’s ridiculously easy – think dump-and-go easy. The creamy root beer flavored filling combined with that slight tang of Cream Cheese is just heavenly. If you’re a fan of those no-bake cheesecake bars everyone’s been making, imagine that, but with a nostalgic root beer twist. My grandma used to Make the BEST root beer floats, and this pie captures that same bubbly, sweet magic in every single bite. This will be a hit, trust me.
What Is Root Beer Float Pie?
Think of it as a no-bake cheesecake meets a classic root beer float. It’s essentially a Creamy, dreamy pie with a root beer flavor that’s hard to resist. The “crust” is usually made from crushed graham crackers, while the filling boasts a blend of cream cheese, sweetened condensed milk, root beer concentrate (the secret weapon!), and whipped topping. No baking required which makes it perfect for hot summer days, or honestly, when you just can’t be bothered to turn on the oven. It’s a nostalgic nod to those classic Ice Cream floats we all loved as kids, but in a much more sophisticated and easier format. Plus, it’s a total crowd-pleaser!
How to Make Root Beer Float Pie
Quick Overview
Making this Root Beer Float Pie is surprisingly simple. You’ll start by making a graham cracker crust, then whip up the creamy root beer filling using Cream Cheese, sweetened condensed milk, root beer concentrate, and whipped topping. Pour the filling into the crust, chill until set, and that’s it! I swear, the hardest part is waiting for it to chill. The whole process takes about 20 minutes of actual work, and the results are seriously impressive.
Ingredients
For the Crust:
• 1 ½ cups graham cracker crumbs: Make sure they’re finely crushed! I usually put them in a zip-top bag and whack them with a rolling pin.
• 5 tablespoons unsalted butter, melted: I always use unsalted so I can control the amount of salt in the crust.
• ¼ cup granulated sugar: Adds a little extra sweetness and helps bind the crust together.
For the Filling:
• 8 ounces Cream Cheese, softened: This is crucial! It needs to be completely softened so there are no lumps in the filling. I usually leave it out on the counter for about an hour.
• 1 can sweetened condensed milk: Don’t use evaporated milk! Sweetened condensed milk is what gives the filling its creamy sweetness.
• 2 tablespoons root beer concentrate: This is the star of the show! Is it possible to buy it at a grocery store? I’ve tried different brands, and they all work pretty well.
• 1 (8 ounce) container frozen whipped topping, thawed: Adds lightness and airiness to the filling. Make sure it’s fully thawed, or it will be lumpy.

What are the steps to
Step 1: Prepare the Crust
Preheat your oven to 350°F (175°C). In a medium bowl, combine the graham cracker crumbs, melted butter, and salt. Stir to combine. How do you prepare a 9-inch pie plate? I like to use the bottom of a measuring cup to really pack it in there. Bake for 8-10 minutes, or until lightly golden brown. Let it cool completely before adding the filling. This step gives the crust a nice, solid base.
Step 2: Soften the Cream Cheese
Make sure your cream cheese is softened to room temperature. If you forget to take it out ahead of time, you can microwave it in 15-second intervals, but be careful not to overheat it. How do I melt a glass? Soft cream cheese is key to a smooth and creamy filling.
Step 3: Make the Filling
In a large bowl, beat the cream cheese with an electric mixer until smooth and creamy. Gradually add the sweetened condensed milk, mixing until well combined. Stir in the root beer concentrate until everything is evenly distributed.
Step 4: Fold in Whipped Topping
Gently fold in the whipped topping until just combined. If you overmix the whipped topping, you’ll deflate it quickly. The goal is to keep the filling light and airy.
Step 5: Assemble the Pie
What is the filling for graham cracker crust? Cover the pie with plastic wrap, pressing it gently onto the surface to prevent a skin from forming.
Step 6: Chill
If you have a big pie, refrigerate the pie for at least 4 hours or preferably overnight to allow the filling to set. What is the best time to bake a pie?
Step 7: Slice and Serve
Once the pie is set, slice and serve. What are some good ways to top it off with Whipped Cream, chocolate shavings, or cinnamon?
What is the best way to serve it?
This Root Beer Float Pie is fantastic all on its own, but here are some ideas for taking it to the next level:
For a Casual Treat:What’s a good root beer float? What are some good pairings for root beer? My kids love it with a side of gummy bears, because, why not?
For a Dessert Party:How do I slice a pie into smaller slices and arrange them on trays with other mini desserts? What are the best brownies, cookies, and fruit skewer How do you serve treats to your guests? Can you make a topping bar with whipped cream, chocolate sauce, sprinkles, and chopped nuts? So everyone can customize their slice.
For a Special Occasion:How do you garnish a slice with fresh mint? What is chocolate syrup? Serve it with a glass of sparkling wine or champagne for an elegant touch. Can you make mini pies in ramekins for a more sophisticated presentation?
My family tradition is to make a pie every year for my dad’s birthday. He’s a huge root beer fan, and it’s always good. What is a good side to serve with potato chips? Is it the perfect combination of sweet and salty?
How do I make a Root Beer Float Pie?
How do I make Root Beer Float Pie? What’s your expert advice?
Crust Perfection: For a super sturdy crust, try “pre-baking” the graham cracker crumbs before mixing them with the butter and sugar. Just spread the crumbs on a baking sheet and bake at 300°F (150°C) for about 5 minutes, or until lightly toasted. This will give the crust a richer flavor and a crispier texture. Also, make sure to press the crust firmly into the pie plate – this will prevent it from crumbling when you slice the pie.
Cream Cheese Secrets: Softened cream cheese is essential for a smooth filling. If you’re short on time, you can microwave it in 15-second intervals, but be careful not to melt it. Another trick is to beat the cream cheese on its own for a few minutes before adding the other ingredients. This will help to break up any lumps and create a super creamy base.
Root Beer Flavor Boost: Don’t be afraid to experiment with different root beer concentrates to find your favorite flavor. Some brands are sweeter, while others have a more intense root beer flavor. You can also add a few drops of root beer extract to the filling for an extra boost of flavor. Just be careful not to add too much, or it can taste artificial.
Whipped Topping Finesse: When folding in the whipped topping, be gentle! Overmixing will deflate it and make the filling dense. Use a spatula to gently fold the whipped topping into the cream cheese mixture until just combined. You should still see streaks of white in the filling.
Chilling Patience: Resist the urge to slice into the pie before it’s fully chilled. It needs at least 4 hours in the refrigerator to set properly. I usually make it the day before I plan to serve it, so it has plenty of time to chill overnight. If you’re really impatient, you can put it in the freezer for about an hour, but be careful not to freeze it solid.
I’ve also experimented with different crusts. A chocolate graham cracker crust is amazing, and you can even use a store-bought Oreo crust for a super easy option. The possibilities are endless!
Storing and Reheating Tips
To keep your Root Beer Float Pie fresh and delicious, here are some storage tips:
Room Temperature: This pie is best stored in the refrigerator. Because of the cream cheese and whipped topping, it will spoil if left at room temperature for more than a couple of hours.
Refrigerator Storage: Cover the pie tightly with plastic wrap or store it in an airtight container. It will keep in the refrigerator for up to 3-4 days. After that, the crust may start to get soggy.
Freezer Instructions: If you want to store the pie for longer, you can freeze it. Wrap it tightly in plastic wrap, then wrap it again in aluminum foil. It will keep in the freezer for up to 2-3 months. To thaw, transfer it to the refrigerator overnight.
Glaze Timing Advice: This pie doesn’t have a glaze, but if you were to add one, I’d suggest adding it right before serving. A simple chocolate ganache would be delicious!
I usually make this pie a day in advance, so it has plenty of time to chill in the refrigerator. It’s also a great way to free up your time on the day of the party or event.
Frequently Asked Questions
Final Thoughts
So, there you have it – my family’s all-time favorite Root Beer Float Pie Recipe. It’s easy, delicious, and always a crowd-pleaser. Whether you’re looking for a quick dessert for a weeknight dinner or a show-stopping pie for a special occasion, this recipe is sure to deliver. The nostalgic root beer flavor combined with the creamy texture is simply irresistible, and I guarantee that everyone will be asking for seconds.
If you love this recipe, be sure to check out my other pie recipes, like my classic apple pie or my decadent chocolate cream pie. And if you try this Root Beer Float Pie, I’d love to hear how it turns out! Leave a comment below and let me know what you think. Happy baking!

How to Make a Root Beer Float Pie: 5 Easy Steps!
Ingredients
Main Ingredients
- 1.5 cups Chocolate Cookie Crumbs Finely crushed
- 0.33 cup Melted Butter
- 1 pint Vanilla Ice Cream Softened
- 12 oz Root Beer
- 1 cup Whipped Topping
Instructions
Preparation Steps
- Combine the chocolate cookie crumbs and melted butter in a bowl. Press into the bottom of a pie plate.
- Spread softened vanilla ice cream over the crust.
- Pour root beer over the ice cream.
- Freeze for at least 2 hours.
- Top with whipped topping before serving.
Notes
Featured Comments
“Impressed! Clear steps and perfect for busy nights results. Perfect for busy nights.”
“New favorite here — super easy. crowd-pleaser was spot on.”
“Super easy and turned out amazing! My family asked for seconds. Saving this one.”
“This sweet treat was absolutely loved — the light really stands out. Thanks!”
“Made it tonight and wow — creamy! Will definitely make How to Make a Root Beer Float Pie: 5 Easy Steps! again.”
“Packed with flavor and so simple. Exactly what I wanted from How to Make a Root Beer Float Pie: 5 Easy Steps!.”


