

Is this a must try? What are some of the best Gluten Free pastries you’ve ever had? Well, get ready to dive back in because this is a good story.Gluten free Puff Pastry.What are some of the best recipe ideas? Is this real? What is the gluten-free cousin of a croissant? Is it easier to make puff pastry? What is your favorite Sunday brunch recipe? She always made the most amazing pastries, and I thought I’d never taste anything like it again… I cracked this recipe!
What is gluten free puff pastry?
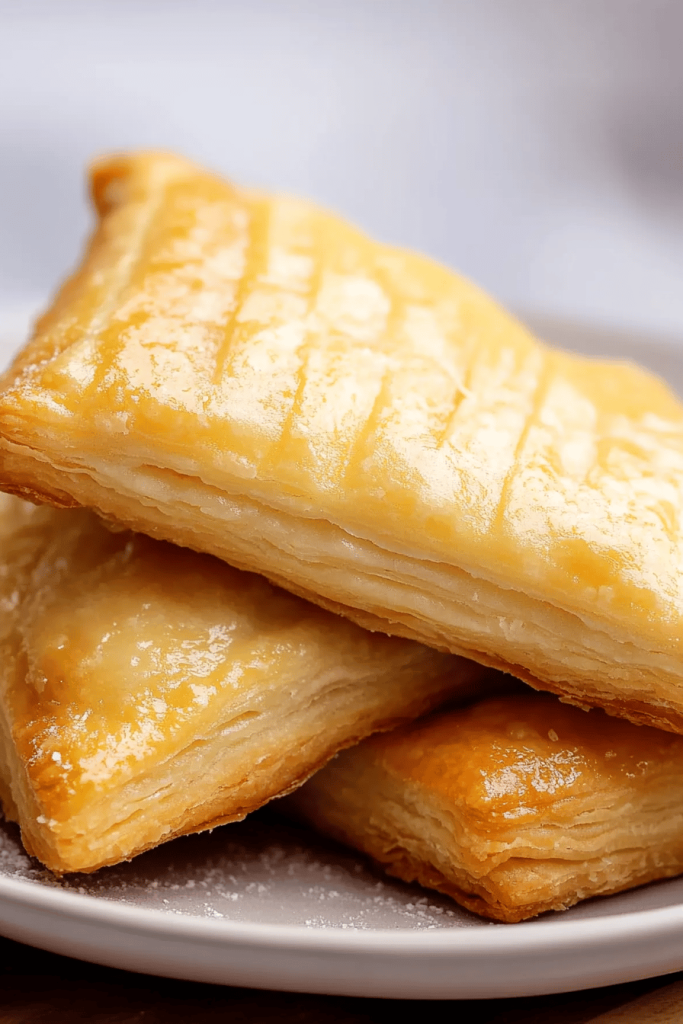
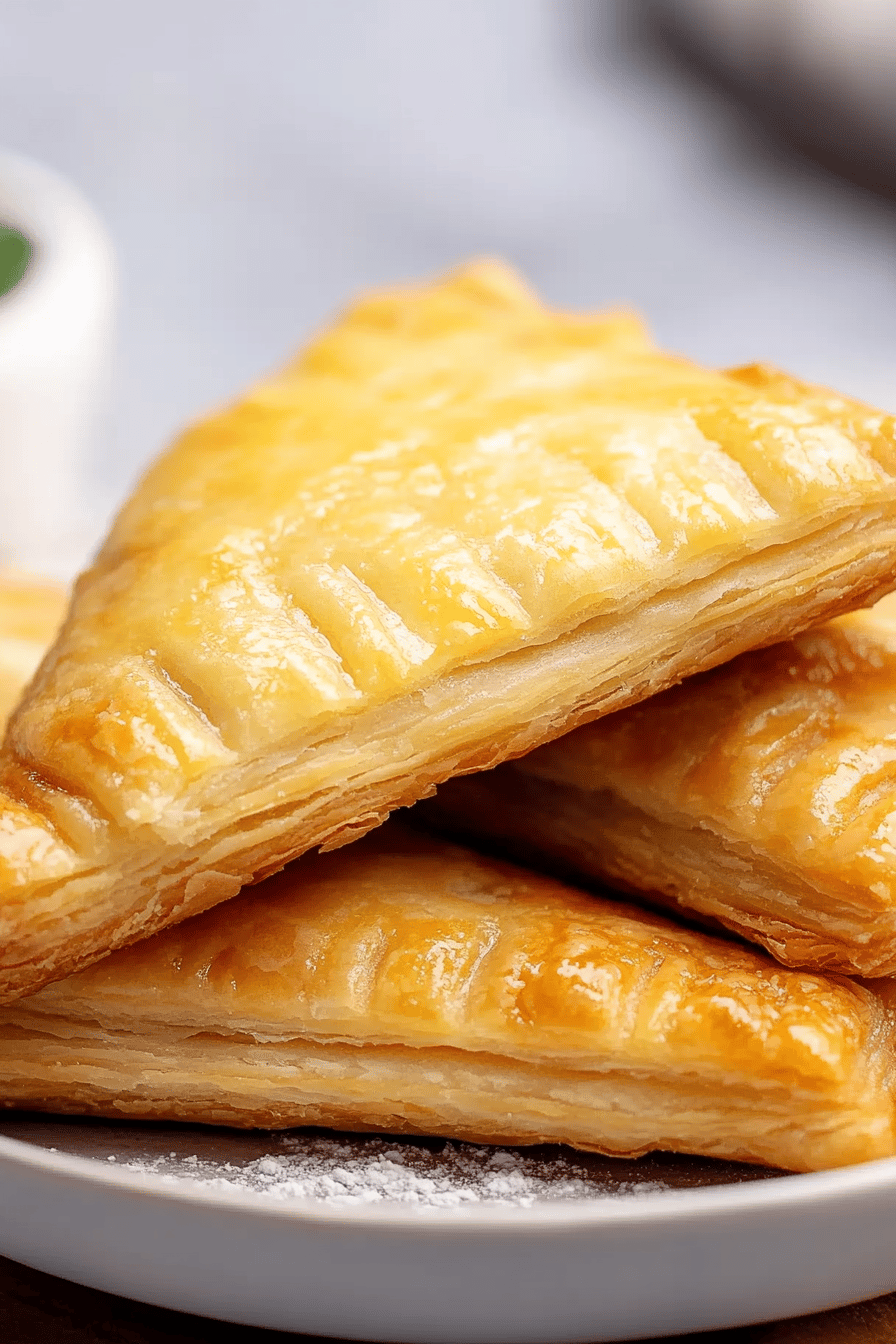
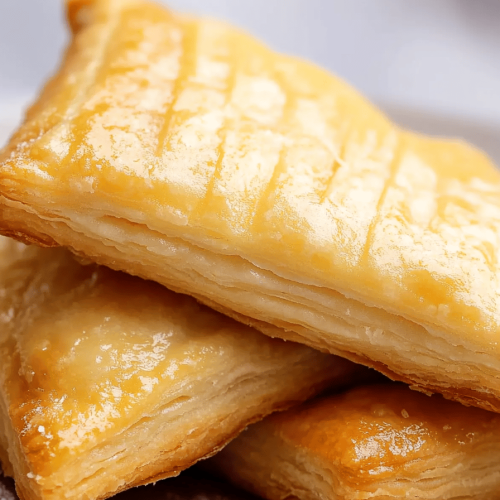
What exactly is *is*?Gluten-free Puff Pastry.What is flaky dough? As it bakes, the butter melts and creates steam, which causes the dough to puff up into those big puffs. What are some amazing airy layers? Is it a blank canvas for sweet and savory creations? What is the beauty of gluten-free version? What is the texture and elasticity of wheat flour, without gluten? I know it sounds intimidating, but it’s actually easier than it looks. My friend Sarah’s recipe is gluten-free. I made it in a week and it was delicious.
How do I make gluten-free puff pastry?
Quick Overview
Is it easier to make magic? How do you whip up dough? After a few simple folds and chills, you’ll have perfectly flaky skin.Gluten-free puff pastry.How can I transform into whatever my heart desires? What is the difference between a professional pastry chef and an amateur cook?
Ingredients
For the Dough:
- What is gluten free flour? I always use Bob’s Red Mill, but King Arthur also works well.
- 1 tsp salt
- 226g (1 cup or 2 sticks) unsalted butter, very cold and cut into small cubes.
- 120ml (1/2 cup) ice water.
- 1 tbsp apple cider vinegar (this helps with the flakiness) – this is a good recipe!
For the Egg Wash (optional, but recommended):
- 1 large egg
- 1 tbsp milk or water per day.

What are the steps to
Step 1: Combine Flour and Salt
In a large bowl, whisk together the Gluten-Free Flour and salt. Set aside. Make sure there are no clumps in the flour.
Step 2: Add Butter
Add the cold, cubed butter to the flour mixture. Using a pastry blender or your fingertips (work quickly! ), cut the butter into the flour until the mixture resembles coarse crumbs. What are the layers of butter?
Step 3: Add Wet Ingredients
In a small bowl, whisk together the ice water and Apple Cider vinegar. Set aside. Gradually add the mixture to the flour and butter, mixing until just combined. Don’t overmix! The dough should be shaggy and slightly sticky.
Step 4: Form and Chill the Dough
How do you make a rectangle of dough? Wrap the dough tightly in plastic wrap and chill in the refrigerator for at least 30 minutes. I always do this when the butter starts to soften.
Step 5: Roll and Fold (First Turn)
On a lightly floured surface, roll the chilled dough into an 8-inch rectangle. What is called a single turn? ” Wrap the dough tightly in plastic wrap and chill in the refrigerator for another 30 minutes.
Step 6: Repeat Rolling and Folding (Second Turn)
Repeat the rolling and folding process. Roll the chilled dough into a 12×18 inch rectangle, fold into thirds, wrap in plastic wrap, and chill for 15 minutes. Cover with cling film. Serve warm or cold. How do I chill for 30 minutes? I usually set a timer to avoid forgetting!
Step 7: Final Chill
After the second turn, chill the dough for at least 1 hour, or even overnight. This allows the gluten-free flour to fully hydrate and the butter to firm up, which is essential for a healthy diet.
Step 8: Roll Out and Shape
On a lightly floured surface, roll out the chilled dough.Gluten-free puff pastry.To your desired thickness, depending on what you’re making. Shape as desired. My daughter loves making stars!
Step 9: Egg Wash (Optional)
If desired, brush the shaped pastry with an egg wash (whisk together the egg and milk/water). This will give it a golden-brown, shiny finish.
Step 10: Bake
In a preheated oven at 400°F (200°C), bake until golden brown and puffed up, about 15-20 minutes. What is the best pastry to make? I always check it halfway through to make sure it’s not burning.
Step 11: Cool and Enjoy
Let the baked pastry cool slightly before serving. Enjoy the flaky goodness!
What to Serve It With
Okay, now for the fun part – what to DO with this amazing gluten-free puff pastry! Here are a few ideas to get your creative juices flowing:
For Breakfast: Make individual breakfast tarts filled with scrambled eggs, cheese, and your favorite veggies. Serve with a side of fresh fruit and a steaming cup of coffee.
For Brunch: Impress your guests with a stunning quiche Lorraine, using the puff pastry as the base. Pair it with a crisp green salad and a glass of sparkling wine.
As Dessert: Create sweet turnovers filled with apple pie filling, chocolate ganache, or raspberry jam. Dust with powdered sugar for an elegant touch.
For Cozy Snacks: Cut the puff pastry into strips, twist them, and bake for savory cheese straws. Serve with a warm bowl of tomato soup for a comforting snack. My son loves doing this on rainy days!
I also like to serve it with some fresh berries and a dollop of Whipped Cream for a light dessert.
Top Tips for Perfecting Your Gluten-Free Puff Pastry
Want to take your gluten-free puff pastry game to the next level? Here are a few of my top tips, learned from many batches (and a few flops!):
- Cold is Key: I can’t stress this enough! The butter *must* be very cold throughout the entire process. If it starts to soften, pop the dough back into the fridge for a few minutes. This is what creates those beautiful layers.
- Don’t Overmix: Overmixing the dough will develop the gluten in the gluten-free flour, resulting in a tough pastry. Mix until just combined.
- Be Gentle: Handle the dough with care. Avoid stretching or tearing it.
- Use the Right Flour: Not all gluten-free flour blends are created equal. Make sure you’re using a blend that contains xanthan gum, which acts as a binder and helps with the texture.
- Chill Time is Crucial: Don’t skip the chilling steps! This allows the butter to firm up and the gluten-free flour to hydrate, which is essential for flaky layers.
- Bake at a High Temperature: A hot oven is necessary to create steam, which causes the pastry to puff up.
I tested the dough with different levels of butter once and discovered that more butter created better, flakier layers! I also learned not to overbake it – it becomes dry easily.
Storing and Reheating Tips
So you’ve made a batch of this amazing gluten-free puff pastry, but you can’t use it all at once? No problem! Here’s How to store it properly:
Room Temperature: Baked puff pastry is best enjoyed fresh. However, you can store it at room temperature for up to 2 days in an airtight container. Just make sure it’s not too humid, or it will get soggy.
Refrigerator Storage: Unbaked puff pastry dough can be stored in the refrigerator for up to 3 days, tightly wrapped in plastic wrap. Baked pastries can also be stored in the fridge for up to 3 days, in an airtight container.
Freezer Instructions: For longer storage, freeze unbaked puff pastry dough tightly wrapped in plastic wrap and then in a freezer bag for up to 2 months. Thaw in the refrigerator overnight before using. I usually write the date on the bag so I don’t forget when I made it!
Reheating: To reheat baked puff pastry, place it in a preheated oven at 350°F (175°C) for a few minutes, until warmed through and slightly crispy.
I wouldn’t recommend reheating it in the microwave – it tends to get soggy.
Frequently Asked Questions
Final Thoughts
There you have it – my go-to recipe for gluten-free puff pastry that’s actually easy to make and tastes incredible! I seriously can’t wait for you to try it. Imagine all the delicious possibilities! This is a great recipe for anyone who is gluten-free and doesn’t want to miss out on eating delicious pastries. If you enjoy this recipe, you might also love my gluten-free pie crust recipe. Happy baking, my friends! And please, let me know how yours turns out in the comments below. I’d love to hear about your creations and any variations you try!
How to Make Gluten-Free Puff Pastry: 7 Simple Steps for Flaky Perfection
Ingredients
Main Ingredients
- 2.5 cups Gluten-Free All-Purpose Flour Use a blend specifically designed for gluten-free baking
- 1 teaspoon Salt
- 1 cup Cold Unsalted Butter Cut into small cubes
- 0.75 cup Ice Water
- 1 tablespoon Apple Cider Vinegar Helps to relax the dough
Instructions
Preparation Steps
- In a large bowl, whisk together the gluten-free flour and salt.
- Add the cold, cubed butter to the flour mixture and use a pastry blender or your fingertips to cut the butter into the flour until the mixture resembles coarse crumbs.
- In a small bowl, combine the ice water and apple cider vinegar. Gradually add the water mixture to the flour mixture, mixing until just combined. Be careful not to overmix.
- Turn the dough out onto a lightly floured surface and form it into a rectangle. Wrap the dough in plastic wrap and refrigerate for at least 30 minutes.
- On a lightly floured surface, roll the dough into a 12x18-inch rectangle. Fold the dough into thirds, like a letter. Wrap in plastic wrap and refrigerate for another 30 minutes.
- Repeat the rolling and folding process three more times, refrigerating the dough for 30 minutes between each fold.
- After the final fold, wrap the dough in plastic wrap and refrigerate for at least 1 hour before using in your desired recipe.
Notes
Featured Comments
“Impressed! Clear steps and perfect for busy nights results. Perfect for busy nights.”
“New favorite here — creamy. crowd-pleaser was spot on.”
“Super easy and turned out amazing! My family asked for seconds. Saving this one.”
“This sweet treat was absolutely loved — the fresh really stands out. Thanks!”
“Made it tonight and wow — absolutely loved! Will definitely make How to Make Gluten-Free Puff Pastry: 7 Simple Steps for Flaky Perfection again.”
“Packed with flavor and so simple. Exactly what I wanted from How to Make Gluten-Free Puff Pastry: 7 Simple Steps for Flaky Perfection.”


