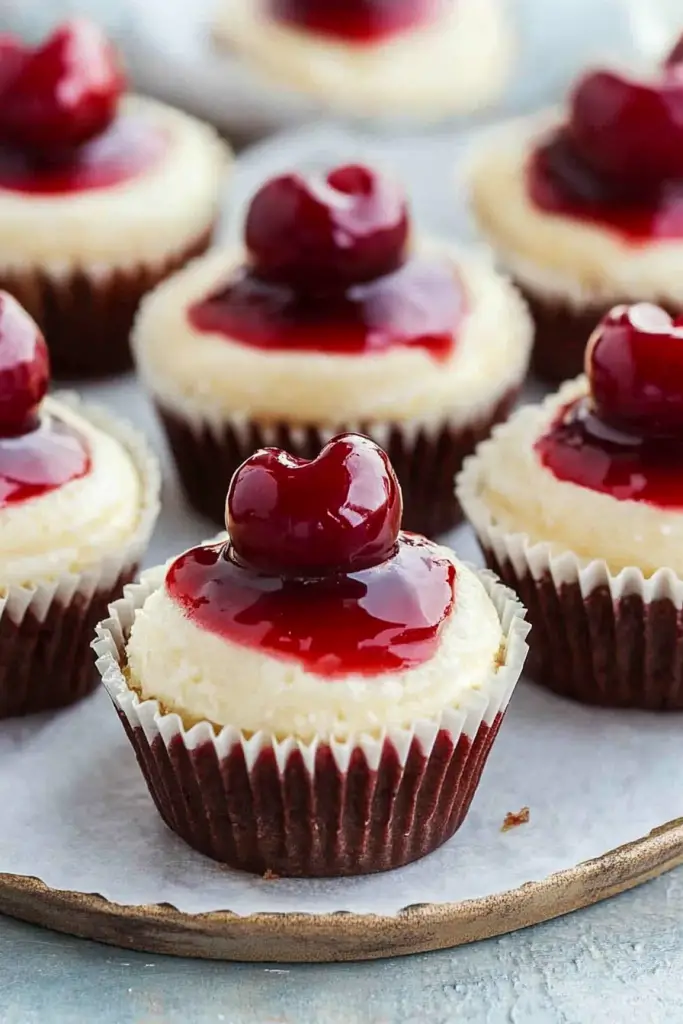
Oh, these mini cherry cheesecakes! Just thinking about them makes my kitchen feel warmer. If there’s one dessert that has earned a permanent spot in my recipe rotation, it’s this one. It’s that perfect bite-sized treat that hits all the right notes: creamy, tangy, sweet, with that delightful burst of cherry. Honestly, they’re my go-to when I need something a little special without the fuss of a whole cake. My family devours them, and I’ve lost count of how many times friends have asked for the secret. They’re like the elegant cousin to a classic cheesecake, but in a much more approachable, individual package. If you’ve ever wanted a slice of cheesecake heaven that’s ridiculously easy to make and impressive enough for guests, you’ve landed in the right place. These mini cherry cheesecakes are truly a lifesaver!
What are mini cherry cheesecakes?
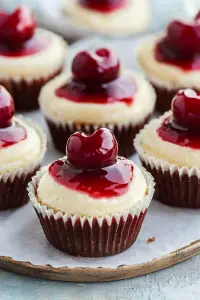
So, what exactly are these little delights? Think of them as tiny, individual cheesecakes, baked in muffin tins, usually with a simple graham cracker crust. Instead of one giant cheesecake that takes ages to bake and cool, you get a whole batch of these perfectly portioned treats. The “cherry” part comes in from a swirl of sweet cherry compote or jam that gets swirled into the creamy cheesecake batter before baking. It’s that pop of fruity sweetness against the rich, velvety cheesecake filling that makes them irresistible. They’re essentially the best of both worlds – the satisfying richness of cheesecake and the convenience and charm of a mini dessert. They’re not overly complicated, which is a huge win in my book, and they always feel like a little indulgence.
How do I make mini cheesecakes?
Quick Overview
Making these mini cherry cheesecakes is wonderfully straightforward. You’ll start by pressing a simple graham cracker crust into muffin tins, then whip up a smooth, creamy cheesecake batter. A quick swirl of cherry goodness goes in, and then they’re off to the oven for a relatively short bake time. The best part is how forgiving they are – they’re designed to be simple and delicious without any fuss. You’ll end up with a batch of beautiful, bite-sized desserts that look and taste incredibly impressive. It’s one of those recipes that makes you feel like a baking pro without breaking a sweat!
Ingredients
For the Crust:
You’ll need about 1 ½ cups of graham cracker crumbs. I usually just buy the crumbs, but you can easily make your own by pulsing graham crackers in a food processor until they’re fine. You’ll also need about 6 tablespoons of melted unsalted butter to bind them together, and a tablespoon or two of granulated sugar for a touch of sweetness. If you don’t have graham crackers, golden Oreos (filling removed) or even shortbread cookies can work in a pinch – just adjust the sugar if needed!
For the Filling:
This is the heart of our mini cheesecakes! You’ll need two 8-ounce blocks of cream cheese, softened to room temperature. This is super important; lumpy cream cheese is nobody’s friend! I also use about ¾ cup of granulated sugar, ½ teaspoon of Vanilla Extract for that classic flavor, and 2 large eggs, also at room temperature. A little bit of lemon zest or juice (about ½ teaspoon) can also add a lovely brightness, if you like that tangy note.
For the Cherry Swirl:
I usually use about ½ cup of good quality cherry preserves or cherry pie filling. If you’re feeling ambitious, you can make your own simple cherry compote by simmering fresh or frozen cherries with a little sugar and lemon juice until thickened. You just want something nice and jammy that will swirl beautifully. Some people like to add a tiny splash of almond extract to their cherry swirl for an extra layer of flavor, which is lovely too!
Step-by-Step Instructions
Step 1: Preheat & Prep Pan
First things first, preheat your oven to 325°F (160°C). Line a standard 12-cup muffin tin with paper liners. This step is crucial for easy removal and cleanup. You can use regular paper liners or even those pretty decorative ones. If you want to be extra sure they don’t stick, you can lightly grease the liners with cooking spray or butter, but usually, the liners are enough. Make sure the tin is on a stable baking sheet so it’s easy to move in and out of the oven.
Step 2: Mix Dry Ingredients
In a medium bowl, combine your graham cracker crumbs, granulated sugar, and melted butter. Stir everything together with a fork until the crumbs are evenly moistened and resemble wet sand. This is what will hold your crust together. If it feels too dry, add a tiny bit more melted butter; if it’s too wet, add a few more crumbs. You want it to clump together when you squeeze it.
Step 3: Mix Wet Ingredients
In a separate large bowl, beat the softened Cream Cheese with an electric mixer (a hand mixer or stand mixer works great) until it’s completely smooth and creamy, with no lumps. Gradually beat in the granulated sugar until well combined. Then, beat in the vanilla extract and the lemon zest or juice, if using. Mix until just combined; don’t overbeat at this stage.
Step 4: Combine
Add the room temperature eggs, one at a time, beating on low speed until just incorporated after each addition. Be careful not to overmix the eggs, as this can lead to cracking or a tough texture. Scrape down the sides and bottom of the bowl with a spatula to ensure everything is evenly mixed. The batter should be thick and smooth.
Step 5: Prepare Filling
If you’re using jam or preserves, give it a quick stir to loosen it up. If you’re making a quick compote, ensure it’s cooled slightly and has a thick, spreadable consistency. You don’t want it too runny, or it will sink to the bottom of the cheesecakes. I usually put my cherry mixture in a small bowl so it’s ready to go.
Step 6: Layer & Swirl
Spoon about 1 tablespoon of the graham cracker crust mixture into the bottom of each prepared muffin cup and gently press it down with the back of a spoon or your fingers to form an even layer. Then, fill each cup about two-thirds full with the cheesecake batter. Dollop about 1 teaspoon of your cherry mixture on top of the cheesecake batter in each cup. Using a toothpick or a skewer, gently swirl the cherry mixture into the batter. Don’t over-swirl; you want distinct swirls, not a muddy mess!
Step 7: Bake
Place the muffin tin on the baking sheet and carefully transfer it to the preheated oven. Bake for 20-25 minutes, or until the edges are set and the centers are just slightly jiggly. They shouldn’t be liquidy, but they’ll continue to set as they cool. Overbaking can lead to cracks and a dry texture.
Step 8: Cool & Glaze
Once baked, turn off the oven, prop the door open slightly with a wooden spoon, and let the cheesecakes cool in the oven for about 30 minutes. This slow cooling process helps prevent cracking. After the oven cooling, remove the tin from the oven and let them cool completely on a wire rack. Once they’re completely cool, you can add an extra drizzle of cherry preserves or a dusting of powdered sugar if you like. I often add a tiny dollop of Whipped Cream right before serving, too.
Step 9: Slice & Serve
Once fully cooled, carefully lift the mini cheesecakes out of the muffin tin using the paper liners. These are best served chilled or at room temperature. If you want to get fancy, you can carefully remove the paper liner just before serving. They look absolutely stunning on a dessert platter. Enjoy these little bites of heaven!
What to Serve It With
These mini cherry cheesecakes are so versatile, they fit in perfectly at almost any occasion. For a casual breakfast or weekend brunch, I love pairing them with a fresh cup of coffee or a steaming mug of herbal tea. They look lovely on a tiered stand alongside fresh fruit and pastries. For a more elegant brunch spread, they’re a perfect sweet ending after a savory quiche or a stack of fluffy pancakes. As a dessert, they’re a dream! They’re fantastic served with a dollop of fresh whipped cream and maybe a few extra fresh cherries or a sprig of mint for garnish. They also pair beautifully with a light dessert wine or a raspberry liqueur. And for those cozy nights when you just need a little something sweet without committing to a whole dessert, these are my absolute go-to. I’ll often just grab one (or two!) while watching a movie. My family loves them with a glass of cold milk. My kids also think they’re the best snack ever, and honestly, I agree! They’re always a hit, whether it’s a holiday gathering or just a Tuesday afternoon craving.
Top Tips for Perfecting Your Mini Cherry Cheesecakes
Over the years, I’ve picked up a few tricks that I think make all the difference when I’m making these mini cherry cheesecakes. For the crust, I always make sure my butter is melted but not hot, and I stir until every crumb is coated. It’s the foundation, so it’s worth getting right! If your crumbs seem too dry and don’t hold together when squeezed, just add another tablespoon of melted butter. When it comes to the cheesecake filling, the biggest tip I can give is to ensure your Cream Cheese and eggs are at room temperature. This is honestly a game-changer for achieving that super smooth, lump-free texture. I’ve made the mistake of using cold cream cheese before, and let me tell you, it’s a workout to get it smooth! Overmixing the eggs is another common pitfall; I always switch to low speed on my mixer as soon as they’re added, and I stop mixing as soon as they’re just combined. For the cherry swirl, don’t go crazy with it. A few gentle swirls with a toothpick are all you need to create that beautiful marbled effect. If you swirl too much, you’ll end up with a uniform pink color, and you want those lovely pockets of cherry goodness. When it comes to baking, resist the urge to open the oven door too often, especially in the first 15-20 minutes. The temperature fluctuations can cause them to sink or crack. I’ve also found that ovens can vary quite a bit, so the baking time is a guideline. Keep an eye on them and look for that slightly jiggly center. If you’re worried about cracking, the slow cooling method in the oven is your best friend. For ingredient swaps, if you can’t find graham crackers, digestive biscuits or even shortbread cookies can work for the crust. You can also experiment with different fruit preserves for the swirl – raspberry or blueberry are delicious too!
Storing and Reheating Tips
These mini cherry cheesecakes are pretty robust when it comes to storing them, which is another reason I love them! For room temperature storage, they’ll be fine for a few hours on a cool day, especially if they’re already cooled. Just keep them covered loosely with plastic wrap or under a cake dome to prevent them from drying out. I wouldn’t leave them out for more than 3-4 hours, though. If you need to store them for longer, the refrigerator is your best bet. I usually store mine in an airtight container in the fridge. They’ll keep beautifully for about 3 to 4 days. The texture stays wonderfully creamy, and the flavors really meld together. If you want to make a big batch ahead of time for a party, you can absolutely freeze these! Once they’re completely cooled, I like to place them on a baking sheet in a single layer and freeze them until solid. Then, I transfer them to a freezer-safe container or a heavy-duty zip-top bag, making sure they’re well-sealed to prevent freezer burn. They can stay in the freezer for up to 2 months. To thaw, just transfer them from the freezer to the refrigerator overnight. It’s best to wait until they are fully thawed before adding any extra glaze or toppings. If you’re planning on freezing them, I’d recommend adding the cherry swirl, but hold off on any extra drizzles or garnishes until after they’ve thawed and are ready to be served. They hold their shape and texture remarkably well, which is a huge plus for make-ahead desserts.
Frequently Asked Questions
Final Thoughts
I truly hope you give these mini cherry cheesecakes a try. They’re such a simple yet elegant way to enjoy the flavors of cheesecake without all the fuss. They’re perfect for when you want a little treat that feels special, but you don’t have hours to spend in the kitchen. The combination of the buttery crust, the creamy filling, and that burst of cherry is just pure bliss. They’ve been a hit at every gathering I’ve brought them to, and they always bring smiles. If you love these, you might also enjoy my recipe for classic New York style cheesecake or my no-bake lemon cheesecake bars – both are fantastic in their own right! I can’t wait to hear what you think of these mini wonders. Please leave a comment below and let me know how yours turn out, and if you’ve tried any fun variations! Happy baking!
Mini Cherry Cheesecakes
Ingredients
Crust
- 1.5 cups graham cracker crumbs
- 0.25 cups granulated sugar
- 6 tablespoons melted butter
Cheesecake Filling
- 16 ounces cream cheese, softened
- 0.5 cups granulated sugar
- 2 large eggs
- 1 teaspoon vanilla extract
Cherry Topping
- 1 can cherry pie filling 21 ounces
Instructions
Preparation Steps
- Preheat oven to 350°F (175°C). Line a 12-cup muffin tin with paper liners.
- In a medium bowl, combine graham cracker crumbs and sugar. Stir in melted butter until well combined. Press about 1 tablespoon of the mixture into the bottom of each muffin liner to form the crust.
- In a large bowl, beat the softened cream cheese and sugar until smooth. Beat in the eggs one at a time until just combined. Stir in the vanilla extract.
- Spoon the cream cheese mixture evenly over the crusts in the muffin liners.
- Bake for 20-25 minutes, or until the edges are set and the centers are still slightly soft. Do not overbake.
- Let the cheesecakes cool in the muffin tin for 10 minutes, then transfer them to a wire rack to cool completely.
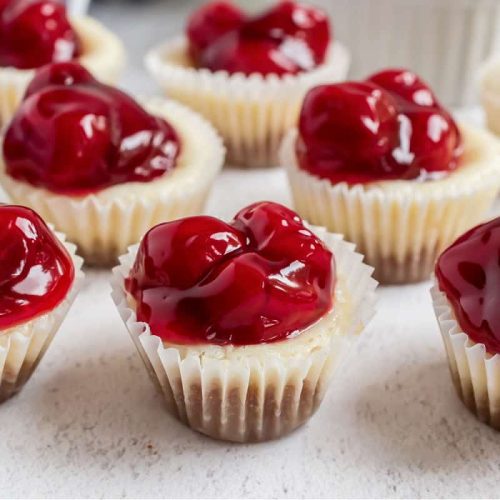
- Once completely cooled, top each cheesecake with about 1 tablespoon of cherry pie filling.
- Chill in the refrigerator for at least 1 hour before serving.
Notes
Featured Comments
“Impressed! Clear steps and crowd-pleaser results. Perfect for busy nights.”
“New favorite here — turned out amazing. crowd-pleaser was spot on.”
“Super easy and turned out amazing! My family asked for seconds. Saving this one.”
“This sweet treat was absolutely loved — the light really stands out. Thanks!”
“Made it tonight and wow — perfect for busy nights! Will definitely make mini cherry cheesecakes again.”
“Packed with flavor and so simple. Exactly what I wanted from mini cherry cheesecakes.”