

Growing up, the kitchen always smelled like butter and vanilla when grandma pulled out our Peanut Butter Cookie Bars, and the scent drifted right into the living room where cousins argued over the last slice. This is one of those recipes that feels like a warm hug—a simple, honest bake you can pull together in under an hour and still taste like Sunday. It’s not flashy, but it’s incredibly comforting, a bridge between peanut butter cookies and a lush dessert bar. I’ve made it countless times, and it never fails to spark smiles. It’s perfect on busy weeknights when you want something homemade but don’t want to raid the entire pantry for ten ingredients. The first bite is chewy and sweet, with a touch of salt to make the peanut butter sing, and that chocolate glaze on top? It’s the little wink that says, yes, you’re in for a treat.
What is peanut butter cookie bars?
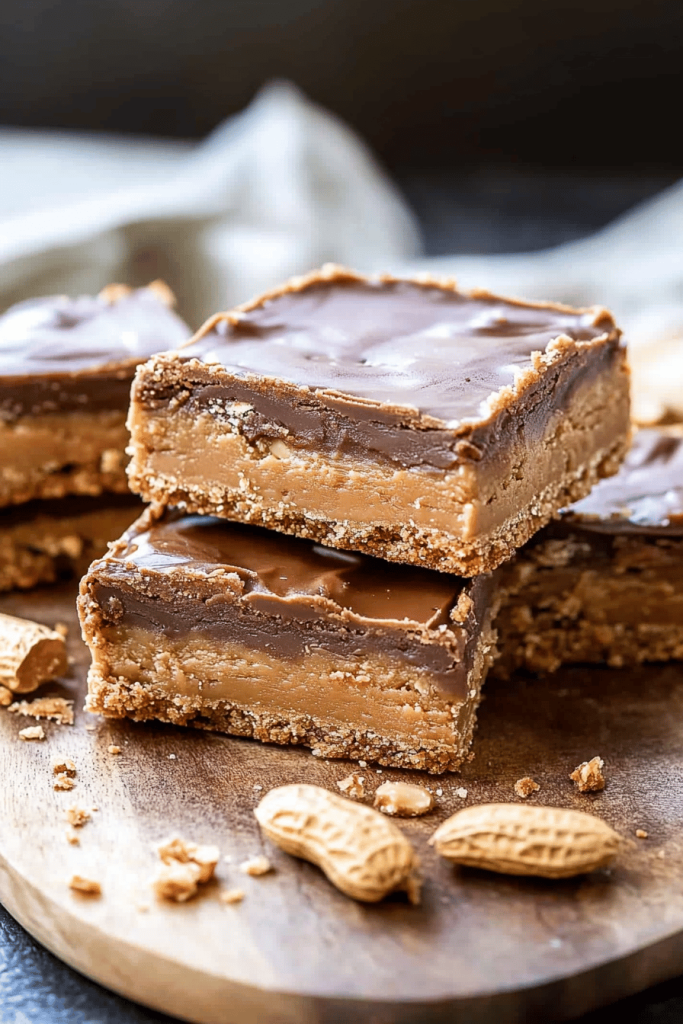
Think of peanut butter cookie bars as the best of both worlds: a sturdy, chewy cookie-like base baked in a shallow pan, topped with a Creamy Peanut Butter filling and finished with a glossy chocolate glaze. It’s essentially a bar version of a classic peanut butter cookie, cut into generous squares for easy sharing. The name isn’t about fancy origins so much as the concept: you bake a comforting sheet of peanut butter goodness, then slice it into bars for quick grab-and-go dessert or snack moments. It’s a crowd-pleaser that travels well to potlucks and school lunches, and the texture? Chewy, slightly crumbly at the edges, with that undeniable nutty aroma that makes everyone reach for a second piece.
How do I make peanut butter cookie bars?
Quick Overview
In just a few steps you’ll have a pan-ready dessert that’s half homey, half indulgent. You’ll mix a sturdy main batter, spread it in a pan, dollop and swirl a creamy Peanut Butter filling, bake until the edges are just turning golden, then drizzle a chocolate glaze across the top. The magic happens in the layering and the swirl—easy to master, but visually appealing enough to feel like you put in more effort than you did. This method keeps the bars moist and chewy, while the glaze adds that shiny finish that makes them look as good as they taste.
Ingredients
For the Main Batter:
- 1 3/4 cups all-purpose flour
- 1 cup old-fashioned oats, optional for texture
- 1/2 teaspoon baking soda
- 1/4 teaspoon salt
- 1/2 cup unsalted butter, softened
- 3/4 cup creamy peanut butter
- 1/2 cup granulated sugar
- 1/2 cup packed light brown sugar
- 1 large egg
- 1 teaspoon vanilla extract
For the Filling:
- 1/2 cup creamy peanut butter
- 2 tablespoons powdered sugar
- 1 tablespoon unsalted butter, softened
For the Glaze:
- 1/2 cup semisweet chocolate chips
- 1 tablespoon light corn syrup or honey
- 1 teaspoon vanilla extract (optional)
Step-by-Step Instructions
Step 1: Preheat & Prep Pan
Preheat your oven to 350°F (175°C). Line a 9×13-inch baking pan with parchment or spray with nonstick spray. A quick grease helps the bars release cleanly, and parchment makes it a breeze to lift the slab for slicing.
Step 2: Mix Dry Ingredients
In a medium bowl, whisk together the flour, oats (if using), baking soda, and salt. These dry ingredients give structure and a little chew to the bar cookies.
Step 3: Mix Wet Ingredients
In a larger bowl, beat the butter, Peanut Butter, and both sugars until light and fluffy. This is where the kitchen starts to smell like a peanut-buttery dream. Beat in the egg and vanilla until everything is smooth and glossy.
Step 4: Combine
Gradually add the dry mixture to the wet, mixing just until a cohesive dough forms. If you’re using oats, fold them in gently. You want a thick batter that can spread but not be so loose it oozes.
Step 5: Prepare Filling
In a small bowl, whip together the peanut butter, powdered sugar, and butter until creamy. This creamy layer is what makes the bars feel extra indulgent without turning into a full-blown dessert cake.
Step 6: Layer & Swirl
Spread about two-thirds of the main batter into the prepared pan, creating an even, smooth surface. Dollop the filling over the batter in a few tablespoons, then dollop the remaining batter on top. Use a knife or skewer to swirl the filling into the surface for a marbled effect. You’ll be able to see ribbons of peanut butter peeking through the top—the prettiest part of the bake.
Step 7: Bake
Bake for 22–28 minutes, or until the edges are golden and a toothpick inserted near the center comes out with a few moist crumbs. The center should be set but still a touch soft; it will firm up as it cools.
Step 8: Cool & Glaze
Let the bars cool completely in the pan on a rack. This is key for clean slicing. While they’re cooling, make the glaze: melt the chocolate chips with the corn syrup and vanilla until smooth. Drizzle or spread the glaze over the cooled bars, then let it set. The glaze adds a glossy finish and a little extra sweetness that pairs perfectly with the peanut butter.
Step 9: Slice & Serve
Once the glaze is set, lift the whole slab from the pan using the parchment, if you used it, and slice into generous bars. Serve with a cold glass of milk or a cup of coffee. They’re even better after a little time in the fridge, which helps them become delightfully chewy.
What to Serve It With
These peanut butter cookie bars shine in lots of contexts. They’re a quick breakfast teammate, a brunch crowd-pleaser, a dessert that doesn’t overwhelm, and a comforting snack that tastes like a hug. Here are a few ideas that my family loves:
For Breakfast: A small square with a dollop of yogurt and fresh berries, alongside a bold cup of coffee or a latte. The bars bring a touch of sweetness without being cloying first thing in the morning.
For Brunch: Plate them with sliced apples, a sprinkle of flaky sea salt, and a warm beverage station—think cappuccinos, cortados, and maybe a little orange-mcent to brighten the palate.
As Dessert: Serve with vanilla ice cream and a drizzle of extra glaze. A few crushed peanuts scattered over the top makes it look like a showstopper, even though it’s simple to pull off.
For Cozy Snacks: Enjoy a square with a mug of hot chocolate or a glass of cold milk. My kids actually ask for seconds, and I don’t blame them—there’s something about that peanut butter aroma that calls to you after a long day.
These bars carry a little nostalgia, but they aren’t stuck in the past. They fit right into modern busy weeks, where you want something homemade but don’t want to chase down ten ingredients. Family-friendly, crowd-pleasing, and a guaranteed hug in every bite.
Top Tips for Perfecting Your Peanut Butter Cookie Bars
Here are some sensible tweaks and tricks I’ve learned from baking these dozens of times. Use them as a quick reference sheet before you bake, so you don’t miss out on that perfect texture and flavor.
Peanut Butter Prep: If you’re using natural peanut butter that separates, give it a good stir. A little extra oil on top can be whisked back in with the other ingredients so you don’t end up with a greasy bar. If you’re using creamy, it’s already smooth—no harm in a quick whip before mixing.
Mixing Advice: Don’t overmix the wet and dry once you combine them. Stir just until you see a cohesive dough. Overmixing can make the bars tougher and less fudgy.
Swirl Customization: For a prettier swirl, dollop the filling on in spoonfuls, then drag a knife through in a zigzag pattern. You’ll get more defined ribbons of peanut butter and a more professional look when you slice them later.
Ingredient Swaps: Oats are optional, but if you skip them you’ll get a tighter bar. For a gluten-free version, use a 1:1 gluten-free flour blend and add an extra tablespoon of peanut butter for moisture. If you want extra chocolate, mix mini chips into the glaze or swap half of the glaze for a peanut butter drizzle.
Baking Tips: If your oven runs hot or you have a convection setting, start checking at 20 minutes. You want the edges golden and the center just set. An underbaked center is part of the charm, but you don’t want a goopy middle either.
Glaze Variations: If you want a lighter finish, use melted white chocolate instead of semisweet. For a deeper chocolate profile, mix in a pinch of espresso powder to the glaze. You can also sprinkle flaky salt on top just after the glaze goes on for an irresistible sweet-salty finish.
Lessons learned: I’ve learned that a little extra peanut butter in the batter can heighten the flavor without overpowering the bars, and resting the bars fully before glazing gives you a sturdier, cleaner look. Trust me, a few small tweaks can turn a great dessert into an unforgettable one.
Storing and Reheating Tips
These bar cookies travel well and stay delicious for several days if stored properly. Here’s how I keep them fresh and tasty.
Room Temperature: Store in an airtight container for up to 3 days. If the weather is warm, keep the container in a cool cabinet or a pantry out of direct sunlight. The glaze is best when the bars are fully cooled, but a short time in a cool room won’t ruin the shine.
Refrigerator Storage: You can refrigerate for up to 5–7 days. The bars firm up a touch in the fridge, which some people love for a chewier bite. Wrap or seal tightly to prevent the bars from absorbing fridge odors.
Freezer Instructions: For longer storage, freeze individual bars or the whole slab wrapped well in plastic and placed in a freezer-safe bag. They’re good for 2–3 months. Thaw overnight in the fridge and bring to room temperature for the best texture; re-warm gently if you want a warm, comforting bite.
Glaze Timing Advice: If you’re freezing the bars, glaze after thawing to maintain the glossy finish. If you’re storing unfrosted, you can glaze just before serving for the freshest look and flavor.
These tips have kept the peanut butter cookie bars tasting like they just came out of the oven, even after days in the fridge or freezer. It’s worth planning ahead a bit so you can slice and serve with confidence.
Frequently Asked Questions
Final Thoughts
This peanut butter cookie bars recipe is a keeper in my kitchen—the kind of dessert that makes friends linger, stories flow, and everyone goes back for one more bite. It’s simple, comforting, and flexible enough to suit your pantry and mood. If you’re new to bar desserts, this is a gentle, forgiving entry point that still delivers that “wow” moment when you slice into the pan and reveal the marbled filling beneath the glossy chocolate. I hope you’ll bake it soon, share it with someone you love, and tell me what little twist you added. Happy baking! And if you try it, I’d love to hear how yours turned out in the comments below.

peanut butter cookie bars
Ingredients
Main Ingredients
- 0.5 cup unsalted butter 1 stick, melted
- 1 large egg
- 1 cup light brown sugar packed
- 1 tablespoon vanilla extract
- 0.5 cup creamy peanut butter use Jif, Skippy, etc.; don’t use homemade or natural
- 1 cup all-purpose flour
- 1 cup Peanut Butter M&Ms
- 0.75 cup semi-sweet chocolate chips or chunks
- 0.5 cup Reese’s Peanut Butter Chips
- 0.33 cup Heath Bar Toffee Bits
Instructions
Preparation Steps
- Preheat oven to 350F. Line an 8-by-8-inch baking pan with aluminum foil, spray with cooking spray; set aside.
- In a large, microwave-safe bowl melt the butter, about 1 minute on high power.
- Wait momentarily before adding the egg so you don’t scramble it. Add the egg, brown sugar, vanilla, and whisk until smooth.
- Add the peanut butter and whisk or stir until smooth and incorporated.
- Add the flour and stir until just combined, don’t overmix.
- Add all remaining add-ins and fold to incorporate.
- Turn batter out into prepared pan, smoothing the top lightly with a spatula. I like to strategically place a few M&Ms on the top of the batter for a nice visual effect.
- Bake for about 25 minutes, or until top is set. A toothpick inserted in the center should come out clean, or with a few moist crumbs, but no batter. Allow bars to cool in pan for at least 30 minutes before slicing and serving. Bars will keep airtight at room temperature for up to 1 week, or in the freezer for up to 6 months.
Notes
Featured Comments
“Impressed! Clear steps and family favorite results. Perfect for busy nights.”
“New favorite here — quick weeknight win. crowd-pleaser was spot on.”
“Super easy and turned out amazing! My family asked for seconds. Saving this one.”
“This sweet treat was absolutely loved — the rich really stands out. Thanks!”
“Made it tonight and wow — so flavorful! Will definitely make peanut butter cookie bars again.”
“Packed with flavor and so simple. Exactly what I wanted from peanut butter cookie bars.”


