

You know those treats that just instantly transport you back to childhood, with that perfect balance of sweet, chewy, and that delightful crunch? Yeah, these peppermint Krispie treats are exactly that, and then some! I swear, every time I make a batch, the smell alone brings my kids running from every corner of the house, shouting “Are those the good ones?!” And honestly, they are. These aren’t just your average rice cereal treats; we’re talking a little bit of holiday magic, a touch of sophisticated flavor, and a whole lot of pure joy. If you love a classic Krispie treat but crave something a little more festive and incredibly flavorful, then these peppermint krispie treats are about to become your new obsession. They’re surprisingly simple, which is always a win in my book, especially when those sweet cravings hit hard and fast!
What is Peppermint Krispie Treats?
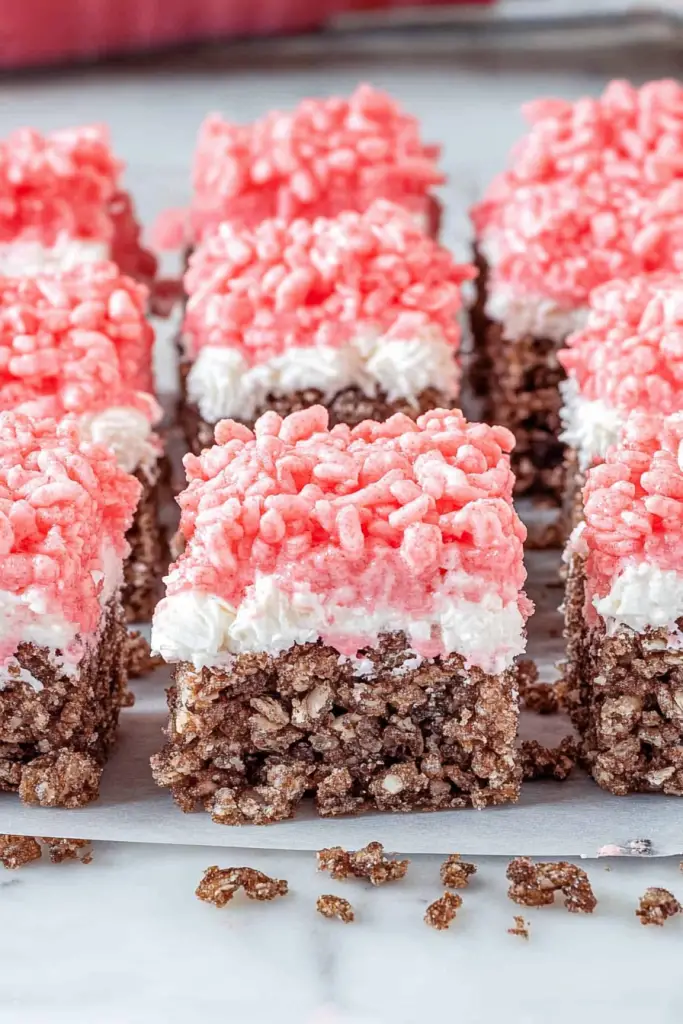
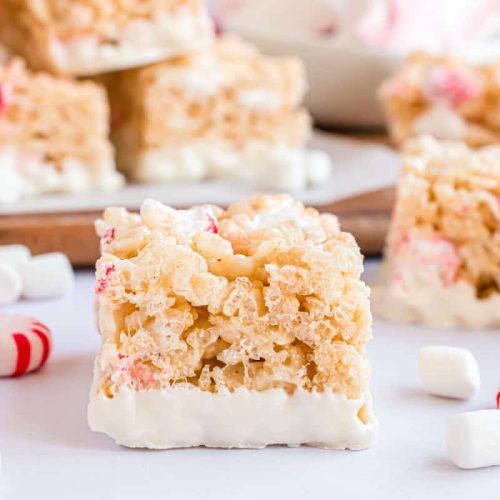
So, what exactly *are* peppermint krispie treats? Think of your beloved, classic rice krispie squares – you know, the ones made with gooey melted marshmallows and crispy cereal. Now, imagine taking that nostalgic goodness and infusing it with the bright, invigorating zing of peppermint. It’s essentially a flavour-boosted version of that comfort food staple. The “peppermint” part comes from a touch of peppermint extract, and if you’re feeling extra festive (or just love a pop of colour!), a little bit of crushed Candy Cane sprinkled on top. It’s not an overpowering mint, just a lovely, cool whisper that perfectly complements the sweetness of the marshmallows and the satisfying crunch of the cereal. It’s the kind of treat that feels special enough for a holiday gathering but easy enough to whip up on a random Tuesday when you just need a little pick-me-up.
How to Make Peppermint Krispie Treats
Quick Overview
Making these delightful peppermint Krispie Treats is a breeze! You’ll essentially be melting butter and marshmallows together, stirring in your crispy rice cereal and that essential peppermint extract, pressing the mixture into a pan, and letting it set. The whole process is incredibly straightforward, and the result is a chewy, crunchy, minty marvel. It’s a no-bake wonder that’s perfect for beginners and seasoned bakers alike. Trust me, this method ensures that perfectly gooey texture every single time.
Ingredients
For the Main Treat:
6 tablespoons unsalted butter
1 package (10 oz) marshmallows (about 40 marshmallows) or 4 cups mini marshmallows. I always go for the regular-sized ones; they seem to melt a little more evenly for me.
6 cups crispy rice cereal. Make sure it’s fresh! Stale cereal makes for sad, soft treats.
1 teaspoon pure peppermint extract. This is key! Don’t skimp on the quality here; it makes a big difference in flavor.
For the Optional Topping:
1/2 cup crushed peppermint candies (like candy canes). I like to put mine in a zip-top bag and give them a good whack with a rolling pin. It’s surprisingly therapeutic!
Step-by-Step Instructions
Step 1: Preheat & Prep Pan
First things first, grab an 8×8 or 9×9 inch baking pan. You’ll want to grease it really well with butter or non-stick cooking spray. I usually grease it and then line it with parchment paper, leaving some overhang on the sides. This makes lifting the treats out so much easier later on. Set that aside. No need to preheat your oven for this recipe!
Step 2: Mix Dry Ingredients
In a large mixing bowl, measure out your 6 cups of crispy rice cereal. Having everything measured and ready to go is super important because once the marshmallows are melted, things move fast!
Step 3: Mix Wet Ingredients
In a large saucepan or Dutch oven, melt the 6 tablespoons of butter over medium-low heat. Once the butter is completely melted, add the entire package of marshmallows. Stir constantly until the marshmallows are completely melted and the mixture is smooth and creamy. This usually takes about 5-7 minutes. You don’t want it to boil, just melt gently.
Step 4: Combine
Remove the saucepan from the heat. Immediately stir in the 1 teaspoon of pure peppermint extract. Give it a quick stir to combine. Then, pour the melted marshmallow mixture over the crispy rice cereal in your large bowl. Fold gently with a rubber spatula until the cereal is evenly coated. Work quickly here, as the mixture will start to set up.
Step 5: Prepare Filling
This step is already done in Step 4 as we’re combining everything in one bowl. The “filling” is the marshmallow-cereal mixture itself!
Step 6: Layer & Swirl
Using your greased spatula (or your hands lightly greased with butter or cooking spray – this is a classic trick!), press the mixture evenly into your prepared baking pan. Don’t press too hard, or your treats will be dense and hard. Just gently coax it into an even layer. If you’re using the crushed peppermint candies, now’s the time to sprinkle them evenly over the top. You can gently press them in a bit if you like, but they’ll mostly adhere on their own.
Step 7: Bake
No baking required for this recipe! The magic happens as it cools and sets. Just ensure your pan is ready and the mixture is pressed in.
Step 8: Cool & Glaze
Let the pan cool completely at room temperature for at least 1 hour, or until firm. If you’re impatient like me, you can pop it in the fridge for about 30 minutes to speed things up, but I find room temperature cooling gives the best texture. Once firm, use the parchment paper overhang to lift the entire block out of the pan. If you opted for the crushed peppermint, it’s already there! No extra glaze needed for this specific recipe, the peppermint flavor is infused directly.
Step 9: Slice & Serve
Once cooled and firm, use a sharp knife to cut the treats into squares. I usually aim for about 12-16 squares, depending on how large I want them. For the cleanest cuts, you can lightly grease your knife between slices. Serve immediately or store them for later!
What to Serve It With
These peppermint krispie treats are pretty much a standalone star, but they can also be the perfect accompaniment to a whole range of occasions and meals. For Breakfast, imagine serving a smaller square alongside a hot cup of coffee or a festive gingerbread latte. They add a sweet, celebratory touch to a simple morning. They’re also fantastic tucked into a lunchbox for a special treat. For Brunch, consider cutting them into smaller, bite-sized pieces and arranging them on a platter alongside other pastries, fruit salads, and maybe even a decadent chocolate fountain. They add a fun, playful element that adults and kids alike will adore. As Dessert, these are absolute winners. Serve them on their own after a hearty meal, or pair them with a scoop of vanilla bean Ice Cream or a warm chocolate lava cake for an extra indulgence. The minty coolness is a delightful contrast to richer desserts. And for those Cozy Snacks, well, this is where they truly shine. Curl up on the couch with a glass of milk and one (or two!) of these. They’re the ultimate comfort food when you need a sweet escape. My family tradition is to have them every year on our Christmas movie marathon day – they just fit the cozy, festive vibe perfectly!
Top Tips for Perfecting Your Peppermint Krispie Treats
Over the years, I’ve definitely picked up a few tricks for making these peppermint krispie treats absolutely perfect every time. When it comes to the cereal, freshness is key. If your cereal is even a little stale, your treats will lack that signature crispness and can turn out chewy and a bit sad. I always double-check the expiration date or give it a sniff test. For mixing, the trick is to work quickly but gently. Once the marshmallows are melted, pour them over the cereal and fold until just combined. You don’t want to overmix, as this can break down the cereal and make them dense. If you find the mixture sticking to your spatula, lightly greasing it with butter or cooking spray makes a world of difference. For the peppermint flavor, I’ve found that 1 teaspoon of pure peppermint extract is the sweet spot for me. If you add too much, it can become overpowering, and if you add too little, you might not taste it at all. I’ve experimented with peppermint oil, but I find extract gives a more consistent and less intense flavor. When it comes to the candy cane topping, make sure your pieces are relatively small. Big chunks can be hard to bite into. I prefer using candy canes that have already been crushed into a fine powder or small pieces. For pressing the mixture into the pan, don’t pack it down too tightly! This is a common mistake that leads to hard, brick-like treats. Just gently press it into an even layer. A lightly greased spatula or even lightly greased hands work best. If you’re worried about sticking, laying a piece of parchment paper over the top and pressing down with that also helps. Finally, for the setting time, patience is a virtue. Letting them cool completely at room temperature ensures they have the best chewy-crisp texture. While chilling them can speed things up, sometimes it can make them a bit too hard, so I usually opt for the slower, room-temperature set unless I’m in a real bind.
Storing and Reheating Tips
These peppermint krispie treats are usually gobbled up pretty quickly in my house, but if you happen to have any leftovers (which I highly doubt!), storing them is super simple. For room temperature storage, the best way is to keep them in an airtight container. They’ll stay fresh and delicious for about 2-3 days this way. Make sure they’re completely cooled before you seal the container, otherwise, you risk getting condensation, which can make them a bit soggy. If you need them to last a bit longer, you can store them in the refrigerator. Again, an airtight container is your best friend. They’ll keep well in the fridge for up to a week, though I find the texture is best within the first 4-5 days. When you want to serve them from the fridge, I usually let them sit out at room temperature for about 15-20 minutes to soften up a bit before cutting and serving. For longer storage, these treats freeze beautifully! Wrap the entire pan (once cut into squares) or individual squares tightly in plastic wrap, then place them in a freezer-safe bag or container. They can stay frozen for up to 2-3 months. To thaw, simply transfer them from the freezer to the refrigerator overnight, then let them come to room temperature. For the glaze timing, since this recipe doesn’t have a separate glaze, you don’t need to worry about that! If you were to add a chocolate drizzle, I would always do that after the treats have completely set and cooled, just before storing or serving.
Frequently Asked Questions
Final Thoughts
There you have it – my absolute favorite peppermint krispie treats! I truly hope you give this recipe a try. It’s a simple pleasure that brings so much joy, and it’s become a staple in my kitchen, especially around the holidays, but honestly, it’s good year-round. The perfect chewy texture combined with that refreshing minty kick is just divine. If you enjoyed these, you might also love my No-Bake Chocolate Peanut Butter Bars for another easy, crowd-pleasing treat, or perhaps my Classic Vanilla Bean Cookies for a more traditional baked good. Don’t hesitate to experiment with variations – maybe a touch of chocolate extract with the peppermint? Or what about adding some festive sprinkles? I can’t wait to hear how yours turn out! Please leave a comment below with your thoughts or any fun twists you tried, and if you loved them, consider sharing this recipe with your friends and family. Happy baking (or rather, no-baking)!
Peppermint Krispie Treats
Ingredients
Main Ingredients
- 6 tablespoons salted butter
- 10 ounce bag mini marshmallows
- 1 teaspoon vanilla extract
- 5 cups Rice Krispies cereal
- 2 cups peppermint marshmallows
Optional Dipping/Drizzling
- 1 cup Ghirardelli white chocolate melting wafers
Instructions
Preparation Steps
- In a large pot, melt butter over medium heat. Add in bag of regular mini marshmallows, reduce heat to low. Stirring constantly, melt marshmallows completely. Remove from heat. Add in vanilla extract.
- Fold in Rice Krispies cereal. Carefully fold in peppermint marshmallows.
- Press gently into a parchment paper lined 9-inch square baking dish. Allow to set, about 1 hour.
- Cut into small squares. If desired, dip bottoms of each square into melted white chocolate, or drizzle over the top. Set onto a piece of parchment paper and allow to set (about 15 minutes). Enjoy!
Notes
Featured Comments
“Impressed! Clear steps and quick weeknight win results. Perfect for busy nights.”
“New favorite here — quick weeknight win. crowd-pleaser was spot on.”
“Super easy and turned out amazing! My family asked for seconds. Saving this one.”
“This sweet treat was absolutely loved — the balanced really stands out. Thanks!”
“Made it tonight and wow — so flavorful! Will definitely make Peppermint Krispie Treats for a Sweet Surprise again.”
“Packed with flavor and so simple. Exactly what I wanted from Peppermint Krispie Treats for a Sweet Surprise.”


