

Oh, these Rice Krispie treats. Honestly, I don’t think I’ve met a single person who doesn’t have a soft spot for them. They’re the ultimate comfort food, aren’t they? For me, they’re pure childhood magic. I can almost smell the sweet, buttery aroma wafting from my mom’s kitchen whenever she’d whip up a batch for after-school snacks. They’re just so incredibly simple, yet they manage to deliver this satisfying chewiness and sweet crunch that’s hard to beat. Forget complicated cookies or fussy cakes for a moment – sometimes, you just need the straightforward, unadulterated joy of a perfect Rice Krispie Treat. This isn’t just any recipe; it’s my tried-and-true method, honed over years of late-night cravings and birthday party contributions, that guarantees that perfect, slightly gooey center and a satisfyingly crisp edge. It’s like a warm hug, but edible!
What are Rice Krispie treats?
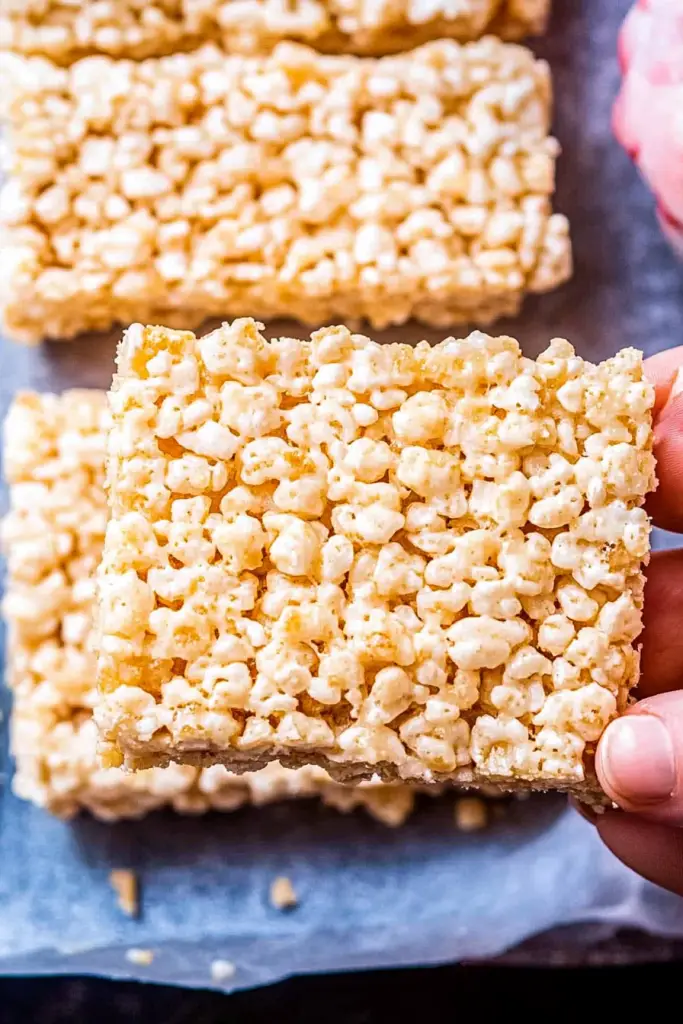
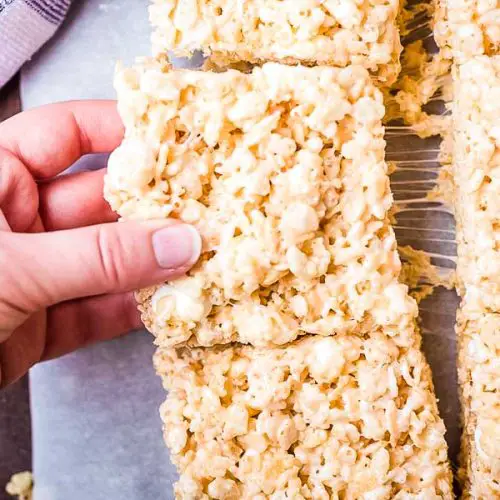
So, what exactly *are* these magical little squares? At their heart, Rice Krispie treats are a deceptively simple confection made from three main ingredients: puffed rice cereal (the classic Rice Krispies, of course!), melted marshmallows, and butter. You melt the butter and marshmallows together until smooth and gooey, then stir in the cereal until it’s all coated. Press it into a pan, let it cool, and voilà! You have these wonderfully chewy, sweet, and satisfying bars. Think of it as a no-bake, super-quick answer to your sweet tooth’s deepest desires. It’s the edible embodiment of happy memories, a classic for a reason. It’s the kid-friendly treat that adults secretly love just as much, if not more!
How to Make Rice Krispie Treats
Quick Overview
This recipe is all about simplicity and achieving that perfect texture. We’ll melt butter and marshmallows, stir in the cereal until it’s beautifully coated, and then press it into a prepared pan. The key is not to overmix and to let them cool properly for that ideal chewy-crisp balance. It’s genuinely that easy, and you’ll be amazed at how quickly you can go from pantry staples to a delightful homemade treat.
Ingredients
For the Main Treat:
– 6 tablespoons unsalted butter (this is key for flavor! Don’t skimp)
– 1 (10-ounce) package marshmallows (use fresh ones for the best melt and chew)
– 1 teaspoon pure Vanilla Extract (optional, but it adds a lovely warmth)
– 6 cups crispy rice cereal (the brand name ones are usually the best for texture)
For the Optional Swirl/Drizzle:
– 1/2 cup chocolate chips (milk, semi-sweet, or dark, your choice!)
– 1 teaspoon coconut oil or vegetable oil (helps the chocolate melt smoothly)
Step-by-Step Instructions
Step 1: Preheat & Prep Pan
Grab a 9×13 inch baking pan. You can grease it lightly with cooking spray or butter, but my favorite trick is to line it with parchment paper, leaving some overhang on the sides. This makes lifting the treats out so much easier later! Set that aside for now.
Step 2: Mix Dry Ingredients
In a large bowl, measure out your 6 cups of crispy rice cereal. Give it a little fluff with a spatula, just to make sure there are no big clumps. This step seems simple, but it ensures your cereal is evenly coated later on.
Step 3: Mix Wet Ingredients
In a large saucepan (big enough to eventually hold your cereal too!), melt the 6 tablespoons of butter over low heat. Once it’s mostly melted, add the entire 10-ounce bag of marshmallows. Stir constantly over low to medium-low heat. You want them to melt completely until the mixture is smooth and creamy, without any lumps. This usually takes about 5-8 minutes. Don’t rush this part – low and slow is the way to go to avoid scorching!
Step 4: Combine
Once the marshmallows are fully melted and smooth, remove the saucepan from the heat. Stir in the vanilla extract, if you’re using it. Now, pour the gooey marshmallow mixture over the cereal in your large bowl. Gently fold everything together with a spatula until the cereal is completely coated. You want every single crispy puff to be enrobed in that sweet, sticky goodness. This is where that gentle folding is important – you don’t want to crush the cereal.
Step 5: Prepare Filling
If you’re planning on a chocolate drizzle, this is the time to prepare it. Place your chocolate chips and the teaspoon of oil in a microwave-safe bowl. Microwave in 30-second intervals, stirring well after each, until the chocolate is melted and smooth. Set aside.
Step 6: Layer & Swirl
Quickly, while the mixture is still warm and pliable, spoon it into your prepared 9×13 inch pan. Using a greased spatula or a piece of wax paper, gently press the mixture evenly into the pan. Don’t press *too* hard, or your treats will be dense and hard. Aim for an even layer. If you’re adding a chocolate swirl, drizzle the melted chocolate over the top and use a toothpick or the tip of your spatula to gently swirl it into the Rice Krispie mixture. It looks so pretty!
Step 7: Bake
Here’s the secret: you don’t actually *bake* these in the traditional sense! You just need them to set. Let them cool completely at room temperature for at least 30 minutes, or until firm. If you’re impatient (like me sometimes!), you can pop them into the refrigerator for about 15-20 minutes to speed things up, but room temperature cooling usually yields the best texture.
Step 8: Cool & Glaze
Once the treats are firm and set, use the parchment paper overhang to lift the entire slab out of the pan. If you didn’t use parchment, carefully invert the pan onto a cutting board. If you added a chocolate drizzle, ensure it’s set before slicing. If you want a simple glaze instead of a swirl, you can melt some white chocolate or a contrasting color and drizzle that on after the treats have cooled and been cut.
Step 9: Slice & Serve
Using a sharp knife (lightly greased or dipped in hot water and wiped dry), cut the treats into squares or rectangles. I like to make mine a bit smaller, more like bite-sized squares, but you do you! Serve them immediately or store them for later. The smell alone as you cut them is just divine.
What to Serve It With
These Rice Krispie treats are so wonderfully versatile, they can accompany almost any meal or occasion. For a simple breakfast, they’re surprisingly good alongside a hot cup of coffee – a little sweet treat to start the day. I sometimes even cut them into smaller squares and serve them with a fruit salad for a playful twist. At brunch, they really shine! You can elevate them by cutting them into elegant little rectangles and arranging them on a tiered stand with other pastries and fruit. They pair beautifully with a mimosa or a sparkling cider. As a simple dessert, they’re a home run. After dinner, they’re just so satisfying. I love serving them with a scoop of vanilla Ice Cream or alongside a rich chocolate cake if you’re feeling extra indulgent. And for those cozy, unplanned snack moments? They’re perfect! Just grab one (or two!) with a cold glass of milk. My family tradition is to have them on movie nights – they’re easy to eat in the dark and always a hit.
Top Tips for Perfecting Your Rice Krispie Treats
After making these countless times, I’ve picked up a few tricks that I think make all the difference. For starters, using fresh marshmallows is non-negotiable. Stale marshmallows just don’t melt as smoothly, and you end up with a tougher texture. If your marshmallows feel a bit hard, you can microwave them for about 10-15 seconds before adding them to the butter; it helps them along. My biggest piece of advice for mixing is to be gentle. You’re not kneading dough; you’re coating delicate cereal. Overmixing or pressing too hard will crush the cereal, leading to dense, hard treats instead of the light and chewy ones we’re after. For swirl customization, don’t go too crazy with the marbling. A few gentle passes with a toothpick are all you need to create a beautiful pattern without overworking the mixture. If you want to add other ingredient swaps, chocolate chips are fantastic! Fold them in right at the end with the cereal. If you’re feeling adventurous and want to try a different cereal, be mindful of the texture. Some cereals can become soggy quickly, so stick with the classics for best results. For baking tips (or rather, setting tips!), I always recommend a parchment-lined pan. It’s a game-changer for easy cleanup and removal. And remember, no actual baking is needed – just patience for them to set up properly. If you’re experimenting with glaze variations, a simple powdered sugar glaze (powdered sugar, a tiny bit of milk or water, and maybe a drop of vanilla) is wonderful. Just make sure the treats are completely cool before drizzling, or the glaze will melt right off!
Storing and Reheating Tips
One of the best things about Rice Krispie treats is how well they store! For room temperature storage, keep them in an airtight container. They’re usually best enjoyed within 1-2 days, though they can stay good for up to 3-4 days. Just be aware that they might get a little firmer as time goes on. If you need to store them for longer, refrigerator storage is your friend. Wrap the slab tightly in plastic wrap, then place it in an airtight container. They’ll keep well in the fridge for about a week. When you want to eat them, just let them sit out at room temperature for about 15-20 minutes to soften up a bit. For freezer instructions, these are fantastic for making ahead! Cut the treats into individual squares, wrap each one tightly in plastic wrap, then place them in a freezer-safe bag or container. They can stay frozen for up to 3 months. To thaw, simply unwrap them and let them come to room temperature. As for glaze timing advice, if you’re storing them at room temperature or in the fridge, it’s best to add the glaze or drizzle just before serving or when they are fully set. If you freeze them with a glaze, it might get a bit sticky upon thawing, so I often prefer to add it after they’re thawed.
Frequently Asked Questions
Final Thoughts
There you have it – my beloved, tried-and-true recipe for the most perfectly chewy and satisfying Rice Krispie treats. They’re more than just a simple snack; they’re a trip down memory lane, a guaranteed smile-maker, and honestly, one of the easiest ways to bring a little bit of joy into your day. I truly believe everyone needs this recipe in their arsenal. It’s the ultimate no-bake wonder that proves you don’t need fancy ingredients or complicated techniques to create something truly delicious. If you love these, you might also enjoy my No-Bake Oatmeal Raisin Cookies or my Easy Chocolate Peanut Butter Fudge – they share that same spirit of simple, satisfying sweetness! I can’t wait to hear how your Rice Krispie treats turn out. Please leave a comment below and share your own tips or any fun variations you tried!
Classic Rice Krispie Treats
Ingredients
Main Ingredients
- 3 tablespoon butter
- 10 ounces mini marshmallows
- 6 cups Rice Krispies cereal
Instructions
Preparation Steps
- Melt butter in a large pot over low heat. Add marshmallows and stir until completely melted.
- Remove from heat. Add Rice Krispies cereal and stir until well coated.
- Press mixture into a greased 9x13 inch pan.
- Let cool, then cut into squares and serve.
Notes
Featured Comments
“Impressed! Clear steps and spot on results. Perfect for busy nights.”
“New favorite here — spot on. crowd-pleaser was spot on.”
“Super easy and turned out amazing! My family asked for seconds. Saving this one.”
“This sweet treat was absolutely loved — the light really stands out. Thanks!”
“Made it tonight and wow — absolutely loved! Will definitely make Rice Krispie treats again.”
“Packed with flavor and so simple. Exactly what I wanted from Rice Krispie treats.”


