

There are some recipes that just feel like sunshine in your kitchen, aren’t there? This one, for my absolute favorite strawberry scones, is definitely one of those. I remember the first time I baked these, it was a drizzly Saturday morning and I was craving something sweet but didn’t want to get too complicated. The smell that wafted from the oven – that buttery, slightly sweet aroma with a hint of fresh berries – instantly lifted my mood. My kids, who were younger then, came downstairs, sniffing the air like little bloodhounds, and before they were even cool enough to touch, they were practically begging for one. Now, years later, they still ask for these strawberry scones whenever they visit, and it just warms my heart. They’re not as fussy as a Layer Cake, but so much more satisfying than a simple cookie. If you’ve ever loved a good buttermilk biscuit or a tender scone, get ready, because these are going to be your new go-to. They’re really the perfect blend of crumbly goodness and fruity sweetness.
What is strawberry scones?
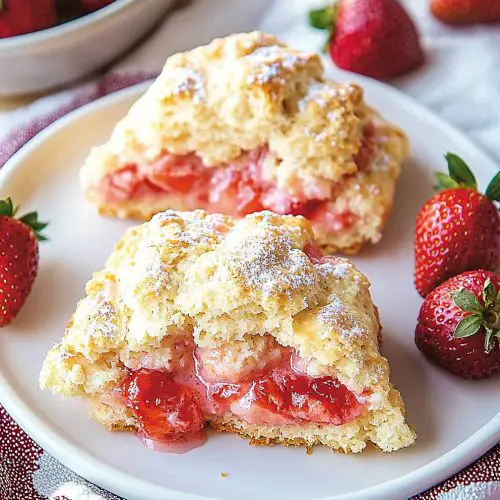
So, what exactly are these little gems? Think of them as a slightly richer, more indulgent cousin to a biscuit, but with a delightful sweetness and bursts of fresh strawberry goodness baked right in. They’re a single-serving treat, typically baked in wedges or rounds, that are a bit denser than a cake but still wonderfully tender. The “scone” part comes from that lovely, slightly crumbly texture you get from using cold butter and minimal mixing. And the “strawberry” part? Well, that’s where the magic happens! We’re talking about juicy, sweet strawberries, either fresh or frozen, that create little pockets of fruity heaven throughout each bite. They’re not overly sweet on their own, which is exactly how I like them, because it means they’re perfectly balanced with whatever you might pair them with, like a dollop of cream or a drizzle of icing. It’s essentially a delightful hand-held pastry that hits all the right notes.
How do I make strawberry scones?
Quick Overview
Making these delightful strawberry scones is a breeze! We’ll start by combining our dry ingredients, then cut in some cold butter to create that signature tender texture. Next, we’ll gently mix in our wet ingredients and, the stars of the show, our lovely strawberries. A quick form, a slice, a bake until golden, and then a simple glaze if you’re feeling fancy. It’s really that simple. The key is to handle the dough gently to keep them light and tender, and the whole process from start to finish takes less than an hour. You’ll have warm, fragrant scones ready to enjoy before you know it!
Ingredients
For the Main Batter:
Here’s what you’ll need to get started on your scone adventure. Using cold butter is absolutely crucial for that flaky, tender texture. Don’t try to cheat on this part – it makes all the difference! Make sure your eggs are at room temperature; they incorporate better. And for the flour, a good quality all-purpose flour is perfect. I usually use King Arthur’s, but any good brand will work. It’s nice to have some extra flour on hand for dusting your work surface.
- 2 ½ cups all-purpose flour, plus more for dusting
- ⅓ cup granulated sugar
- 1 tablespoon baking powder
- ½ teaspoon salt
- ½ cup (1 stick) cold unsalted butter, cut into ½-inch cubes
- 1 large egg, lightly beaten
- ¾ cup buttermilk, plus more if needed
For the Filling:
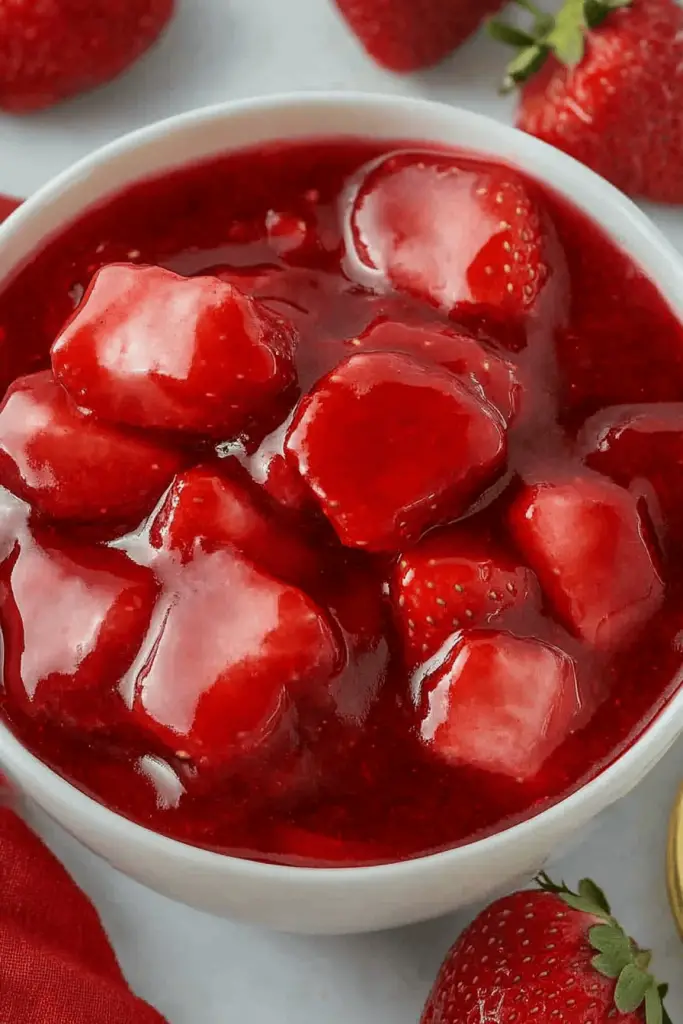
This is where the star of the show comes in! Fresh strawberries are usually my preference because they have the best flavor and texture, but good quality frozen strawberries work wonderfully too, especially if fresh ones aren’t in season. If you use frozen, don’t thaw them completely; you want them to hold their shape a bit. Just a quick chop is all they need. You can also toss them with a tiny bit of extra flour to help absorb any excess moisture. I’ve also experimented with adding a touch of lemon zest here, and it really brightens up the strawberry flavor.
- 1 ½ cups fresh strawberries, hulled and chopped
- 1 tablespoon granulated sugar (optional, depending on strawberry sweetness)
- 1 tablespoon all-purpose flour (optional, helps prevent sogginess)
For the Glaze:
This is totally optional, but I highly recommend it! It adds an extra touch of sweetness and a pretty finish. A simple powdered sugar glaze is perfect. If you want to make it a little more special, you can add a splash of Vanilla Extract or even a tiny bit of lemon juice for a zingy contrast. Make sure your powdered sugar is sifted to avoid any lumps. The consistency is key here – you want it pourable but not too thin.
- 1 cup powdered sugar, sifted
- 2-3 tablespoons milk or heavy cream
- ½ teaspoon vanilla extract (optional)
Step-by-Step Instructions
Step 1: Preheat & Prep Pan
Alright, let’s get this party started! First things first, preheat your oven to a nice, cozy 400°F (200°C). While it’s heating up, grab a baking sheet and line it with parchment paper. This is one of those little tricks that makes cleanup a breeze and ensures your scones don’t stick. You want to make sure the parchment paper is smoothed out so your scones bake evenly. I usually place my baking sheet on the middle rack so everything gets nice and evenly cooked.
Step 2: Mix Dry Ingredients
In a large mixing bowl, whisk together the flour, granulated sugar, baking powder, and salt. Give it a good whisk so everything is evenly distributed. This is important because you want the leavening agent (baking powder) and sweetness to be spread out evenly through the batter. You’re looking for a light, fluffy mixture. I always give it a little extra swirl just to be sure everything is combined. It’s like setting the foundation for something truly delicious!
Step 3: Mix Wet Ingredients
In a separate, smaller bowl, whisk together the lightly beaten egg and the buttermilk. If you don’t have buttermilk, you can easily make a substitute by adding 1 tablespoon of white vinegar or lemon juice to 1 cup of regular milk and letting it sit for about 5 minutes. It’ll curdle slightly, and that’s exactly what you want. You’ll notice it starts to look a little thick, which is perfect for these scones. Just a quick whisk until it’s well combined is all you need.
Step 4: Combine
Now comes the fun part! Add the cold, cubed butter to the dry ingredients. Use your fingertips, a pastry blender, or even two knives to cut the butter into the flour mixture. You’re aiming for a coarse, crumbly texture, with some pieces of butter still about the size of peas. This is what creates those tender, flaky layers. Don’t overwork it; you don’t want it to be a paste. Once you have that nice crumbly texture, make a well in the center and pour in the wet ingredients. Stir with a fork or a spatula until *just* combined. The dough will be shaggy and a little sticky – that’s exactly what you want! Overmixing is the enemy of tender scones, so stop as soon as there are no dry streaks of flour left.
Step 5: Prepare Filling
While your dough is coming together, if you haven’t already, give your strawberries a quick chop. If you’re using fresh ones and they seem really juicy, or if you’re using frozen, I like to toss them with that optional tablespoon of flour and sugar. This little trick helps soak up some of the extra liquid and prevents your scones from getting too soggy. It’s a lifesaver, especially if you’re using frozen berries. Just a gentle toss to coat them evenly.
Step 6: Layer & Swirl
Turn the shaggy dough out onto a lightly floured surface. Gently bring it together with your hands, as little as possible. You can pat it into a rough rectangle, about ¾ inch thick. Scatter your prepared strawberries evenly over the dough. Now, gently fold the dough over itself a couple of times to partially enclose the strawberries, creating some lovely swirls. You don’t need to be precise here; the rustic look is part of their charm. Pat it down again gently to about 1 inch thick. Then, using a sharp knife or a bench scraper, cut the dough into 6 or 8 wedges, like cutting a pizza. You can also use a round biscuit cutter if you prefer, but the wedges are classic and super easy.
Step 7: Bake
Carefully transfer the scone wedges to your prepared baking sheet, leaving a little space between them. If you like, you can brush the tops lightly with a little extra buttermilk or milk for a nice golden finish. Pop them into the preheated oven and bake for 18-22 minutes, or until they’re puffed up, golden brown around the edges, and a toothpick inserted into the center comes out clean (or with just a few moist crumbs, but no wet batter). The baking time can vary depending on your oven, so keep an eye on them after the 18-minute mark. I usually rotate my baking sheet halfway through for even browning.
Step 8: Cool & Glaze
Once they’re baked to perfection, carefully remove the scones from the baking sheet and transfer them to a wire rack to cool slightly. They’re absolutely heavenly when they’re still warm! While they’re cooling, whisk together the sifted powdered sugar, 2 tablespoons of milk or cream, and vanilla extract (if using) for the glaze. Add more milk or cream, a teaspoon at a time, until you reach your desired drizzling consistency. It should be thick enough to coat but still pourable. Drizzle generously over the still-warm scones. The glaze will set up a bit as they cool, adding that extra touch of sweetness and beauty.
Step 9: Slice & Serve
Once the glaze has set a bit (or if you skipped the glaze!), your beautiful strawberry scones are ready to be enjoyed! I love serving them warm, as is, with a cup of coffee or tea. They are best eaten the day they are made, but they still hold up pretty well for a day or two. You can easily reheat them gently in a toaster oven or a low oven for a few minutes to bring back that fresh-baked warmth. Enjoy every delicious, fruity bite!
What to Serve It With
These strawberry scones are so versatile, they fit in perfectly at any meal or as a special treat. For a cozy breakfast, I love pairing them with a hot mug of coffee or a steaming cup of herbal tea. They’re substantial enough to feel like a real meal without being heavy. When we have friends over for brunch, these scones are always a hit. I like to arrange them on a pretty platter with some fresh berries and perhaps a small bowl of clotted cream or whipped cream for a touch of elegance. They also make a surprisingly lovely dessert! Imagine serving a warm scone with a scoop of vanilla bean Ice Cream and a drizzle of strawberry sauce – pure bliss! And for those moments when you just need a little something sweet to tide you over, these are perfect. They’re a step up from a cookie but much quicker than a full cake. My family’s favorite way to enjoy them on a lazy Sunday afternoon is with a glass of cold milk and maybe a smear of butter.
Top Tips for Perfecting Your Strawberry Scones
I’ve made these strawberry scones more times than I can count, and through those batches, I’ve picked up a few tricks that I think really make a difference. First, when it comes to the strawberries, if you’re using fresh ones and they’re very ripe and juicy, or if you opt for frozen, it’s a good idea to toss them with a tablespoon of flour and perhaps a little extra sugar. This helps absorb any excess moisture and prevents those dreaded soggy bottoms. Trust me on this one; it’s a game-changer! Another vital tip is about the butter. It absolutely needs to be cold. I mean, ice-cold. If your butter isn’t cold, your scones won’t be as tender and flaky as they could be. I’ve even popped my cubed butter back into the freezer for 10 minutes if my kitchen is warm. When you’re mixing the dough, remember that ‘less is more.’ Overmixing develops the gluten too much, leading to tough scones. Stop mixing as soon as the ingredients are *just* combined. The dough should look shaggy. For that beautiful swirl effect, don’t overwork the dough when you fold in the strawberries. A few gentle folds are all you need to distribute them and create those gorgeous pockets of fruit. If you’re using a biscuit cutter, dip it in flour between each cut and press straight down without twisting; twisting can seal the edges and prevent them from rising evenly. When it comes to baking, ovens can be so different. I always recommend doing the toothpick test to check for doneness. If your scones are browning too quickly on top but aren’t cooked through, you can loosely tent them with foil. And for the glaze, consistency is key! Start with the lower amount of liquid and add more a teaspoon at a time until it drizzles nicely but isn’t runny. I’ve found that a simple glaze made with just powdered sugar and milk is often the most satisfying, letting the strawberry flavor truly shine.
Storing and Reheating Tips
One of the best things about these strawberry scones is that they’re delicious even the next day! If you have any leftovers, which is rare in my house, I usually store them in an airtight container at room temperature. They’ll stay fresh and delicious for about 1-2 days this way. The key is to make sure they’re completely cooled before sealing them up, otherwise, you’ll end up with condensation, and nobody wants soggy scones! If you know you won’t get to them within a couple of days, or if you want to make a big batch to freeze, the freezer is your best friend. Wrap individual scones tightly in plastic wrap, then place them in a freezer-safe bag or container. They can stay frozen for up to 2-3 months. When you’re ready to enjoy them, you can either let them thaw at room temperature for an hour or two, or pop them directly into a preheated oven (around 350°F/175°C) for about 5-10 minutes until they’re warmed through. If you decide to glaze your scones, I highly recommend doing it just before serving, especially if you plan to store them. Glazing them too far in advance, particularly if they’re stored at room temperature, can sometimes make the glaze a little sticky or melty. For the best experience, it’s often best to glaze them right after they’ve cooled a bit, or even after reheating them.
Frequently Asked Questions
Final Thoughts
I truly hope you give these strawberry scones a try. They’re more than just a recipe to me; they’re a little piece of comfort, a taste of happy memories, and a testament to how simple ingredients can create something truly magical. Whether you’re looking for a special breakfast treat, a delightful afternoon snack, or something to impress your friends, these scones deliver every single time. The combination of tender crumb, buttery richness, and those sweet, juicy bursts of strawberry is just pure perfection. If you love these, you might also enjoy my Classic Blueberry Muffins or my Lemon Raspberry Loaf Cake – they share a similar vibe of comforting, delicious home baking. Please, if you make these strawberry scones, I would absolutely love to hear all about it! Leave a comment below, tell me how yours turned out, any little twists you added, or just how much you enjoyed them. Your feedback makes my day! Happy baking, and enjoy every single bite!
Strawberry Scones
Ingredients
Main Ingredients
- 2.5 cups all-purpose flour
- 0.33 cup granulated sugar
- 2 teaspoons baking powder
- 0.5 teaspoon salt
- 0.5 cup cold unsalted butter cut into cubes
- 1 cup fresh strawberries hulled and finely chopped
- 0.5 cup heavy cream
- 1 large egg beaten, for egg wash
Instructions
Preparation Steps
- Preheat oven to 400°F (200°C). Line a baking sheet with parchment paper.
- In a large bowl, whisk together the flour, sugar, baking powder, and salt.
- Cut in the cold butter using a pastry blender or your fingertips until the mixture resembles coarse crumbs.
- Gently stir in the chopped strawberries.
- Pour in the heavy cream and mix until just combined. Do not overmix.
- Turn the dough out onto a lightly floured surface and pat into a 0.75-inch thick round. Cut into 8 wedges.
- Place the scones on the prepared baking sheet. Brush the tops with the beaten egg.
- Bake for 12-15 minutes, or until golden brown.
- Let cool on a wire rack before serving.
Notes
Featured Comments
“Impressed! Clear steps and super easy results. Perfect for busy nights.”
“New favorite here — family favorite. crowd-pleaser was spot on.”
“Super easy and turned out amazing! My family asked for seconds. Saving this one.”
“This sweet treat was absolutely loved — the balanced really stands out. Thanks!”
“Made it tonight and wow — perfect for busy nights! Will definitely make Strawberry Scones again.”
“Packed with flavor and so simple. Exactly what I wanted from Strawberry Scones.”


