

There are some recipes that just *feel* like home, aren’t there? For me, it’s this strawberry ice cream pie. I swear, the moment I pull it out of the freezer, a little bit of sunshine breaks through, even on the cloudiest of days. It’s the kind of dessert that doesn’t need a fancy occasion. In fact, it’s become my go-to when I’m feeling a bit overwhelmed or just need a serious hug in dessert form. Forget complicated layer cakes or fussy tarts; this strawberry ice cream pie is all about pure, unadulterated joy. It’s bright, it’s creamy, and it has that perfect balance of sweet and tart that makes you close your eyes and savor every single bite. I remember the first time I made it for a family picnic, and honestly, the whole pie disappeared in about ten minutes flat. My uncle, who’s notoriously hard to impress when it comes to sweets, actually asked for the recipe! That’s when I knew this was something special, a real keeper. It’s so much easier than you might think, and it always, always gets rave reviews. If you’re a fan of fruity desserts that aren’t overly sweet, this is going to be your new best friend, just like it is mine.
What is strawberry ice cream pie?
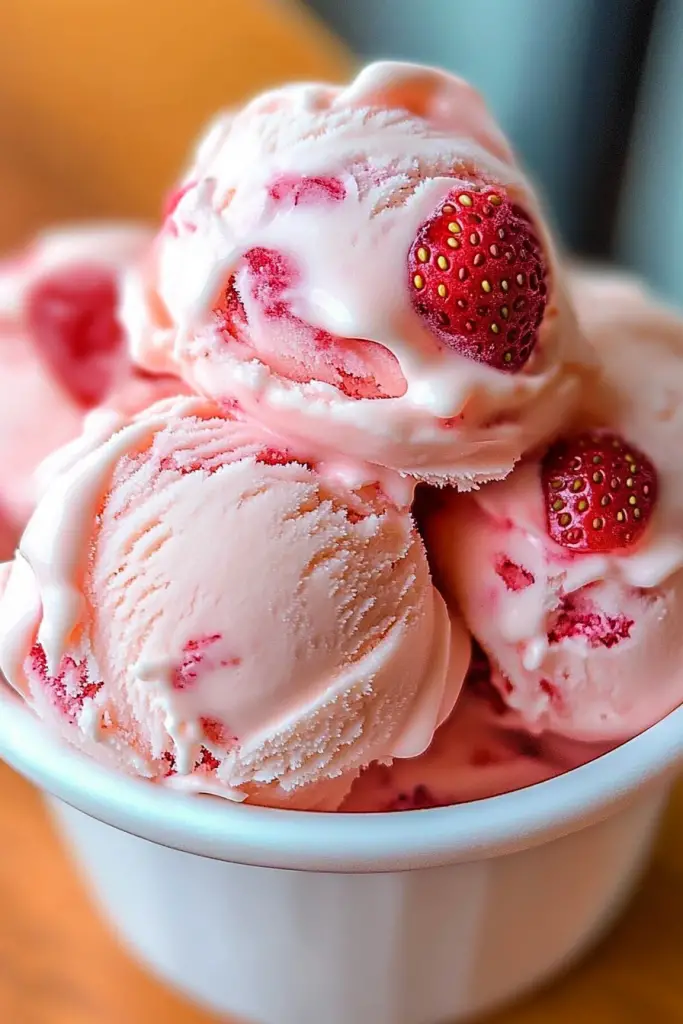
So, what exactly *is* this magical thing called Strawberry ice cream pie? Well, think of it as the ultimate summer dessert, but honestly, I make it year-round because why wait for a season to be happy? It’s essentially a no-bake wonder that combines a buttery, crunchy crust with a luscious, homemade strawberry ice cream filling. We’re talking real strawberries, folks, not just artificial flavoring. The magic happens when that creamy, sweet-tart strawberry ice cream gets to chill in a perfectly crumbly cookie crust. It’s less of a “pie” in the traditional sense and more of a chilled, frozen delight that’s incredibly satisfying. The name itself, “strawberry ice cream pie,” just paints a picture, doesn’t it? It conjures up images of sunny afternoons and lazy weekends. It’s the kind of dessert that looks impressive but is surprisingly straightforward to assemble, making it perfect for both novice bakers and seasoned pros who just want something delicious without a ton of fuss.
How do you make strawberry ice cream pie?
Quick Overview
Making this strawberry Ice Cream pie is surprisingly simple! It’s a no-bake masterpiece that involves pressing a buttery cookie crust into a pie plate, then filling it with a luscious, homemade strawberry ice cream mixture. The hardest part is waiting for it to freeze! You blend fresh strawberries with sweetened condensed milk and a touch of cream, pour it into the prepared crust, and let the freezer do its magic. It’s perfect for when you crave something sweet but don’t want to turn on the oven, especially during warmer months. The whole process, once you get the hang of it, takes maybe 20-30 minutes of active work, with the rest being glorious freezing time.
Ingredients
For the Crust:
You’ll need about 2 cups of finely crushed cookies. My absolute favorite are graham crackers because they have that subtle honey flavor that pairs so well with berries. You can also use vanilla wafers or even shortbread cookies for a richer taste. Make sure they’re really finely crushed – I like to use my food processor for this, but a zip-top bag and a rolling pin work wonders too. Then, you’ll need about 6-8 tablespoons of melted unsalted butter. This is what holds your crust together and gives it that lovely richness. A pinch of sugar is optional, but I sometimes add it if my cookies aren’t very sweet. Make sure to get the butter quantity just right; too little and it crumbles, too much and it’s greasy.
What is the Strawberry Ice Cream Filling?
This is where the magic happens! You’ll need about 2 pints of fresh strawberries, hulled and roughly chopped. Ripe, sweet strawberries are key here; they’ll give you the best flavor and color. You’ll also need one 14-ounce can of sweetened condensed milk. This is what makes it creamy and sweet without needing to add sugar separately. And for ultimate creaminess and that classic ice cream texture, you’ll need 2 cups of heavy whipping cream, cold. Don’t skimp on the cream here; it’s what gives it that luxurious, frozen-dessert feel. A splash of Vanilla Extract (about 1 teaspoon) enhances all the flavors, and a tiny pinch of salt actually helps to balance the sweetness and bring out the strawberry flavor even more.
For Optional Toppings (but highly recommended!):
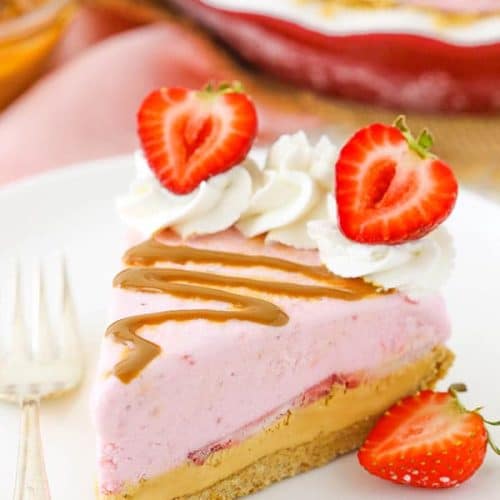
Fresh strawberry slices are a must for garnish if you want it to look as good as it tastes. A drizzle of hot fudge sauce is always a winner in my house, and some people love a sprinkle of chopped toasted almonds for a bit of crunch. And of course, a generous swirl of homemade or store-bought whipped cream makes it feel extra special. You could also do a simple strawberry glaze if you’re feeling fancy, but honestly, it’s divine just as it is!
Step-by-Step Instructions
Step 1: Preheat & Prep Pan
This recipe is no-bake, but we still need to prep our pie plate! Grab a standard 9-inch pie plate. I like to use a glass one because I can see how the crust is setting up. There’s no need to grease it since the butter in the crust usually does the trick, but if you’re worried about sticking, a quick spray of cooking oil won’t hurt. The first actual “cooking” step is just getting your oven preheated to 350°F (175°C). We’re going to blind-bake the crust for just a few minutes to make sure it holds its shape and gets nicely crisp before we add the cold filling. It’s a small step that makes a big difference in the final texture.
Step 2: Mix Dry Ingredients
In a medium bowl, combine your finely crushed cookies and the optional pinch of sugar, if you’re using it. If you’re using graham crackers, they’re usually sweet enough on their own. Give it a good stir with a fork or whisk to make sure everything is evenly distributed. The goal here is just to have a homogenous mixture of crumbs. This ensures that when we add the butter, it coats all the crumbs evenly, leading to a nice, compact crust.
Step 3: Mix Wet Ingredients
Now, in a separate bowl, pour in your melted unsalted butter. You want the butter to be melted but not piping hot. Add the cookie crumbs from Step 2 to the melted butter. Stir everything together with a fork or a spatula until all the crumbs are moistened. It should look like wet sand – clumpy and uniformly damp. If it seems too dry and won’t hold together when you squeeze it, add another tablespoon of butter. If it seems too wet, add a tablespoon or two more of crumbs.
Step 4: Combine
This is where we bring it all together. Take your moist cookie crumb mixture and press it firmly into the bottom and up the sides of your prepared pie plate. I find using the bottom of a flat measuring cup or a small glass works really well to get an even, compact layer. Make sure you press it really well, especially up the sides, so it doesn’t crumble when you slice it. Once it’s nicely pressed, pop the crust into the preheated oven for about 8-10 minutes, just until it’s lightly golden and smells fragrant. This par-baking step is super important for a sturdy crust.
Step 5: Prepare Filling
While the crust is baking, let’s make that glorious filling! In a large bowl, combine the hulled and chopped fresh strawberries, the sweetened condensed milk, the splash of vanilla extract, and that tiny pinch of salt. Blend this mixture using an immersion blender, a regular blender, or a food processor until it’s smooth and well combined. You want all those strawberry chunks to be puréed. Now, in a separate, very clean bowl, whip the cold heavy whipping cream until stiff peaks form. You can use an electric mixer for this. Be careful not to over-whip it into butter!
Step 6: Layer & Swirl
Once your crust is out of the oven and has cooled slightly (just enough so it’s not scorching hot but still warm), gently fold the whipped cream into the strawberry mixture. You want to do this gently to keep as much air in the whipped cream as possible. Fold until just combined; it’s okay if there are a few streaks of white. This is what gives it that airy, ice cream texture. Pour this beautiful pink mixture into your par-baked crust. Smooth the top gently with a spatula.
Step 7: Bake
Oops, I meant freeze! This is a no-bake dessert, remember? Place the pie in the freezer. Now comes the hardest part: waiting. You’ll want to freeze it for at least 6-8 hours, or preferably overnight, until it’s firm. You’ll know it’s ready when you can press the center and it feels solid, not soft. The longer it freezes, the firmer it will be, so adjust based on your preference. Some people like it just firm enough to slice, others like it rock solid, almost like a traditional ice cream.
Step 8: Cool & Glaze
Since this is a frozen dessert, cooling isn’t quite the right term! Once it’s completely frozen and firm, you can decorate it. If you’re adding any drizzles like hot fudge or a strawberry glaze, now’s the time to do it. I usually do this right before serving so the toppings don’t freeze solid. For a simple strawberry glaze, you can simmer some chopped strawberries with a little sugar and lemon juice until thickened, then strain it. Let it cool slightly before drizzling. For fresh strawberries, arrange them artfully on top.
Step 9: Slice & Serve
This is the moment of truth! To get clean slices, I highly recommend running a sharp knife under hot water, wiping it dry, and then slicing. Repeat this for each slice. It makes cutting through the frozen pie so much easier. Serve immediately with a dollop of whipped cream or any other toppings you desire. The contrast between the cold, creamy pie and the fluffy cream is just divine. Enjoy every single bite of this delightful strawberry ice cream pie!
What to Serve It With
This strawberry ice cream pie is so versatile, it can actually be enjoyed at almost any meal or occasion! For breakfast, though it sounds decadent, a small, thin slice alongside a strong cup of coffee is surprisingly satisfying. It’s like a little treat to start your day off right, especially on a weekend when you have a bit more time to linger. Think of it as a sweet accompaniment to a simple fruit salad or a few slices of crispy bacon. If you’re hosting brunch, this pie steps up to the plate beautifully. Imagine it as the grand finale to a spread of savory dishes. It adds a burst of freshness and a lovely, bright color to the table. Serve it with a side of fresh berries and maybe a light dusting of powdered sugar for an extra touch of elegance. Beverage-wise, a sparkling rosé or a light Moscato pairs wonderfully. As a dessert, well, it’s in its prime! It’s perfect after a hearty meal, a lighter option than a rich chocolate cake but just as satisfying. I love serving it with a few extra fresh strawberries and perhaps a scattering of mint leaves for a pop of green. For those moments when you just need a cozy snack to chase away the blues, this pie is your answer. It’s super easy to grab a fork and dig in while curled up on the couch with a good book or a favorite movie. No fuss, no pretense, just pure comfort.
Top Tips for Perfecting Your Strawberry Ice Cream Pie
Over the years of making this strawberry ice cream pie, I’ve picked up a few tricks that I think really elevate it from good to absolutely spectacular. Let’s start with the strawberries themselves. If your strawberries aren’t super sweet or flavorful, don’t fret! You can enhance their flavor by macerating them. Just toss the chopped strawberries with a tablespoon or two of sugar and let them sit for about 15-20 minutes before blending. This draws out their juices and intensifies their flavor. For the crust, the key is to get it nice and compact. Really press it into the pan, especially up the sides. A slightly firmer, more even crust means your pie won’t fall apart when you slice into it. I always use a food processor to crush my cookies; it gets them to a really fine, uniform crumb that binds together perfectly. If you don’t have one, a zip-top bag and a rolling pin will do the job, just make sure you get them as fine as possible. When it comes to the filling, the whipping cream is crucial. Make sure it’s *very* cold when you whip it; this helps it achieve stiff peaks faster and ensures a creamier texture. Also, don’t overmix when you fold the whipped cream into the strawberry mixture. Overmixing can deflate the whipped cream, making your pie dense instead of light and airy. For ingredient swaps, I’ve tried making this with different types of cookies for the crust – shortbread adds a lovely richness, and vanilla wafers give it a classic flavor. If you’re looking for a dairy-free option, I’ve had some success using full-fat canned coconut cream (chilled and scooped off the solid part) instead of heavy cream, and a vegan cookie for the crust. It’s not exactly the same, but it’s still delicious! Don’t be afraid to play with the sweetness level. If your strawberries are very sweet, you might want to reduce the sweetened condensed milk slightly or skip the extra sugar in the macerating step. Conversely, if they’re tart, you might add a touch more. The biggest tip for baking (or rather, freezing!) is patience. Let it freeze completely. If you slice it too soon, it will be a melty mess, and while that might be tasty, it’s not the perfect strawberry ice cream pie experience. I’ve learned that leaving it overnight is always the best bet for optimal texture and sliceability. And finally, for the glazes and toppings, experiment! A drizzle of white chocolate, a sprinkle of freeze-dried raspberry powder, or even a caramel sauce can totally transform the flavor profile. It’s a canvas for your creativity!
Storing and Reheating Tips
Storing this strawberry ice cream pie is pretty straightforward, but a few tips will ensure it stays delicious. For best results, keep it tightly wrapped in the freezer. Once it’s fully frozen and you’ve served some, re-wrap any leftovers snugly with plastic wrap, then a layer of aluminum foil, or place it in an airtight freezer-safe container. This helps prevent freezer burn and keeps it tasting fresh. It will keep well in the freezer for about 2-3 weeks, though honestly, it rarely lasts that long in my house! If you’re planning on serving it later in the day but want to get ahead, you can make the crust and let it cool completely, then store it at room temperature in an airtight container. You can also make the strawberry purée mixture (before adding whipped cream) and keep it in the fridge for up to 2 days. Then, whip your cream and assemble just before freezing for the freshest possible result. Reheating isn’t really applicable here since it’s a frozen dessert, but if you find it’s gotten too hard from being in the freezer, just let it sit at room temperature for about 5-10 minutes before slicing. This makes it much easier to cut and softens it up just enough to get that perfect creamy texture. If you added a glaze, I’d recommend doing that just before serving, as glazes can sometimes get a bit sticky or hard when frozen for too long. For any leftover slices, just re-wrap them tightly and pop them back into the freezer. They’re just as delicious the second time around!
Frequently Asked Questions
Final Thoughts
There you have it – my beloved strawberry ice cream pie! I truly hope you give this recipe a try. It’s one of those desserts that feels special enough for company but is so simple and satisfying that it’s perfect for a quiet evening at home too. The bright, fresh strawberry flavor, combined with that creamy, dreamy texture and the buttery crust, just hits all the right notes. It’s more than just a dessert; it’s a little slice of happiness that brings a smile to everyone’s face. If you love this recipe, you might also enjoy my no-bake lemon raspberry cheesecake or my classic no-bake chocolate oat bars – they share that same easy-yet-impressive vibe! I can’t wait to hear what you think when you make it. Please leave a comment below to let me know how yours turned out, any variations you tried, or just to share your own strawberry memories! Happy baking (or freezing!)!
strawberry ice cream pie
Ingredients
Main Ingredients
- 1.25 cups graham cracker crumbs
- 2 tbsp granulated sugar
- 1 tsp ground cinnamon
- 6 tbsp salted butter melted
- 0.5 cup heavy whipping cream cold
- 0.25 cup powdered sugar
- 0.33 cup dulce de leche
- 1 lb strawberries washed and stems removed
- 2 tbsp water
- 0.25 cup powdered sugar
- 1.5 tbsp cornstarch
- 0.75 cup heavy whipping cream cold
- 6 tbsp powdered sugar
- 0.75 cup sweetened condensed milk
- 0.75 cup heavy whipping cream cold
- 6 tbsp powdered sugar
- 0.5 tsp vanilla extract
Instructions
Preparation Steps
- Grease a 9-inch pie pan and preheat oven to 325°F (163°C).
- Combine graham cracker crumbs, sugar, cinnamon, and melted butter in a medium bowl and mix until well combined.
- Press the crumb mixture evenly into the bottom and up the sides of the pie pan, then bake for 8-10 minutes. Set aside to cool.
- Add the 1/2 cup heavy whipping cream and 1/4 cup powdered sugar to a mixer bowl and whip on high until stiff peaks form.
- Add about half of the whipped cream to the dulce de leche and gently fold together until combined.
- Add the remaining whipped cream and fold gently until smooth and uniform.
- Pour the dulce de leche filling into the pie crust and spread into an even layer.
- Thinly slice 2-3 strawberries and arrange a single layer on top of the dulce de leche layer. Place in the freezer to chill while preparing the ice cream.
- Cut 1.5 cups of strawberries in half and puree in a food processor until smooth (about 3/4 cup puree). Stir in 2 tbsp water.
- In a saucepan, combine 1/4 cup powdered sugar and 1.5 tbsp cornstarch, then whisk in the strawberry puree.
- Cook over medium heat, stirring constantly, for 10 minutes until mixture thickens and comes to a boil.
- Boil for 1 minute, then remove from heat and cool completely.
- In a mixer bowl, whip 3/4 cup cold heavy cream and 6 tbsp powdered sugar until stiff peaks form.
- Gently fold about half the whipped cream into the sweetened condensed milk until smooth.
- Fold in the remaining whipped cream, avoiding overmixing.
- Gently fold the cooled strawberry mixture into the whipped base to form the ice cream filling.
- Spread the strawberry ice cream evenly over the chilled pie. Smooth with a spatula.
- Freeze the pie until firm, 4-5 hours or overnight.
- Just before serving, whip 3/4 cup cold heavy cream, 6 tbsp powdered sugar, and 1/2 tsp vanilla extract until stiff peaks form.
- Drizzle dulce de leche over the ice cream, then pipe whipped cream around the edge. Top with halved strawberries if desired.
- Freeze until ready to serve. Store leftovers tightly covered for up to 1 week.
Notes
Featured Comments
“This looks absolutely delicious! I love how refreshing and simple it sounds—perfect for a hot day.”
“Impressed! Clear steps and so flavorful results. Perfect for busy nights.”
“New favorite here — spot on. crowd-pleaser was spot on.”
“Super easy and turned out amazing! My family asked for seconds. Saving this one.”
“This sweet treat was absolutely loved — the balanced really stands out. Thanks!”
“Made it tonight and wow — comforting! Will definitely make Sweet Strawberry Delight Ice Cream Pie again.”


This looks absolutely delicious! I love how refreshing and simple it sounds—perfect for a hot day.