


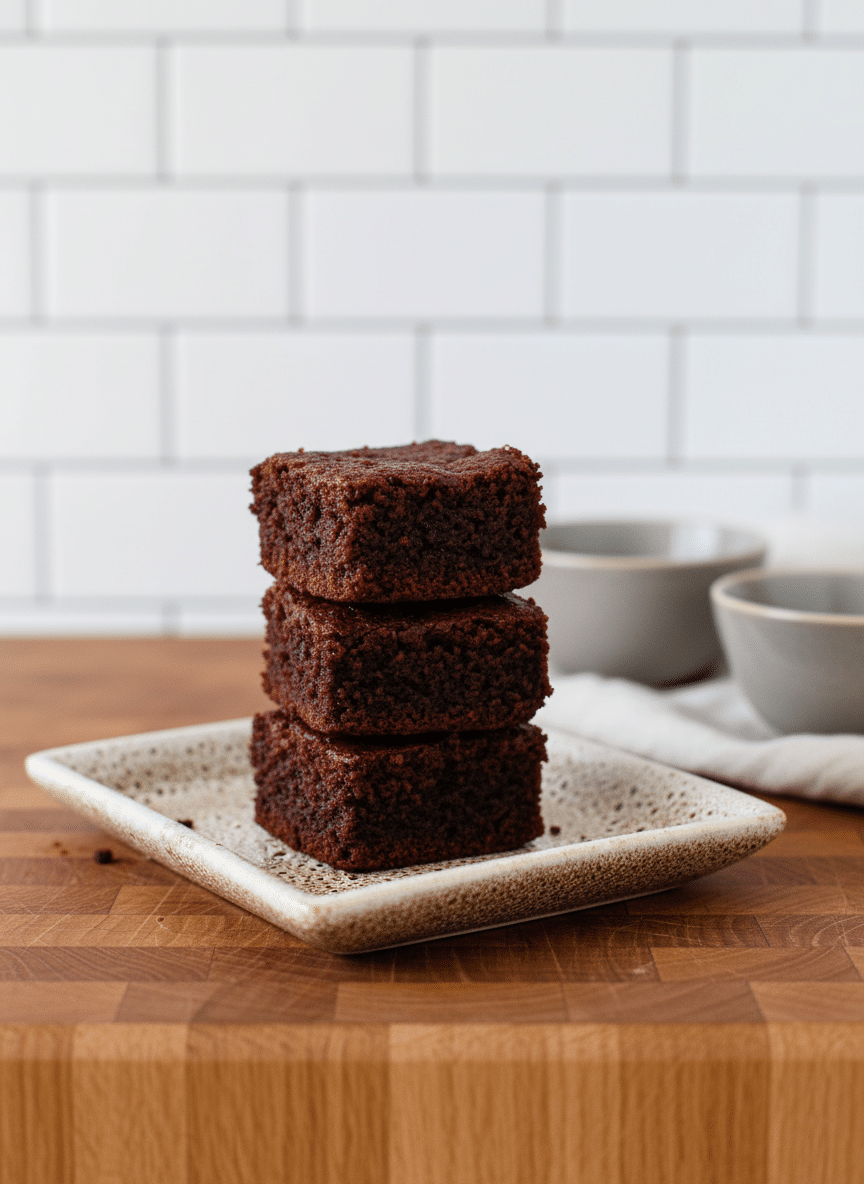
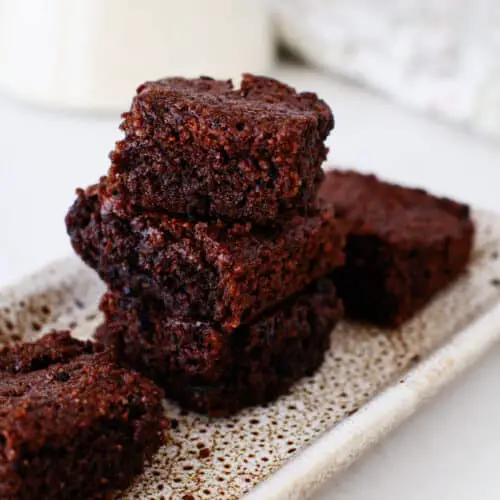
The Best Keto Chocolate Brownies
Hey there, friend! Let’s talk about something we all crave but usually try to avoid when eating low-carb: rich, gooey, utterly decadent chocolate brownies. If you’ve been on a keto journey for a while, you already know the struggle. You want that classic comfort food experience, but you definitely don’t want the sugar crash or the carb guilt that comes with traditional baked goods. I’ve been testing batch after batch of keto desserts, and let me tell you, it can be a real rollercoaster. Some end up tasting like cardboard, while others are just overly complicated with a million steps.
But today, I’m beyond excited to share a total game-changer with you. These Keto Chocolate Brownies are exactly what you’ve been dreaming of. They’re incredibly fudgy, perfectly sweet, and they hit that chocolate craving right out of the park. You honestly won’t even believe they’re sugar-free and made without a single ounce of regular flour. Grab your favorite mixing bowl, because we’re about to make some low-carb magic happen right in your kitchen!
What Are Keto Chocolate Brownies?
So, what exactly makes these Keto Chocolate Brownies different from the ones you grew up baking from a box? Traditional brownies rely heavily on all-purpose flour and heaps of white sugar to get that chewy texture and sweet flavor. Our keto version flips the script entirely. Instead of wheat flour, we’re using finely milled almond flour. It provides a wonderful, tender crumb while keeping the carbohydrate count incredibly low. For the sweetness, we swap out regular sugar for erythritol, a fantastic natural sweetener that doesn’t spike your blood sugar.
When you combine these low-carb staples with rich cocoa powder, melted butter, and a splash of vanilla, you create a batter that’s just as thick, glossy, and satisfying as the real deal. Essentially, these brownies are a brilliant little baking hack. They give you all the deep, dark chocolatey goodness of a classic bakery treat, but with macros that actually fit your lifestyle. At just 90 calories and 3 grams of net carbs per square, they’re a completely guilt-free indulgence that you can enjoy any day of the week.
How to Make Keto Chocolate Brownies
Quick Overview
Making these brownies is an absolute breeze, even if you don’t consider yourself a master baker! The whole process takes about 30 minutes from start to finish. You’ll spend roughly 10 minutes gathering your ingredients and mixing up the batter, and then the oven does the rest of the work for the next 20 minutes. It’s a straightforward, dump-and-mix kind of recipe that is completely foolproof. We’ll start by creaming together our wet ingredients and sweetener, then gently fold in the dry ingredients until we get a gorgeous, glossy batter. After a quick trip to the oven, the hardest part is simply waiting for them to cool down before you slice into them!
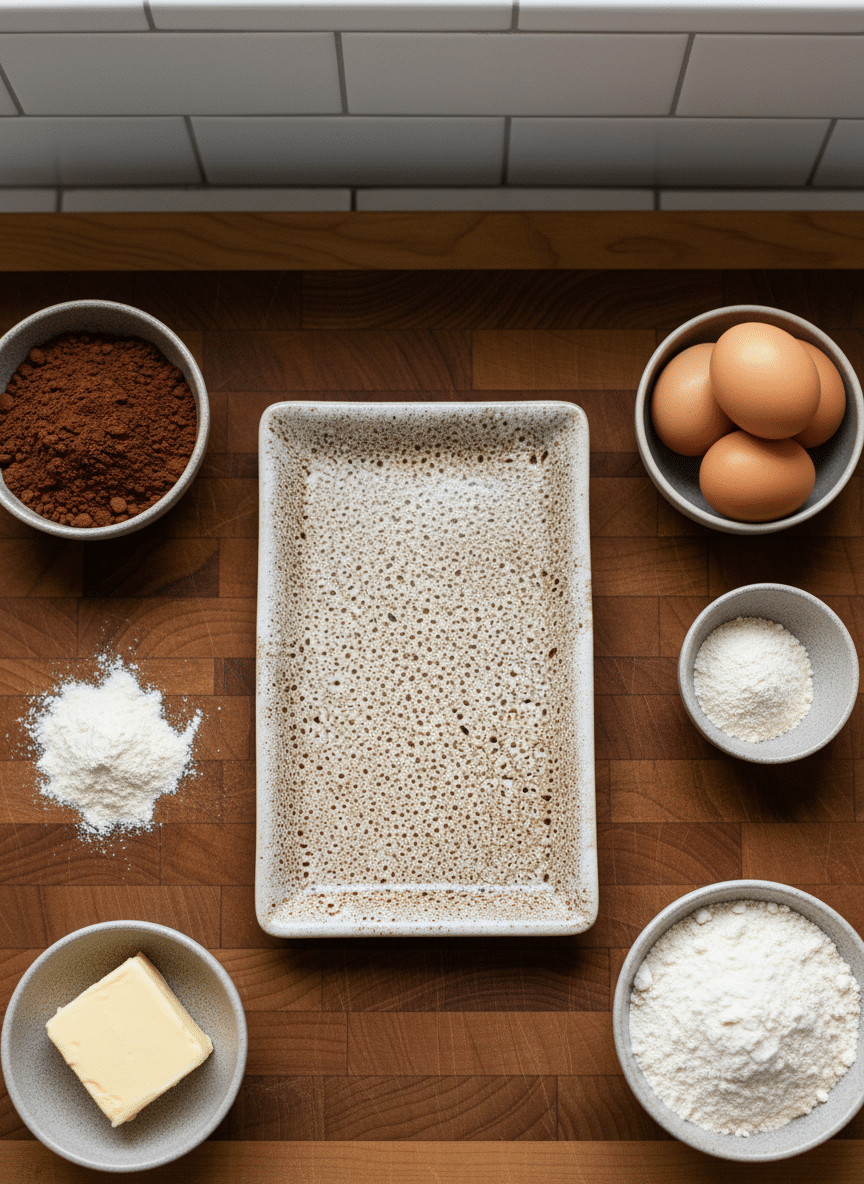
Ingredients
Here is everything you need to grab from your pantry and fridge to get started:
- Almond flour: 1 cup (Make sure it’s finely blanched almond flour for the best texture, not coarse almond meal!)
- Cocoa powder: 1/4 cup plus 2 tablespoons (Unsweetened is key here.)
- Vanilla extract: 1 teaspoon (A good quality vanilla really enhances the chocolate flavor.)
- Baking powder: 1 teaspoon (This gives our brownies just a little bit of lift.)
- Salt: 1/2 teaspoon (Never skip the salt in chocolate desserts; it balances the sweetness beautifully.)
- Melted butter: 1/3 cup (Unsalted is best so we can control the sodium.)
- Water: 2 tablespoons (Just a splash helps the batter come together.)
- Eggs: 2 large eggs (Room temperature eggs mix into the batter much easier.)
- Erythritol: 2/3 cup (Our favorite keto-friendly sweetener to keep things sugar-free.)
Step-by-Step Instructions
Step 1: Preheat & Prep Pan
First things first, let’s get that oven warming up! Preheat your oven to 350°F (175°C). Grab an 8-inch square baking dish, give it a light grease with some butter or coconut oil, and line it with a sheet of parchment paper. Leaving a little overhang with the parchment makes it so much easier to lift the brownies out later.
Step 2: Mix the Wet Ingredients
In a large mixing bowl, pour in your melted butter. Add the erythritol, vanilla extract, and salt. Whisk everything together really well until the mixture takes on a smooth, creamy consistency. Taking a minute to dissolve the sweetener into the warm butter helps prevent a gritty texture in your final bake.
Step 3: Fold in the Dry Ingredients
Now, slowly add your almond flour, cocoa powder, baking powder, eggs, and water right into the bowl. Grab a rubber spatula and gently fold the mixture together. Keep stirring until all the dry spots disappear and you’re left with a beautifully thick and glossy brownie batter. Try not to overmix; just stir until everything is combined!
Step 4: Bake to Perfection
Pour your batter evenly into the prepared baking pan, using your spatula to smooth out the top so it bakes evenly. Pop the pan onto the center rack of your oven. Bake for 18 to 20 minutes. You’ll know they’re done when the center is no longer jiggly and you see those gorgeous little cracks forming on the top.
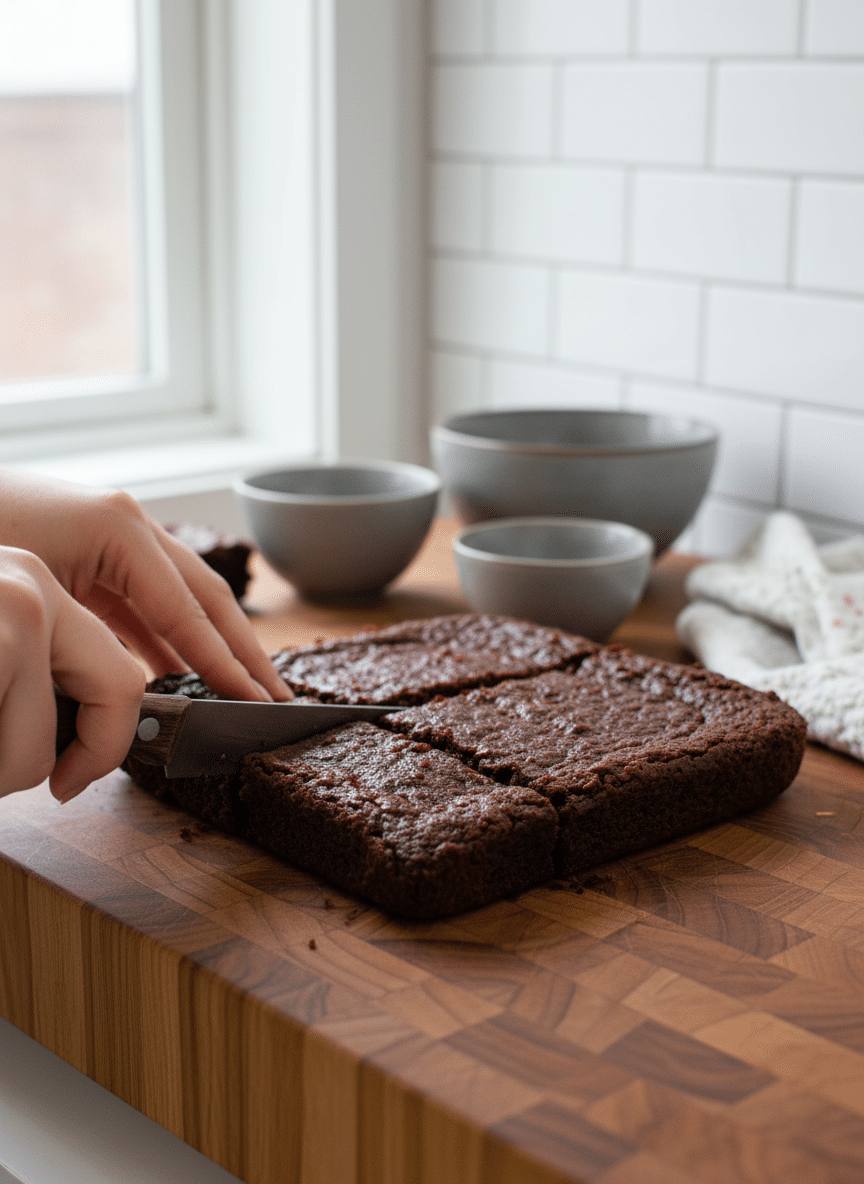
Step 5: Cool and Slice
I know it’s incredibly tempting to dive right in, but you’ve got to let them cool completely in the pan! Low-carb baked goods are a bit fragile when they’re hot, and cooling helps them set up into that perfect fudgy texture. Once cooled, lift them out using the parchment paper, slice into 16 squares, and enjoy!
What to Serve It With
These Keto Chocolate Brownies are incredibly rich and indulgent all on their own, but if you want to elevate your dessert game, here are some of my absolute favorite low-carb pairings:
- Top with whipped cream: Whip up some heavy cream with a touch of erythritol or monk fruit. A generous dollop adds a light, creamy contrast to the dense chocolate.
- Drizzle with sugar-free chocolate: Melt a few squares of keto-friendly chocolate or ultra-dark chocolate (85% cacao or higher) and drizzle it right over the top. It looks fancy and tastes divine!
- Add fresh berries: A handful of raspberries or sliced strawberries brings a bright, tart, juicy bite to the plate without pushing your daily carb limit too far.
- Serve warm with keto ice cream: Pop a brownie in the microwave for a few seconds and serve it with a scoop of low-carb vanilla bean ice cream. It’s the ultimate comforting treat.
- Dust with powdered sweetener: A light sprinkle of powdered erythritol or a dusting of extra cocoa powder gives them a gorgeous bakery-style finish.
Top Tips for Perfecting Your Keto Chocolate Brownies
Want to make sure your brownies come out flawless every single time? Keep these handy tips in mind before you start baking:
- Sift your cocoa powder: Unsweetened cocoa powder loves to clump up in the pantry. Give it a quick sift before adding it to your bowl to ensure your batter is perfectly smooth.
- Do not overbake: Keto baking can be tricky because almond flour dries out faster than regular flour. Pull them out right at the 18 to 20-minute mark. They’ll continue to firm up as they cool down!
- Use room temperature eggs: Cold eggs can cause your melted butter to seize up and clump. Setting your eggs on the counter for 30 minutes before baking makes a world of difference in your batter’s texture.
- Patience is key: I cannot stress enough how important the cooling process is! If you cut into them while they’re hot, they might crumble. Let them chill, and you’ll be rewarded with the fudgiest texture imaginable.
Storing and Reheating Tips
If you actually manage to have leftovers (which is a rare occurrence in my house!), storing them properly will keep them tasting fresh and fudgy for days.
To Store: Place the sliced brownies in an airtight container. You can keep them at room temperature on the counter for up to 3 days. If you want them to last a bit longer, pop the container in the fridge, where they’ll stay fresh for up to a week. The fridge actually makes them even denser and chewier, which I absolutely love!
To Freeze: These freeze beautifully! Wrap each brownie individually in parchment paper, then place them all in a freezer-safe zip-top bag. They’ll keep in the freezer for up to 3 months.
To Reheat: When you’re ready for a warm treat, just microwave a brownie for about 10 to 15 seconds. It’ll taste like it just came right out of the oven.
Frequently Asked Questions
Final Thoughts
There’s honestly something so incredibly satisfying about pulling off a dessert this good without relying on sugar or regular flour. These Keto Chocolate Brownies check absolutely all the right boxes for me. They’re rich, they’re intensely fudgy, and they’re incredibly easy to throw together on a busy weeknight when that chocolate craving hits hard.
Whether you’re enjoying a square straight from the fridge as a midnight snack, or dressing it up with a beautiful swirl of homemade whipped cream for a dinner party, this is one of those special recipes that makes low-carb living feel a whole lot more delicious and sustainable.
I really hope you love making (and eating!) these as much as I do. If you give this recipe a try, please let me know how it turned out for you in the comments! I always love hearing about your baking adventures. Happy baking, friends!
Keto Brownies
Ingredients
Main Ingredients
- 1 cup almond flour
- 0.25 cup cocoa powder plus 2 tbsp
- 1 tsp vanilla extract
- 1 tsp baking powder
- 0.5 tsp salt
- 0.33 cup butter melted
- 2 tbsp water
- 2 eggs
- 0.66 cup erythritol
Instructions
Preparation Steps
- Preheat the oven to 350°F/175°C. Grease an 8-inch baking dish and line with parchment paper.
- In a large bowl, combine the melted butter with sugar, vanilla extract, and salt until it has a creamy consistency.
- Add the remaining ingredients slowly and fold the mixture until you get a thick and glossy brownie batter.
- Pour evenly into the pan. Bake for 18-20 minutes on the center rack until the center is not jiggly and the top has cracks.
- Allow it to cool completely before slicing and serving.
- Enjoy!
Featured Comments
“Impressed! Clear steps and restaurant-level results. Perfect for busy nights.”
“New favorite here — family favorite. crowd-pleaser was spot on.”
“Super easy and turned out amazing! My family asked for seconds. Saving this one.”
“This sweet treat was absolutely loved — the buttery really stands out. Thanks!”
“Made it tonight and wow — comforting! Will definitely make zero sugar brownies again.”
“Packed with flavor and so simple. Exactly what I wanted from zero sugar brownies.”


