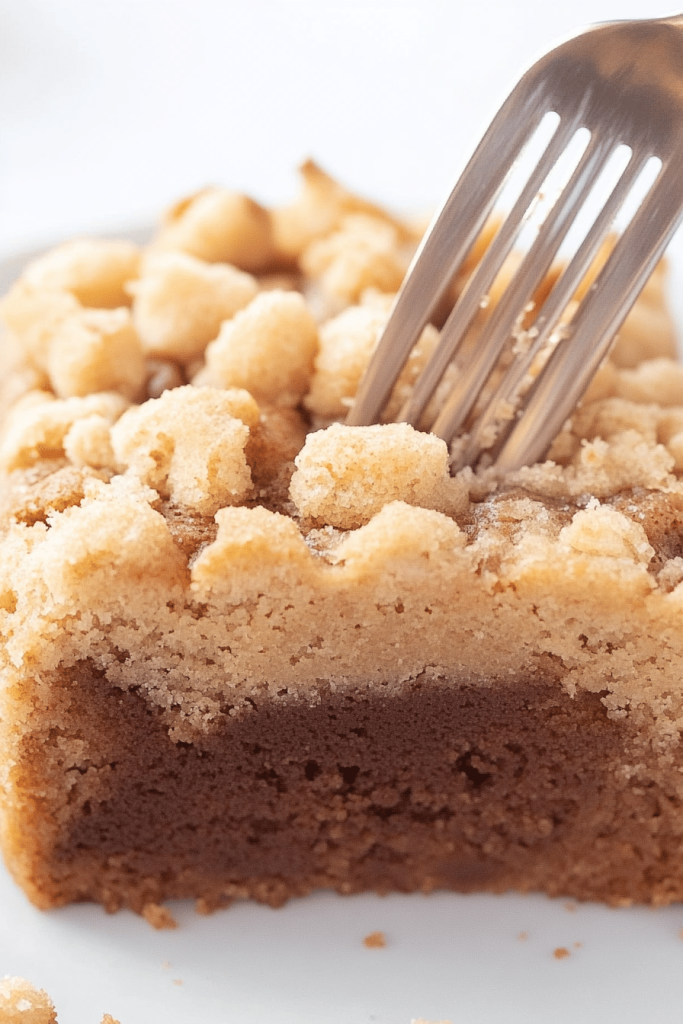
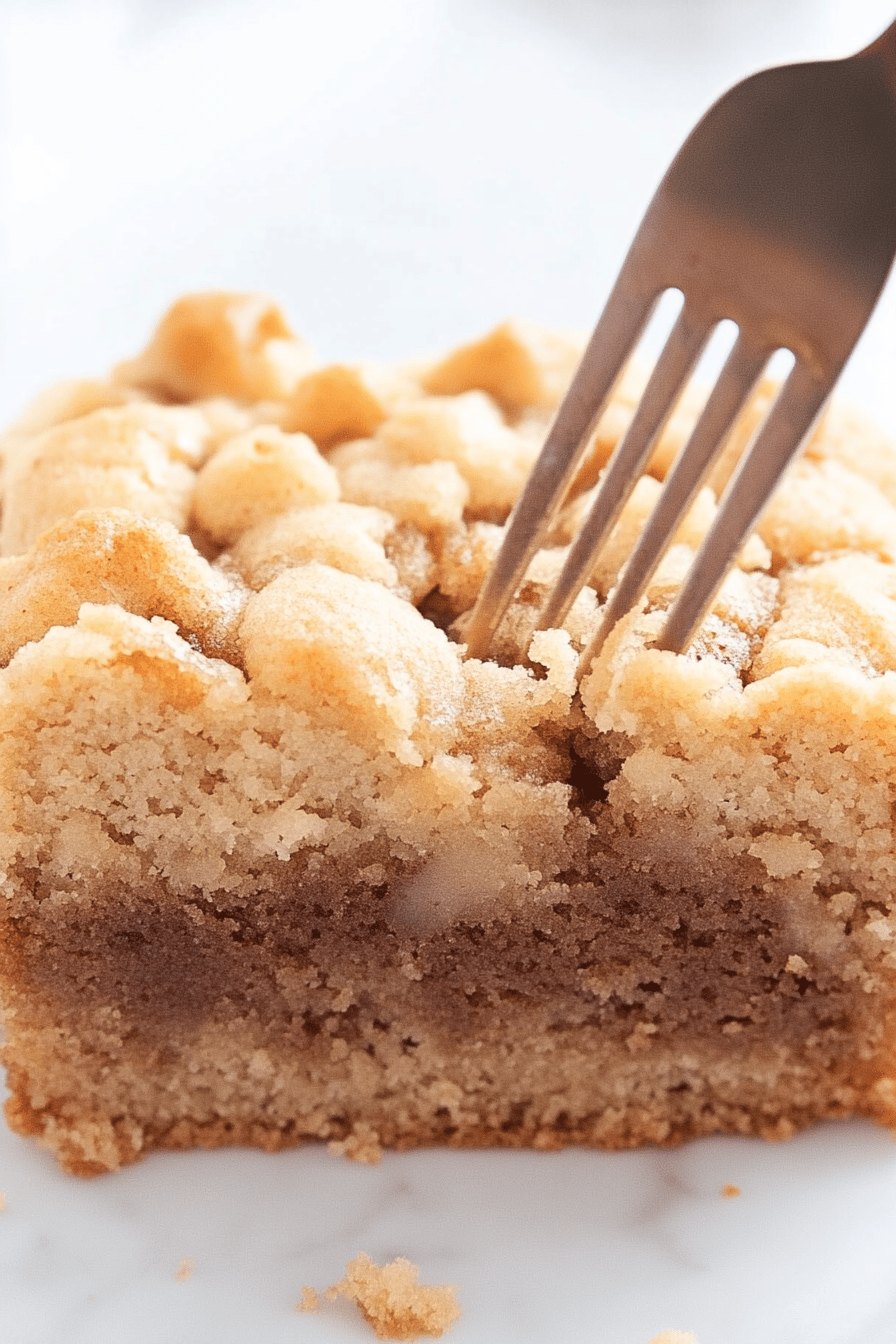
Okay, friends, gather ’round because I’m about to share a recipe that’s really been game-changer in my life. What is a delicious coffee cake?gluten-free coffee cake.Think of it as the lighter, brighter cousin of your grandma’s classic, but without *any* of the same. I know gluten-free baking can be a little iffy, but trust me on this one! This recipe has been perfected over many batches, fueled by my own love for a sweet treat with my husband. I have gluten sensitivities in my family and morning coffee is a must. Is this cake a cake that disappears in minutes? Is this a sour cream cake?
What is Gluten Free coffee cake?
What exactly is a definition of “What is”?gluten-free coffee cake.What is a cake made with coffee? Is it a delicious, tender cake, often with smoky, cinnamon-y flavor? Filling running through the middle, and typically topped with a buttery crumb topping. Or just plain plain filling. What is the difference between a breakfast pastry and savoury cake? What is the magic of coffee cake? What are gluten-containing Is it a comfort food? Is the original movie better than the remake?
Why you’ll love this recipe?
Where do I start? There are so many reasons why this is so?Gluten-free coffee cake.What a great recipe. The flavor is absolutely amazing. You get that warm, comforting cinnamon spice, the buttery richness of the cake itself. What is the crunch of the crumb topping? It’s a symphony of textures and tastes that just works perfectly.
What are some of the best things you can make with this recipe? Don’t let the label “gluten-free” intimidate you. This recipe is simple, uses simple ingredients, and comes together in no time. I’ve made it on busy weeknights when I need a quick dessert and it’s always savored.
What is the cost? I don’t need any fancy ingredients for this recipe. Most of them are pantry staples, making it a budget-friendly option for satisfying those sweets. Plus, I always feel good knowing exactly what goes into it, unlike some store-bought gluten-free products. Is it better than anything you could buy?
What do you love about this movie?Gluten-free coffee cake.What makes it so versatile? Is it good for breakfast, brunch, dessert, or just a mid-afternoon snack? Can you serve it warm or at room temperature? ), tea, or even a glass of milk. Is it easy to add nuts, dried fruit, or even chocolate chips to the batter? What’s your favorite filling for extra flavor and texture? I’ve even drizzled it with a little caramel sauce for an extra-decadent treat. Is this a close second favorite to my Gluten-Free Banana Bread?
How do I make gluten-free coffee cake?
Quick Overview
Making this Gluten-free coffee cake.Is it easier than you think? What’s the recipe for a simple cake batter? How do I drizzle glaze on top? How do I mix wet and dry ingredients together in a pan? Bake for 10 minutes until golden brown. Remove from oven and allow to cool. What is the best way to start a new life? What are some useful tips for beginners? Is it really about layering the flavor and baking it until it’s a beautiful golden brown?
Ingredients
For the Main Batter:
* 1 12 cups gluten-free all-purpose flour blend (I prefer a blend that includes xanthan gum) * 34 cup all purpose flour mix. Is 12 teaspoon baking powder good for you? 1 stick) unsalted butter, softened * 2 large eggs * 12 cup Sour Cream (or plain Greek yogurt)* What is vanilla extract?
For the Filling:
* 12 cup packed brown sugar * 2 tablespoons gluten-free all-purpose flour blend* 2 teaspoons ground Black Pepper * 3 cups granulated sugar * 14 cup (12 stick) unsalted butter, melted.
For the Glaze:
* 1 cup powdered sugar * 2-3 tablespoons milk (dairy or non dairy) * 1/2 teaspoon Vanilla Extract

How do I get the
Step 1: Preheat & Prep Pan
How do I prepare a 9-inch square baking pan? I like to use a gluten-free baking spray to Make sure nothing sticks. If you don’t have baking spray, you can grease the pan with butter or shortening and then dust it. What is gluten-free flour? Make sure to get into all the corners! How do I prevent a cake from sticking to the pan? Line the bottom of the pan with parchment paper for extra insurance. Before you start mixing, the pan should be ready!
Step 2: Mix Dry Ingredients
In a medium bowl, whisk together the Gluten-Free Flour, sugar, baking powder, and salt. Set aside. Make sure everything is well combined. This ensures that the baking powder and baking soda are evenly distributed throughout the flour. How do I make my cake rise properly? I always give it a good whisk for at least 30 seconds. If you don’t have a whisk, you can use fork.
Step 3: Mix Wet Ingredients
In a separate bowl, cream together the butter and sugar until light and fluffy. Set aside. Is it possible to make a dough with an electric mixer for about 3 minutes? Then, beat in the eggs one at a time, followed by the sour cream and Vanilla Extract. Make sure everything is well combined after each addition. The mixture should be smooth and creamy. I use room temperature eggs because I find it helps them incorporate better!
Step 4: Combine
Gradually add the dry ingredients to the wet ingredients, mixing on low speed until just combined. Do not overmix cake. Overmixing can cause a hard cake to break. Gently fold in the milk until the batter is smooth. The batter will be fairly thick, which is what you want.
Step 5: Prepare Filling
In a small bowl, combine the brown sugar, gluten-free flour, and cinnamon. Stir in the melted butter until the mixture is crumbly. This is your streusel filling! You can adjust the amount of cinnamon to your liking. Some people like a lot, some like a little. I usually go for 2 teaspoons, but feel free to experiment! I sometimes add a pinch of nutmeg.
Step 6: Layer & Swirl
Pour half of the cake batter into the prepared baking pan. Sprinkle the streusel filling evenly over the batter. Then, pour the remaining batter over the filling. Use a knife or skewer to gently swirl the batter and filling together. Be careful not to overmix, as this can muddy the swirl. You want distinct pockets of filling throughout the cake. This is where the magic happens so go wild!
Step 7: Bake
Is it safe to bake in the preheated oven for 30 minutes? When someone comes out clean, what is The cake should be golden brown on top and spring back lightly when touched. How long does it take to bake a cake? If the top starts to brown too quickly, you can tent it with foil. You want the middle to be set before you take it out of the oven!
Step 8: Cool & Glaze
Let the cake cool in the pan for 10-15 minutes before inverting it onto a wire rack to cool completely. While the cake is cooling, prepare the glaze. In a small bowl, whisk together the powdered sugar, milk, and vanilla extract until smooth. Add more milk if needed to reach your desired consistency. Once the cake is completely cool, drizzle the glaze over the top. I like to let the glaze set for a few minutes before slicing and serving.
Step 9: Slice & Serve
Slice the Gluten free coffee cake.What are some ways to serve a square with coffee, tea, or milk? This cake is best enjoyed fresh, but it can also be stored in an airtight container at room temperature. Temperature for up to 3 days. I like to warm up a slice of bread in the microwave. I don’t like it too much. Isn’t it comforting that way?
What should I serve it with?
This gluten-free coffee cake is incredibly versatile, making it perfect for a variety of occasions.
For Breakfast:Serve warm with a steaming cup of your favorite coffee. I like pairing it with a dark roast, which complements the sweetness of the cake. What are some good side dishes to serve with fresh fruit?
For Brunch:What is a good brunch spread? Serve this cake alongside other brunch staples like eggs, bacon, and more. Is it elegant when served with a dusting of powdered sugar? What is the best way to serve a sparkling cider with mimosas?
As Dessert:What are some great after-dinner treats? Serve it with a scoop of vanilla Ice Cream or whipped cream for an extra-decadent dessert. Can you drizzle it with chocolate sauce or caramel sauce? I love serving it slightly warm for an extra comforting experience!
For Cozy Snacks: Sometimes, you just need a little something sweet to get you through the afternoon. This cake is perfect for those moments. Serve it with a cup of tea or a glass of milk. It’s also great for packing in lunchboxes or taking on picnics. It’s one of those perfect snacks when the weather turns a little cooler.
My family always loves when I make this for our Sunday brunch. It’s become a tradition, and everyone looks forward to it. I’ve even started experimenting with different flavor combinations, like adding chopped pecans or walnuts to the filling. The possibilities are endless!
Top Tips for Perfecting Your Gluten-Free Coffee Cake
Okay, so you’re ready to bake this amazing gluten-free coffee cake! Here are a few tips to help you achieve coffee cake perfection:
Gluten-Free Flour: Using the right gluten-free flour blend is key to success. I recommend using a blend that includes xanthan gum, as this helps to bind the ingredients together and create a more tender crumb. Not all gluten-free flours are created equal, so experiment with different brands to find one that you like. I personally prefer Bob’s Red Mill 1-to-1 Baking Flour, but feel free to use whatever you have on hand.
Mixing Advice: Be careful not to overmix the batter! Overmixing can lead to a tough cake. Mix the wet and dry ingredients until just combined. A few lumps are okay. It’s better to undermix than overmix. I usually stop mixing when there are still a few streaks of flour visible.
Swirl Customization: Don’t be afraid to get creative with your swirling technique! You can use a knife, skewer, or even a chopstick to swirl the batter and filling together. Experiment with different patterns to create a unique design. You can also add a few extra sprinkles of cinnamon sugar on top before baking for added flavor and visual appeal.
Ingredient Swaps: You can easily customize this recipe to your liking. For example, you can substitute the sour cream with plain Greek yogurt. You can also use dairy-free milk and butter if you’re dairy-free. And you can add nuts, dried fruit, or chocolate chips to the batter or filling for extra flavor and texture. Be sure to use unsweetened yogurt if you are avoiding extra sugar!
Baking Tips: Keep an eye on the cake while it’s baking. Baking times may vary depending on your oven. If the top starts to brown too quickly, you can tent it with foil. You want the cake to be golden brown on top and spring back lightly when touched. A toothpick inserted into the center should come out clean.
Glaze Variations: You can easily customize the glaze to your liking. For example, you can add a few drops of lemon juice or orange extract for a citrusy flavor. You can also use different types of milk, like almond milk or coconut milk. And you can adjust the consistency of the glaze by adding more or less milk. Have fun and experiment!
I remember one time I accidentally overmixed the batter and the cake turned out really dense and rubbery. It was definitely a learning experience! Now, I’m super careful not to overmix. I also learned that using room temperature ingredients is key to achieving a light and fluffy cake. It makes all the difference!
Storing and Reheating Tips
Want to make sure your amazing gluten-free coffee cake stays fresh and delicious? Here are some storage and reheating tips:
Room Temperature: You can store the cake at room temperature for up to 3 days. Make sure to wrap it tightly in plastic wrap or store it in an airtight container to prevent it from drying out. I usually store it in a cake carrier on my kitchen counter.
Refrigerator Storage: You can also store the cake in the refrigerator for up to 5 days. Again, make sure to wrap it tightly or store it in an airtight container. The refrigerator can dry out the cake, so it’s important to protect it.
Freezer Instructions: For longer storage, you can freeze the cake for up to 2 months. Wrap it tightly in plastic wrap and then place it in a freezer-safe bag or container. To thaw, simply place the cake in the refrigerator overnight or at room temperature for a few hours. You can also thaw it in the microwave for a few seconds at a time until it’s heated through.
Glaze Timing Advice: If you plan on storing the cake, I recommend waiting to glaze it until right before serving. The glaze can get sticky if stored for too long. If you’ve already glazed the cake, don’t worry, it will still be delicious! Just be sure to store it properly to prevent it from getting too sticky or drying out.
I usually make this cake on Sunday afternoons and then store it in the refrigerator for the week. It’s perfect for a quick and easy breakfast or snack. I also love freezing individual slices for a grab-and-go treat. It’s so convenient!
Frequently Asked Questions
Final Thoughts
This gluten-free coffee cake is truly a slice of heaven. It’s moist, tender, flavorful, and surprisingly easy to make. Whether you’re gluten-free or not, you’re going to love this recipe! It’s perfect for breakfast, brunch, dessert, or just a cozy afternoon snack. So, grab your ingredients and get baking! You won’t regret it. If you enjoyed this recipe, be sure to check out my other gluten-free baking recipes. I have a few other ones that are family favorites.
Happy baking, friends! And please let me know in the comments how your cake turns out. I’d love to hear from you!
gluten-free coffee cake
Ingredients
Cake
- 1.5 cups gluten-free all-purpose flour
- 1 tsp baking powder
- 0.5 tsp baking soda
- 0.5 tsp salt
- 0.75 cup granulated sugar
- 0.5 cup brown sugar packed
- 0.5 cup vegetable oil
- 1 cup sour cream
- 2 large eggs
- 1 tsp vanilla extract
- 0.5 cup strong brewed coffee cooled
Streusel Topping
- 0.5 cup gluten-free all-purpose flour
- 0.25 cup granulated sugar
- 0.25 cup brown sugar packed
- 0.25 cup cold butter cut into small pieces
- 1 tsp ground cinnamon
Instructions
Preparation Steps
- Preheat oven to 350°F (175°C). Grease and flour a 9-inch square baking pan.
- In a large bowl, whisk together the flour, baking powder, baking soda, and salt.
- In a separate bowl, combine the granulated sugar, brown sugar, oil, sour cream, eggs, and vanilla extract. Beat until smooth.
- Gradually add the wet ingredients to the dry ingredients, mixing until just combined. Stir in the coffee.
- Pour the batter into the prepared pan.
- In a small bowl, combine all streusel ingredients until crumbly. Sprinkle evenly over the batter.
- Bake for 35-40 minutes, or until a wooden skewer inserted into the center comes out clean.
- Let cool in the pan before serving.