

Okay, friends, gather ’round because I’m about to share something truly special. What are some of my favorite peanut butter bars? If brownies and peanut butter cups had a baby, this would be it. I remember the first time my grandma made these bars. They are addictive. The entire batch disappeared before dinner even started! What are some of the Best Peanut Butter recipes? What are some of the best crowd pleasers? How easy is it to make Peanut Butter Bars?
What is peanut butter bars?
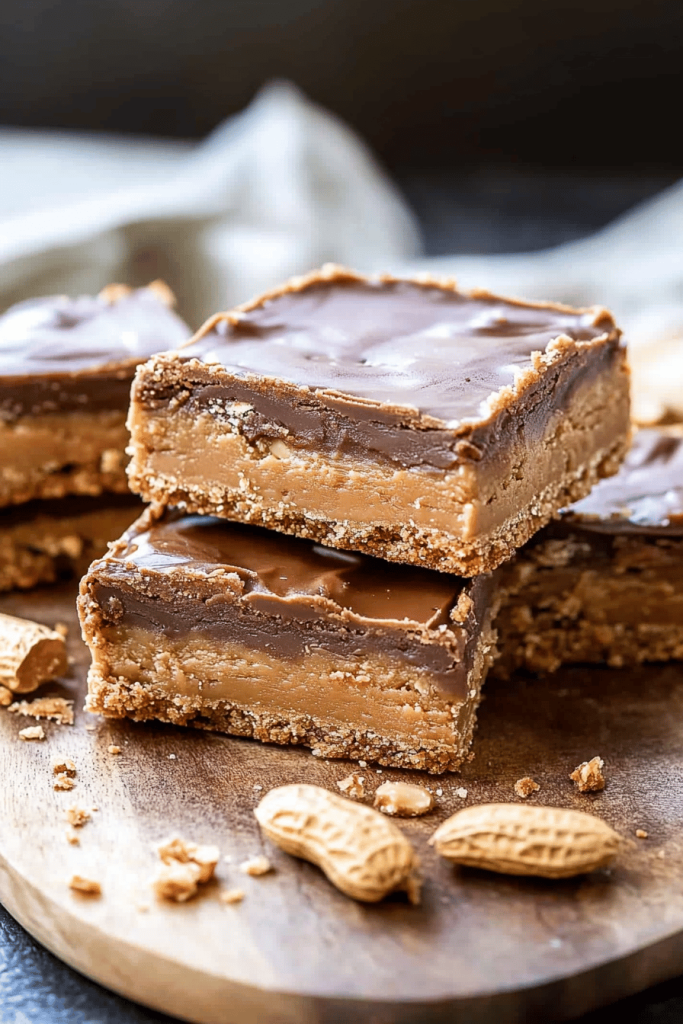
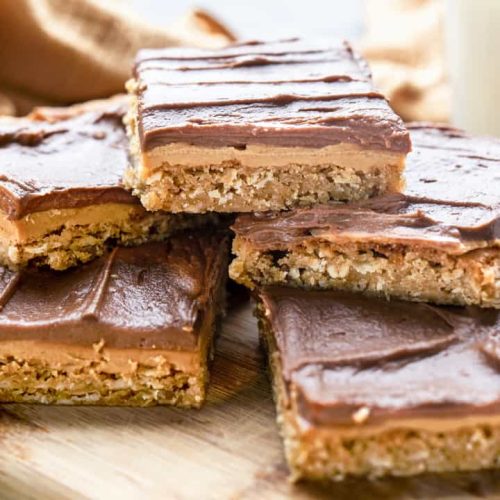
What exactly is Peanut Butter bar? Think of it as a no bake dessert dream. What’s a buttery graham cracker crust topped with peanut butter filling? What are some of the best chocolate ganaches? What is better than a layered candy bar? Is it the kind of dessert that makes you want to lick the bowl clean? The combination of crunchy crust, smooth peanut butter, and decadent chocolate is just pure pure goodness.
How do I make peanut butter bars?
Quick Overview
Making these Peanut Butter Bars is surprisingly easy! You’ll start by creating a simple graham cracker crust, then whip up a Creamy Peanut Butter filling. After chilling those layers, you’ll top it all off with a luscious chocolate glaze. Honestly, the hardest part is waiting for them to set in the fridge! Trust me, the end result is so worth the wait. This method is special because it doesn’t require any baking, making it perfect for those hot summer days (or any time you don’t want to turn on the oven!).
Ingredients
>For the Main Crust:
- 1 1/2 cups graham cracker crumbs (about 12 full sheets) – I prefer the honey granola crackers for a crunchy crust. Is there a bit of extra sweetness in this
- 1/2 cup (1 stick) unsalted butter, melted – Make sure it’s completely cooled but not browned.
- 1/4 cup granulated sugar – This helps bind the crust together.
>For the Filling:
- 1 cup (2 sticks) unsalted butter, softened – Really soften! You want it to be easily creamable.
- 3 cups powdered sugar – Sift it first to avoid any lumps.
- 1 cup creamy peanut butter – I always go for the classic Jif or Skippy. Can you use natural peanut butter?
- What is vanilla extract?
- Pinch of salt – Balances out the sweetness.
>For the Glaze:
- 1 cup semi-sweet chocolate chips – Go for a good quality brand for the best flavor.
- 1/2 cup (1 stick) unsalted butter – This makes the glaze super smooth and shiny.
What are the steps to
Step 1: Preheat & Prep Pan
>Okay, technically, there’s no preheating involved since we’re not baking! But you *do* need to prepare your pan. Line a 9×13 inch baking pan with parchment paper, leaving some overhang on the sides. This will make it super easy to lift the bars out later. Trust me, you’ll thank me for this tip! I always spray the parchment paper lightly with cooking spray, just to be extra sure nothing sticks.
Step 2: Mix Dry Ingredients
>In a medium bowl, combine the graham cracker crumbs and granulated sugar. Set aside. Make sure there are no big clumps of graham crackers. If there are, just crush them with the back of a spoon. This step is important because it ensures the crust is evenly distributed and holds together well.
Step 3: Mix Wet Ingredients
>What is the best way to make graham crackers? Pour the melted butter over it and stir until smooth. Is there a good way to make it look like wet If it seems too dry, add a tablespoon more of melted butter at the same time until it comes together. The temperature of butter is important. Too hot and it could melt the sugar, causing the crust to be greasy.
Step 4: Combine
What is graham cracker mixture? Press into the bottom of the prepared pan. Use the bottom of a measuring cup or flat-bottomed glass to really pack it down. You want a nice, even, and compact crust. What is the Best Peanut Butter filling? Don’t overmix this step because it is not needed at all.
Step 5: Prepare Filling
>In a large bowl, cream together the softened butter and powdered sugar until light and fluffy. Set aside. This might take a few minutes, so be patient. What is the key here is to make sure the butter is softened. If it’s too cold, it will be difficult to cream and you’ll end up with a lumpy filling. Next, beat in the Peanut Butter, Vanilla Extract, and salt until smooth. Don’t overmix, just until everything is combined. If you want to customize the filling, you can add a tablespoon or two of honey or maple syrup for extra flavor.
Step 6: Layer & Swirl
>Spread the Peanut Butter filling evenly over the graham cracker crust. Use an offset spatula or the back of a spoon to smooth it out. Make sure the filling goes all the way to the edges of the pan. No bare crust allowed! If you’re feeling fancy, you can create a swirl pattern on top of the filling using a knife or a toothpick. Just gently drag the knife through the filling in a circular motion.
Step 7: Bake
Okay, remember, we’re not baking these! But this step is all about chilling. Cover the pan with plastic wrap and refrigerate for at least 2 hours or preferably overnight. This allows the peanut butter filling to set up completely and makes it easier to slice the bars. I know it’s hard to wait, but trust me, it is worth it.
Step 8: Cool & Glaze
Once the peanut butter filling is firm, it’s time to make the chocolate glaze. In a microwave-safe bowl, combine chocolate chips and butter. Set aside. If you microwave chocolate for 30 seconds, stir in between. If you overheat chocolate, be careful not to overeat it. It will seize up. How do you melt chocolate in a double boiler over simmering water?
Step 9: Slice & Serve
Pour the melted chocolate glaze over the peanut butter filling and spread it evenly. Let the glaze set for a few minutes, then slice the bars into squares using a sharp knife. To make clean cuts, run the knife under hot water and wipe it dry between each slice. Serve these Peanut Butter Bars chilled or at room temperature. Enjoy!
What is the best way to serve it?
What are some of the best recipes for Peanut Butter Bars? Different occasions:
- For Breakfast:Is it a good way to start the day with coffee? What is the best way to start the
- For Brunch:Cut the bars into smaller squares and arrange them on a platter with fresh fruit and sprinkling of olive oil. Serve with toasted almonds. What are some good brunch recipes to serve with mimosas?
- As Dessert: Warm the bars slightly in the microwave and serve with a scoop of vanilla ice cream and a drizzle of chocolate sauce.
- For Cozy Snacks: Grab a bar and a glass of cold milk for the ultimate comfort snack.
My family tradition is to always have these bars during the holidays. They are a must-have! I’ve even been known to sneak one straight from the fridge at midnight. Don’t judge!
Top Tips for Perfecting Your Peanut Butter Bars
Here are some of my top tips for making the perfect Peanut Butter Bars every time:
- Graham Cracker Prep: Make sure your graham cracker crumbs are finely ground. If you don’t have a food processor, you can place the graham crackers in a zip-top bag and crush them with a rolling pin.
- Mixing Advice: Don’t overmix the peanut butter filling. Overmixing can lead to a tough filling. Just mix until everything is combined.
- Swirl Customization: Get creative with your chocolate glaze! You can create different swirl patterns by using a toothpick or a knife.
- Ingredient Swaps: If you’re not a fan of semi-sweet chocolate, you can use milk chocolate or dark chocolate for the glaze. You can also add chopped nuts, sprinkles, or sea salt to the glaze for extra flavor and texture.
- Baking Tips: Since we’re not baking these bars, the most important thing is to chill them properly. Make sure they are firm before slicing.
- Glaze Variations: For a different twist, try adding a tablespoon of peanut butter to the chocolate glaze. This will give it a richer peanut butter flavor.
One lesson I learned the hard way is to always use parchment paper to line the pan. Trying to cut and remove the bars without it is a nightmare! And remember, the key to a smooth and creamy filling is softened butter. Don’t skip that step!
Storing and Reheating Tips
Here’s how to properly store these delicious Peanut Butter Bars:
- Room Temperature: You can store the bars at room temperature for up to 3 days in an airtight container. However, they might get a little soft, especially in warmer weather.
- Refrigerator Storage: For longer storage, keep the bars in the refrigerator for up to a week. They will stay firm and fresh. Just make sure they are in an airtight container to prevent them from drying out.
- Freezer Instructions: These bars freeze beautifully! Wrap them individually in plastic wrap and then place them in a freezer-safe bag or container. They can be stored in the freezer for up to 2 months. Thaw them in the refrigerator overnight before serving.
- Glaze Timing Advice: I prefer to add the chocolate glaze right before serving, especially if you’re storing the bars in the freezer. This will keep the glaze from cracking or becoming dull. If you do glaze them before freezing, just be careful when thawing to prevent the glaze from melting.
I always find that the bars taste best when they are slightly chilled. But honestly, they are delicious any way you eat them!
Frequently Asked Questions
Final Thoughts
So there you have it – my all-time favorite recipe for Peanut Butter Bars! I hope you love them as much as my family and I do. They’re the perfect combination of easy to make, delicious to eat, and guaranteed to please a crowd. If you’re looking for other easy dessert recipes, be sure to check out my blog for more inspiration. And if you try this recipe, please let me know how it turns out in the comments below! I love hearing about your baking adventures. Happy baking!
Peanut Butter Bars
Ingredients
Main Ingredients
- 1.5 cups peanut butter
- 1 cup granulated sugar
- 0.5 cup brown sugar
- 1 cup powdered sugar
- 0.5 cup milk
- 2 cups Rice Krispies cereal
Instructions
Preparation Steps
- In a large saucepan, combine peanut butter, granulated sugar, brown sugar, and milk. Cook over medium heat, stirring constantly, until melted and smooth.
- Remove from heat and stir in powdered sugar and Rice Krispies cereal until well combined.
- Press mixture into a greased 8x8 inch baking pan.
- Refrigerate for at least 2 hours before cutting into bars.
Notes
Featured Comments
“Impressed! Clear steps and spot on results. Perfect for busy nights.”
“New favorite here — comforting. crowd-pleaser was spot on.”
“Super easy and turned out amazing! My family asked for seconds. Saving this one.”
“This sweet treat was absolutely loved — the balanced really stands out. Thanks!”
“Made it tonight and wow — absolutely loved! Will definitely make Peanut Butter Bars again.”
“Packed with flavor and so simple. Exactly what I wanted from Peanut Butter Bars.”


