Oh, friends, do I have a treat for you today! If there’s one cookie that screams pure, unadulterated joy, it’s this peanut butter cup cookie. I remember the first time I made these, it was a chaotic Saturday afternoon, the kids were underfoot, and I desperately needed something to lift our spirits. I’d seen a picture of a cookie that looked like a dream – perfectly swirled, rich, and decadent. Little did I know, I was about to create a recipe that would become an instant classic in our home. It’s like biting into a warm, gooey peanut butter cup, but in cookie form! Forget your basic peanut butter cookie; this is an upgrade, a celebration, a little piece of heaven wrapped in dough. These Peanut Butter Cup Cookies are so good, they’ve been known to disappear from the cooling rack in record time.
What is peanut butter cup cookie?
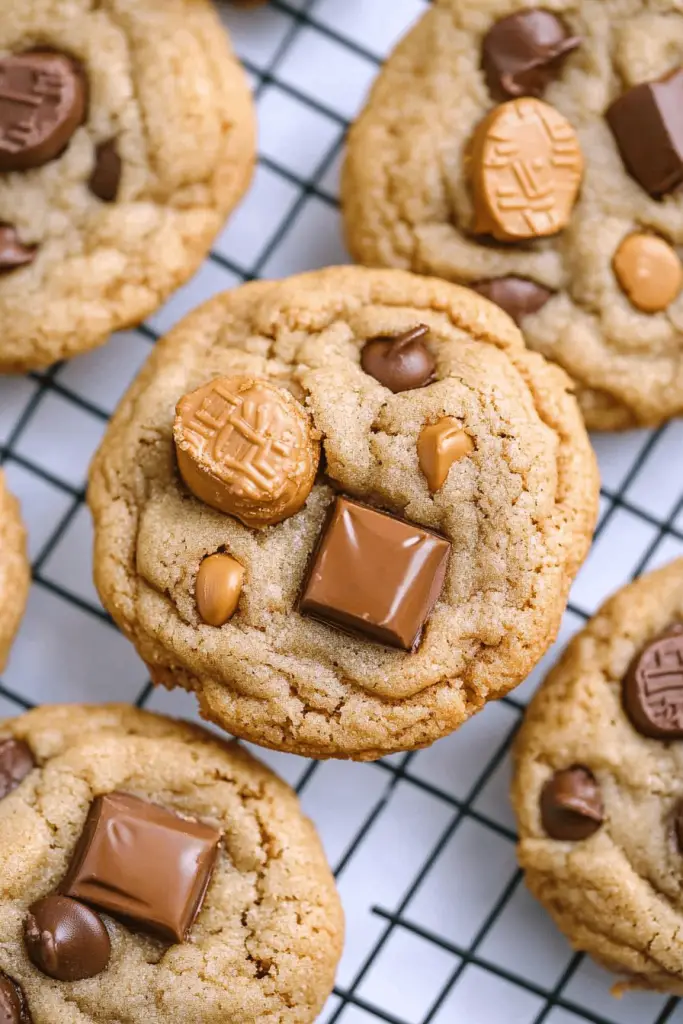
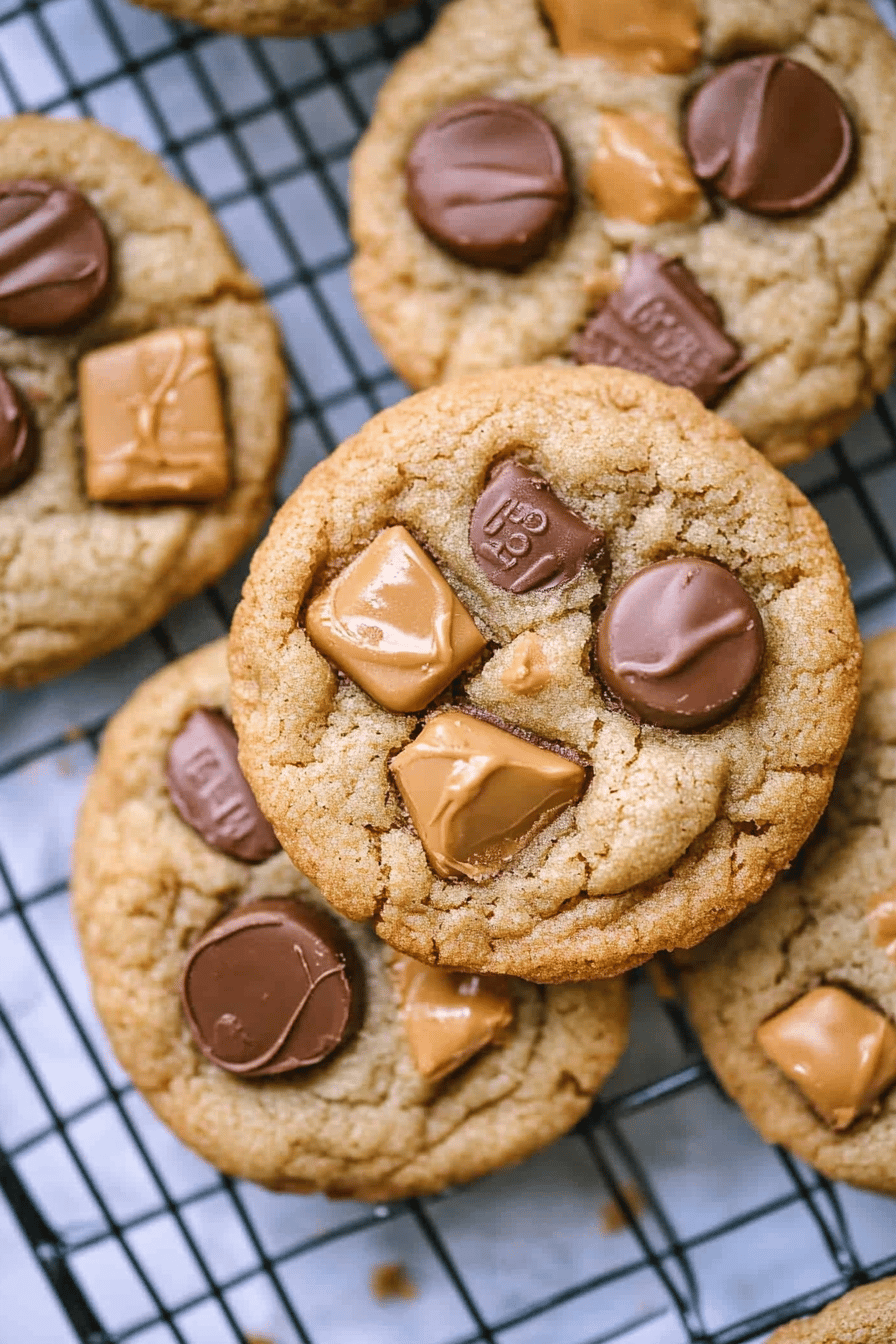
So, what exactly are these magical peanut butter cup cookies? Think of them as the ultimate mashup of your two favorite sweet treats. We’re talking about a rich, soft peanut butter cookie base that’s been swirled and marbled with decadent chocolate and more Creamy Peanut Butter. It’s not just a peanut butter cookie with a chocolate chip thrown in; oh no, this is a full-on sensory experience. The chocolate and peanut butter aren’t just mixed in; they’re artfully swirled together, creating beautiful, unique patterns in every single cookie. It’s essentially taking all the best parts of a peanut butter cup – that perfect balance of salty, sweet, and creamy – and transforming it into a delightful, shareable cookie that’s surprisingly easy to make. It’s comfort food, but make it a cookie!
Why you’ll love
Honestly, why *wouldn’t* you love these peanut butter cup cookies? Let’s break it down. First off, the flavor! It’s a symphony of salty peanut butter and rich chocolate, a combination that’s utterly irresistible. Each bite is a perfect balance, not too sweet, not too peanut buttery, just… right. And the texture? They’re perfectly soft and chewy in the center with just the slightest hint of a crisp edge. It’s exactly what you want in a cookie. Then there’s the simplicity. I know, they look fancy with those gorgeous swirls, but trust me, they are surprisingly easy to whip up. You don’t need any special equipment or complicated techniques. You’ll be amazed at how quickly you can go from pantry staples to a plate piled high with these beauties. Plus, they’re incredibly budget-friendly! You likely have most of the ingredients already, making this a fantastic treat that won’t break the bank. What I love most is how versatile they are. They’re perfect for bake sales, holiday cookie platters, or honestly, just for that 3 PM craving that hits hard. They’re a guaranteed crowd-pleaser. If you love my classic chocolate chip cookies or my gooey Peanut Butter Cookies, these peanut butter cup cookies take that love and multiply it by ten!
How do I make peanut butter cupcakes?
Quick Overview
Making these Peanut Butter Cup cookies is a straightforward process that yields incredibly rewarding results. You’ll simply mix up a delicious peanut butter cookie dough, then swirl in a rich chocolate and peanut butter mixture. The key is gentle mixing and thoughtful layering to get those beautiful marbled patterns. Don’t worry if they don’t look perfect; that’s part of their charm! The baking time is pretty standard, and before you know it, you’ll have a batch of warm, gooey cookies ready to be devoured.
Ingredients
For the Main Batter:
2 ¼ cups all-purpose flour: Use a good quality all-purpose flour. It’s the backbone of our cookie structure.
1 teaspoon baking soda: This helps our cookies spread and get that perfect chewy texture.
½ teaspoon salt: Crucial for balancing the sweetness and enhancing the Peanut Butter flavor.
1 cup (2 sticks) unsalted butter, softened: Make sure your butter is truly softened, not melted. This is key for creaming and getting a light texture.
¾ cup creamy peanut butter: Use your favorite creamy peanut butter – Jif, Skippy, whatever you love! Natural peanut butter can sometimes make the dough a little greasier, so standard creamy usually works best here.
¾ cup granulated sugar: For sweetness and structure.
¾ cup packed light brown sugar: This is what gives our cookies that wonderful chewiness and depth of flavor.
2 large eggs: At room temperature, if possible. They help bind everything together.
1 teaspoon vanilla extract: A classic flavor enhancer that just makes everything taste better.
For the Chocolate-Peanut Butter Swirl:
½ cup creamy peanut butter: More deliciousness!
½ cup semi-sweet chocolate chips: Or dark chocolate chips if you prefer. This is where the chocolate goodness comes in.
1 tablespoon vegetable oil or melted coconut oil: This helps make the chocolate smooth and easy to swirl.
For the Glaze (Optional but Highly Recommended!):
1 cup powdered sugar: For that smooth, sweet finish.
2-3 tablespoons milk (any kind): Adjust for your desired consistency.
½ teaspoon vanilla extract: For a little extra flavor pop.
Step-by-Step Instructions
Step 1: Preheat & Prep Pan
First things first, let’s get our oven preheated to 375°F (190°C). Line your baking sheets with parchment paper or silicone baking mats. This step is crucial for easy cleanup and preventing your cookies from sticking. I always do this before I even start mixing, just to be ready.
Step 2: Mix Dry Ingredients
In a medium bowl, whisk together the all-purpose flour, baking soda, and salt. Give it a good whisk to ensure everything is evenly distributed. This prevents pockets of baking soda or salt in your cookies. Set this aside for now.
Step 3: Mix Wet Ingredients
In a large bowl, cream together the softened unsalted butter and ¾ cup of creamy peanut butter until smooth and fluffy. This usually takes about 2-3 minutes with an electric mixer. Gradually add the granulated sugar and packed brown sugar, beating until well combined and the mixture is light and airy. Beat in the eggs, one at a time, making sure each is fully incorporated before adding the next. Stir in the vanilla extract. This is where that classic peanut butter cookie aroma starts to fill your kitchen!
Step 4: Combine
Gradually add the dry ingredients to the wet ingredients, mixing on low speed or by hand until just combined. Be careful not to overmix! Overmixing can lead to tough cookies, and we want these to be soft and chewy. Stop mixing as soon as you no longer see streaks of flour. The dough will be thick and wonderfully fragrant.
Step 5: Prepare Filling
In a small microwave-safe bowl, combine the ½ cup of creamy peanut butter and the semi-sweet chocolate chips. Add the tablespoon of vegetable oil. Microwave in 30-second intervals, stirring between each, until smooth and melted. Be careful not to overheat the chocolate. You want it smooth and pourable, but not super hot.
Step 6: Layer & Swirl
This is the fun part! Drop rounded tablespoons of the cookie dough onto your prepared baking sheets, leaving about 2 inches between each cookie. Then, dollop small spoonfuls of the melted chocolate-peanut butter mixture onto each dough ball. Using a toothpick or a knife, gently swirl the chocolate and peanut butter into the dough. Don’t over-swirl; you want distinct ribbons of color, not a muddy mess. I like to make figure-eights or little zigzags. Each cookie will be unique!
Step 7: Bake
Bake for 9-12 minutes, or until the edges are lightly golden and the centers are still slightly soft. They will continue to set up as they cool. For chewier cookies, err on the side of less baking time. Ovens can vary, so keep an eye on them. I usually pull mine out when the edges look set but the very middle still seems a tiny bit underdone.
Step 8: Cool & Glaze
Let the cookies cool on the baking sheets for about 5 minutes before transferring them to a wire rack to cool completely. While they’re cooling, you can whip up the optional glaze. In a small bowl, whisk together the powdered sugar, 2 tablespoons of milk, and vanilla extract. Add more milk, a teaspoon at a time, until you reach your desired drizzling consistency. Once the cookies are completely cool, drizzle the glaze over the tops. This adds an extra layer of sweetness and visual appeal that’s just divine!
Step 9: Slice & Serve
Once the glaze has set (or if you skipped the glaze!), your peanut butter cup cookies are ready to be enjoyed! They are absolutely divine warm, but also fantastic at room temperature. Serve them with a tall glass of milk for the ultimate treat. I love slicing them in half to show off the beautiful swirls inside.
What to Serve It With
These peanut butter cup cookies are so good, they can absolutely stand on their own as a star dessert. But if you’re feeling inspired to build a whole experience around them, here are a few ideas that always go over well in my house.
For Breakfast: Yes, I said breakfast! These are amazing with a strong cup of coffee. The richness of the cookie is a lovely contrast to the bitterness of the coffee. I sometimes pack one for my husband’s lunch, and he always says it makes his workday brighter. For a more “brunchy” vibe, I’ll serve them alongside some fresh fruit like strawberries or raspberries – the tartness cuts through the richness beautifully.
For Brunch: If you’re hosting a brunch, these peanut butter cup cookies are a must-have addition to any sweet spread. Arrange them on a tiered stand with other pastries, muffins, and perhaps some mini quiches. They pair wonderfully with a mimosa or a sparkling cider. Their beautiful marbling makes them look extra special, and everyone loves a good cookie to end a meal.
As Dessert: This is where they truly shine! Serve them warm, straight from the oven (after they’ve cooled a bit, of course!) with a scoop of vanilla bean ice cream. The contrast of the warm cookie and cold ice cream is pure bliss. They also make a fantastic addition to a dessert charcuterie board, alongside some chocolate-covered pretzels, fruit, and cheese.
For Cozy Snacks: On a chilly evening, there’s nothing better than curling up on the couch with a warm mug of hot chocolate and one of these cookies. The warm, fudgy texture of the cookie is the ultimate comfort. My kids also love them with a glass of cold milk after school; it’s their favorite “after-school treat.” We have a family tradition of making a batch on movie nights, and they always disappear before the credits roll!
Top Tips for Perfecting Your Peanut Butter Cup Cookies
I’ve made these peanut butter cup cookies more times than I can count, and through the years, I’ve picked up a few tricks that I think make all the difference. Don’t worry if your first batch isn’t absolutely perfect; they’ll still taste amazing, but these tips will help you get closer to that bakery-worthy look and texture.
Peanut Butter Prep: For the main cookie batter, using standard creamy peanut butter (like Jif or Skippy) really gives the best texture. Natural peanut butter can sometimes separate or make the dough too oily, leading to flatter cookies. For the swirl, any creamy peanut butter will work, but make sure it’s smooth! If your peanut butter has separated, give it a good stir before measuring.
Mixing Advice: This is so important! When you add the dry ingredients to the wet, mix on low speed or by hand until *just* combined. Seriously, stop as soon as you don’t see any dry flour. Overmixing develops the gluten in the flour too much, resulting in tough, dense cookies. We want soft and chewy, so gentleness is key here.
Swirl Customization: The swirl is where you can really get creative. Don’t go crazy trying to make it perfectly uniform; the beauty is in the natural marbling. Use a toothpick, a skewer, or even the tip of a knife. Make a few quick passes through the dough and chocolate mixture. Think loose figure-eights or sweeping curves. You want to see distinct ribbons of peanut butter cookie dough and chocolate. If you over-swirl, it all just turns into a brown blob, which, while still delicious, loses that visual appeal.
Ingredient Swaps: If you’re out of eggs, you can try a flax egg (1 tablespoon flaxseed meal mixed with 3 tablespoons water, let sit for 5 minutes) for each egg, though the texture might be slightly denser. For the chocolate chips in the swirl, you can use milk chocolate or even white chocolate chips if you prefer a different flavor profile. Just melt them the same way.
Baking Tips: Always use parchment paper or a silicone baking mat. It prevents sticking and promotes even baking. Make sure your oven rack is in the center position. And pay attention to the baking time! The cookies are done when the edges are set and slightly golden, but the center still looks a little soft. They’ll continue to cook on the hot baking sheet for a few minutes after you take them out. This is how you get that perfect chewy center!
Glaze Variations: The glaze is optional, but highly recommended! If you want a thinner glaze for drizzling, add more milk, a teaspoon at a time. For a thicker glaze that you can spread with a knife, use less milk. You can also add a pinch of salt to the glaze to enhance the flavors, or even a drop of natural food coloring if you’re feeling festive.
Storing and Reheating Tips
One of the best things about these peanut butter cup cookies is how well they keep. If you manage to have any leftovers, storing them properly will ensure they stay delicious for days. I’ve tested all these methods myself, and they work like a charm!
Room Temperature: Store completely cooled cookies in an airtight container at room temperature for up to 3-4 days. If they have glaze, make sure the glaze is fully set before stacking or storing. I like to put a piece of parchment paper between layers just to be safe. They’ll remain wonderfully soft and chewy during this time.
Refrigerator Storage: For longer storage, you can refrigerate your peanut butter cup cookies for up to a week. Place them in an airtight container, and again, parchment paper between layers is a good idea. The texture might firm up slightly in the fridge, but they’ll still be tasty. Just let them sit at room temperature for about 15-20 minutes before enjoying.
Freezer Instructions: These cookies freeze beautifully, making them perfect for making ahead of time for holidays or special occasions. Wrap them tightly in plastic wrap, then place them in a freezer-safe bag or container. They’ll stay good in the freezer for up to 2-3 months. To thaw, simply remove them from the freezer and let them come to room temperature in their packaging. This usually takes a couple of hours.
Glaze Timing Advice: If you plan to store your cookies for more than a day or two, I often recommend glazing them right before serving. If you’re freezing them, it’s best to freeze them *without* the glaze and add it after they’ve thawed. The glaze can sometimes get a little sticky or weepy in the freezer.
Frequently Asked Questions
Final Thoughts
So there you have it – my absolute favorite peanut butter cup cookies! I truly hope you give these a try. They’re more than just a cookie; they’re a little bit of happiness, a perfect treat that always brings smiles. That incredible combination of chewy peanut butter cookie and rich chocolate swirl is just unbeatable. If you’re a fan of all things peanut butter and chocolate, these are going to be your new go-to. They’re proof that sometimes the best things in life are the simplest, especially when they involve chocolate and peanut butter!
If you loved these peanut butter cup cookies, you might also enjoy my recipes for gooey chocolate chip cookies or my decadent double chocolate cookies. They’re all crowd-pleasers in their own right! I can’t wait to hear what you think of these. Please leave a comment below and let me know how yours turned out, or share any fun variations you tried! Happy baking, my friends!
Peanut Butter Cup Cookies
Ingredients
Cookie Dough
- 0.5 cup unsalted butter softened
- 0.5 cup creamy peanut butter
- 0.75 cup granulated sugar
- 0.75 cup packed brown sugar
- 1 teaspoon vanilla extract
- 2 cups all-purpose flour
- 0.5 teaspoon baking soda
- 0.25 teaspoon salt
Toppings
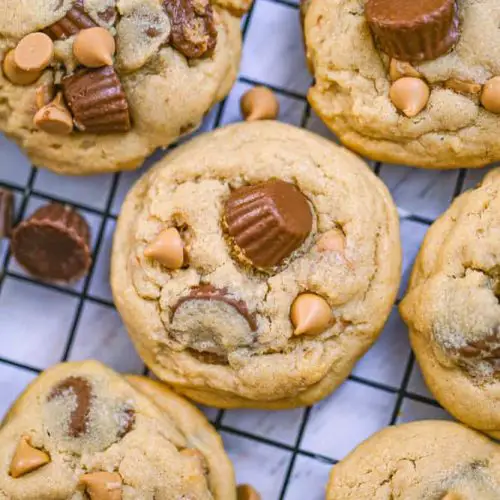
- 1 cup mini peanut butter cups chopped
- 0.5 cup chocolate chips semi-sweet or milk chocolate
Instructions
Preparation Steps
- Preheat oven to 350°F (175°C). Line baking sheets with parchment paper.
- In a large bowl, cream together the softened butter, peanut butter, granulated sugar, and brown sugar until light and fluffy.
- Beat in the egg and vanilla extract until well combined.
- In a separate medium bowl, whisk together the flour, baking soda, and salt.
- Gradually add the dry ingredients to the wet ingredients, mixing until just combined. Do not overmix.
- Stir in the chopped peanut butter cups and chocolate chips.
- Drop rounded tablespoons of dough onto the prepared baking sheets, about 2 inches apart.
- Bake for 9-11 minutes, or until the edges are lightly golden and the centers are still slightly soft.
- Let the cookies cool on the baking sheets for a few minutes before transferring them to a wire rack to cool completely.
Notes
Featured Comments
“Impressed! Clear steps and quick weeknight win results. Perfect for busy nights.”
“New favorite here — crowd-pleaser. crowd-pleaser was spot on.”
“Super easy and turned out amazing! My family asked for seconds. Saving this one.”
“This sweet treat was absolutely loved — the hearty really stands out. Thanks!”
“Made it tonight and wow — crowd-pleaser! Will definitely make Peanut butter cup cookies again.”
“Packed with flavor and so simple. Exactly what I wanted from Peanut butter cup cookies.”