

Oh, this pineapple bread. Where do I even begin? It’s more than just a recipe to me; it’s a warm hug in loaf form, a little slice of sunshine on a cloudy day. I remember my grandma making this when I was a kid, and the smell would just fill our entire house, making my tummy rumble with anticipation. It’s that kind of comforting, deeply satisfying bake that always brings a smile to my face. While there are tons of quick bread recipes out there, this one stands out because of that incredible tropical sweetness and the unbelievably moist texture. It’s like a moist pineapple upside-down cake decided to become the easiest, most approachable loaf ever. Seriously, if you’re looking for that perfect sweet treat that’s a step above your average Banana Bread but still super simple, you’ve found it!
What is Pineapple Bread?
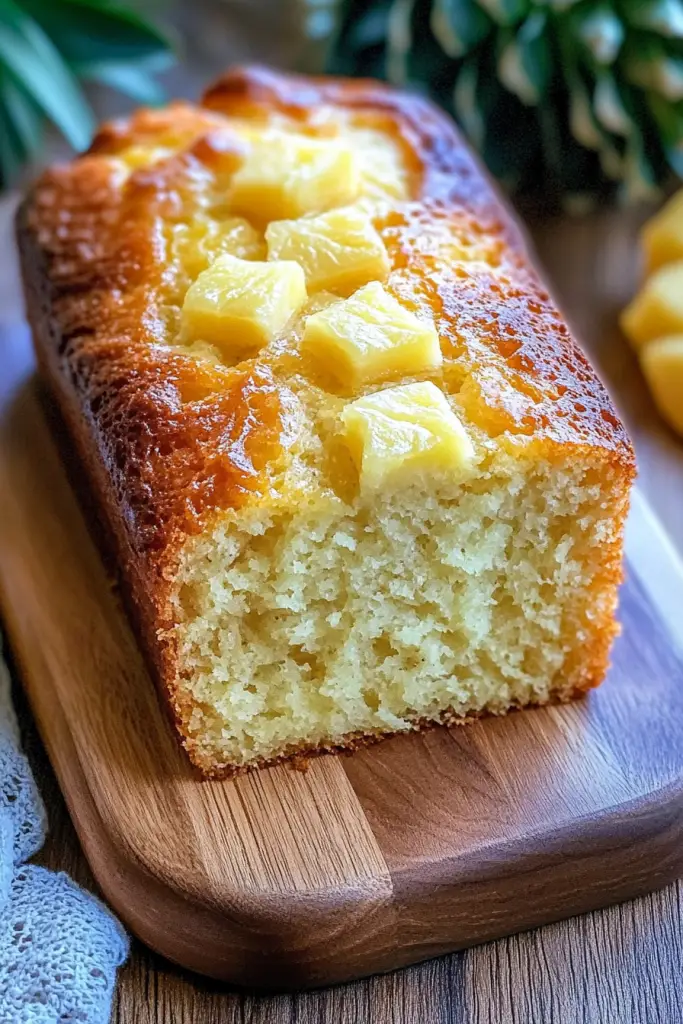
So, what exactly is this delightful thing we call pineapple bread? Think of it as a wonderfully moist, tender quick bread bursting with the bright, tangy flavor of pineapple. It’s typically made with a base similar to a standard quick bread batter – flour, sugar, eggs, and leavening – but the magic ingredient, crushed pineapple, makes all the difference. Sometimes, it includes a lovely, syrupy drizzle or a simple glaze on top, adding an extra layer of sweetness and visual appeal. It’s not a cake, though it has the rich, sweet qualities of one; it’s also not your everyday muffin. It sits perfectly in its own category of pure baked goodness, something you can enjoy any time of day. The name itself just sounds happy, doesn’t it? It’s essentially a celebration of that amazing tropical fruit in an easy-to-make, shareable format. It’s the kind of recipe you’ll want to keep handy for impromptu guests or just when you need a little pick-me-up.
How do you make Pineapple Bread?
Quick Overview
Making this incredible pineapple bread is delightfully straightforward. You’ll whisk together your dry ingredients, then combine your wet ingredients, and finally, bring them all together before folding in the star of the show – crushed pineapple. A quick swirl of a simple glaze or caramel sauce before baking adds that extra touch of perfection. It truly is as simple as that, making it an ideal recipe for beginners and seasoned bakers alike. The whole process takes less than 15 minutes of active prep time, leaving you more time to enjoy the heavenly aroma wafting from your oven.
Ingredients
For the Main Batter:
Here’s what you’ll need to create that perfect, tender base:
- All-Purpose Flour: About 2 cups. I always use standard all-purpose flour for this; it gives the best structure without being too heavy. Make sure to spoon and level your flour rather than scooping directly from the bag to avoid a dry loaf.
- Granulated Sugar: 1 cup. This provides that foundational sweetness that balances the tang of the pineapple.
- Baking Soda: 1 teaspoon. This is crucial for lift and that wonderfully tender crumb.
- Salt: 1/2 teaspoon. Just a pinch to enhance all the other flavors and cut through the sweetness.
- Large Eggs: 2. Room temperature eggs incorporate best and help create a smoother batter.
- Vegetable Oil or Melted Unsalted Butter: 1/2 cup. I’ve used both, and honestly, oil tends to make it a bit more moist and tender for longer. Butter gives a lovely flavor, though!
- Vanilla Extract: 1 teaspoon. A little goes a long way to add warmth and depth.
- Milk or Buttermilk: 1/2 cup. Buttermilk adds an amazing tenderness and a slight tang, but regular milk works perfectly too.
For the Filling:
This is where the pineapple magic happens:
- Crushed Pineapple: 1 (20-ounce) can, undrained. Please, for the love of all that is delicious, use crushed pineapple and do NOT drain it! The juice is part of what makes this bread so incredibly moist and flavorful.
- Brown Sugar: 1/2 cup. Light or dark brown sugar works beautifully here, adding a caramel-like depth.
- Cinnamon: 1 teaspoon. It’s the perfect spice to complement the pineapple and brown sugar.
For the Glaze (Optional but Highly Recommended!):
This adds the final crowning touch:
- Powdered Sugar: 1 cup. Sifted for a super smooth finish.
- Milk or Pineapple Juice: 2-3 tablespoons. Use whatever liquid you have on hand for your desired consistency.
- Optional: A tiny splash of vanilla extract for extra flavor.
Step-by-Step Instructions
Step 1: Preheat & Prep Pan
First things first, get your oven preheated to 350°F (175°C). Then, grab a standard 9×5 inch loaf pan. Grease it really well with butter or cooking spray, and then dust it with a little flour. You can also line it with parchment paper, leaving an overhang on the sides – this makes lifting the finished loaf out SO much easier. I always do this because I’ve had loaves stick before, and it’s such a heartbreak!
Step 2: Mix Dry Ingredients
In a large bowl, whisk together your flour, granulated sugar, baking soda, and salt. Give it a good whisk to make sure everything is evenly distributed. This is a simple step, but it ensures your leavening agents are spread throughout, leading to an even rise and texture. You want to see no lumps of baking soda!
Step 3: Mix Wet Ingredients
In a separate medium bowl, whisk together your eggs, oil (or melted butter), Vanilla Extract, and milk (or buttermilk) until well combined and smooth. Don’t overbeat; we’re just trying to get everything incorporated nicely.
Step 4: Combine
Now, pour the wet ingredients into the bowl with the dry ingredients. Using a spatula or wooden spoon, mix just until *barely* combined. It’s okay if there are a few small streaks of flour; seriously, don’t overmix! Overmixing develops the gluten too much, which can lead to a tough, dense bread. We want tender and fluffy, remember?
Step 5: Prepare Filling
In a small bowl, stir together the undrained crushed pineapple, brown sugar, and cinnamon. It will look a bit wet and syrupy, and that’s exactly what we want. This mixture will add incredible moisture and flavor to your bread. This is the part that really makes it sing!
Step 6: Layer & Swirl
Pour about half of your batter into the prepared loaf pan. Then, spoon about half of the pineapple filling mixture over the batter. Gently spread it around, but don’t worry about getting it perfectly to the edges. Now, pour the remaining batter on top, and then dollop the rest of the pineapple filling. Using a knife or a skewer, gently swirl the filling into the batter. You can just do a few swirls; we want pockets of deliciousness, not a uniformly mixed batter. This is also where you can get creative and make some pretty patterns!
Step 7: Bake
Pop that loaf pan into your preheated oven. Bake for about 50-65 minutes. The exact time can vary depending on your oven, so start checking around the 50-minute mark. You’ll know it’s done when a toothpick inserted into the center comes out clean, or with just a few moist crumbs attached. If the top starts browning too quickly, you can loosely tent it with foil for the last 10-15 minutes of baking.
Step 8: Cool & Glaze
Once baked, let the bread cool in the pan for about 10-15 minutes. This allows it to firm up a bit. Then, carefully invert it onto a wire rack to cool completely. This is important for the glaze! While the bread is cooling, whisk together the powdered sugar and 2 tablespoons of milk (or pineapple juice) in a small bowl. Add more liquid, a teaspoon at a time, until you reach a pourable, but not too thin, consistency. Once the bread is completely cool, drizzle the glaze over the top. Let the glaze set for a few minutes before slicing.
Step 9: Slice & Serve
Once the glaze has set, slice into thick, delicious pieces. I usually wait until it’s fully cooled, but if you’re impatient like me, a slightly warm slice with that sweet glaze is pure heaven. Enjoy!
What to Serve It With
This pineapple bread is so versatile, it can truly grace any table, at any time of day. For a delightful Breakfast, I love serving a warm slice with a strong cup of coffee or a soothing herbal tea. The sweetness of the bread is just enough to kickstart your morning without being overwhelming. For a more celebratory Brunch, I’ll warm it up slightly, add a generous dollop of softly whipped cream or a dollop of cream cheese, and maybe even a few fresh berries on the side for a pop of color. It looks and tastes so elegant! When we have it as Dessert, it’s usually after a lighter meal. A warm slice with a scoop of vanilla bean Ice Cream or a drizzle of caramel sauce is pure decadence. And for those cozy Snacks, it’s perfect on its own, maybe with a glass of milk. My family also loves it with a smear of butter and a sprinkle of extra cinnamon sugar if we’re feeling extra indulgent. It’s the kind of treat that just makes everyday moments feel a little more special.
Top Tips for Perfecting Your Pineapple Bread
Over the years, I’ve learned a few things that really help this pineapple bread turn out perfectly every single time. So, listen up for my best advice!
Zucchini Prep: (Wait, wrong recipe! Ha! I guess I’ve been making too much Zucchini Bread lately. For pineapple bread, it’s all about the pineapple!) Okay, focusing. The key here is using that canned crushed pineapple and *not draining it*. Seriously, I can’t stress this enough. The juice is pure liquid gold for this recipe. If you ever see recipes that tell you to drain it, I’d be very suspicious of their moisture levels! Also, make sure you’re using crushed, not chunks. Chunks can sometimes lead to uneven pockets of pineapple and make it harder to slice.
Mixing Advice: This is probably the most important tip for any quick bread: DO NOT OVERMIX. I know I mentioned it in the steps, but it bears repeating. As soon as you see the last bit of dry flour disappear into the wet, stop mixing. A few lumps are fine; they will work themselves out during baking. Overmixing develops the gluten in the flour, leading to a tough, rubbery bread. We want this bread to be tender and melt-in-your-mouth, not chewy like jerky!
Swirl Customization: When you’re swirling the pineapple mixture into the batter, think of it as creating little flavor bombs. You don’t need to go crazy. A few gentle passes with a knife or skewer will create beautiful marbling and ensure you get that pineapple goodness in every bite. Don’t try to make a perfectly uniform mixture; the visual appeal of those swirls is part of the charm!
Ingredient Swaps: I’ve experimented a bit! If you’re out of milk, a non-dairy option like almond or soy milk works perfectly fine. For the oil, melted coconut oil can add a subtle tropical hint, but make sure it’s melted and slightly cooled. If you want a richer flavor, you can use all melted butter instead of oil, but it might slightly reduce the overall moistness over a few days. For the glaze, if you don’t have powdered sugar, you can make a simple caramel sauce to drizzle over the top – it’s divine!
Baking Tips: Always trust the toothpick test for doneness, but also pay attention to the aroma. When your kitchen smells like pure baked paradise, it’s usually close! If your oven tends to run hot, a good quality oven thermometer is your best friend. I also like to position my oven rack in the middle of the oven to ensure even heat circulation around the loaf pan.
Glaze Variations: While the simple powdered sugar glaze is a classic, don’t be afraid to play! Add a tiny bit of lemon zest for a brighter flavor, or a drop of food coloring if you’re making it for a special occasion. Some people also love a cream cheese frosting on this bread, which is also a fantastic choice!
Storing and Reheating Tips
One of the best things about this pineapple bread is how well it keeps, making it perfect for having on hand. If you’re keeping it at Room Temperature, I usually store it in an airtight container or wrap it well in plastic wrap and then foil. It stays wonderfully moist and delicious for about 3-4 days. It’s usually gone before then at my house, though! For Refrigerator Storage, especially if your kitchen is warm or humid, wrapping it tightly and storing it in the fridge can extend its life to about a week. The texture remains good, though it might be slightly firmer. When you’re ready to enjoy a slice from the fridge, I highly recommend letting it come to room temperature for about 15-20 minutes, or give it a quick zap in the microwave (about 10-15 seconds) to bring back that lovely soft texture. If you plan on Freezer Instructions, this bread freezes like a dream! Wrap the completely cooled loaf (or slices) tightly in plastic wrap, then in a layer of aluminum foil, and finally pop it into a freezer-safe bag or container. It will keep its best quality for up to 3 months. To thaw, remove the outer layers and let it come to room temperature on the counter, or gently reheat in a low oven. For Glaze Timing Advice, if you plan to freeze the bread, I actually recommend glazing it *after* thawing. The glaze can sometimes get a bit sticky or melt when frozen. So, freeze the plain loaf, and then glaze it once it’s thawed and ready to eat!
Frequently Asked Questions
Final Thoughts
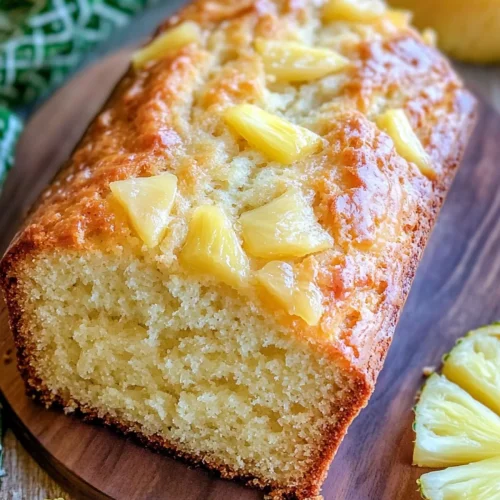
So there you have it – my absolute favorite pineapple bread recipe! It’s a recipe that brings me so much joy, from the moment I start mixing the batter to the last delicious crumb. It’s that perfect balance of tropical sweetness, incredible moisture, and ease of preparation that makes it a winner in my kitchen. It’s the kind of thing that proves you don’t need complicated techniques or fancy ingredients to create something truly special and heartwarming. I really hope you give this pineapple bread a try; I promise it won’t disappoint. If you love this recipe, you might also enjoy my moist banana bread or my easy lemon poppy seed loaf for more quick bread inspiration. Happy baking, and please let me know in the comments how yours turns out! I can’t wait to hear all about your pineapple bread adventures!
Pineapple Bread
Ingredients
Wet Ingredients
- 0.25 cup unsalted butter melted
- 2 large eggs
- 0.5 cup crushed pineapple drained
- 0.33 cup milk
Dry Ingredients
- 1.5 cup all-purpose flour
- 0.75 cup granulated sugar
- 1 teaspoon baking soda
- 0.5 teaspoon salt
- 0.25 teaspoon ground cinnamon
Instructions
Preparation Steps
- Preheat your oven to 350°F (175°C). Grease and flour a 9x5 inch loaf pan.
- In a large bowl, whisk together the flour, sugar, baking soda, salt, and cinnamon.
- In a separate medium bowl, whisk together the melted butter, eggs, crushed pineapple, and milk.
- Pour the wet ingredients into the dry ingredients and stir until just combined. Do not overmix.
- Pour the batter into the prepared loaf pan and spread evenly.
- Bake for 50-60 minutes, or until a wooden skewer inserted into the center comes out clean.
- Let the bread cool in the pan for 10 minutes before inverting it onto a wire rack to cool completely.
Notes
Featured Comments
“This pineapple bread sounds absolutely heavenly—I can already imagine the sweet, tropical aroma filling my kitchen!”
“Impressed! Clear steps and so flavorful results. Perfect for busy nights.”
“New favorite here — spot on. crowd-pleaser was spot on.”
“Super easy and turned out amazing! My family asked for seconds. Saving this one.”
“This sweet treat was absolutely loved — the silky really stands out. Thanks!”
“Made it tonight and wow — comforting! Will definitely make pineapple bread again.”


This pineapple bread sounds absolutely heavenly—I can already imagine the sweet, tropical aroma filling my kitchen!