

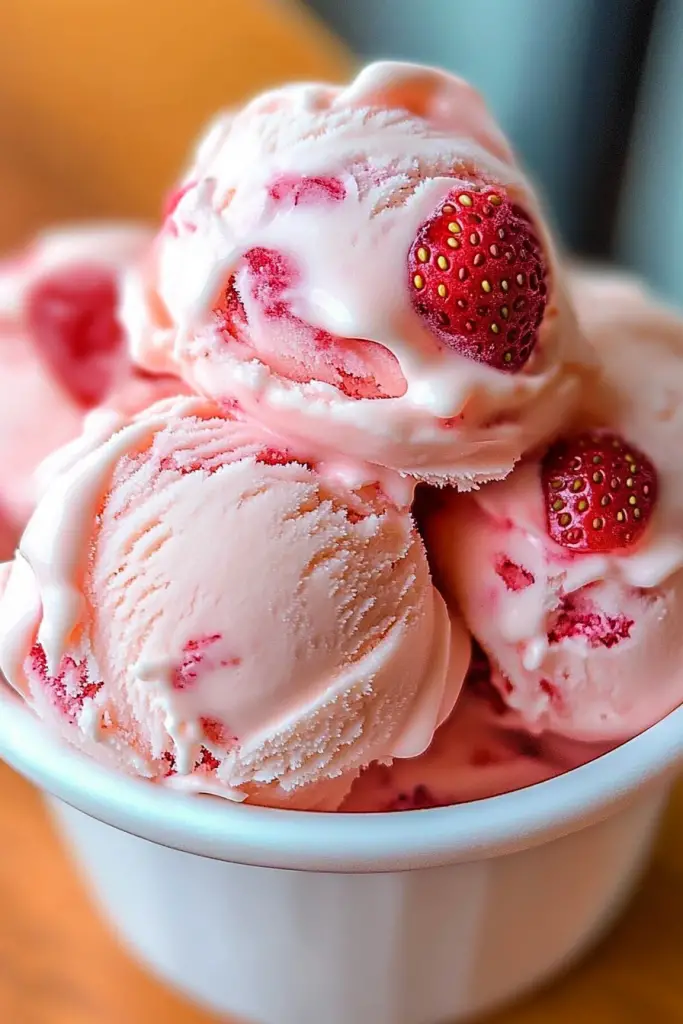
Oh, strawberry ice cream. Just the thought of it takes me back to those long, sun-drenched summer days of my childhood, sticky fingers and all. There was always a carton of something frozen in the back of our old freezer, but nothing, absolutely nothing, could beat the homemade stuff. I remember my Grandma’s kitchen, always warm and smelling of baked goods, and the special clanking sound of her old ice cream maker. This recipe? It’s my grown-up, slightly-less-messy version, but with all that same pure, unadulterated joy. Forget those fancy, complicated dairy-free ice creams that require a science degree; this is the real deal, simple enough for a weeknight treat but special enough for company. It’s like a sweet hug in a bowl, and honestly, it’s my go-to when I need a serious dose of happy. If you love the vibrant burst of fresh berries, then this strawberry ice cream is about to become your new best friend.
What is homemade strawberry ice cream?
So, what exactly *is* this glorious concoction we’re talking about? At its heart, it’s pretty straightforward: creamy dairy (or a fantastic dairy-free alternative!), sugar, and the star of the show – ripe, juicy strawberries. Think of it as capturing the essence of summer in frozen form. It’s that perfect balance of sweet and tangy, with the unmistakable aroma of fresh strawberries that just fills your kitchen. Unlike those Ice Cream shop versions that can sometimes taste a bit artificial, this homemade strawberry ice cream bursts with authentic berry flavor because you control exactly what goes in. It’s essentially summer in a scoop, a comforting classic that never goes out of style. It’s the kind of dessert that makes everyone pause and savor each spoonful.
How do you make strawberry ice cream?
Quick Overview
Making this dreamy strawberry Ice Cream is a delightful process that starts with pureeing fresh strawberries and then combining them with a simple, creamy base. If you’re using an ice cream maker, the magic really happens in the churning process, where it transforms into that signature smooth, frozen texture. The key is good quality strawberries and a patient hand during chilling. It’s remarkably straightforward, and the results are so worth the minimal effort. You’ll be amazed at how easily you can create something so utterly delicious right in your own kitchen.
Ingredients
For the Strawberry Base: For the Strawberry Base: For the Strawberry Base: For the Strawberry Base
2 pounds fresh strawberries, hulled and sliced (about 5-6 cups)
1/2 cup granulated sugar (adjust to taste based on strawberry sweetness)
1 tablespoon fresh lemon juice (this really brightens the berry flavor!)
For the Creamy Base:
2 cups heavy cream
1 cup whole milk
3/4 cup granulated sugar
1 teaspoon pure Vanilla Extract
Pinch of salt
Step-by-Step Instructions
Step 1: Prepare the Strawberries
First things first, we want to get those beautiful strawberries ready. Hull them (that’s just removing the leafy green tops) and give them a good wash. Slice them up – no need to be fancy, just get them into manageable pieces. Now, in a medium bowl, toss the sliced strawberries with the 1/2 cup of sugar and that tablespoon of lemon juice. Give it a good stir. Let this mixture sit on the counter for about 20-30 minutes. This process is called macerating, and it does two things: it draws out the juices from the strawberries, creating a more intense flavor, and it starts to dissolve the sugar. You’ll see a lovely syrupy liquid form around the berries – that’s pure strawberry gold!
Step 2: Puree the Strawberries
Once the strawberries have had their little spa treatment, it’s time to blend them. You can use a food processor, a blender, or even an immersion blender if you’re feeling it. I usually just pop mine into my trusty blender. Blend until you have a smooth puree. If you’re a texture person and prefer little bits of berry, you can pulse it instead of going for super smooth. Taste this puree. Seriously, take a tiny spoonful. Is it sweet enough? Does it have that bright strawberry punch? This is your chance to adjust. If your strawberries were a bit tart, you might want to add another tablespoon of sugar. If they were super sweet, maybe a tiny bit more lemon juice. This is where you make it *your* perfect strawberry flavor.
Step 3: Mix the Creamy Base
While the strawberries are doing their thing, let’s get the creamy part ready. In a large bowl, combine the heavy cream, whole milk, the remaining 3/4 cup of granulated sugar, vanilla extract, and that tiny pinch of salt. Whisk everything together until the sugar is completely dissolved. You want a smooth, homogenous mixture. I usually just use a regular whisk for this, and it takes maybe a minute or two. Make sure there are no grainy bits of sugar lurking at the bottom. The vanilla and salt might seem small, but trust me, they are crucial for enhancing all the other flavors.
Step 4: Combine the Bases
Now for the moment of truth! Gently pour the strawberry puree into the creamy base. Using your whisk or a spatula, stir everything together until it’s well combined and you have a beautiful, rosy pink mixture. It should look gorgeously swirled at first, and then as you stir, it will become this lovely, even color. Again, give it a taste. This is the final flavor check before it goes into the ice cream maker. It should taste a little sweeter than you think you want it, because freezing dulls the sweetness.
Step 5: Chill the Mixture
This is a super important step, and I’ve learned this the hard way after a few less-than-perfect batches! The colder your base is before churning, the faster and better it will freeze. So, cover the bowl tightly with plastic wrap and pop it into the refrigerator for at least 2-4 hours, or ideally, overnight. The colder it is, the smoother your ice cream will be. Patience here is your friend!
Step 6: Churn the Ice Cream
If you have an ice cream maker, now’s the time to get it ready! Make sure your ice cream maker bowl is completely frozen according to the manufacturer’s instructions (this usually means at least 24 hours in the freezer). Once it’s good and cold, churn the mixture according to your machine’s directions. This typically takes about 20-30 minutes. The ice cream will start to thicken and become wonderfully soft-serve consistency. It’ll be a beautiful, light pink and smell absolutely heavenly.
Step 7: Freeze to Firm (Ripen)**
The ice cream coming out of the churner is delicious, but it’s more like soft-serve. For that classic scoopable ice cream texture, transfer the churned ice cream into a freezer-safe container. Press a piece of parchment paper or plastic wrap directly onto the surface of the ice cream to prevent ice crystals from forming. Then, cover the container tightly with its lid. Pop it into the freezer for at least 4 hours, or until it’s firm enough to scoop. This final freezing stage is often called “ripening” and it’s where the magic really sets in.
Step 8: Scoop and Enjoy!
Once your strawberry ice cream is firm and ready, scoop it up and savor every single bite! You can serve it immediately, or let it sit at room temperature for a few minutes to soften just slightly for easier scooping. The vibrant color and the pure, fresh strawberry flavor will have everyone asking for seconds.
What to Serve It With
This homemade strawberry ice cream is honestly a star on its own, but it also plays incredibly well with others! For a simple BREAKFAST treat that feels like a dessert, try a small scoop alongside some fresh berries and a dollop of Greek yogurt. It’s a lovely way to start the day with a little indulgence. For BRUNCH, imagine a slice of fluffy angel food cake or a delicate pound cake with a generous scoop of this bright pink beauty melting slightly over the top. It’s elegant and always a crowd-pleaser. As a DESSERT, the possibilities are endless! It’s divine served with warm chocolate brownies or a rich chocolate lava cake. The contrast between the warm, gooey chocolate and the cold, fruity ice cream is pure perfection. You could also pair it with a simple shortcake or even some lightly grilled peaches. For COZY SNACKS, sometimes all you need is a bowl of this ice cream with a sprinkle of chopped nuts or a drizzle of chocolate sauce. My kids also love it blended with a splash of milk for an instant strawberry milkshake. One of our favorite family traditions is to have a bowl after a summer BBQ, just pure, unadulterated happiness.
Top Tips for Perfecting Your Strawberry Ice Cream
I’ve made this strawberry ice cream more times than I can count, and along the way, I’ve picked up a few little tricks that I think make a big difference. First, for the strawberries: always use the ripest, most fragrant ones you can find. If you’re making this off-season, frozen strawberries can work in a pinch, but you might need to adjust the sugar and lemon juice. Make sure to thaw them completely and drain off any excess liquid before pureeing. When it comes to mixing the creamy base, I always stress dissolving the sugar completely. Any undissolved sugar can lead to a grainy texture, and nobody wants that! Also, don’t skip the pinch of salt; it really helps to balance the sweetness and bring out the berry flavor. For the chilling stage, I cannot emphasize enough how important it is to have your base as cold as possible. I’ve had my best results when I’ve let it chill overnight. If you’re in a hurry, you can try an ice bath for the bowl after mixing, but overnight is ideal. When it comes to churning, make sure your ice cream maker bowl is *thoroughly* frozen. A partially frozen bowl means a longer churn time and potentially a icier final product. If you notice your ice cream isn’t freezing well in the machine, it might be too warm. Don’t overfill the machine either; it needs room to expand. Finally, for that perfect scoopable texture, don’t skimp on the final freezing time. It needs that time to really firm up. I’ve also experimented with adding a tablespoon of vodka to the base before churning; it doesn’t affect the flavor but can help keep the ice cream a bit softer and less icy, especially if you store it for a while.
Storing and Reheating Tips
Storing homemade strawberry ice cream is all about preserving that creamy texture and vibrant flavor. At ROOM TEMPERATURE, it’s best enjoyed immediately! If you need to leave it out for a few minutes to soften for scooping, that’s fine, but don’t leave it out for longer than 15-20 minutes to avoid it melting too much and developing ice crystals. For REFRIGERATOR STORAGE, this isn’t really applicable as ice cream will melt! It needs to stay frozen. For FREEZER INSTRUCTIONS, the key is airtightness. Transfer your churned and ripened ice cream into a sturdy, freezer-safe container. The best way to prevent ice crystals is to press a layer of parchment paper or plastic wrap directly onto the surface of the ice cream before you put the lid on. This creates a barrier against the air. Properly stored, your homemade strawberry ice cream should last for about 1-2 weeks before the texture starts to degrade. Beyond that, it’s still edible, but it might become a bit icier. When you’re ready to serve, let it sit on the counter for 5-10 minutes to soften up for easier scooping. I’ve found that if it feels too hard to scoop, a quick dip of your ice cream scoop in hot water works wonders!
Frequently Asked Questions
Final Thoughts
There you have it – my cherished recipe for homemade strawberry ice cream. It’s more than just a dessert to me; it’s a taste of pure joy, a reminder of simpler times, and a way to bring a little bit of summer magic into our lives any time of year. The vibrant, fresh strawberry flavor is something store-bought just can’t replicate, and the creamy texture is utterly divine. It’s proof that delicious, high-quality treats don’t need to be complicated or expensive. I truly hope you’ll give this a try and find as much happiness in making and eating it as my family and I do. If you love this, you might also enjoy my recipe for {link to another recipe, e.g., “Classic Vanilla Bean Ice Cream”} or my {link to another recipe, e.g., “Easy No-Churn Chocolate Ice Cream”}. I can’t wait to hear how your strawberry ice cream turns out! Please leave a comment below and tell me your favorite way to enjoy it, or share any fun twists you’ve added. Happy scooping!
Strawberry Ice Cream
Ingredients
Main Ingredients
- 2 pounds fresh strawberries hulled and sliced
- 1 cup granulated sugar
- 1.5 cups heavy cream
- 1 cup milk whole milk recommended
- 1 teaspoon vanilla extract
- 0.25 teaspoon salt
Instructions
Preparation Steps
- In a bowl, toss the sliced strawberries with granulated sugar. Let them sit for about 10-15 minutes to macerate and release their juices.
- Puree the macerated strawberries (including the juices) using a blender or food processor until smooth.
- In a separate bowl, whisk together the heavy cream, milk, vanilla extract, and salt until well combined.
- Pour the strawberry puree into the cream mixture and stir until evenly incorporated.
- Chill the mixture thoroughly in the refrigerator for at least 2-3 hours, or until very cold.
- Pour the chilled mixture into an ice cream maker and churn according to the manufacturer's instructions until it reaches a soft-serve consistency.
- Transfer the ice cream to an airtight container and freeze for at least 2-4 hours to harden.
Notes
Featured Comments
“Impressed! Clear steps and quick weeknight win results. Perfect for busy nights.”
“New favorite here — turned out amazing. crowd-pleaser was spot on.”
“Super easy and turned out amazing! My family asked for seconds. Saving this one.”
“This sweet treat was absolutely loved — the hearty really stands out. Thanks!”
“Made it tonight and wow — quick weeknight win! Will definitely make Strawberry ice cream again.”
“Packed with flavor and so simple. Exactly what I wanted from Strawberry ice cream.”


