

Okay, friends, gather ’round because I’m about to share something that’s pure magic. Remember those classic Peanut Butter blossom cookies, the ones with the Hershey’s Kiss in the middle? Well, imagine that, but in bar form, even easier, and arguably even more delicious.Peanut Butter Blossom Bars: What are someAre like the cookie’s cool older sibling – just as comforting, but with a little more flair. I think they’re better than cookies, and that’s saying something!
What is peanut butter blossom bar?
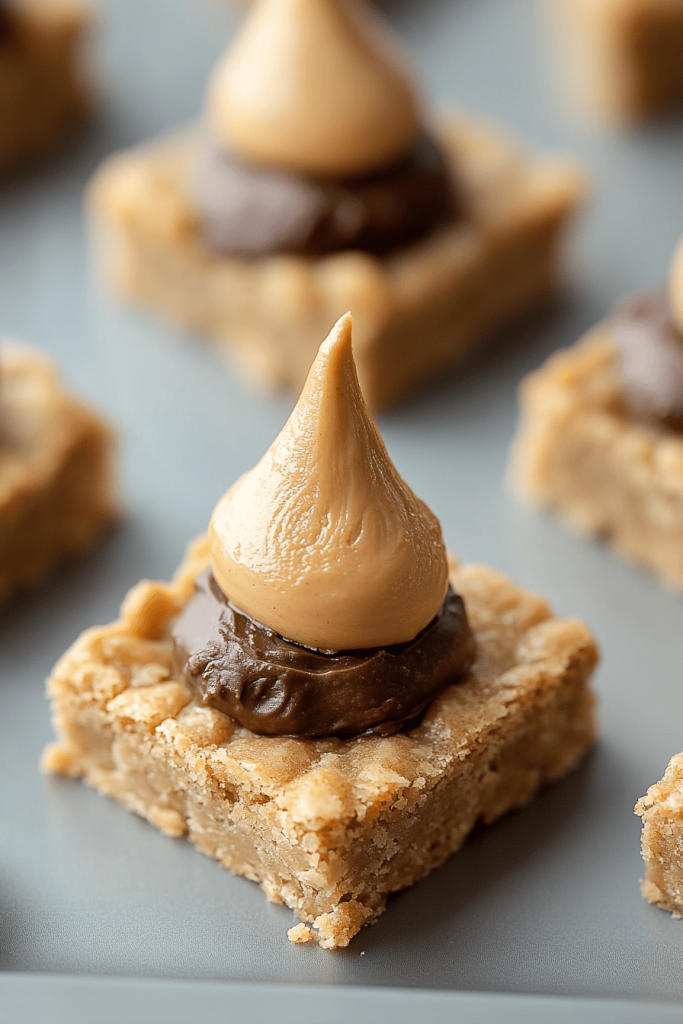
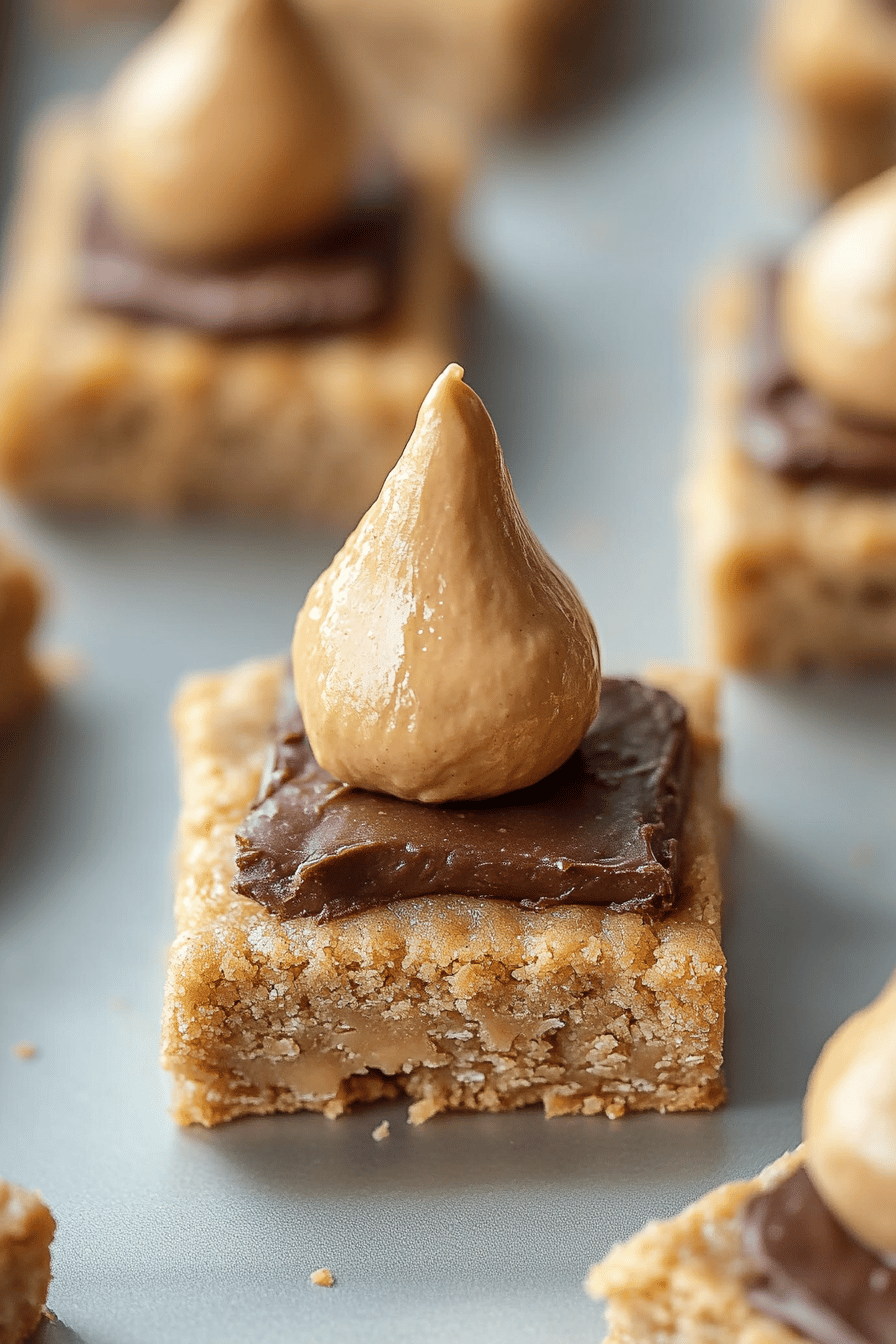
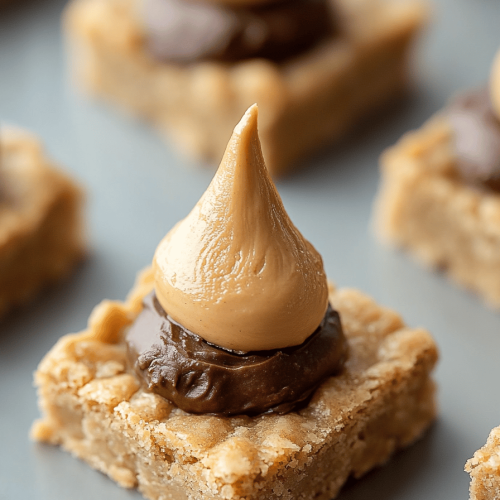
Think of these as peanut butter blondies, but elevated. What is a peanut butter kiss topped with chocolate? The bars version is easier than individual cookies – no rolling or shaping needed! The peanut butter flavor is rich and nutty, and the chocolate kisses add that perfect touch of chocolate. What are some of the best things to bring to a potluck? What are some of the Best Peanut Butter desserts?
How do you make peanut butter blossom bars?
Quick Overview
Making these Peanut Butter Blossom Bars is a breeze! You’ll whip up a simple peanut butter batter, spread it into a pan, stud it with chocolate kisses (the best part!), and bake until golden and gooey. No need to chill the dough, no fancy equipment required, just straightforward baking goodness. The secret? Don’t overbake! They’re best when they’re still a little soft in the center.
Ingredients
For the Main Batter: What are some examples?
* 1 cup (2 sticks) unsalted butter, softened: Make sure your butter is properly softened for a smooth batter. I usually take it out of the fridge an hour before baking.
* 1 cup granulated sugar: Adds sweetness and helps with the bars’ texture.
* 1 cup packed light brown sugar: Adds a deeper, molasses-like sweetness and keeps the bars moist.
* 2 large eggs: Use room-temperature eggs for better incorporation.
* 1 teaspoon Vanilla Extract: Adds a warm, aromatic flavor. Don’t skimp on the good stuff!
* 1 cup creamy peanut butter: Use your favorite brand of creamy peanut butter. I prefer using the classic brands like Jif or Skippy because they have the best consistency.
* 2 1/2 cups all-purpose flour: Provides structure. Spoon and level for accurate measuring.
* 1 teaspoon baking soda: Helps the bars rise and gives them a light texture.
* 1/2 teaspoon salt: Enhances the sweetness and balances the flavors.
For the Topping:
* 40-50 milk chocolate Hershey’s Kisses, unwrapped: This is where the magic happens! You can also use other flavors of Kisses if you’re feeling adventurous.

How do I follow step
Step 1: Preheat & Prep Pan
Preheat your oven to 375°F (190°C). Grease and flour a 9×13 inch baking pan. I always use parchment paper too, leaving an overhang on the sides – it makes removing the bars SO SO easy. Is it easier to do later? What are some lifesaving tips?
Step 2: Cream Butter and Sugars
In a large bowl, cream together the softened butter, granulated sugar, and brown sugar until light and fluffy. This usually takes about 3-5 minutes with an electric mixer. The mixture should be pale and almost doubled in volume. This step is crucial for a tender crumb, so don’t rush it!
Step 3: Add Eggs and Vanilla
Beat the eggs one at a time, then stir in the Vanilla Extract. Make sure each egg is fully incorporated before adding the next. How do you scrape down the sides of a bowl to ensure everything is evenly mixed.
Step 4: Mix in Peanut Butter
Add the Peanut Butter and mix until well combined. The batter will be thick and creamy. When you know it’s gonna be good, this is when you have to do it!
Step 5: Combine Dry Ingredients
In a separate bowl, whisk together the flour, baking soda, and salt. Set aside. This ensures that the baking soda and salt are evenly distributed throughout the flour.
Step 6: Gradually Add dry ingredients to wet ingredients.
Gradually add the dry ingredients to the wet ingredients, mixing until just combined. How do I avoid overmixing a bar? Mix until the flour streaks disappear, then stop.
Step 7: Press into Pan
Press the batter evenly into the prepared baking pan. It might seem a little stiff, but just keep pressing – it will spread out as it bakes.
Step 8: Add Kisses
How do you unwrap Hershey’s Kisses and press them into the batter, spacing them evenly apart? The more kisses, the better!
Step 9: Bake
Bake for 20-25 minutes, or until the edges are golden brown and a toothpick inserted into the center comes out clean. Is there any moist crumbs on my thigh? Keep an eye on them – ovens can vary. They should be set but still slightly soft in the middle.
Step 10: Cool & Cut
Let the bars cool completely in the pan before cutting into squares. If you used parchment paper, lift the bars out of the pan using the overhang. This makes slicing a breeze! I know it’s tempting, but they’re much easier to cut when they’re cool.
What should I serve it with?
These Peanut Butter Blossom Bars: What are someWhat are some great pairing ideas for a wedding?
For Breakfast:What is the best way to start the day with a cup of coffee? What’s a peanut butter Coffee Cake?
For Brunch: Serve alongside fresh fruit and yogurt for a balanced brunch spread. They look beautiful arranged on a platter with strawberries and blueberries.
As Dessert:Warm them up slightly and top with a scoop of vanilla Ice Cream or whipped cream. Drizzle with chocolate sauce for extra indulgence!
For Cozy Snacks:What’s a good cold drink to enjoy with ice cold milk or hot chocolate? What are some of the best comfort foods?
My family tradition is to make these every Christmas, but honestly, we enjoy them year-round. What are some of the best wedding dresses?
What are some tips for perfecting peanut butter blossom bars?
What are some tips to make these bars even better?
Room Temperature Butter:This is crucial for a smooth and creamy batter. If you forget to take butter out of the fridge, you can microwave it for a few seconds. How do you melt a metal?
Don’t Overmix: Overmixing can lead to tough bars. Mix the dry ingredients into the wet ingredients until just combined.
Use Quality Peanut Butter: The flavor of the peanut butter really shines through in this recipe, so use a good quality brand that you enjoy.
Press the Kisses in Gently: Press the Hershey’s Kisses into the batter gently, but firmly. You want them to stay in place while baking.
Don’t Overbake: Overbaking will result in dry, crumbly bars. The bars should be set around the edges but still slightly soft in the center.
Experiment with Flavors: Try using different flavors of Hershey’s Kisses, like dark chocolate or caramel. You can also add chopped nuts or chocolate chips to the batter for extra flavor and texture.
One time, I accidentally used salted butter instead of unsalted, and while they were still delicious, they were a little too salty. Lesson learned! Always double-check your ingredients!
Storing and Reheating Tips
These bars are so good, they rarely last long in my house! But if you do have leftovers, here’s How to store them:
Room Temperature: Store in an airtight container at room temperature for up to 3 days. They’re best consumed within the first 24 hours for optimal freshness.
Refrigerator Storage: Store in an airtight container in the refrigerator for up to 1 week. Bring to room temperature before serving for the best texture.
Freezer Instructions: Wrap the bars individually in plastic wrap and then place them in a freezer-safe bag or container. Freeze for up to 2 months. Thaw at room temperature before serving.
If you’re freezing them, I recommend adding the Hershey’s Kisses after thawing, as they can sometimes get a little frosty in the freezer.
Frequently Asked Questions
Final Thoughts
So there you have it – my go-to recipe for Peanut Butter Blossom Bars! They’re easy, delicious, and always a crowd-pleaser. The perfect combination of peanut butter and chocolate? Yes, please! If you’re a fan of peanut butter treats, you might also want to try my peanut butter cookies or my peanut butter fudge. They’re just as simple and satisfying. Happy baking, friends! I can’t wait to hear how yours turn out. Let me know in the comments if you try them – and don’t forget to rate the recipe! Sharing is caring, so spread the peanut butter love!
How to Make 7 Irresistible Peanut Butter Blossom Bars at Home
Ingredients
Main Ingredients
- 0.5 cup Butter, softened
- 0.75 cup Peanut butter Creamy
- 0.5 cup Granulated sugar
- 0.5 cup Brown sugar, packed
- 1 Egg
- 1 tsp Vanilla extract
- 1.75 cups All-purpose flour
- 1 tsp Baking soda
- 0.5 tsp Salt
- 48 Chocolate candies Unwrapped
Instructions
Preparation Steps
- Preheat oven to 350°F (175°C). Grease and flour a 9x13 inch baking pan.
- In a large bowl, cream together the butter, peanut butter, granulated sugar, and brown sugar until light and fluffy. Beat in the egg and vanilla.
- In a separate bowl, whisk together the flour, baking soda, and salt. Gradually add to the wet ingredients, mixing until just combined.
- Press the dough evenly into the prepared baking pan.
- Bake for 20-25 minutes, or until a toothpick inserted into the center comes out with a few moist crumbs.
- Immediately press chocolate candies into the top of the warm bars.
- Let cool completely in the pan before cutting into squares.
Notes
Featured Comments
“Impressed! Clear steps and quick weeknight win results. Perfect for busy nights.”
“New favorite here — quick weeknight win. crowd-pleaser was spot on.”
“Super easy and turned out amazing! My family asked for seconds. Saving this one.”
“This sweet treat was absolutely loved — the light really stands out. Thanks!”
“Made it tonight and wow — family favorite! Will definitely make How to Make 7 Irresistible Peanut Butter Blossom Bars at Home again.”
“Packed with flavor and so simple. Exactly what I wanted from How to Make 7 Irresistible Peanut Butter Blossom Bars at Home.”


